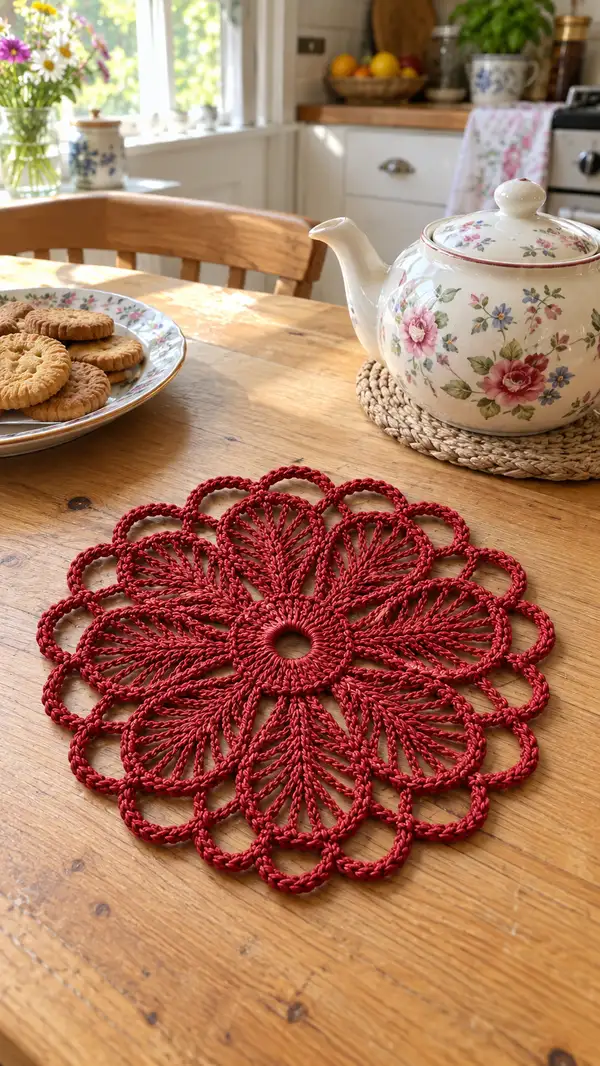
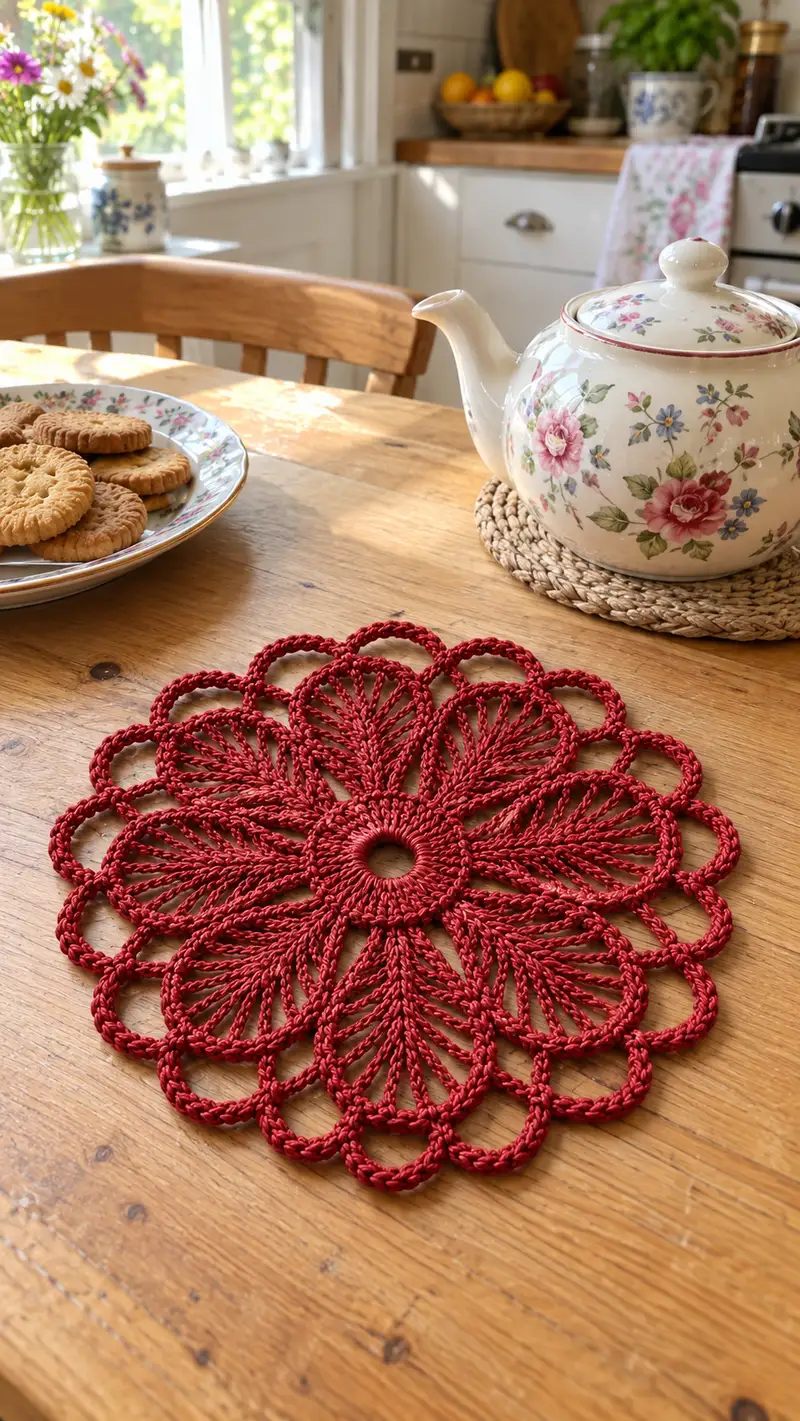
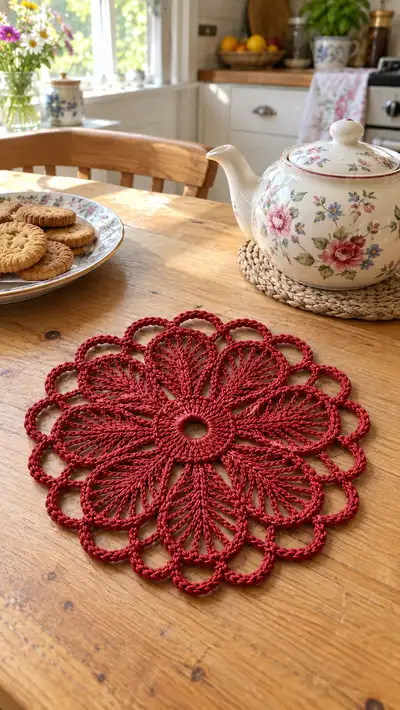
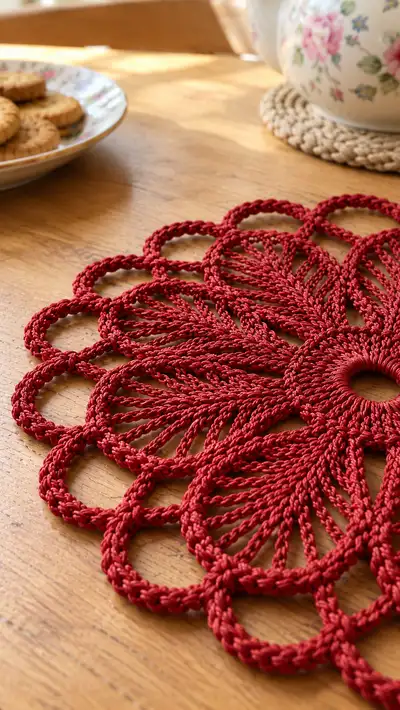
A richly textured scalloped petal placemat worked in bold red cotton cord. This decorative round placemat features a tightly crocheted center, radiating petal lacework and looped scallop edging — perfect as a stylish table accent or seasonal centerpiece. The pattern uses clear round-by-round instructions and plenty of tips for blocking and finishing to recreate the pictured piece.
Progress Tracker
0% Complete
— Center and Foundation Rounds :
Round 1 :
Make a magic ring. 6 sc in magic ring (6)
Round 3 :
(1 sc, 1 inc) x 6 (18)
Round 4 :
(2 sc, 1 inc) x 6 (24)
Round 5 :
(3 sc, 1 inc) x 6 (30)
Round 6 :
(4 sc, 1 inc) x 6 (36)
Info :
Work these first rounds tightly to form a stable closed center. Use a slightly smaller hook for Rounds 1-6 if your cord is floppy; this keeps the center hole small.
Round 7 :
(5 sc, 1 inc) x 6 (42)
Round 8 :
(6 sc, 1 inc) x 6 (48)
Info :
At the end of Round 8 you should have 48 stitches. These will serve as the anchor stitches for the 12 petal repeats (48/12=4 stitches per petal). Place a marker in the first stitch of each 4-stitch grouping to mark petal anchors: count 4 sts, place marker, repeat x12.
— Petal Foundation Loops :
Round 9 :
*Sc in next 3 sts, ch 16, sl st in next st; rep from * around (12 ch-loops formed, base remains 48 stitches)
Info :
Each repeat uses 4 base stitches (3 sc then 1 sl st). The ch-16 arches will form the openwork that becomes each petal. Keep chain tension relaxed so loops are not twisted; adjust chain length to taste - the sample used 16 for a broad petal.
Round 10 :
Working into ch-arches: *sl st into first ch of next ch-16, ch 3 (counts as tr), (tr, ch 1) x 6, tr in last ch, sl st into sl st that closed that arch on previous round; rep x12 (each petal now has a trimmed fan of tall stitches)
Round 11 :
Turn and work back along each arch (working into chains of the arch): *sl st to join to base sl st, ch 1, 12 hdc evenly across the ch-16 arch, sl st into base sl st; rep x12 (12 hdc per petal — total 144)
Info :
Work evenly across the chain arch — for even spacing, count chains and place a small repeat (for 16 chains use 12 hdc spaced by occasionally using hdc2tog if needed to ease) to create a tidy fan. The number of stitches per arch needs to be consistent across all petals.
Round 12 :
*Sl st into first hdc on petal, ch 2, (dc in next 2 hdc, ch 2) x 3, dc in last 2 hdc, sl st into base sc between petals; rep x12 (8 dc + 4 ch-2 sps per petal — total 96 dc)
Round 13 :
*Sl st into next ch-2 sp, ch 6 (counts as tr+ch3), tr in same ch-2 sp, ch 2, picot (sl st into 3rd ch from hook) to anchor center of petal, sl st into base sc; rep x12
Info :
These two rounds begin to create the tall inner ribs of the petal. Keep each petal identical by using your stitch markers and by working the same placement into the same reference points in each arch.
— Petal Vertical Rows (building height) :
Round 14 :
*Join with sl st at base of petal, ch 3 (counts as first tr), tr in next 7 sts along petal body, ch 1, tr in last 2 sts, sl st to base sc; rep x12 (10 tr per petal — total 120)
Round 15 :
*Ch 2, 1 hdc in each tr across petal (10 hdc), ch 1, sl st to base sc; rep x12 (10 hdc per petal — total 120)
Round 16 :
*Ch 3, (dc in next 2 hdc, ch 1) x 3, dc in last 2 hdc, sl st to base; rep x12 (8 dc per petal — total 96)
Round 17 :
*Ch 4, tr in next 8 sts across petal (8 tr), ch 1, sl st into base; rep x12 (8 tr per petal — total 96)
Info :
Rounds 14-17 are worked into the raised body of each petal and begin to stack vertical columns. These columns form the leaf-like ribs you see in the photo. Keep stitch heights consistent for the petal to lay flat.
Round 18 :
*Work 1 sc in each tr and dc across the petal body (approx 18 sc per petal), sl st to base; rep x12 (approx 216 sc total; count per petal may vary slightly based on earlier tension)
Round 19 :
*Ch 2, hdc in each sc across petal body (approx 18 hdc), sl st to base; rep x12 (approx 216 hdc)
Round 20 :
*Ch 3, dc in every other hdc across petal body to shape top of petal (approx 9 dc per petal), sl st to base sc; rep x12 (approx 108 dc)
Info :
The exact number of stitches worked into the petal body depends on your chain tension and how many stitches you created on Round 11. The pattern uses 'approx' counts for these dense rounds — maintain equal counts across petals for consistent shaping. Use a stitch marker to note the first stitch of each petal body when you begin these rounds.
— Petal Shaping Rounds (taper and texture) :
Round 21 :
*Ch 1, sc in next 3 dc, (sc2tog) once across the center of petal to begin taper, sc in last 3 dc, sl st to base; rep x12 (approx 7 sc per petal — total 84)
Round 22 :
*Ch 2, hdc around the outside edge of each petal working 1 hdc in each sc across (approx 7 hdc), sl st to base sc; rep x12 (approx 84 hdc)
Round 23 :
*Work 1 sc in FLO around petal edge to create a raised cord-like ridge (approx 7 sc), sl st to base; rep x12 (approx 84 sc)
Info :
Using BLO or FLO on alternate rounds creates a subtle ridge that mimics the braided look in the photo. The raised ridges around the outside of each petal help define the petals visually and make the later outer loops sit neatly.
Round 24 :
*Ch 6, sl st into top of petal ridge to create small picot loops around petal tip (6 ch loop anchored on petal top), sl st to base; rep x12
Round 25 :
*Into each ch-6 picot loop: (sc, hdc, dc, tr, dc, hdc, sc), sl st to base sc; rep x12 (7-stitch petal tip shell per loop)
Info :
These rounds create a small decorative cap at the tip of each petal — you may omit rounds 24-25 if you prefer a simpler petal top. The sample uses them to bulk up the center of the petal before joining outer loops.
— Inner Join Round and Reinforcement :
Round 26 :
Join petals together with a reinforcement round around the base: *sc into base sc between petals, ch 2, sc into next base sc, ch 2; rep x12 (24 sc + 24 ch-2 sps around the inner join)
Round 27 :
*Working into each ch-2 sp: (hdc, dc, hdc) in each ch-2 sp; sl st to next sc; rep x12 (3 sts per ch-2 sp = 36 sts total)
Info :
This reinforcement round stabilizes the base of all petals and creates firm anchors for the outer scalloped loops. It reduces stretch and keeps the placemat flat when in use.
Round 28 :
*Ch 3, then 1 dc in each of the 3 sts worked in previous round across, sl st to next sc; rep x12 (36 dc total)
Round 29 :
*1 sc in next dc, ch 8, sk to next dc, 1 sc into that dc; rep x12 (12 ch-8 loops formed between petals)
Info :
These ch-8 loops become the structural basis for the outer scalloped rope loops you see in the photo. Make sure each loop is the same length to maintain symmetry.
— Outer Loop Building (first pass) :
Round 30 :
*Into each ch-8 loop: sl st, ch 12, sl st into same loop to create an inner corded arch; sl st into next sc between petals; rep x12 (12 ch-12 arches created)
Round 31 :
*Work around each ch-12 arch: 1 sc in each of 12 ch (12 sc per arch, 144 sc total), sl st to base between petals; rep x12
Round 32 :
*BLO: 1 sc in each sc across arch (12 sc per arch), sl st to next base; rep x12 (144 sc)
Info :
Working in BLO on one of these rounds gives a subtle spiral ridge to the corded arch, giving the impression of twisted rope from the sample photos. Keep consistent stitch counts across arches.
Round 33 :
*Ch 2, hdc in each sc around arch (12 hdc), sl st to base; rep x12 (144 hdc)
Round 34 :
*Ch 3, dc in every other hdc across arch (6 dc per arch), sl st to base; rep x12 (72 dc)
Info :
Rounds 30-34 begin to bulk up the outer loop to match the cord-like weight in the photo. You want the arches to be sturdy enough to form large outer scallops.
— Outer Loop Building (second pass) :
Round 35 :
*Into each arch: (sc, ch 2) x 6 across the top of the arch to create headset points, sl st to base; rep x12 (72 sc + 72 ch-2 sps)
Round 36 :
*Into each ch-2 sp: (sc, sc, sc) i.e., 3 sc per ch-2 sp to bulk the arch top, sl st to base; rep x12 (216 sc total)
Round 37 :
*Ch 6, sl st into top center of each arch (forms small loop adornments), sl st to next base; rep x12 (12 loops)
Info :
Rounds 35-37 are decorative and give additional weight and visual rope to the outer edge. If your cord is very thick these rounds will be shorter — reduce ch counts accordingly to match the look in the picture.
Round 38 :
*Work 1 sc in each stitch across the arch body and into each small loop you made (approx 18 sc per arch), sl st into base; rep x12 (approx 216 sc)
Round 39 :
*Ch 2, hdc in each sc across arch, sl st to base; rep x12 (approx 216 hdc)
Round 40 :
*BLO: sc around arch to form a raised outer ridge (approx 216 sc)
Info :
At this stage the outer arches should begin to look rope-like and have the weight to lay flat. Constantly compare all arches to make sure they are uniform in height and density.
— Scallop Formation (outermost edge) :
Round 41 :
*Ch 10, sl st into top of arch to make large scallop loop, sl st to next base; rep x12 (12 large scallops)
Round 42 :
*Work 1 sc in each ch across the scallop loop (10 sc per scallop), sl st to base; rep x12 (120 sc)
Round 43 :
*Ch 3, (dc, ch 3, dc) into every 2nd sc of scallop to create decorative picot arches (approx 5 shell clusters per scallop), sl st to base; rep x12
Info :
This shell-and-picot formation at the outer edge is what creates the rounded looped scallops seen in the sample. Adjust ch-10 length if your material creates overly large or small loops; the photo uses broad, robust scallops.
Round 44 :
*Into each shell cluster work (sc, hdc, dc, hdc, sc) to bulk the shell, sl st to base; rep x12
Round 45 :
*Ch 4, sc in next sc, ch 4 across the top of scallop to form braided-looking loops (creates 6 ch-4 sps per scallop), sl st to base; rep x12
Round 46 :
*Into each ch-4 sp: (sc, sc, sc) to convert the chain loops into a thicker corded loop, sl st to base; rep x12 (approx 6x3=18 sc per scallop, 216 sc total)
Info :
Many of the outer rounds are simply building texture and bulk to mimic a twisted cord. These extra layers allow the loops to hold shape and look rope-like; alternate working in BLO/FLO to get a top-folded ridge like the sample.
— Edge Reinforcement and Rope Finish :
Round 47 :
*Ch 2, hdc around each sc of outer loops (approx 216 hdc), sl st to join
Round 48 :
*BLO: 1 sc in each hdc to form cord ridge (approx 216 sc)
Round 49 :
*Ch 1, sc around entire outer edge including edges of scallops (approx 216 sc), sl st to join; fasten off and weave ends in securely
Info :
If you wish your edge to look even more like the rope pictured, consider a final pass of slip stitch rope: with RS facing, insert hook under back loops only of final round and work slip stitches evenly to the end, then pull gently to gather into a more tubular rope.
— Optional Decorative Cord Rounds (to create thicker rope look) :
Round 50 :
Join yarn at a base point on outer edge. *Ch 30 (or length to go around one scallop), sl st to next base point to create long chain-tab; rep x12 to make 12 long chains across scallops
Round 51 :
*Work 1 sc in each ch across the long chain (approx 30 sc per chain), sl st to base to anchor; rep x12 (approx 360 sc total)
Round 52 :
*Work 1 sc in FLO around the long chain sc to build thickness (approx 360 sc), sl st to base
Info :
These optional rounds mimic the twisted thick rope in the photograph. They add bulk and may change finished diameter — add them only if you prefer the heavier look in the sample.
— Final Stabilizing Rounds :
Round 53 :
*1 sc around entire edge (this round evens out any irregularities), sl st and fasten off
Round 54 :
Weave in all ends using a tapestry needle, making sure the start tail from the very center is pulled to the back and buried under several passes to keep center hole tidy
Info :
Before final weaving, lightly damp-block the placemat to its finished diameter and pin scallops carefully to shape. Once dry, weave in ends and apply any final edge adjustments for symmetry.
— Blocking & Finishing :
Round 55 :
Blocking: lay placemat flat on blocking mat or towel. Pin the 12 scallop points evenly in a circle to achieve the flower shape. Spray lightly with water, reshaping scallops as you pin. Allow to dry fully.
Info :
Blocking is essential for this design to open the petals and make the scalloped loops even. Use rust-proof pins and make small adjustments to ensure the placemat is symmetrical.
Round 56 :
After blocking, check outer edge for any uneven scallops. If needed, unpick a small section and adjust the chain length used for the scallop in that area, then re-block and dry.
Round 57 :
Final finish: trim any visible tails after weaving them in. For extra durability, use a small dab of clear craft glue at several weave points hidden on the back to secure thick cord yarn ends.
Info :
Place felt pads or small non-slip discs under the placemat if using on very smooth surfaces to prevent slipping. Store flat to avoid crushing the scallops.
— Notes on Scaling & Variations :
Round 58 :
To make a larger placemat, increase the initial number of petal repeats (from 12 to 14 or 16) by increasing the base count accordingly (for N petals you need 4*N base stitches at Round 8). Adjust ch lengths for arches proportionally.
Round 59 :
For a sturdier, heavier look, use two strands of worsted cotton held together and work with a 4.5–5.5mm hook. This will require slightly shorter chain lengths to keep scale balanced.
Info :
If you convert to more petals, remember to maintain consistent repeats and to place markers at each anchor so all petals are identical. The mathematics of repeats must remain accurate for even symmetry.
Round 60 :
End of written rounds. The pattern above gives an extensive step-by-step plan to create the pictured placemat; adjust counts based on your tension and material thickness. Enjoy shaping the petals and scallops during blocking.
You did it — a beautiful scalloped petal placemat that looks like it belongs at a cozy kitchen table! This project is a lovely mix of structure and lace: a firm center, airy petal ribs, and a decorative rope-like scalloped edge. Block it well, add a pot of tea and biscuits, and enjoy the warm handmade touch on your table. 🧶🌸