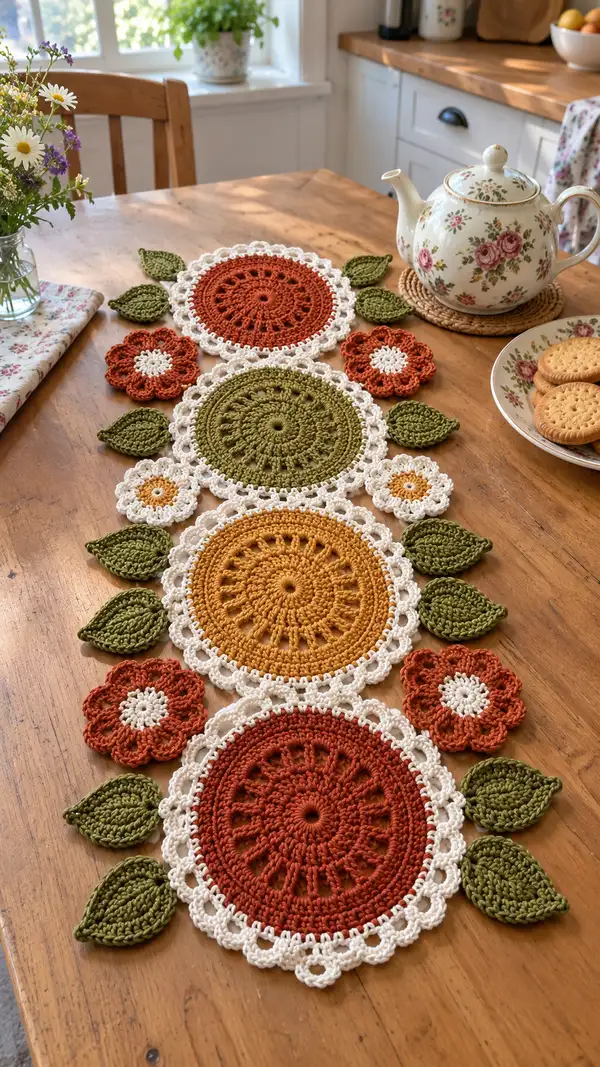
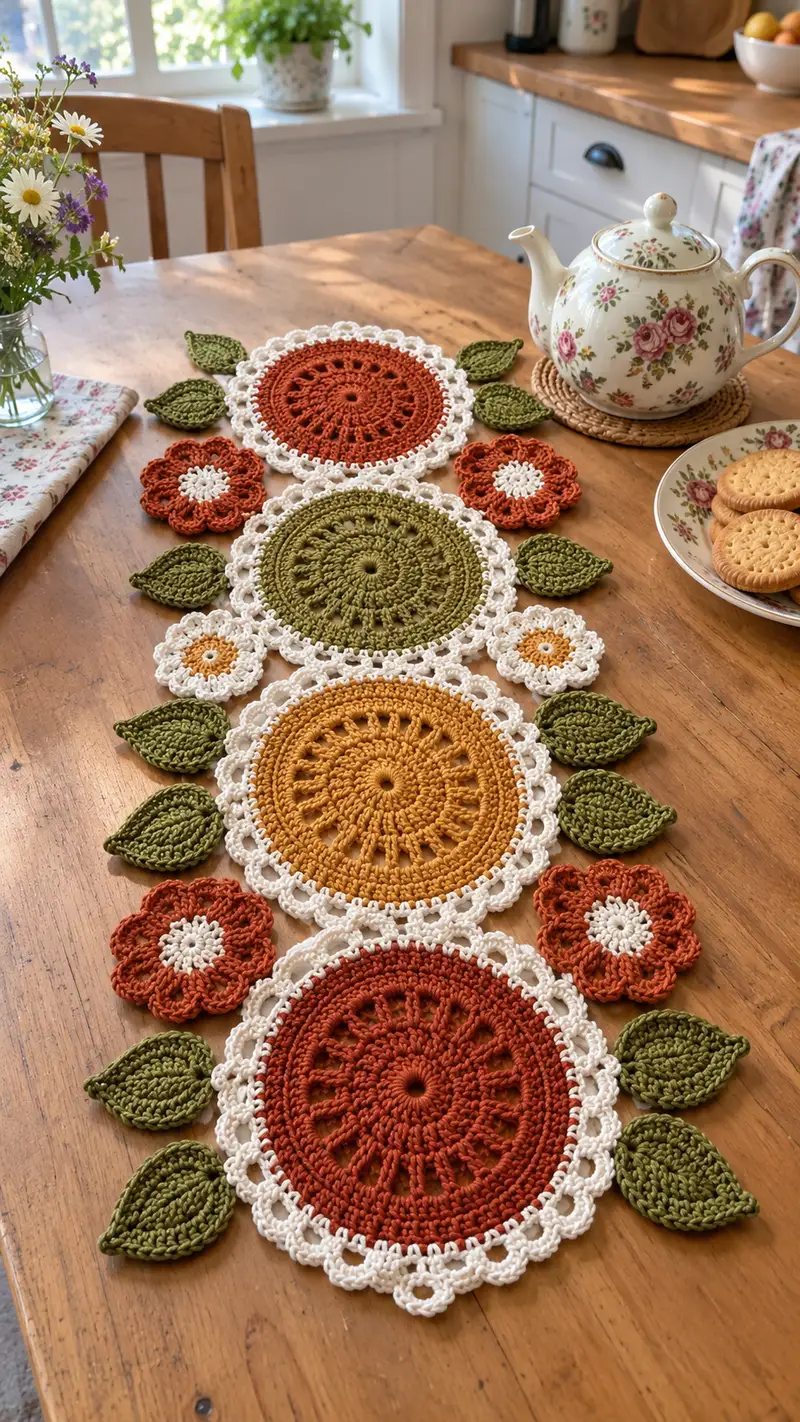
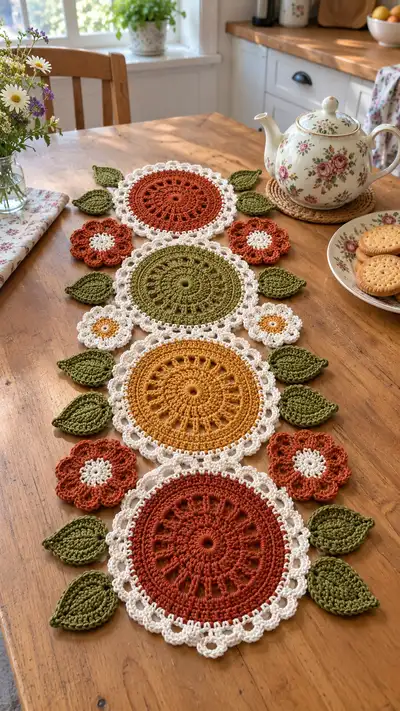
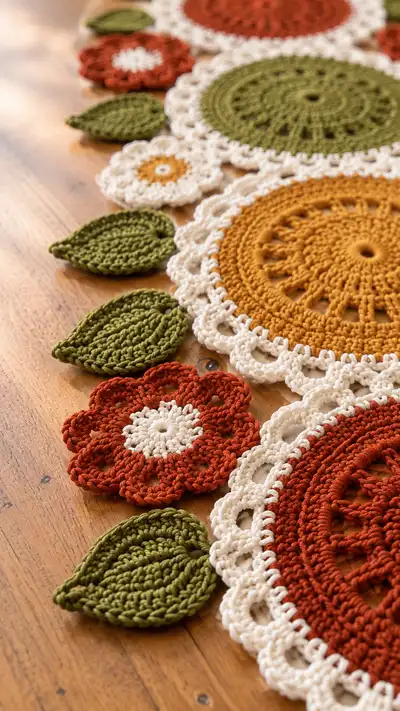
A warm, farmhouse-inspired table runner made from layered circular doily motifs, lacy cream edgings, leafy accents and cute crocheted flowers. Colours: terracotta rust, mustard gold, olive green and soft cream create a cozy autumnal palette. This runner is constructed from repeatable motifs that are easy to multiply to any length. The finished runner in the photos is made of four large circles, coordinating small flowers and leaves arranged into a decorative centre strip.
Progress Tracker
0% Complete
— Notes & Gauge :
Info :
Gauge is not critical for layout but is important for matching finished size. With worsted cotton and 4.0mm hook each large circle measures approximately 20-22cm (8-8.5") across after blocking. Adjust hook if you want them larger or smaller. Work tightly enough that the fabric is crisp and holes are tidy.
Info :
All motifs are worked in continuous rounds unless noted. Use a stitch marker to mark your first stitch and move it each round. When changing colour, fasten off and weave tails or carry the yarn behind where not visible. Block every motif flat before joining for best results.
— Large Circle Motif (Make 4; colours: rust, olive, mustard) :
Round 1 :
6 sc in magic ring (6)
Round 3 :
(1 sc, 1 inc) x 6 (18)
Round 4 :
(2 sc, 1 inc) x 6 (24)
Round 5 :
(3 sc, 1 inc) x 6 (30)
Round 6 :
(4 sc, 1 inc) x 6 (36)
Round 7 :
(5 sc, 1 inc) x 6 (42)
Round 8 :
(6 sc, 1 inc) x 6 (48)
Round 9 :
(7 sc, 1 inc) x 6 (54)
Round 10 :
(8 sc, 1 inc) x 6 (60)
Info :
At round 10 you have a stable circular base (60 stitches). From here we will add texture and lace. Keep counts accurate and rotate your stitch marker each round.
Round 11 :
1 sc in each st (60)
Round 12 :
1 sc in each st BLO (60)
Info :
Working BLO on round 12 creates a subtle ridge that separates the centre rounds from the decorative outer rounds. This ridge helps the later lacy rounds sit neatly.
Round 13 :
(1 sc, ch1, skip next st) x 30 (30 sc, 30 ch1 loops)
Round 14 :
1 sc in each sc and 1 sc in each ch-1 sp (60)
Round 15 :
(3 sc, ch3, skip next 3 sts) x 10 (30 sc, 10 ch3 loops)
Info :
Round 15 creates a set of lacy chain-3 arches. Count carefully: each repeat consumes 6 stitches from the previous round (3 worked + 3 skipped) x10 = 60 positions.
Round 16 :
1 sc in each sc and 1 sc into each ch-3 loop (60)
Round 17 :
(5 sc, puff stitch in next st) x 10 (60)
Info :
Puff stitch: yarn over, insert hook, yarn over and pull up a loop (three times), yarn over and pull through all loops on hook to close puff. Each puff replaces a single stitch and counts as 1 for totals. Work puff loosely so it sits raised without puckering.
Round 18 :
1 sc in each st (60)
Round 19 :
Change to cream yarn with sl st, ch1. 1 sc in each st (60)
Info :
Change to cream colour now to form the lacy border. Fasten colour by pulling through on last pull-through and begin round with sl st into any stitch before chaining to the height required by next round.
Round 20 :
(1 sc, ch4, skip next 3 sts) x 15 (15 sc, 15 ch4 loops)
Round 21 :
1 sc in each sc and 1 sc in each ch-4 loop (60)
Round 22 :
(1 sc, ch5, skip next 4 sts) x 12 (12 sc, 12 ch5 loops) — note: last repeat adjusted to match round count
Info :
On rounds with ch-5 loops you will create larger decorative arches for the outer scallop. Ensure repeats evenly divide the round; if needed distribute leftover stitches across the final repeats to avoid uneven spacing.
Round 23 :
1 sc in each sc and 1 sc in each ch-5 loop (60)
Round 24 :
(sc, ch2, picot, ch2, sc) into every other stitch across to create mini scallops (60 decorative points)
Info :
Picot: ch3, sl st into top of the chain-3 - or for a smaller picot use ch2 sl st into the base stitch. Work picots consistently for a neat scalloped finish.
Round 25 :
Working into each ch2 and sc from previous round: sc around to stabilize (60)
Round 26 :
Slip stitch neat edge around: sl st in each st to smooth final round (60)
Info :
Fasten off and weave in tails neatly at the back. Block flat using pins to open up lace. Repeat the above rounds to make 4 large circles — choose colours rust, olive, mustard as pictured. Make sure each motif is blocked and dried before joining.
— Medium Circle Motif (Make 1; colour: olive) :
Round 1 :
6 sc in magic ring (6)
Round 3 :
(1 sc, 1 inc) x 6 (18)
Round 4 :
(2 sc, 1 inc) x 6 (24)
Round 5 :
(3 sc, 1 inc) x 6 (30)
Round 6 :
(4 sc, 1 inc) x 6 (36)
Round 7 :
(5 sc, 1 inc) x 6 (42)
Round 8 :
1 sc in each st (42)
Round 9 :
1 sc in each st BLO (42)
Info :
Smaller centre circle uses fewer rounds for a tighter look that contrasts the large motifs. The BLO ridge gives a subtle ring for later decoration.
Round 10 :
(2 sc, ch3, skip next 3 sts) x 7 (14 sc, 7 ch3 loops)
Round 11 :
1 sc in each sc and 1 sc in each ch3 loop (42)
Round 12 :
Change to cream. (sc, ch4, sc in next) x 14 to form small lacy scallops (42)
Round 13 :
1 sc in each stitch and into each ch4 loop to revert to 42 stitches (42)
Round 14 :
Optional decorative shell: (skip 1, 5 dc in next, skip 1, sl st) x 7 across to create shell border (42 positions)
Info :
Fasten off and weave ends. Block this motif flat. This medium motif fits between two large circles in the runner layout.
— Small Flower Motif (Make 4-6 small and 2 larger flowers; colours: cream centres with rust petals and full rust flowers) :
Round 1 :
6 sc in magic ring (6)
Round 3 :
Change to petal colour (or continue same colour). (1 sc, ch2, 2 dc, ch2, 1 sc) all worked around same base stitch to form a petal. Repeat around to create 6 petals. Finish round with sl st to first sc (6 petals, 12 base stitches used)
Info :
For tiny flowers work smaller petals using hdc instead of dc. For the larger petal flowers use 8 petals by increasing the base repeat: (ch2, 3 dc, ch2, sc) x 8 from a 16 base stitch round.
Round 4 :
Fasten off, weave ends. Block petals to shape. Make 4 small flowers and 2 larger flowers to match the photographs.
— Leaf Motif (Make 12-14 leaves total; colour: olive) :
Round 1 :
Ch 8, sc in 2nd ch from hook, hdc in next, dc in next 2, hdc in next, sc in last ch to form a short leaf foundation (6 worked sts)
Round 2 :
Working around the other side of the foundation chain: sc along, hdc, dc, dc, hdc, sc. Join at base with sl st. (12)
Round 3 :
Ch1, 1 sc in same, fpdc in next 2 sts, dc in next 2, fpdc in next 2, 1 sc in last. This establishes a central raised vein via front post double crochet. (12)
Round 4 :
Work a neat edging: sc in each st around, adding 1 sc extra in the tip to create a pointed finish (12-13)
Info :
When making leaves for a runner, keep edges crisp. Use blocking pins to flatten the leaf and steam lightly for a firm shape. Make at least 12 leaves; the layout in photos uses 12 leaves placed evenly along the runner sides.
— Joining Layout & Centre Assembly :
Info :
Layout your motifs on a flat surface before joining. The photographed runner layout (from top to bottom) shows: Large rust circle, large mustard circle, large olive circle, large rust circle separated by small cream-edged flowers and leaves clustered between the circles. Use pins to mark positions. Leave roughly 2-3cm overlap between circles so edges nest together naturally.
Round 1 :
Join motifs by mattress stitch or whip stitch using matching yarn and tapestry needle: start by overlapping edges by 6-8 stitches and sewing through both motif edges to create a flat seam (no stitch count)
Info :
Sewing tip: use a single strand of yarn folded (two-plies) from a scrap to get a neater seam. Work from right side ensuring loops and scallops line up so the seam is decorative rather than hidden.
Round 2 :
Sew small flowers into gaps between circles. Attach the small cream-centred flowers by sewing through their centre rounds to the base motifs (no stitch count)
Round 3 :
Sew leaves in pairs along each side of the runner. Position the leaves so their tips point outward, stitching through the base only, and secure with several passes for durability (no stitch count)
Info :
For a tidy join, bury tails into the seam and use a few hidden backstitches at the ends. Block the entire runner again after joining to help seams relax and settle flat.
— Decorative Final Edging (Worked across the full joined length) :
Round 1 :
With cream yarn, work a continuous round of sc around entire assembled runner edge: sc evenly across sides and into scallop spaces to create a consistent base (count will vary by runner length)
Round 2 :
(ch 5, sl st into 3rd stitch ahead to create long loop, skip 2 sts) repeat around to form a larger looped border for an airy look (space counts vary)
Round 3 :
Sc into each ch-5 loop twice to define the loops (loop count equals number of ch-5 loops from prior round)
Round 4 :
Optional: Work a delicate picot point at the base of each loop: (sc, ch3, sl st into base) across to add subtle points
Info :
These finishing rounds are worked to taste; because the assembled runner is a long shape, counts will vary. Aim for symmetrical spacing and consistent loop sizes for a balanced look. Fasten off and weave in ends along the inside of the scallops.
— Blocking & Final Tips :
Info :
Block each motif flat using stainless pins and a blocking mat. For a crisp finish use steam from an iron held a few inches above the fabric or a spray bottle and allow to dry fully. Re-pin after sewing to ensure the seam sits flat, then lightly steam and allow to rest.
Info :
If your runner is destined for a high-use table, consider backing the runner with a fabric strip or non-slip felt to protect the crochet from wear; glue or machine-sew the backing carefully to the underside.
Finishing this runner is such a satisfying process — watching the circles, flowers and leaves come together into a flowing centrepiece is joyful! Each motif is a small, meditative project and assembling them yields a beautiful, vintage-inspired result you’ll be proud to place on the table. The warm rust, mustard and olive palette brings a cozy seasonal glow to your home. 🧶🌸 Enjoy the relaxing rhythm of crochet and display your handmade runner with a pot of tea and a plate of biscuits! 🍪