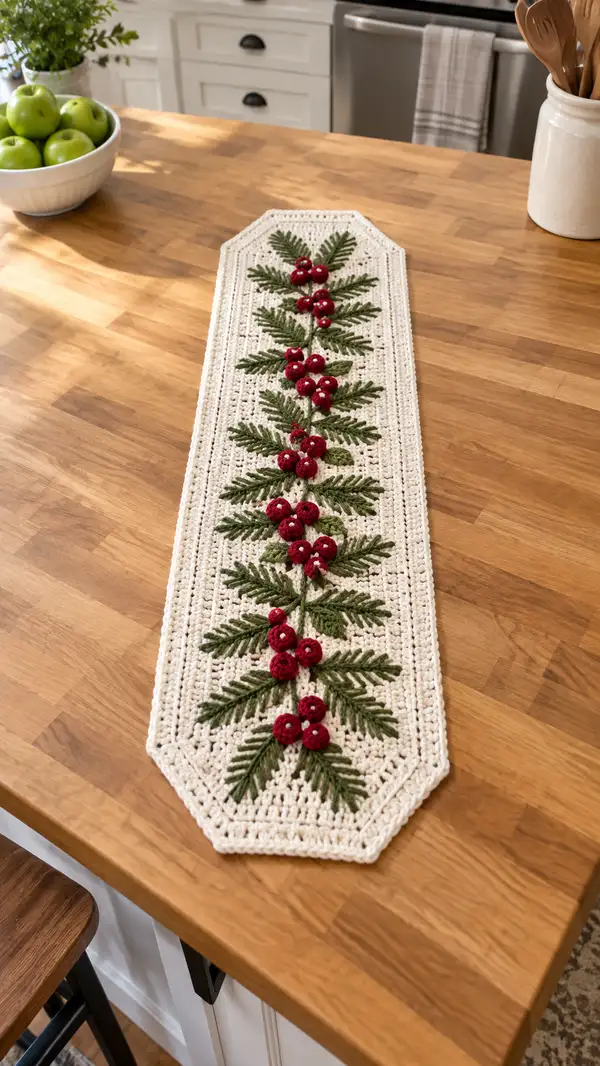
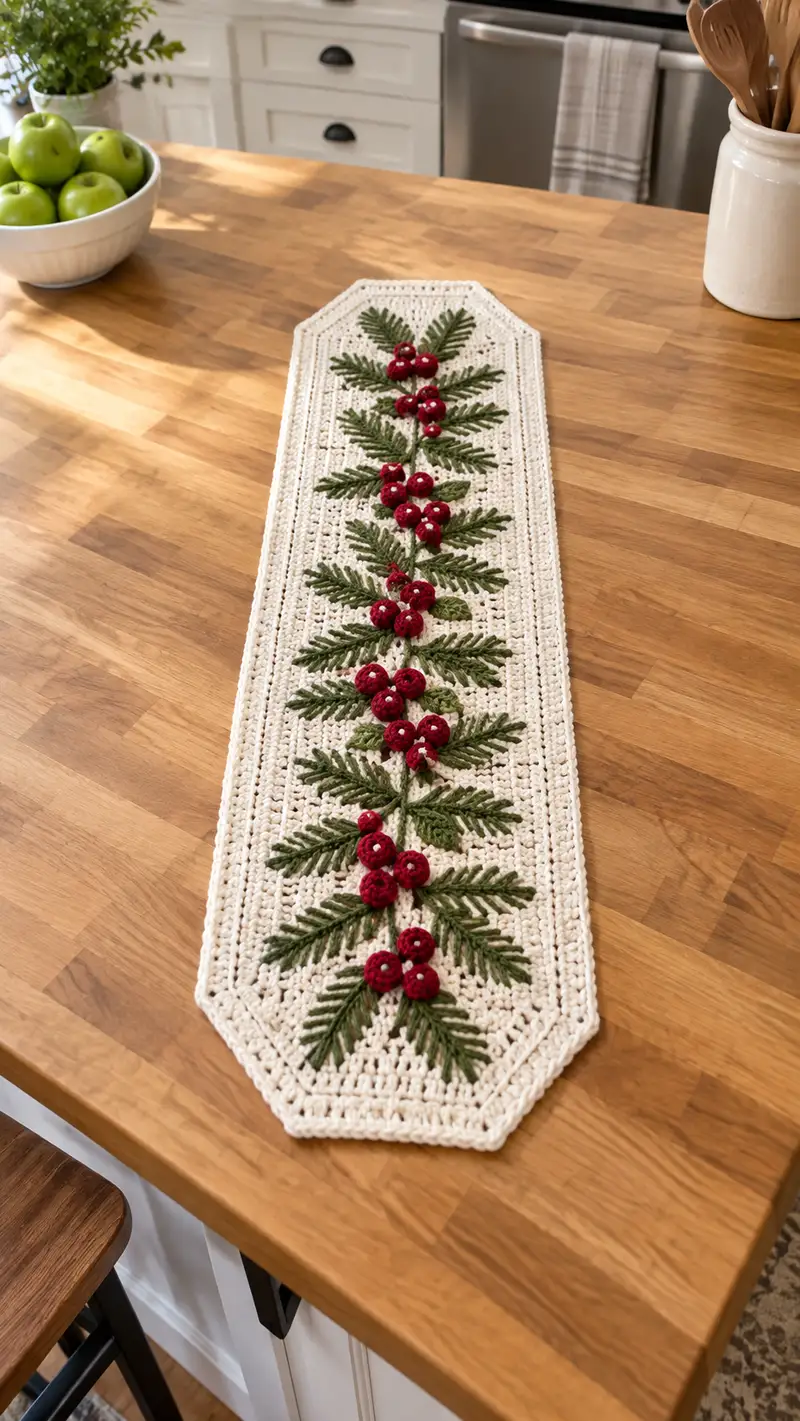
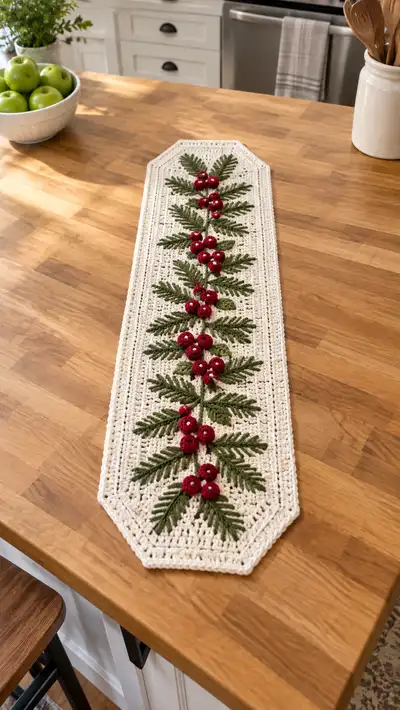
A charming crocheted table runner featuring a neutral cream base with a central garland of sculpted green fern leaves and clustered red berries. The runner has octagon-shaped ends, textured stitches for depth, and 3D berry appliques for a holiday-ready centerpiece. Perfect for a kitchen island or dining table to add handmade seasonal charm.
Progress Tracker
0% Complete
— Notes & Gauge :
Info :
This runner is worked flat across rows for the center panel, with octagon ends formed by short-row shaping and decreases. Appliques (fern fronds and berries) are made separately and sewn on. Gauge: 14 hdc and 10 rows = 4 inches using 5.0mm hook and worsted weight yarn. Adjust hook to match gauge if necessary.
Info :
All 'Round' labels in this pattern refer to rows when you work flat across; the runner is constructed in continuous rows with turning chains. Place stitch markers at both edges every 20 rows to keep edges even during long rows.
— Main Panel (Foundation & Body Rows) :
Round 1 :
Ch 86. Hdc in 3rd ch from hook and in each ch across (84 hdc). Turn. (84)
Round 2 :
Ch 2 (counts as first hdc). Hdc in each st across to last st, hdc in last st. Turn. (84)
Round 3 :
Repeat Round 2. Maintain a consistent tension. Turn. (84)
Round 4-10 :
Repeat Round 2 for 7 rows total (Rounds 4-10). This establishes the textured reversible fabric for the runner base. (84)
Info :
Check width after 10 rows; adjust hook if necessary. The runner width here will be approximately 8.5-9 inches depending on yarn and tension. Keep edges straight by working into the top of the turning chain on the turning side.
Round 11-20 :
Continue working even hdc rows (Round 2 style) for 10 more rows. (84)
Info :
Place a temporary marker at center stitch of the row to help align appliques later. Find the center st by counting 42 sts from either edge; mark it each few rows.
Round 21-32 :
Continue in hdc across for 12 rows to create the central length before shaping the first octagon end. (84)
Info :
The photo runner shows nine clusters of berries spaced evenly down the center; leave approx 8-9 hdc rows between centers of each cluster. We will mark placement on the right side of the work before finishing the base.
Round 33 :
Begin end shaping - working short rows: Ch 2, hdc in first 72 sts, ch 2, turn (skip last 12 sts). (72)
Round 34 :
Ch 2, hdc in first 72 sts, ch 2, turn repeating as short row to build rounded end; continue 2 more short rows (72)
Info :
Short rows on the end create the tapered octagon point. Work the short rows until the end depth matches the photo—approximately 4-5 short-row passes, then begin symmetric decreases across the full width to shape the angled corners.
Round 35 :
Ch 2, hdc across all 84 sts restoring full width. Turn. (84)
Round 36 :
Ch 2, hdc in next 12 sts, dec over next 2 sts (hdc2tog), hdc in remaining 68 sts. Turn. (83)
Round 37 :
Ch 2, hdc in next 11 sts, dec (hdc2tog), hdc in remaining 70 sts. Turn. (82)
Round 38 :
Ch 2, hdc across reducing 1 stitch each side in the same manner to form angled edges: hdc in next 10 sts, dec, hdc remaining. (81)
Round 39-44 :
Continue symmetrical decreases every row across the first 12 sts at each edge until outer corner has decreased by 6 stitches per side over 6 rows. Verify math and maintain same number decreased each side. Example row pattern: ch2, hdc in first X sts, dec, hdc in center, dec before last X sts, hdc final X sts. (75 down to ~69 depending on pacing)
Info :
After completing the corner shaping on one end, continue even hdc rows down the body to the midsection where the opposite end will mirror the shaping. Keep track of the number of short-row passes and decreases so the opposite end matches exactly.
Round 45-92 :
Work even hdc rows across the full runner length until you reach the position for shaping the second octagon end to mirror Rounds 33-44. Count rows from the first octagon to ensure symmetry. (st count will vary slightly depending on decreases; maintain rectangular center and symmetrical corners)
Round 93-104 :
Mirror shaping of Rounds 33-44 exactly on the second end: short rows followed by symmetrical decreases to form the octagon. Fasten off and weave in ends. Block runner to flatten and square edges.
Info :
Blocking will help even out the hdc ridges, open up the fabric slightly, and make applique placement easier. Pin the runner to desired finished dimensions and lightly steam or wet block according to yarn label instructions.
— Fern Frond Applique (Make 10 pairs / 20 total fronds) :
Info :
Each frond is worked from a central stem outward as a flat appliqué with worked-on leaflets. The fronds in the photo are about 3.5-4 inches long and layered in mirrored pairs along the center stem. Work 10 long fronds and 10 shorter fronds (shorter ones approx 60-70% length) to form alternating clusters.
Round 1 :
Using Moss Green. Ch 24. Sl st in 2nd ch from hook and next ch to create a twisted stem base (22 sts). Turn. (22)
Round 2 :
Ch 1, sc in first 3 sts (forming small base), *ch 2, skip 2, sc in next st* across to within 3 sts of end; sc in last 3 sts. This creates small spacer loops for later crocheting leaflets. Turn. (approx 22)
Info :
We will work leaflets into the ch-2 loops across both sides of the stem. Each leaflet is created by working a small fan of stitches into the ch-2 sp and securing back to the stem base. Work symmetrically on both sides for an even fern look.
Round 4 :
At first ch-2 sp on right side: (sc, hdc, dc, hdc, sc) in ch-2 sp. Sl st into next stem sp to secure. Move to the next ch-2 sp and repeat fan on same side until halfway along the stem (approx 11 leaflets on one side). Do not fasten off. (leaflet fans create textured edge)
Round 5 :
Turn work to the opposite side of the stem base. Working into the remaining ch-2 spaces, repeat the fan (sc, hdc, dc, hdc, sc) into each ch-2 sp mirroring the opposite side. Sl st into last st and fasten off leaving a long tail for sewing. Block flat. (approx 22 leaflets total)
Info :
For shorter fronds, reduce starting chain to 18 and work mirrored leaflets with 8-9 leaflets per side. Vary length for a natural effect when arranging on the runner.
Round 6 :
Optional accent: With same green, embroider a midrib down the center of each leaflet using duplicate stitch, or work a row of tiny sl st down the stem to anchor applique placement.
Info :
Make pairs of fronds that mirror each other around a central point. You will make approximately 20 fronds total to match the photo layout (10 pairs). Number and label them as long or short to ease placement during assembly.
— Small Pointed Leaves (Make 20) :
Round 1 :
Ch 6. Sc in 2nd ch from hook, hdc in next, dc in next, hdc in next, sc in last. Fasten off leaving long tail for sewing. (5 stitches)
Info :
These little leaves are worked quickly and are used to sit beneath berry clusters to soften the transition between fronds and berries. Make 20 leaves and block flat with a slight curve by pinning while damp.
— Berry Cluster (Make ~18 clusters: mixture of 2–5 berries per cluster) :
Info :
Each individual berry is a small 3D sphere made with tight sc rounds and lightly stuffed. Combine 2-5 berries to make clusters; the runner photo shows clusters of 3-5 berries spaced evenly down the center. Use a slightly smaller hook (4.0mm) for berries to ensure tight stitches.
Berry Round 1 :
Make 1 berry: With Cherry Red and 4.0mm hook. Magic ring, 6 sc into ring (6). Pull ring closed. (6)
Berry Round 2 :
Inc in each st around (12). (12)
Berry Round 3 :
(1 sc, inc) x 6 (18). (18)
Berry Round 4 :
1 sc in each st around (18). (18)
Berry Round 5 :
(1 sc, dec) x 6 (12). Begin stuffing lightly. (12)
Berry Round 6 :
6 dec (6). Fasten off leaving long tail. Weave tail through remaining 6 sts and cinch closed, secure and hide tail inside. Add small amount of fiberfill before final cinch. (6)
Info :
Sew a tiny bead or a contrasting small white stitch at center of some berries for a dewy highlight as shown. Use seed beads or a few white embroidery stitches and secure knot thoroughly on the reverse side so beads do not come loose.
Berry Assembly :
To create a cluster, stitch berries together using mattress stitch-style joins: place berries close, work through the back loops only of adjacent berry foundations to create a compact clustered look. Secure with several passes of matching yarn. Make clusters of varying sizes (mostly 3-4 berries) and a few single accent berries for variety. Make approximately 18 clusters total to space along the runner.
Info :
For a more rustic look, use a small knot of natural twine or tan thread peeking from the center of clusters as a connecting point to the runner stem; otherwise, attach clusters directly to the crocheted stem with matching green thread to hide joins.
— Central Stem Embroidery (worked directly on runner) :
Info :
We will create an embroidered stem running down the center of the runner to which fronds and berry clusters will be attached. Use length of Moss Green yarn doubled for strength and a tapestry needle to stitch a running chain of stem stitch or backstitch down the marked center of the runner. Mark positions for berry clusters before stitching (space approx 6-8 rows apart).
Round 2 :
Using a removable stitch marker, mark center stitch on right side of work in each marked row where berry centers will sit. Use a total of 9 cluster positions along runner center spaced evenly. When satisfied, remove markers and embroider stem as a backstitch from one end to the other, anchoring securely at each cluster point with an extra stitch to create a small nub for sewing clusters to.
Info :
Make the embroidered stem slightly raised by using a couching technique: chain a length of foundation chain and secure it with small sl st at intervals; alternatively work a single strand of sc along the center as a raised ridge before attaching appliques.
— Attachment & Layout Prep :
Round 1 :
Lay runner on flat surface right side up and pin frond pairs symmetrically along the embroidered stem. Long frond pairs alternate with shorter pairs; place a small cluster of three-pointed leaves under each berry cluster to soften edges. Use pins to temporarily fix placement before sewing.
Info :
Refer to photo for spacing: berry clusters appear every 6-8 body rows. Adjust placement if your runner length differs; maintain even spacing for visual rhythm. For each cluster, position frond pairs so the frond tips meet near the cluster and the bases are slightly overlapped at the stem.
Round 2 :
Sew fronds onto the runner using matched green yarn and a yarn needle: use whip stitch along the center stem of each frond to the embroidered stem on the runner. Sew through runner stitches and frond stem, pulling just snug enough to secure without puckering. Sew short leaves under each cluster similarly.
Round 3 :
Sew berry clusters to runner by anchoring the cluster's central connecting yarn to the embroidered stem; pass thread through runner to the back and back again to secure each cluster. Ensure clusters are fixed at their base and can’t rotate. Use extra small stitches through the berry bottoms to minimize wobble.
Info :
Arrange slight overlaps where frond tips cross over berries to mimic the photo’s layered, natural look. Consider a tiny dab of fabric glue under berry clusters for additional security (optional) but do not use glue on visible surfaces.
— Decorative Border & Octagon Edging :
Round 1 :
With Cream and 5.0mm hook attached to runner edge, join with sl st at one corner. Ch 2, hdc evenly around entire runner edge working 1 hdc in each row end and 3 hdc in corner points to maintain octagon shape. If needed, place increases at the previously shaped corner points (3 hdc in corner) to keep the corners flat. Continue until full round is complete. Join with sl st to first hdc. (even count varies by runner size)
Round 2 :
Ch 2, *hdc in BLO of each st across to corner, 3 hdc in corner sp* around to create a defined ridge along the border. Join and fasten off after 2-3 rounds for a neat framed edge. (repeat rounds for desired border width)
Info :
Work 2-3 rounds of border depending on how thick you want the frame. The bord er in the photo has a double ridge effect; use BLO on second round to emphasize the inner channel and produce shadowing around the central garland.
Round 3 :
Optional decorative chain: With 4.0mm hook and same cream, join and work crab stitch (reverse single crochet) around the outer edge for a finished twisted rope appearance. This is purely decorative but gives professional finish and helps keep edges from rolling.
Info :
Weave in all ends from appliques on the underside of runner and hide tails under border rows to secure. Trim loose fibers and block once more if needed for crisp presentation.
— Finishing Touches & Variations :
Round 1 :
Optionally add small white seed-beads to the top of some berries: thread bead onto needle and pass through berry top, secure thread through berry base and tie off on underside. Alternatively, use a couple of white sc stitches to imitate snow-dusted berries.
Round 2 :
To make runner longer or shorter, add or subtract multiples of 6-10 even hdc rows during Main Panel Rounds 45-92 stage so the berry spacing remains proportional. You will need to adjust number of fronds and clusters proportionately.
Info :
For a firmer runner, use a slightly smaller hook for the main panel to produce denser fabric. For a drapier look, go up a hook size and add extra rows between clusters. Color swap suggestions: use deep navy instead of cream for a dramatic high-contrast look; or moss green base with gold berries for festive variation.
Final :
Care instructions: Hand wash gently in cool water and lay flat to dry. Avoid harsh agitation to preserve 3D berry shapes. Store flat for long-term keeping or lightly fold with tissue to protect beads.
This table runner combines cozy textures with sculptural botanical details to create a truly special seasonal centerpiece. As you assemble fronds and berry clusters you'll see the design come to life in layers of green and red against a soft cream background—perfect for holiday settings or everyday rustic charm. The pattern rewards patience with a handmade piece that looks store-bought but is entirely yours. Enjoy the slow, relaxing rhythm of the base rows and the creative joy of applique placement. 🧶🌿