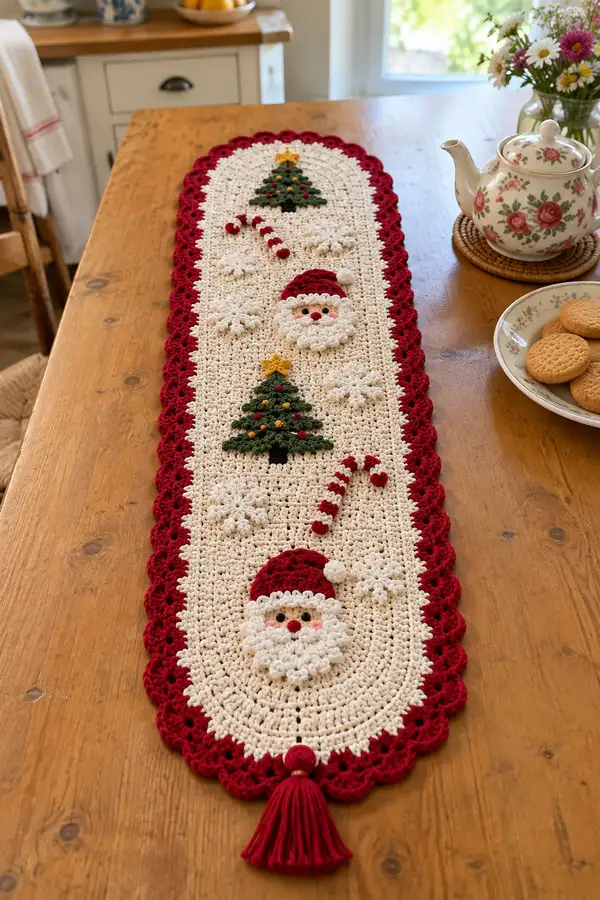
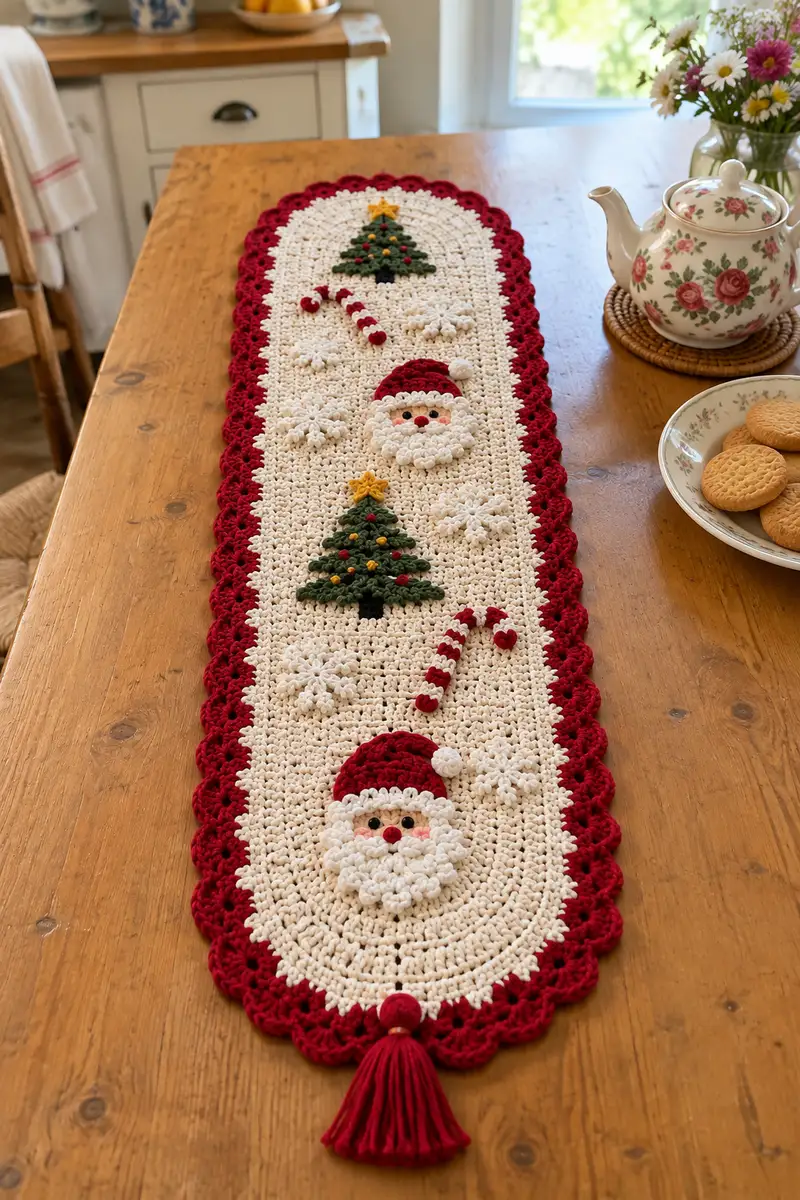
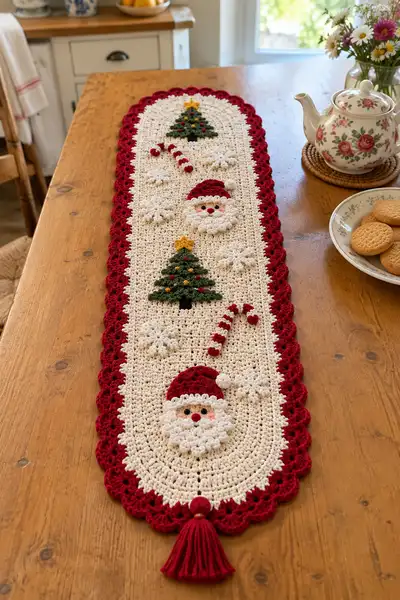
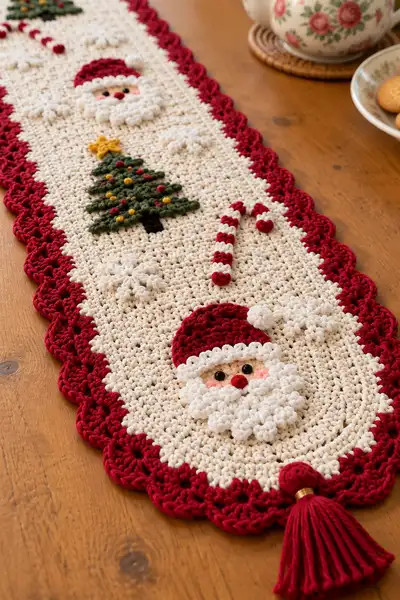
Create a cozy, festive table runner featuring two cheerful Santa appliques, two layered Christmas trees, candy canes, delicate snowflakes, scalloped deep-red edging and a tassel finish. Worked in warm cream with rich red and deep green accents, this runner adds handmade charm to your holiday table. The pattern includes clear step-by-step rounds for the oval base, all appliques, and border so you can assemble a professional-looking finished piece.
Progress Tracker
0% Complete
— Runner Base (Oval Panel) :
Round 1 :
Make a magic ring. Work 6 sc into the ring. Pull tight. (6)
Round 2 :
Inc in each stitch around. (12)
Round 3 :
(1 sc, inc) x 6 around. (18)
Round 4 :
(2 sc, inc) x 6 around. (24)
Round 5 :
(3 sc, inc) x 6 around. (30)
Info :
We are starting a symmetrical oval end. This initial circle will form the curved end - counts below are per round for a half-oval build. Keep tension firm; this gives a sturdy start for the long runner.
Round 6 :
(4 sc, inc) x 6 around. (36)
Round 7 :
(5 sc, inc) x 6 around. (42)
Info :
At this point the curved end is a small oval. We will begin elongating by working rows across the top and bottom of the oval to create the runner body. Mark the two opposite stitches that will be the long-side centers (these are your side markers for later increases).
Round 8 :
Increase pattern for shaping: [ch 1, turn], place 1 sc in each st across the top until you reach the side marker; then work 2 sc in the next stitch (inc), 1 sc in the next side area, 2 sc in the stitch directly opposite the other side marker (inc), continue 1 sc to end. Work in continuous rounds joining with sl st at end of round if desired so that the long sides grow. (48)
Round 9 :
1 sc in each st around across the long side with 2-inc points maintained at the two side markers to elongate the oval evenly, producing a tall oval shape. (48)
Round 10 :
1 sc in each st around. (48)
Round 11 :
1 sc in each st around. (48)
Info :
Gauge check: your oval should now be visibly elongated. If your runner is wider than desired, stop increasing at earlier rounds; if narrower, add an extra round with increases spaced evenly along the long sides (for example add 2 extra increases along long sides in round 8 pattern to go to 52).
Round 12 :
Work 1 sc in each st for 6 rounds to create the central panel height. (48)
Round 13-17 :
1 sc in each st (48)
Info :
Weave in any tails from the initial rounds into the fabric now or later; leave long tail at the join for the second end. Keep fabric flat by checking that your stitch tension is uniform. This central panel is where we will later place appliques; measure and mark the center and the quarter points to guide motif placement.
Round 18 :
Start subtle broadening for the second curved end: work (1 sc in each st for 8 sts, inc) across each side point, maintaining 2 inc points across the side markers used earlier. (52)
Round 19 :
1 sc in each st around. (52)
Round 20 :
1 sc in each st around. (52)
Round 21 :
Repeat increases symmetrically for the curved second end: [work 1 sc across the long side until you reach the first increase area, work inc in next stitch, continue across to the opposite increase area and work inc]. (56)
Info :
At the end of round 21 you should have a long oval shape with two identical rounded ends. Measure the runner; if the central panel is shorter than you want, work additional even rounds in sc until your desired length (add in multiples of 2 rounds to keep symmetry). The counts here assume a medium length runner approximately 36-44 inches using worsted yarn and 5.0mm hook.
Round 22-28 :
1 sc in each st around. (56)
Round 29 :
Even round in sc while planning applique placement. Use pins to mark where the two Santa faces and two trees will sit: top quarter, middle quarter, bottom quarter. Leave equal vertical spacing between motifs (approx 6-8 rows between appliques). (56)
Round 30-34 :
1 sc in each st around to create the space for motifs. (56)
Info :
If you prefer a slightly more textured ground, you can substitute every third round with hdc rounds for a softer look: Round A: 1 hdc in each st. But for consistent applique sewing, stick to sc for a dense base.
Round 35 :
Reduce slightly along the long sides to pull the edges in for a neater scallop later: work (9 sc, dec) x 4 evenly spaced around the long edges maintaining end-round increases at both curved points. (52)
Round 36 :
1 sc in each st around. (52)
Round 37 :
1 sc in each st around. (52)
Info :
Now the base panel is ready for appliques. Lay the panel flat and position your motifs before sewing. You can lightly steam-block the panel if the fabric has tension waves, but avoid heavy blocking if you plan to hand-wash later.
Round 38 :
Prepare to work the red scalloped border start: change color to deep red by joining with sl st at any stitch along the long edge. (52)
Round 39 :
In deep red: ch2 (counts as first hdc), hdc in same st, *skip 1 st, (5 dc in next st) shell, skip 1 st, hdc in next 2 sts; rep from * around, adjusting shells so you get 14 shells around the long side and 5 shells across each curved end for a balanced scallop. Join with sl st. (shell counts vary by placement)
Round 40 :
Fasten off and weave in ends. Note where you want the tassel: at the rounded end center stitch, mark with a small pin. (work complete for base)
Info :
The base construction above used a combined circular-start and elongation method to create a symmetrical oval. If you need to lengthen, add repeats of Rounds 22-34 before starting the border. This sequence allows precise control over the finished length while keeping the curved ends neat.
— Santa Face Applique (Make 2 identical) :
Round 1 :
With cream yarn: make mr, 6 sc in ring. (6)
Round 2 :
Inc in each st around. (12)
Round 3 :
(1 sc, inc) x 6 around. (18)
Round 4 :
(2 sc, inc) x 6 around. (24)
Round 5 :
(3 sc, inc) x 6 around. (30)
Info :
These rounds form a small rounded face disk approx 2.5-3 in diameter depending on tension. Place safety eyes between Rounds 3 and 4, spaced 6-8 sts apart (approx) if using safety eyes; otherwise mark for embroidered eyes after beard placement.
Round 6 :
1 sc in each st around to flatten and add height. (30)
Round 7 :
Switch to skin-tone or very light beige (if desired) by joining and working 1 sc in each st around. (30)
Round 8 :
1 sc in each st around. (30)
Info :
Embroider blush or use a small circle of pink yarn felt for cheeks later. If using safety eyes, attach them now and then lightly stuff the face with a small pinch of fiberfill to give the face a gentle convex shape — do not overstuff as the beard will sit on top.
Round 9 :
Begin beard base (cream): in front loop only of each st around, 1 sc in each st FLO (30) — this creates a ridge to sew on the beard clusters.
Round 10 :
For beard pom-puff clusters: *skip 1 st, in next st work (5 dc cluster closed together) in the same st leaving last loop on hook between dcs, draw through all loops, sl st to secure; move 1 st and repeat across the lower half of the face to form 7 clusters.* Work clusters across 7 positions centered on lower half. Secure and fasten off with long tail for sewing. (7 clusters)
Info :
To make the little poppy beard clusters: you can make 5-dc bobbles or puff stitches — whichever gives rounded shape. If using puff: yo, insert, pull up loop, repeat 4 times, yo and draw through all loops, ch1 to close. This creates 3D curly beard effect seen in the photo.
Round 11 :
Create moustache: with cream yarn, make two small 6-sc semicircular petals: make mr, 6 sc, pull tight, leave tail for sewing. Flatten and position above beard clusters center. Repeat for other side. (2 moustache halves)
Round 12 :
Hat base: join deep red at top edge of face disk and sc around the top third of the face forming a hat crown — 10 sc across topmost stitches to form a semicircle cap. (10)
Round 13 :
Working in deep red, increase slightly to shape hat: (1 sc, inc) x 5 across the hat semicircle to open crown. (15)
Round 14 :
1 sc in each st around the hat area to form a short cap height. (15)
Info :
To create the white hat trim, switch to cream and work a scalloped trim: join cream along the hat bottom and *(sl st, ch2, 3 dc in same st, sl st) across each stitch of hat base* to create a ridged popcorn edge that matches the photo's small bobble trim.
Round 15 :
Hat trim: switch to cream, work (sc, *2 dc cluster in next st, sc in next st*) across to form a scalloped trim. Fasten off leaving long tail. (approx 15 scallops)
Round 16 :
Pom-pom: with cream, make a small 6-sc circle in mr and pull tight to form a small pom; fasten off leaving long tail for sewing. (1 small pom)
Round 17 :
Facial details: sew on safety eyes (6-8mm depending on scale) between Rounds 3-4, place a small red-nose bobble (2 sc tight ball or small pom) centered under eyes and above beard clusters, embroider small mouth with red or leave hidden under moustache. Secure threads and weave ends. (eyes, nose)
Info :
Make two identical Santa appliques. When sewing on, place them slightly below the center line of the runner so their beards sit proud of the fabric. Add a faint blush to cheeks using light pink yarn stitched in a small circle or very small dab of washable blush applied and heat-set gently.
— Tree Applique (Make 2) :
Round 1 :
With forest green: mr, 6 sc in ring. (6)
Round 2 :
Inc in each st around. (12)
Round 3 :
(1 sc, inc) x 6 around. (18)
Round 4 :
Chain 1, ch3 to act as height for first branch row, turn and work a small chevron/leaf row to create layered branches: on the next row attach clusters of 3 dc separated by sc to form the first tier — work 5 clusters across the wide part (counts visual). (approx 5 clusters)
Round 5 :
Second tier: step down one row back toward center and create smaller cluster row of 4 clusters using ch1 spaces to position. Fasten off tail for sewing. (4 clusters)
Round 6 :
Third tier (top): make 3 clusters close together to form a pointed tree top. (3 clusters)
Round 7 :
Trunk: with black or dark brown, join under the bottom center of the tree and sc 3 sts forming a small rectangular trunk 2 rows high. Fasten off. (3 x 2 trunk)
Info :
Decorations: use mustard/gold and deep red small french knot-style bobbles made with small wrapped yarn balls or tiny 3-loop picot stitches sewn onto the tree to look like baubles. Space them symmetrically across the tiers.
Round 8 :
Make a small star with mustard/gold: mr, ch2, make 5 petals of (sl st, ch2 loop, sl st in ring) and secure with a central embroidery stitch; leave tail for sewing. (small star)
Info :
Make two identical trees. Sew star to top and small baubles in alternating colors (gold and red) using single wraps of yarn to secure as tiny raised dots. The tree is layered and slightly 3D to give a lush effect against the flat background.
— Candy Cane Applique (Make 2) :
Round 1 :
With red yarn: ch 10, sl st back along chain to make a slightly rounded stick, continue to work in rounds around the ch to make a thin tube by sc in each row for 3 rounds forming a small cord. (10 length tube)
Round 2 :
Switch to cream and work 1 round of sc in each st around to create alternating stripes. Continue alternating red/cream for 6 stripes total. Fasten off leaving tail for sewing. (6 stripes)
Round 3 :
Bend the cane gently and sew the top curve into the cane forming a hook; secure with invisible stitches. Add two tiny heart bobbles near the end using deep red yarn for accent. (curved cane)
Info :
For a more robust candy cane, slightly stuff the tube with tiny bits of fiberfill before closing. Sew on small red bobbles along one side for the decorative little dots seen in the photo.
— Snowflake Motif (Make 6 small snowflakes) :
Round 1 :
With cream yarn: ch 6, sl st to first ch to form ring. (6)
Round 2 :
*ch 4, sl st in ring; rep from * 6 times to form 6 points. (6 points)
Round 3 :
On each point: join yarn at base, *sc, ch2, picot (3 ch and sl st back into ch), sc* to form a raised point. Repeat around. Fasten off. (6 decorative picots)
Info :
These tiny layered snowflakes are sewn on flat. If you prefer larger snowflakes, work a second round of chain arches between points and add more picots. Make six to decorate evenly across the runner between motifs.
— Small Red Buttons / Baubles (Make 8) :
Round 1 :
With red yarn make mr, 6 sc in ring, pull tight and sl st to close, fasten off leaving tail to sew as tiny round baubles. (6)
Info :
Use these baubles for candy cane ends, tree decorations, or scattered accents. For more structure you may wrap these rounds around a small bead then cover with yarn.
— Tassel :
Round 1 :
Cut multiple lengths of deep red yarn approximately 8-9 inches long. Fold in half to create a loop. Use an 18-inch length of yarn to wrap the top collar tightly around the top to form the head of the tassel. Attach a yarn-wrapped bead then secure. Sew the tassel to the marked center stitch on one rounded end of the runner using a long tail.
Info :
Finish by trimming the tassel ends evenly. Add decorative gold thread wrap around the collar for a polished look like the sample in the photo.
— Assembly & Placement :
Info :
Block or steam the base lightly if desired. Arrange motifs as pictured: Santa faces near each rounded end, trees placed between the Santas toward center, candy canes near the second tree and top, snowflakes scattered evenly between motifs. Use pins to hold pieces in place before sewing. Ensure mirror symmetry so the runner reads the same from both ends.
Round 1 :
Sewing detail: using matching yarn and a yarn needle, sew each applique down with small invisible whip stitches around firmly but not so tight that the base puckers. For 3D items like pom-pom beard clusters, sew through the center of the cluster and secure several times to anchor them down. Repeat for all appliques. (assembly)
Info :
Take your time: tack the appliques with a few loose stitches first, check final placement, then go over again to secure. Weave and hide tails through the base panel to the inside. Add final minis: scatter the red baubles and sew them on as tiny raised stitches to emulate the photographed runner.
This festive runner is a joyful way to decorate your table — each textured Santa face, layered tree and delicate snowflake brings a hand-made, cozy charm to the season. The rich red scalloped border and tassel give a classic finish that feels both nostalgic and new. Gather your yarn, make a cup of tea, and enjoy stitching this warm holiday accent — it makes a perfect gift or centerpiece for the season. 🎄🧶