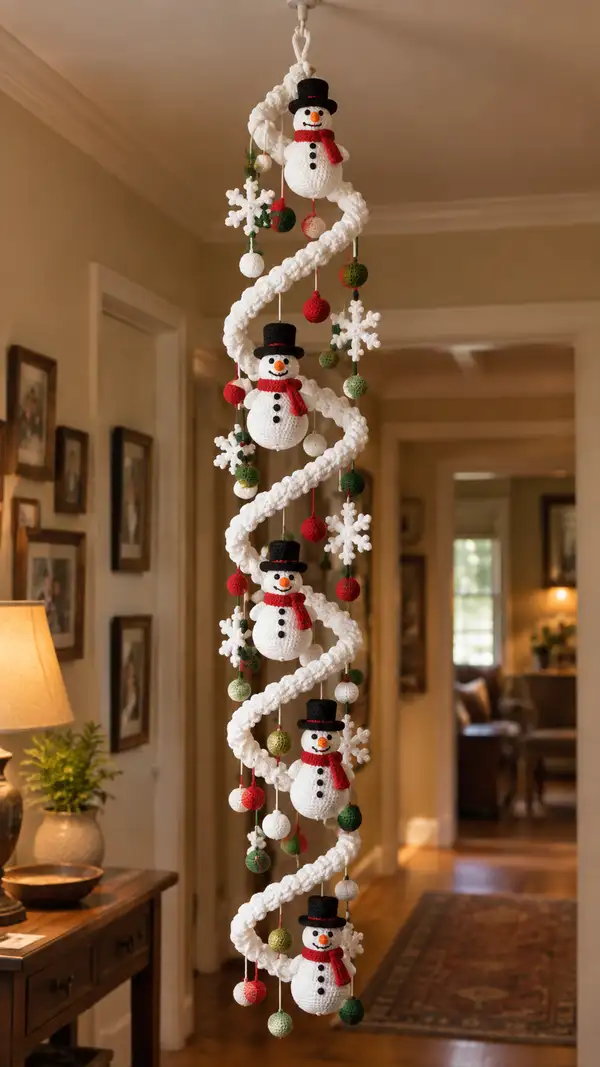
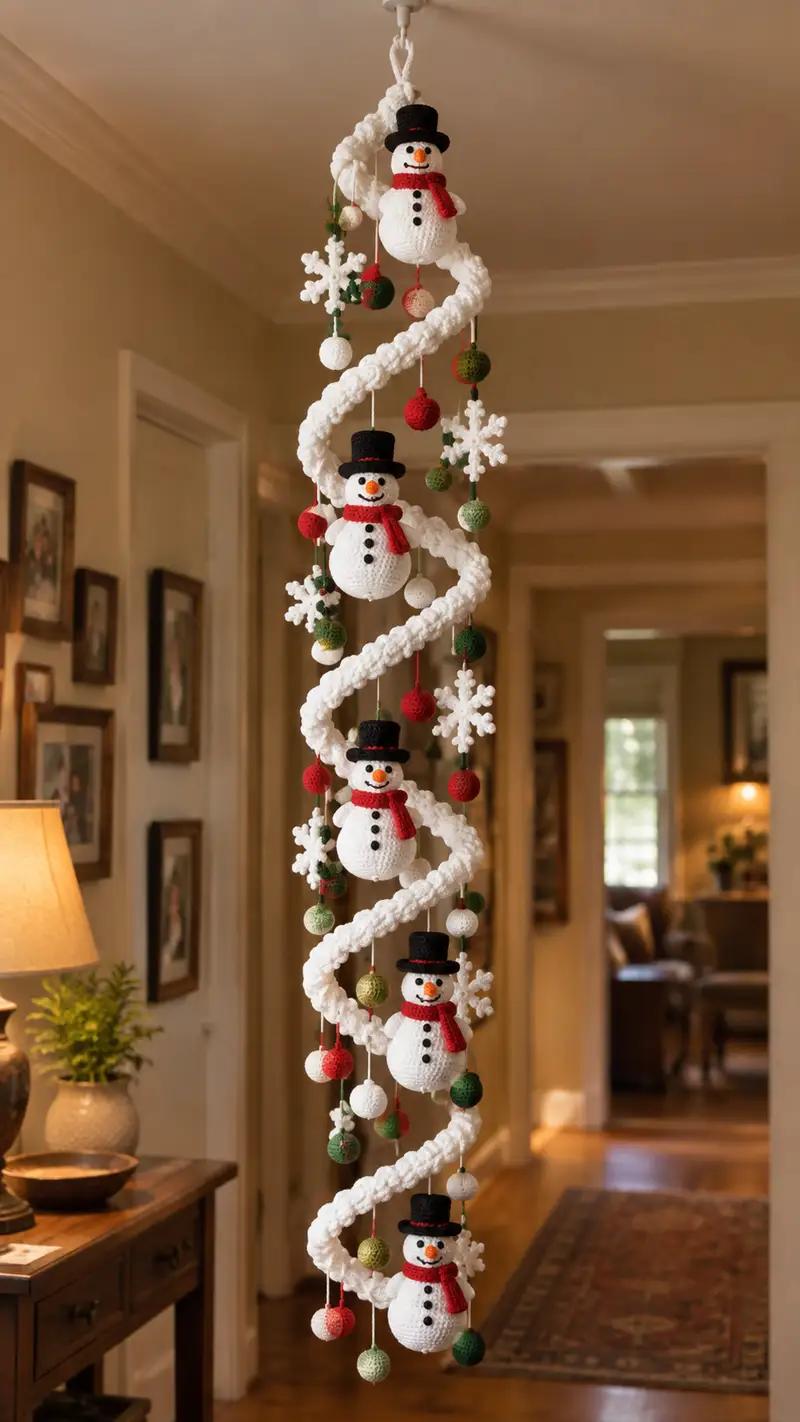
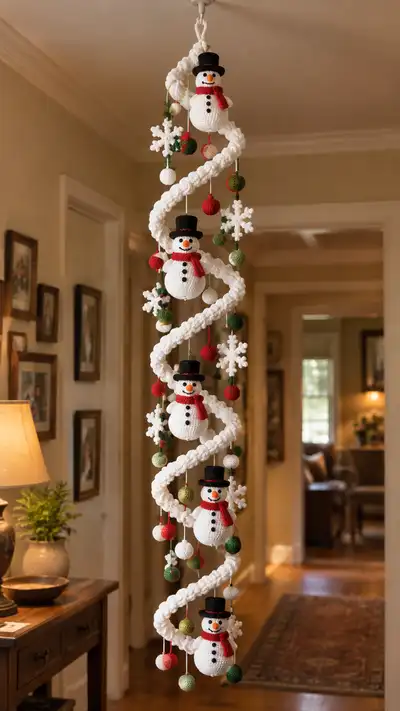
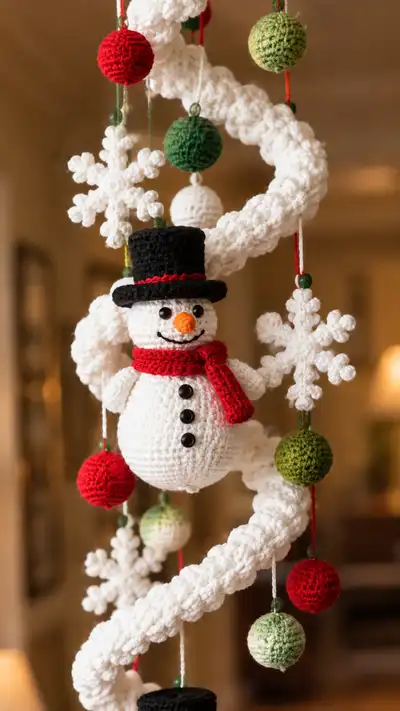
Create a charming hanging spiral mobile featuring adorable crocheted snowmen, snowflakes and decorative balls. This pattern recreates the tall spiral garland with three plush snowmen, tiny top hats, carrot noses, and colorful ornaments shown in the photo. The finished mobile is a warm, festive accent perfect for hallways or doorways and makes a lovely handmade gift.
Progress Tracker
0% Complete
— Head :
Round 1 :
6 sc in magic ring (6)
Round 3 :
(1 sc, inc) x 6 (18)
Round 4 :
(2 sc, inc) x 6 (24)
Round 5 :
(3 sc, inc) x 6 (30)
Round 6 :
(4 sc, inc) x 6 (36)
Round 7 :
(5 sc, inc) x 6 (42)
Round 8 :
(6 sc, inc) x 6 (48)
Round 9 :
1 sc in each st (48)
Round 10 :
1 sc in each st (48)
Info :
Place safety eyes between rounds 11-12, about 6-8 sts apart depending on expression. For this small snowman, place eyes 7 sts apart (count leaving 20 sts between eye centers for a 48-st round), secure washers before stuffing.
Round 11 :
1 sc in each st (48)
Round 12 :
1 sc in each st (48)
Round 13 :
1 sc in each st (48)
Round 14 :
1 sc in each st (48)
Info :
Optional: embroider mouth using black yarn or embroidery thread now. Use small backstitches to form a smile centered under the eyes; hide tails inside the head.
Round 15 :
(6 sc, dec) x 6 (42)
Round 16 :
(5 sc, dec) x 6 (36)
Round 17 :
(4 sc, dec) x 6 (30)
Info :
Begin stuffing head firmly but not overstuffed; use small bits of fiberfill to shape cheeks and forehead evenly. Continue stuffing gradually as decreases progress.
Round 18 :
(3 sc, dec) x 6 (24)
Round 19 :
(2 sc, dec) x 6 (18)
Round 20 :
(1 sc, dec) x 6 (12)
Info :
Fasten off leaving a 12-15cm tail for sewing the head to the body. Use yarn needle to close remaining hole with neat gather-through stitches and weave tail inside.
— Body (two-sphere style) :
Round 1 :
6 sc in magic ring (6)
Round 3 :
(1 sc, inc) x 6 (18)
Round 4 :
(2 sc, inc) x 6 (24)
Round 5 :
(3 sc, inc) x 6 (30)
Round 6 :
(4 sc, inc) x 6 (36)
Round 7 :
(5 sc, inc) x 6 (42)
Round 8 :
(6 sc, inc) x 6 (48)
Round 9-12 :
1 sc in each st (48)
Info :
These rounds build the lower (larger) sphere of the snowman. Stuff the sphere firmly after round 11 to create a stable bottom. For a two-sphere snowman, we will make two spheres: lower (this) and a smaller middle/upper body sphere. Leave a long tail for sewing when closing.
Round 13 :
(6 sc, dec) x 6 (42)
Round 14 :
(5 sc, dec) x 6 (36)
Round 15 :
(4 sc, dec) x 6 (30)
Round 16 :
(3 sc, dec) x 6 (24)
Round 17 :
(2 sc, dec) x 6 (18)
Round 18 :
(1 sc, dec) x 6 (12)
Info :
Fasten off and close, leaving a long tail for sewing to the middle sphere if you choose to construct the snowman as stacked spheres sewn together. For a classic three-sphere snowman or two-sphere small snowman, follow the additional sphere instructions below.
— Middle/Upper Body Sphere (if making two-sphere style) :
Round 1 :
6 sc in magic ring (6)
Round 3 :
(1 sc, inc) x 6 (18)
Round 4 :
(2 sc, inc) x 6 (24)
Round 5 :
(3 sc, inc) x 6 (30)
Round 6-9 :
1 sc in each st (30)
Info :
Place button decoration positions now: mark 3 evenly spaced stitches on the front for 3 small buttons. If using sewn-on buttons, leave tails or sew after assembly.
Round 10 :
(3 sc, dec) x 6 (24)
Round 11 :
(2 sc, dec) x 6 (18)
Round 12 :
(1 sc, dec) x 6 (12)
Info :
Stuff this sphere moderately; it should be slightly firmer than the head so the snowman sits round and firm. Fasten off leaving a tail for sewing to the lower sphere or for attaching the head directly.
— Carrot Nose :
Round 1 :
4 sc in magic ring (4)
Round 2 :
1 sc in each st (4)
Round 3 :
(1 sc, inc) x 2 (6)
Round 4 :
1 sc in each st (6)
Round 5 :
sc around in continuous rounds decreasing the circumference using two sc then dec once if shaping a tapered cone (example: (2 sc, dec) x 2 = 6)
Info :
Use orange yarn. Stuff very lightly to keep it slightly pliable—the nose is small. Fasten off leaving a tail for sewing to the head. Sew the nose centered between the eyes and slightly protruding.
— Hat (Make 1 per snowman) :
Round 1 :
6 sc in magic ring (6)
Round 3 :
(1 sc, inc) x 6 (18)
Round 4 :
(2 sc, inc) x 6 (24)
Round 5-8 :
1 sc in each st (24)
Info :
This forms the top (cylinder) of the top hat. For a small brim, switch to slightly larger hook or work additional rounds in BLO to create a firmer edge.
Round 9 :
1 sc BLO in each st for 1 round to create a ridge (24)
Round 10 :
Work 24 sc into next round to flatten the brim—this forms the brim edge. Option A: 24 sc evenly placed (24) Option B: Using increases to make a wider brim: (3 sc, inc) x 6 = 30
Round 11 :
1 sc in each st (24) (or 30 if you chose wider brim)
Info :
Fasten off, weave in ends. Optionally add a red yarn cord or embroidery along hat base to match photo trim.
— Scarf :
Info :
Scarf is worked flat as a small strip and tied around the neck. Use red yarn and smaller hook for denser fabric.
Row 1 :
Ch 26, sc in 2nd ch from hook and across (25)
Row 2-6 :
Ch1, turn, sc across (25)
Info :
Optional: work a decorative picot at rows ends or add fringe by cutting short lengths and knotting. Fasten off leaving long tails to wrap around snowman neck.
— Arms (Make 2; small stubby arms) :
Round 1 :
6 sc in magic ring (6)
Round 3 :
(1 sc, inc) x 3 (9)
Round 4-6 :
1 sc in each st (9)
Round 7 :
(1 sc, dec) x 3 (6)
Round 8-10 :
1 sc in each st (6)
Info :
Arms are small and slightly flat; stuff lightly or leave unstuffed for flat look. Sew arms to sides of middle sphere aligned with the scarf (about round 6-8 of middle sphere). If you prefer twig arms, substitute brown yarn and shape using increases and decreases to create small pointy fingers.
— Buttons & Eyes :
Info :
Sew three small black buttons onto the front of the middle sphere in a vertical line. Space evenly: start approx 6-8 sts below scarf and space about 4-6 rounds between buttons. Secure tightly and knot yarn on interior.
Info :
Safety eyes: use 6mm safety eyes for small snowmen; place between rounds 11-12 of head and approx 7 sts apart. Double-check symmetry before locking washers. For child-safe toy, embroider eyes with black yarn.
— Snowflake Motif (Make multiple) :
Round 1 :
6 sc in magic ring (6)
Round 2 :
(ch3, sl st in next st) x6 to form points (6 ch-3 loops)
Round 3 :
In each ch-3 loop: (sc, hdc, 3 dc, hdc, sc) - repeat for 6 points; slip to join center
Round 4 :
Work small picot or 3-ch bobble on the tip of each point to mimic the puffed look (optional)
Info :
Block snowflakes flat and stiffen lightly using fabric stiffener or watered-down PVA glue to keep shape when suspended.
— Small Ornament Balls (multiple sizes) :
Small Ball A (approx 2.5cm) :
Rnd1:6 sc in mr (6). Rnd2:6 inc (12). Rnd3:(1 sc,inc)x6 (18). Rnd4-6:1 sc around (18). Rnd7:(1 sc,dec)x6 (12). Rnd8:6 dec (6). Fasten off, stuff lightly, close and leave tail for attaching to hanging cord.
Small Ball B (approx 3.5cm) :
Rnd1:6 sc in mr (6). Rnd2:6 inc (12). Rnd3:(1 sc,inc)x6 (18). Rnd4:(2 sc,inc)x6 (24). Rnd5-7:1 sc around (24). Rnd8:(2 sc,dec)x6 (18). Rnd9:(1 sc,dec)x6 (12). Rnd10:6 dec (6). Fasten off, stuff and close.
Info :
Make balls in red, green, white and variegated yarn. Use beads above each ball on the hanging cord to secure knots and for decorative spacing. Leave long yarn tails or use thin cord to hang.
— Spiral Column (Textured Snowy Spiral) :
Info :
This spiral backbone is worked as a long chain of bobble/puff clusters then joined into a twisted spiral. The photo shows a thick, irregular spiral height approx 90-120cm; work a length to suit your hanging space. Use white bulky look by making puff clusters to create the rope effect.
Foundation :
Ch 180 (or length desired, adjust for height); join to form a long circular chain if you want continuous spiral—otherwise work a long strip and stuff later around a wire core for stiffness.
Round 1 :
In each ch: sc across entire chain to create a tubular cord (180 sc)
Round 2 :
Work textured bobble row along length: *ch1, skip 1 ch, in next ch work (yo, insert, pull up loop)x3, yo pull through all loops, ch1, sl st to secure* repeat to end to make puff clusters every 2 sts (approximately 90 puffs)
Round 3-4 :
Sc in each st along length to even fabric and encase puffs (180)
Round 5 :
Optional: add an inner core by inserting a length of flexible wire or a thin dowel down the center for weight and shape. If using wire, wrap the crochet tube around it and stitch the seam closed to hide the core.
Info :
To shape the spiral, wrap the finished textured tube around a cardboard cylinder or spiral form and lightly steam-block or spray with starch to set. Allow to dry in spiral form. Alternatively, stitch the spiral onto a flexible wire that has been shaped into the spiral to hold it permanently.
Round 6 :
Fasten off ends neatly and weave tails in. If you want more height, make additional segments and join them together using mattress stitch for an invisible seam.
— Hanging Assembly Strands :
Info :
Cut multiple lengths of thin cord or yarn in desired colors (red, green, white). Each strand will hang down from the spiral and carry balls, snowflakes and the snowmen. Space strands evenly along the spiral curve: top, middle, bottom, and between turns. Use beads as spacers to add a polished look and to secure components above and below ornaments.
Strand Example :
Cut 6 strands approx 30cm each for small ornaments, and 3 strands approx 45-60cm for snowmen positions. Tie yarn securely through spiral stitch holes or stitch strands to the interior of the spiral tube so knots are hidden inside the texture.
— Large Snowman Assembly (Full Stack Snowman used as single motif) :
Info :
Assemble head and body spheres: if using three spheres (head, mid, lower), sew middle to lower first, then sew head to middle. For the mobile in the photo, the snowman appears as two-sphere bodies (larger bottom, smaller upper) with head integrated—use the body instructions to produce a compact two-sphere figure about 7-10cm tall.
Step 1 :
Sew the upper sphere to the lower sphere using the long tail and a yarn needle. Use whip stitch or ladder stitch to create a seamless join; match rounds so joins sit hidden in the midline.
Step 2 :
Sew the head to the top of the upper sphere centered on the seam. Reinforce with 6-8 secure passes to prevent wobble. Weave tails inside and trim.
Step 3 :
Attach carrot nose between safety eyes. Sew small arms to middle sphere on either side aligned with scarf. Attach buttons using small black buttons sewn vertically on the front center. Add hat by placing on head and tacking with a few stitches at the top and back to secure.
Info :
Ensure the snowman is balanced and not too heavy for its hanging cord. If placing a bead above the head on the hanging cord, the bead will help keep the snowman upright and add a decorative accent.
— Finishing Details & Repeats :
Info :
Repeat the snowman and ornament production for each tier shown in the photo—three identical snowmen spaced evenly along the spiral. Make approximately 12-18 small balls and 6-8 snowflakes to hang between and around snowmen. Vary ball sizes and colors to mimic photo arrangement.
Final Touch :
Create a hanging loop at the very top by forming a small chain of 10 ch, slip stitching back into top spiral stitch to form secure loop. Optionally hide a ceiling hook or ring inside the top knot for more secure hanging.
Info :
Weave and hide all tails inside the spiral tube or inside spheres so the finished mobile looks tidy from all angles. Add a small drop of fabric glue on particularly stressed knots for extra security before trimming ends.
This festive spiral snowman mobile brings holiday cheer and handmade charm into any hallway or doorway. Each snowman, hat and snowflake is crafted with care and assembled into a whimsical spiral of winter magic. I guarantee the textured spiral and tiny details will delight friends and family—it's a joyful, display-ready project. 🧶❄️ Make one to keep or gift it to someone special for a cozy seasonal accent. Happy stitching and enjoy the sparkle of your creation! 🎄