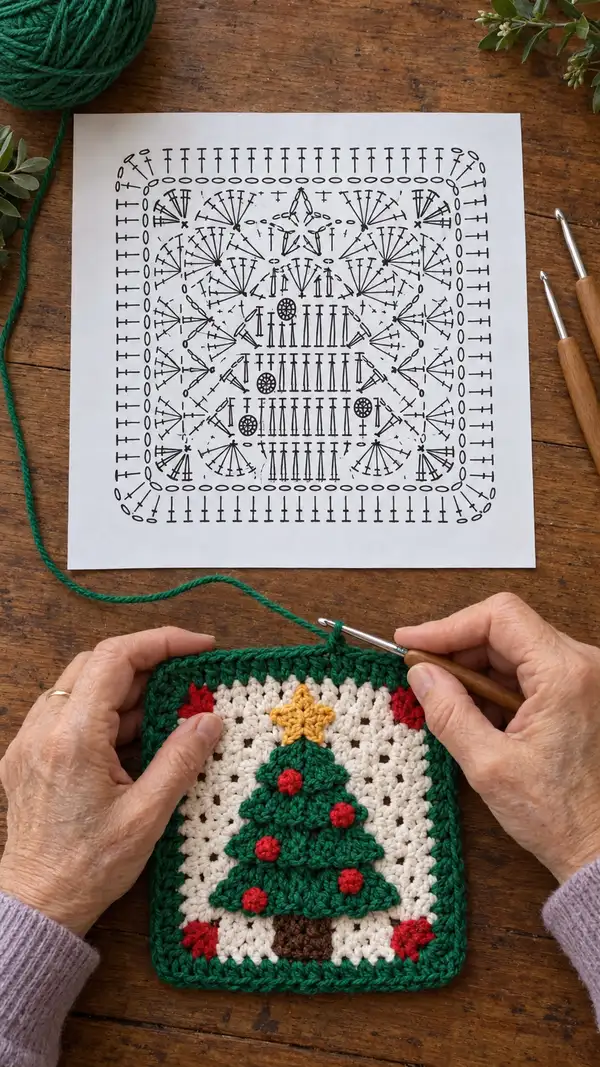
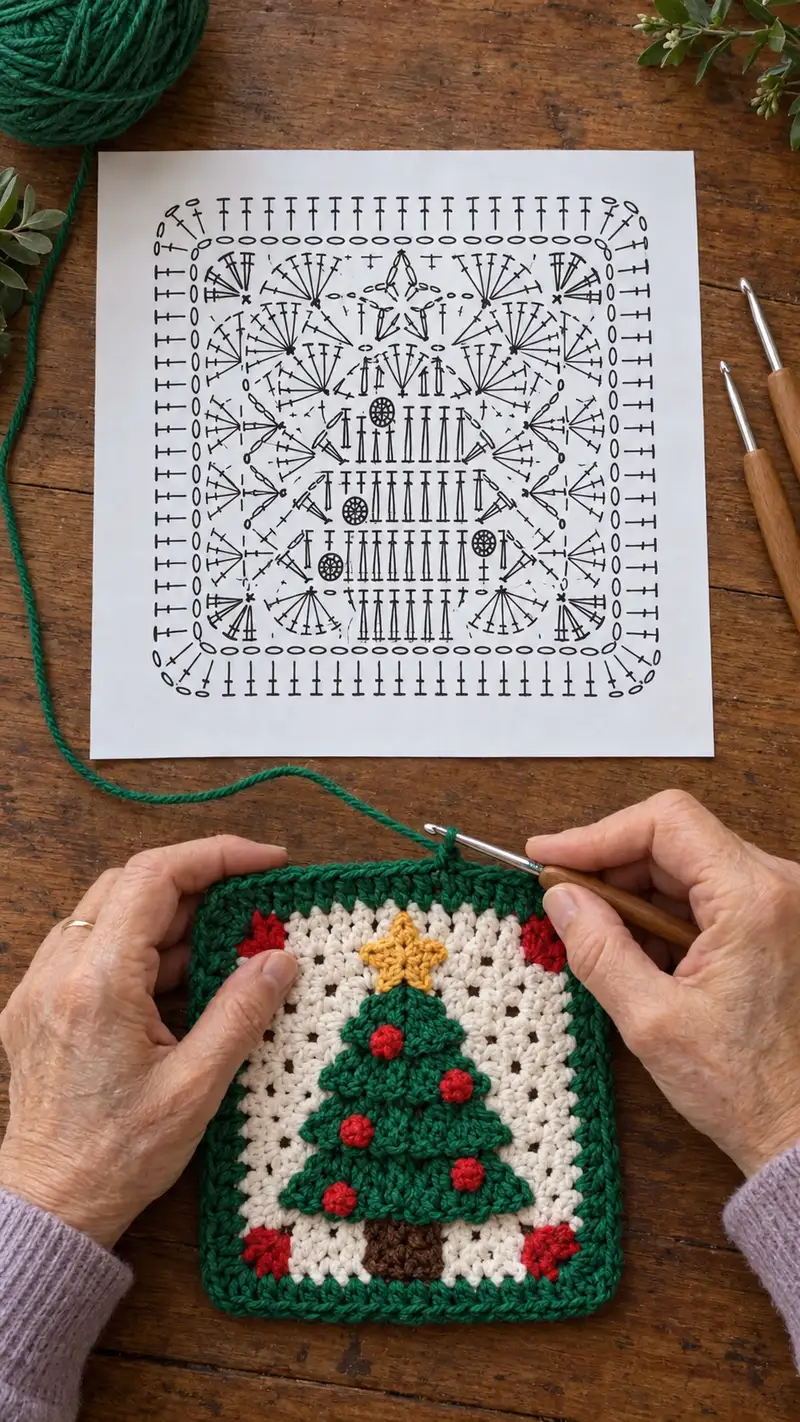
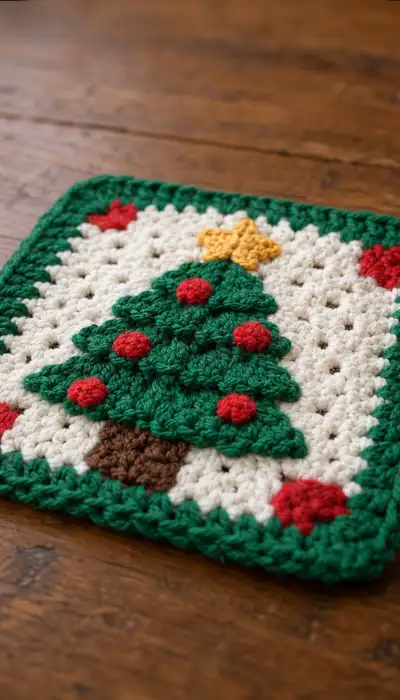
Make a charming holiday granny square featuring a layered 3D Christmas tree, tiny red baubles, a golden star and a rich green border. This square uses classic granny clusters for the background and textured applique pieces for the tree tiers and embellishments. Perfect for a festive cushion panel, potholder, or seasonal afghan block — cozy, colorful, and full of handmade charm.
Progress Tracker
0% Complete
— Materials & Gauge :
Info :
Gauge is not critical for this decorative square but for reference: 12 dc x 8 rows = 10 cm in worsted weight yarn with 4.0 mm hook. Finished square using specified yarn and 4.0 mm hook measures approximately 15 cm (6") square. Adjust hook and yarn weight to change finished size.
— Background Granny Square (Cream) :
Round 1 :
Make a magic ring. Ch3 (counts as first dc), work 2 dc into ring, ch2 (corner made), *(3 dc into ring, ch2) repeat from * 3 more times; join with sl st to top of ch3. (4 corners; 4 groups of 3 dc, ch2)
Info :
Each corner is worked as (3 dc, ch2, 3 dc). Use a stitch marker to mark the first ch3 as the beginning of the round; this helps keep track of round joins and corners.
Round 2 :
Sl st into next 2 dc and into ch-2 space. Ch3, (2 dc, ch2, 3 dc) into same ch-2; *in next ch-2 space (3 dc, ch2, 3 dc) repeat from * around; join with sl st to top of ch3. (4 corners; square now larger)
Round 3 :
Sl st to next ch-2. Ch3, (2 dc, ch2, 3 dc) in same ch-2, *ch1, in next ch-2 space (3 dc, ch2, 3 dc) repeat from * around placing ch1 between corner shells on each side; join. (This round adds a single ch-1 side spacer between corner shells)
Round 4 :
Sl st into corner ch-2, ch3, (2 dc, ch2, 3 dc) in same corner ch-2, *ch2, in each side ch-1 work (3 dc, ch2, 3 dc) into corner ch-2 repeat from * around; join. (You now have ch2 side spacers every other side cluster.)
Info :
Keep the tension steady; the cream background should lay flat. If you see cupping, switch to slightly larger hook for this round and then go back. The purpose of alternating ch1/ch2 spacers is to create an even lattice that the tree applique will sit on.
Round 5 :
Sl st to any corner ch-2. Ch3, (2 dc, ch2, 3 dc) in corner ch-2, *ch3, (3 dc, ch2, 3 dc) in next corner ch-2 repeat from * around; join. (Ch-3 side spaces form a slightly more open background; square expands evenly)
Round 6 :
Repeat Round 5 but replace side ch-3 with (ch1, 1 dc) into ch-3 spaces to create a modest fill: Sl st into first ch-3, ch3, (2 dc,ch2,3 dc) in corner; *in each side ch-3: 1 dc, ch1, 1 dc; in next corner (3 dc,ch2,3 dc) repeat. Join. (Square more filled but still with decorative spaces)
Round 7 :
Sl st to corner. Ch3, (2 dc,ch2,3 dc) in corner ch-2; *in each side work (3 dc, ch1, 3 dc) into the previous side area to introduce a double cluster row; in next corner (3 dc,ch2,3 dc) repeat. Join.
Info :
At the end of Round 7 lay your square flat and mark the center column where the tree will be placed. The tree base will align roughly with the third-fourth shell up from the bottom depending on your tension; note this now for later.
Round 8 :
Sl st to corner. Ch3, (2 dc,ch2,3 dc) in corner, *ch2, (3 dc in each side space) x [side cluster count] then ch2, (3 dc,ch2,3 dc) in next corner. Join. (This round continues to enlarge square; work even spacing on each side)
Round 9 :
Work a round of filled double-cluster sides for a more solid background: Sl st to corner, ch3, (2 dc,ch2,3 dc) in corner ch-2, *in each side ch-2 space work (1 dc, ch1, 1 dc, ch1, 1 dc) to create a triple-dc spread; in next corner work (3 dc,ch2,3 dc). Join.
Info :
If your square is already the size you prefer (approx 15 cm) you may stop after Round 9 and move to block. If you want a slightly larger square leave for one or two more rounds using the same corner rule: in each corner (3 dc,ch2,3 dc) and fill sides with evenly spaced dc groups.
Round 10 :
Optional expansion: Sl st to first corner ch-2, ch1 (does not count as stitch), 1 sc into same space to anchor, *work 1 sc in each dc across side and 3 sc in each corner ch-2; join with sl st. (This creates a firmer base for the applique attachments and reduces large gaps)
Info :
Fasten off cream, leaving a 20 cm tail to help with final weaving if you plan to add sewn applique details. We will now create the tree applique pieces separately and sew them on.
— Tree Applique Overview :
Info :
The tree is made of three layered triangular tiers worked as small semicircular triangle shells that create overlapping branches. Each tier is worked in green and has a scalloped front edge. Work tiers flat and block them gently to shape before sewing to the cream background. Tiers are named Top Tier (small), Middle Tier (medium), Bottom Tier (largest).
— Top Tier (Green) :
Round 1 :
With green yarn make a magic ring. Ch3 (counts as dc), 2 dc into ring, ch1, turn. (You now have three dc forming the small apex of the tree)
Round 2 :
Turn piece: ch3, in same base work 2 dc, ch1, *in next sp work 3 dc, ch1 repeat; finish with sl st to top of beg ch3. (You now have two small shell clusters forming an elongated rounded triangle apex)
Round 3 :
Ch1, sc into first dc, sc across until reach side, at each end work (3 dc, ch1, 3 dc) to create a small corner arch; this shapes the triangular curve. Join. (Edge has two small arches)
Round 4 :
Edging round for scallop: Sl st to an outer dc, *work (sc, ch2, sc) across each small group to make decorative picot-like scallops; continue around and join. Fasten off leaving long tail for sewing. (Top Tier complete)
Info :
The Top Tier is small and lightweight. Block lightly with water spray to emphasize scallops. Place this tier approximately 3 shells down from the top center of the background square when placing for assembly.
— Middle Tier (Green) :
Round 1 :
With green yarn ch6, sl st to form a ring, ch3 (counts as dc), work 11 dc evenly into ring; join. (12 dc total forming a small round)
Round 2 :
Ch3, (1 dc in next st) x 11 (12 dc), rotate so center forms small circle; ch1, turn. This round creates a solid base for subsequent shell building.
Round 3 :
Begin creating triangular shell shape: *ch1, sk 1 st, (3 dc) into next st; rep across to make 6 shells; end with sl st to first shell top. (6 small shells total)
Round 4 :
Ch3, in each shell work (3 dc, ch1, 3 dc) to create expanded arches; this forms a semicircular fan row. Join with sl st. (6 fan arches)
Round 5 :
Ch1, sc into the top of each fan arch across to smooth edge, then work a row of shell points: *ch2, in next sc work (5 dc) forming a pointed scallop; repeat across; join. (This round gives the middle tier a pronounced triangular front with 6 points)
Round 6 :
Sc around the entire piece to tidy edges, placing 3 sc in the inside corners to keep the fabric flat. Fasten off leaving a long tail for sewing. (Middle Tier complete)
Info :
Block the Middle Tier to a gentle triangular shape that is larger than the Top Tier. When positioning on the square it should overlap the Top Tier by about 8-10 mm to create layered branches.
— Bottom Tier (Green) :
Round 1 :
With green yarn ch8, join to make a ring. Ch3 (counts as dc), work 15 dc into ring; join. (16 dc total)
Round 2 :
Ch3, dc in same st and across to form even round (16 dc), join. This is base foundation.
Round 3 :
*ch1, sk 1, (3 dc) in next st; repeat across to form 8 shells; join. (8 shells)
Round 4 :
Ch3, in each shell work (3 dc, ch1, 3 dc) to expand shells. Join. (8 large fan arches)
Round 5 :
Ch1, sc in each st across smoothing the arch tops; then create scallops: *ch2, in next sc work (7 dc) for a broad scallop; repeat across to form 8 prominent scallops; join. (Large scalloped front edge)
Round 6 :
For additional texture work one more shell row: Ch1, *work (sc, ch1, sc) in the center of each scallop; repeat around; join. Fasten off leaving long tail for sewing. (Bottom Tier complete)
Info :
The Bottom Tier is the widest. Slightly stiffen with light starch or block to hold scallop shape. Overlap this tier about 10-12 mm over the Middle Tier when sewing to create the impression of dense branches.
— Tree Trunk (Brown) :
Round 1 :
With brown yarn ch6, join into a loop. Ch1, work 6 sc into the ring; join. (6 sc)
Round 2 :
Ch1, 2 sc in each st around (inc in each) (12 sc). Join. (This widens trunk slightly)
Round 3 :
Ch1, sc in next 12 sts (12 sc). Join. (Work even to create a short column)
Round 4 :
Ch1, sc in next 12 sts (12 sc). Join. (Height approx 2 cm depending on tension)
Round 5 :
Ch1, dec, sc across until last 2 sts, dec to shape slightly for bottom attachment: (10 sc) Join. Fasten off leaving long tail to sew.
Info :
Sew the trunk centered under the lowest scallop of the Bottom Tier. The trunk is designed to sit fully on the cream background square with its bottom edge aligning with the lower center shells of the square.
— Star Topper (Golden) :
Round 1 :
With golden yarn ch5, sl st to form a ring. Ch1, work 10 sc into ring; join. (10 sc)
Round 2 :
*Ch3, sl st into next st to make each point; repeat from * around until you have 5 points. (5 points forming a flat star)
Round 3 :
To firm up points, work around each point: In point chain work (sc, hdc, dc, hdc, sc); sl st back to base and move to next point. Fasten off and leave tail for sewing. (Star ready)
Info :
Block the star gently to flatten points. The star is lightweight and will be sewn to the very top center of the Top Tier. If you want a slightly puffier star, add a tiny dot of fiberfill and stitch closed before sewing onto tree.
— Red Baubles / Ornaments (Make 6 small balls) :
Round 1 :
With red yarn make a magic ring. Ch1, work 6 sc into ring; join. (6 sc)
Round 2 :
Ch1, inc in each st around (12 sc). Join.
Round 3 :
Ch1, 1 sc in each st around (12 sc). Join. Fasten off leaving long tail for sewing. (Small puff ball ornament)
Info :
Optionally stuff lightly with two small tufts of fiberfill for a rounded ornament. Use long tail to add running stitches to the back so ornaments sit slightly raised when sewn on.
— Corner Poinsettias (Make 4) :
Round 1 :
With red yarn ch6, sl st to ring. Ch1, work 8 sc into ring; join. (8 sc)
Round 2 :
*Ch3, sl st into same st to make a tiny petal; move to next and repeat across forming 4 petals. Fasten off leaving tail for sewing. (4 petal mini flower)
Info :
These small flowers are placed in each corner of the cream square in the open corner ch-2 spaces to create balanced red accents. Pin before sewing to ensure symmetry.
— Final Border & Edging (Green) :
Round 1 :
Join green yarn at any corner of the granny square. Ch1, work 1 sc into corner ch-2, *sc in each dc across side, in corner ch-2 work (3 sc), repeat around working 1 sc in each dc across; join with sl st. (This creates a firm sc round around the square)
Info :
Adjust number of sc across each side so the corners remain square; it is acceptable to increase or decrease 1 sc on a side to keep fabric flat. Use your fingers to smooth out the square before continuing.
Round 2 :
Ch3 (counts as dc), in same st work 2 more dc to make a small shell, *skip 2 sc, in next sc work (3 dc) to create shells evenly around the edge; ensure you work 3 dc in each corner center sc to keep corners square; join. (Creates a decorative dc shell border)
Round 3 :
Ch1, *sc in each dc across shells placing (sc,ch2,sc) in shell centers to make small picot points; continue around and join. (Adds a neat picot-like finish)
Round 4 :
For a finished clean fold round: Ch1, sc in each st around working 3 sc in each corner to maintain square; join. Fasten off and weave ends. (Edge secure and tidy)
Info :
If you prefer a thicker border for potholder use, work two additional rounds of sc around with smaller hook (3.5 mm) and insert a layer of cotton potholder insert between two identical squares then whipstitch together for insulation.
— Assembly & Placement :
Info :
Before sewing any pieces on, lay out the background on a flat surface. Place the Bottom Tier centered vertically on the central column you marked earlier so it sits approximately 3 shells above the bottom edge. Center the Middle Tier above the Bottom Tier with approximate 8-12 mm overlap. Place the Top Tier so it overlaps the Middle Tier by 6-8 mm and aligns with the center top. Place the star at the apex of the Top Tier. Arrange trunk centered beneath the Bottom Tier. Place six red baubles evenly across tiers: two on bottom scallops, two on middle, two on top. Pin corner poinsettias in corner ch-2 spaces. Once satisfied with placement, sew appliques on with matching yarn and a yarn needle using small whip or mattress stitches to make attachment invisible.
Round 1 :
Sewing tip: Use long tails left on each applique to stitch through the cream square into the applique base; take small stitches only through outermost loops of the applique shells to keep 3D look. Tie off at the back and weave in ends securely.
Info :
For a neat back finish, after sewing all pieces, place a small scrap of matching fabric and blanket stitch around appliques' attachment points or apply a thin line of fabric glue to stabilize stitches (optional).
— Finishing Touches :
Info :
Block the square lightly to even edges: mist with water and pin to a square blocking mat ensuring 90-degree corners. Let dry completely. Add optional French knot embroidery in golden thread to the star center or add sparkle with tiny beads sewn to baubles if desired. Trim and weave in all tails on the wrong side neatly.
Final Care :
Hand wash gently or machine wash on gentle cycle inside a pillowcase, reshape while damp and lay flat to dry. Avoid high heat to maintain shape of shell edges and star points.
This cozy square brings classic crochet charm with playful 3D texture — a Christmas tree that practically sparkles with handmade personality. Pin it to a cushion, make a festive cushion cover, or turn two into a padded potholder for festive kitchen cheer. I hope stitching this piece fills your home with a little handmade joy and holiday warmth. 🎄🧶😊