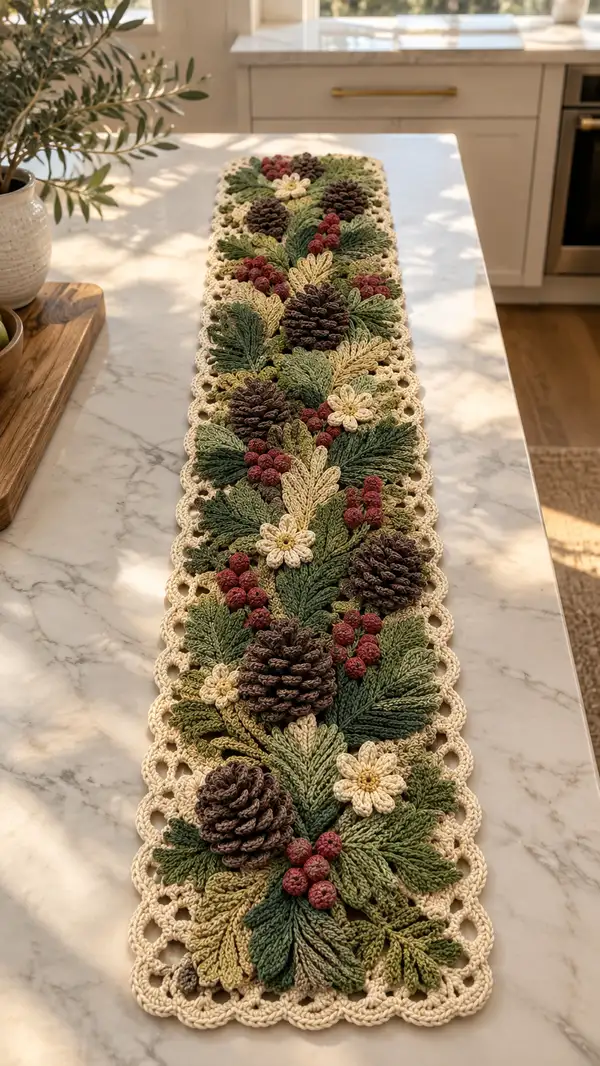
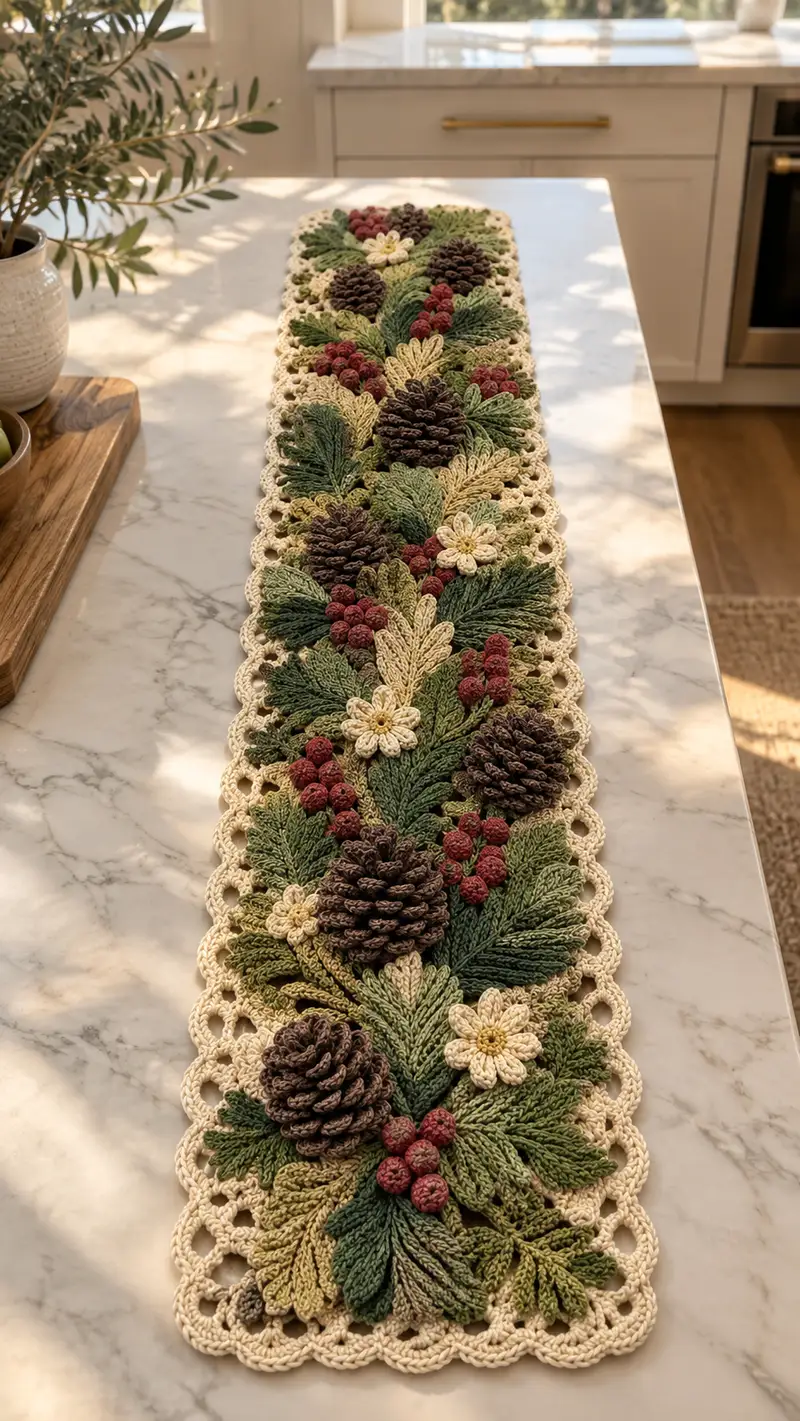
Create a richly textured holiday table runner inspired by natural pine boughs. This pattern features layered crochet leaves, 3D pinecones, clustered berries, and delicate flowers arranged on a neutral mesh base with a scalloped border. The runner uses warm greens, rustic browns, deep berry reds and soft cream edging to achieve an elegant, handcrafted centerpiece perfect for seasonal tables and gift-giving.
Progress Tracker
0% Complete
— Pattern Overview :
Info :
This runner is constructed as a long neutral mesh base onto which separate motifs are sewn. Motifs include large layered leaves, small fern leaves, clusters of berries, 3D pinecones and small daisy-like flowers. Work each motif independently, block or shape, then arrange and sew onto base. I recommend making all motifs first, then arranging them on the base for a natural composition before sewing.
Info :
Gauge and finished dimensions: Using worsted weight yarn and 3.5mm hook, the sample runner measures approximately 12 in (30 cm) wide by 46-50 in (116-127 cm) long with three full pinecone groups plus end motifs. You can lengthen or shorten by repeating base mesh rounds or adding/removing motif clusters.
— Runner Base (make 1 long strip) :
Round 1 :
Foundation chain 72, join with sl st being careful not to twist chain (72 foundation chains, counts as base length not a stitch round)
Round 2 :
Ch 1, 1 sc in each chain around, join with sl st to first sc (72)
Round 3 :
Ch 3 (counts as first dc), *skip 1 sc, dc in next sc, ch 1* repeat across to create a slightly open mesh; join to top of ch-3 (36 dc, 36 ch-1 spaces)
Round 4-9 :
Ch 1, 1 sc in each stitch and in each ch-1 space around (72)
Info :
Work rounds 2-9 to create a stable but slightly flexible base. If you prefer a more open base, repeat Round 3 every 6th round to add airiness. Keep tension even to help motifs sit flat when sewn.
Round 10 :
Ch 1, *sc 3, ch 4, skip next 3 sc* repeat across, join (this will create scalloped loop points to which you can later attach edging or motifs; expect 18 ch-4 loops)
Round 11-20 :
Ch 1, 1 sc in each st and in each ch-4 loop around (72 + 18 loop insert points counted as 90 working spaces for sc placement if you insert sc into loop, but maintain 72 base stitches; when working sc into ch-4 loops, count the loop as a single stitch position to keep even measurement)
Info :
To lengthen the runner, continue repeating Rounds 4-11 in multiples until desired length is achieved. The sample uses 40 rounds total to set body length before decorative joining. Keep base long but leave final rounds unworked until you have motif placement mapped out.
Round 21 :
Ch 3, *dc in next 3 sc, ch 1* repeat around to create a slightly textured field (72 dc, 18 ch-1 spaces)
Round 22-30 :
Ch 1, 1 sc in each st around (72)
Info :
Leave the base long and block lightly to square if desired. The final border will be worked after motifs are attached; do not fasten off the base yet if you plan to join border rounds directly to it.
— Large Layered Leaf (make 20-26 assorted sizes) :
Round 1 :
Ch 12, sc in 2nd ch from hook and across (11 sc) — this is the leaf foundation (11)
Round 2 :
Ch 1 turn, sc in first 5 sts, 3 sc in next st (tip turning cluster), sc in remaining 5 sts, work 3 sc into last chain to create mirrored tip, now work down opposite side of foundation: sc in next 5, 2 sc in next 1, sc in final 4, join to first sc (count around = 30 sc)
Round 3 :
Ch 1, sc in each st around (30)
Round 4 :
Ch 2 (counts as hdc), *hdc in next 4 sts, 2 hdc in next st* repeat across leaf to create gentle increase at midline (36)
Round 5 :
Ch 1, 1 sc in each st (36)
Round 6 :
Ch 1, *sc in next 2, 2 sc in next* repeat to tip, mirror back down other side (48)
Info :
To create defined veins, we will work post stitches on the next rounds; use a contrasting shade of green or the same color worked FLO for a subtle ridge. Decide whether this leaf will be layered flat or slightly cupped; we will use post stitches to shape toward the tip.
Round 7 :
Ch 1, sc in first 6, fpdc around next st (create a raised central vein), sc to tip, at tip work 3 sc, continue around and work fpdc on mirrored vein point (48)
Round 8 :
Ch 1, sc in each st (48)
Round 9 :
Ch 1, *sc in next 3, dec over next 2* repeat to tip and mirror back (40)
Round 10 :
Ch 1, 1 sc in each st (40)
Round 11 :
Ch 1, *sc in next 2, dec* repeat to tip and mirror back (32)
Round 12 :
Ch 1, 1 sc in each st (32)
Round 13 :
Ch 1, *sc in next 1, dec* repeat to tip and mirror back (24)
Round 14 :
Ch 1, 1 sc in each st (24)
Info :
Fasten off leaving a long tail for sewing. Lightly block or shape the leaf with steam to open stitches and set vein ridges. For very large leaves increase foundation chain to 14 or 16 and adjust counts proportionally (maintain symmetrical increases and decreases).
— Small Feather/Fern Leaf (make 30-36) :
Round 1 :
Ch 8, sc in second ch from hook and across (7 sc)
Round 2 :
Ch 1, sc in first 3 sts, (sl st in next st and 3 sl st down the side of the chain for a textured serration), sc in remaining 3 sts and mirror across the opposite side to create a small serrated leaf (approx 14 small serration points)
Round 3 :
Ch 1, 1 sc in each st around to tidy edge (14)
Round 4 :
Ch 1, *sc 2, dec* repeat around to produce a slight taper (10)
Round 5 :
Ch 1, work 1 sc in each st and add small fpdc at center edge to create a vein ridge (10)
Info :
These small fern leaves are worked quickly and stacked under larger leaves to add depth. Use mixed greens to create a natural variegation effect.
Round 6 :
Fasten off leaving long tail for sewing (10)
— Berry (cluster) (make 14-20 clusters, each cluster contains 5-8 berries) :
Round 1 :
Make bobble berry: With deep red, make magic ring, ch 1, 6 sc in ring (6)
Round 2 :
1 sc in each st (6)
Round 3 :
Work small puff stitch cluster into each st to give berry texture: *(yarn over, insert hook, pull up loop, yarn over, pull through 2) repeat 3 times to create puff, yarn over and pull through all loops, ch 1 to close* make 6 small puff clusters alternating around for textured berry (6 puff clusters)
Round 4 :
Fasten off leaving 6-8 in tail. Stuff lightly with tiny amount of fiberfill if you want rounder berries. Use tail to sew berries into clusters of 5-8 berries per cluster.
Info :
Sew berries together with tails to form clusters; group them in odd numbers (5 or 7) for a natural look. Position clusters between leaves and pinecones.
— Small Daisy Flower (make 8-12) :
Round 1 :
With cream, ch 2, work 6 sc in 2nd ch from hook (6)
Round 2 :
*Ch 3, sl st in next st* repeat 6 times to create 6 small petals (6 petal loops)
Round 3 :
In each ch-3 loop, work (sc, hdc, dc, hdc, sc) to form petal, finish with sl st to center (6 petals)
Round 4 :
With small amount of yellow, embroider a tiny French knot style center using tapestry needle and yarn or work 6 sc into center and fasten off (6)
Info :
Make sure flower centers are secure; weave tails through center and sew to base or onto leaves so flowers remain flat and secure.
— Pinecone (3D sculpted motif) (make 6-8 medium/large pinecones) :
Round 1 :
Make magic ring with brown yarn, ch 1, 6 sc in ring (6)
Round 2 :
Inc in each st around (12)
Round 3 :
(1 sc, inc) x 6 (18)
Round 4 :
(2 sc, inc) x 6 (24)
Round 5 :
(3 sc, inc) x 6 (30)
Info :
We will now begin to build the cone height. The early rounds form the pinecone core which will be slightly domed. Stuff lightly as you build the core; do not overstuff as this will make adding scales difficult.
Round 6 :
1 sc in each st (30)
Round 7 :
1 sc in each st (30)
Round 8 :
(3 sc, dec) x 6 (24)
Round 9 :
1 sc in each st (24)
Round 10 :
(2 sc, dec) x 6 (18)
Round 11 :
1 sc in each st (18)
Round 12 :
(1 sc, dec) x 6 (12)
Round 13 :
6 dec (6) — leave center small and open; fasten off leaving long tail if you want to close bottom after scale application (6)
Info :
At this point we have a tightly stitched cone-shaped core. Now we will add layered scales. Scales are made separately as small petals that are sewn around the cone in offset rows to recreate pinecone texture. Each scale is worked as a small fan. Make 40-50 scales per pinecone depending on size; plan 6-7 staggered rows of scales.
Scale Round 1 (make 40-50 per pinecone) :
Ch 4, sc in 2nd ch from hook, hdc in next, dc in next, sl st to base to form a single petal (4-stitch fan)
Scale Round 2 :
Fasten off leaving long tails for sewing. Make all scales in two shades of brown to give depth — lighter brown for upper scales, darker brown for inner scales.
Info :
Sew scales to cone starting from bottom edge upward in rows, overlapping previous row by about half of each scale to mimic natural pinecone layering. Use the long tails to whipstitch each scale to the cone, working 6-8 scales per row and 6-7 rows depending on pinecone size.
Scale Row Attachment 1 :
Attach first row of scales around the base of cone, spacing evenly (approx 8 scales); secure tightly (8)
Scale Row Attachment 2 :
Attach second row above first, offset by half a scale so seams are staggered (approx 8-9 scales)
Scale Row Attachment 3 :
Continue attaching rows until the top is covered; at the final row arrange scales so smaller tips cover the top hole. Tuck and sew last few to close any gaps. Add a small tail of yarn inside core and tie securely; weave tail into interior and trim.
Info :
For a more sculpted pinecone, sew multiple layers of scales with the lighter color on top rows and darker color lower to emulate natural shading. You can add a stitch of brown paint or rub a little darker yarn across the tips for extra realism.
— Assembling Motifs into Clusters :
Info :
Plan clusters by grouping 1 pinecone, 3-5 large leaves, several small fern leaves, one berry cluster and 1-2 flowers. Pin motifs onto the base in pleasing, staggered arrangements — offset repeated clusters down the runner. Use pins and measuring tape to keep spacing consistent (sample has three main clusters plus smaller filler groupings).
Info :
Use tapestry needle and a matching yarn tail to sew each motif to the base. Use strong whip stitch or mattress stitch where needed. Sew under the body of leaves so stitches are hidden and secure central areas of pinecones with extra passes to prevent wobble.
— Decorative Edge / Scalloped Border (worked after motifs are attached) :
Round 1 :
With cream yarn and 3.5mm hook, join at any edge point, ch 1, sc evenly around the entire runner edge, placing 3 sc into each corner and 1 sc every 0.5 inch along the long edges. Sample counts approx 220 sc around after motifs attached (count will vary depending on base length).
Round 2 :
*Ch 3, skip 1 sc, sl st in next sc* repeat around to form small looped scallops. Expect approx 70 ch-3 loops depending on edge count.
Round 3 :
Into each ch-3 loop work (sc, hdc, 3 dc, hdc, sc) to create a full scallop shell. Join and fasten off leaving long tail for weaving. The sample uses 1 shell per loop resulting in 70 shells around edge.
Info :
Block entire runner flat and let dry completely to set scalloped edge and open up motif detail. Use pins to position shells evenly as you steam or wet-block.
— Finishing Touches & Variation Tips :
Info :
For added dimension, lightly tack down a few leaf tips so they curl up slightly. You can also add small glass beads to berry clusters for shine (sew beads to center of a few berries). To make runner longer, add more base rounds before attaching motifs or add more clusters spaced evenly.
Info :
If substituting yarn weights, choose a hook 1-2 sizes smaller to maintain tight stitches for textured motifs. Keep coverage uniform by making additional leaves or berries if the base shows through too much after placement.
This festive table runner turns traditional crochet stitches into a natural, layered centerpiece full of depth and charm. Carefully assembled leaves, berries, and sculpted pinecones give your table a handcrafted, heirloom quality that looks stunning in photos and real life. The detailed instructions let you customize colors and cluster placement to match your home decor — making each runner uniquely yours. 🧶🌲🎁