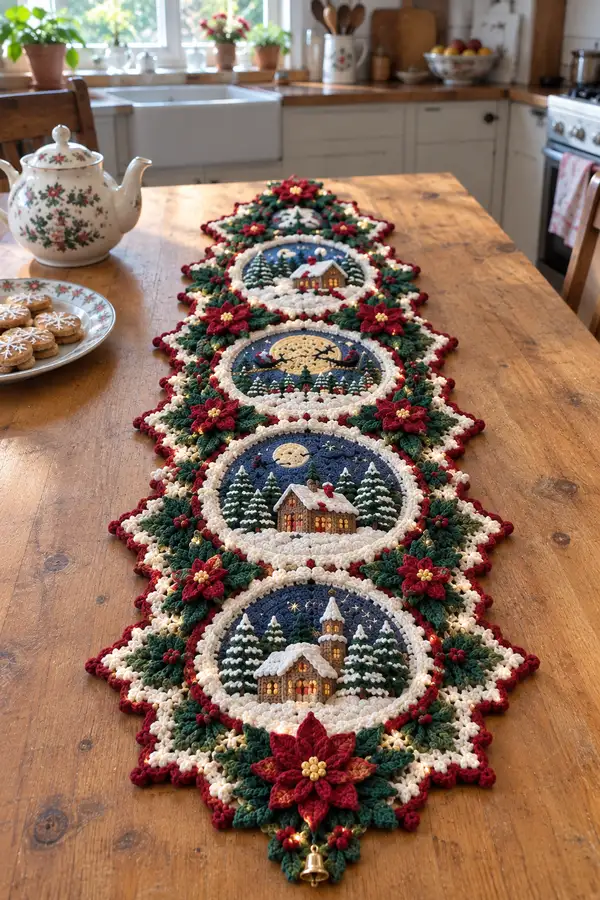
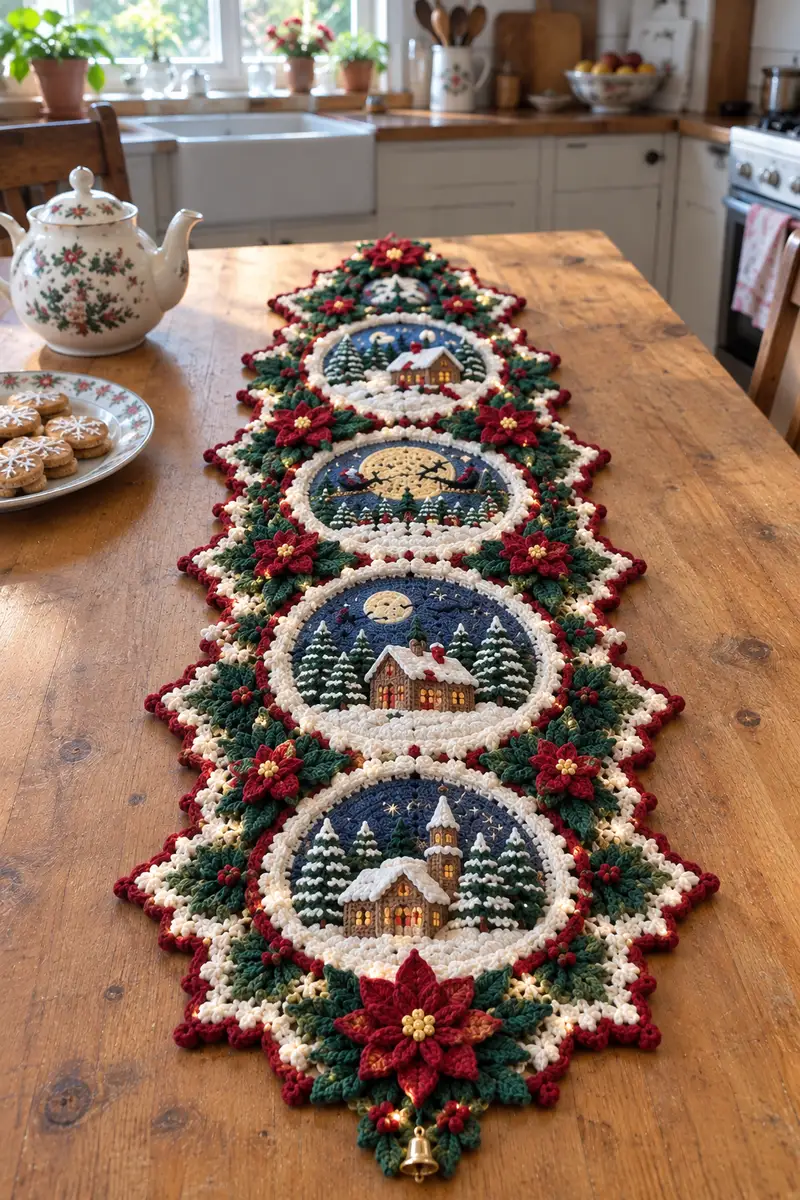
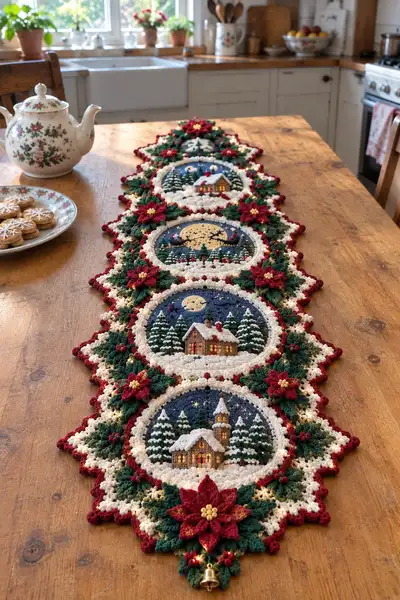
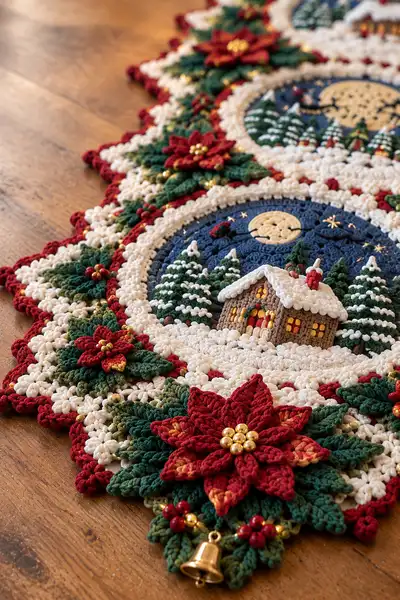
Create a stunning holiday table runner made from layered circular medallions, 3D cottages, snowy textures, and poinsettia clusters. This pattern builds four connected scenic medallions with rich border details, beads and a tiny bell. Perfect for a centerpiece with timeless vintage charm and cozy holiday colors.
Progress Tracker
0% Complete
— Overview & Gauge :
Info :
Gauge is not strict for this decorative runner, but recommended gauge for medallion center is approximately 12 cm (4.7 in) diameter after Round 12 using 3.5mm hook and worsted weight yarn, worked tightly to prevent stuffing or backing from showing. Work tightly for nugget texture in snowy areas. Use 3.0mm hook for appliques if you need finer control.
Info :
Pattern is modular: make four scenic medallions (identical base rounds with colorwork), four 3D cottages, clusters of trees, four large poinsettias, leaf clusters, and a connecting scalloped border. Join medallions using join-as-you-go rounds described in the Border section.
— Medallion Base (Make 4 identical circles) :
Round 3 :
(1 sc, inc) x 6 (18)
Round 4 :
(2 sc, inc) x 6 (24)
Round 5 :
(3 sc, inc) x 6 (30)
Round 6 :
(4 sc, inc) x 6 (36)
Round 7 :
(5 sc, inc) x 6 (42)
Round 8 :
(6 sc, inc) x 6 (48)
Round 9 :
(3 sc, inc) x 12 (60)
Round 10-12 :
1 sc in each st (60)
Info :
These first 12 rounds establish your medallion diameter. Change yarn to deep navy (sky color) at end of Round 12 if you began with a core color. Use a stitch marker at the first st of every round.
Round 13 :
1 sc in each st BLO (60)
Round 14 :
*sc 4, pc in next st* rep around (12 popcorns, 48 sc) — Note: popcorn (pc) made as 5 dc in same st, remove hook, insert into 1st dc, pull loop through to close and sl st to secure into same st; counts as one stitch
Round 15 :
1 sc in each st (60)
Round 16 :
*sc 3, puff in next st* rep around (puff = yo 3 times, insert, pull through all loops, ch1 to close) (60)
Info :
Rounds 14-16 add texture for a snow-dimpled inner rim. Work popcorns and puffs firmly so they stand from the surface. If your puffs are loose, reduce yarnovers to yo twice.
Round 17 :
Change to cream/ivory. 1 sc in each st around (60)
Round 18 :
*sc 4, inc* x 10 + sc 0 to maintain count = (66) — work (4 sc, inc) x 10 and then 1 sc in each remaining 6 sts (66)
Round 19 :
1 sc in each st (66)
Round 20 :
*sc 5, inc* x 11 (77)
Info :
Rounds 17-20 build a raised snow rim to frame the inner scene. Increase carefully and count every repeat; miscounted increases will distort the medallion circumference.
Round 21 :
1 sc in each st (77)
Round 22 :
*sc 6, inc* x 11 (88)
Round 23 :
1 sc in each st (88)
Round 24 :
Change to deep navy (sky). 1 sc in each st (88)
Info :
Round 24 places your sky color for the main background. Carry unused yarn inside if you prefer, or fasten off and weave in tails later. Place temporary stitch markers to mark quarter points for later reference when positioning house and trees.
Round 25 :
Working in FLO, *sc 3, dc cluster (2 dc, ch1, 2 dc) in next st* rep around to create a lightly textured night-sky surface (88)
Round 26 :
1 sc in each st (88)
Round 27 :
Change to gold/mustard for moon applique area. Work 12 sc evenly across a chosen upper quadrant to anchor moon placement (do not fasten off) — place moon center later as applique
Round 28 :
Change to cream. Work 1 sc in each st for 88 sts around inner rim to prepare snow base (88)
Round 29 :
*sc 4, (3 sc in next st) - creates raised scalloped stitch point* rep across quarter points to make subtle scallops — count resulting sts: (88 + 22) = 110
Info :
Round 29 creates the inner decorative frame. If you prefer a tighter count, simply work (sc,x then inc) repeats to reach an even scallop number; ensure symmetry by counting quarter sections (approx 27-28 sts each quarter before scallops).
Round 30 :
Finish with 1 sc in each st around (110). Fasten off and set medallion aside until appliques are ready.
— 3D Cottage Applique (Make 4) :
Info :
Work the cottage as two pieces: a rectangular main wall worked in rows for height, then a roof piece formed as a dome / sloped panel. Sew together and stuff lightly for dimension, then position and sew to medallion inner snow base centered at lower quadrant.
Round 1 :
With warm brown, ch 12, turn. Row 1: sc in 2nd ch from hook and across (11)
Round 2 :
Ch1, turn, inc in first st, sc 9, inc in last st (13)
Round 3 :
Ch1, turn, 1 sc in each st (13)
Round 4 :
Ch1, turn, (1 sc, inc) x 4, sc 1 (17)
Round 5 :
Ch1, turn, 1 sc in each st (17)
Round 6 :
Ch1, turn, sc across (17)
Round 7 :
Ch1, turn, (sc2tog, 1 sc) across to reduce to 12 sts for door area shaping — work evenly (12)
Round 8 :
Ch1, turn, sc across (12). Fasten off leaving long tail for sewing. Fold rectangle to create three-dimensional wall: bring short edges together and whip stitch up side for a small box cabin (leaving top and bottom open).
Info :
Sew bottom closed loosely and stuff lightly with a small amount of fiberfill to form a tiny cottage volume. Keep stuffing minimal so it lies flush on medallion surface.
Roof Round 1 :
With cream/ivory, mr, 6 sc in mr (6)
Roof Round 2 :
inc x 6 (12)
Roof Round 3 :
(1 sc, inc) x 6 (18)
Roof Round 4 :
(2 sc, inc) x 6 (24)
Roof Round 5 :
1 sc in each st (24)
Roof Round 6 :
Work sl st rows across to shape a shallow ridge: ch1, sl st 24 to create a flatter roof. Finish and leave long tail to sew roof onto cottage top.
Info :
Sew the roof centered on top of the cottage, allowing some overhang. Add a chimney by stitching a small 6-st loop of red then stuffing and sewing to roof. Use yellow or gold bits of yarn embroidered through cottage walls as window lights, or sew small gold beads to represent glowing windows.
— Pine Trees (Make 8-12 small trees per medallion cluster) :
Round 1 :
With forest green, mr, 6 sc in mr (6)
Round 3 :
(1 sc, inc) x 6 (18)
Round 4 :
1 sc in each st (18)
Round 5 :
Change to cream and work 1 sc in every 3rd st to make snow tips; return to green and continue (18)
Round 6 :
Working in FLO in green, *ch3, sl st in a stitch 2 rows below* rep to create layered branch tips (18)
Info :
Sew trees to medallion inner rim in groups of three to five, varying heights. Use tiny stitches on tree bases to anchor securely. Add white puff stitches across branches for snow dots.
— Snow Mound & Texture (Inner Snow Field) :
Round 1 :
With cream, work a strip foundation: ch 30, join to medallion's lower half with sl st at designated snowline points; then sc along chain back attaching to medallion with sl sts roughly every 2 sts to create an anchored snowbank
Round 2 :
Working into the strip and medallion edge, use alternating bobbles: *sc 3, bobble in next st* rep around to create a piled snow texture. Maintain even spacing (count roughly 48 textured bumps across front)
Round 3 :
Work a round of puff stitches over bobbles for higher dimension: *puff, sc 2* rep across (approx 48 puffs)
Info :
For extra depth, add very light stuffing under larger puffs using small folded scraps of batting or a touch of fiberfill pressed under the front of the medallion. Glue is optional but not required if sewn well.
— Moon & Night Sky Details (Appliques) :
Round 1 :
With gold/mustard, mr, 6 sc in mr (6)
Round 3 :
(1 sc, inc) x 6 (18)
Round 4 :
1 sc in each st (18). Fasten off leaving long tail for sewing. Position in selected upper quadrant and sew on using invisible stitches. Embroider thin black sleigh line or gold star accents around moon using fine embroidery thread.
Info :
Sew moon slightly raised by leaving a small loop of yarn under before closing to create subtle dome effect. Use a few metallic gold seed beads stitched around to simulate stars if desired.
— Inner Scene Embellishment (Birds, Snowstars, Lights) :
Round 1 :
Using small bits of red yarn and sewing needle, attach tiny berries on tree clusters in sets of 2-3. Each berry is a french knot made by wrapping yarn twice around needle and pulling through to the front. Space aesthetically.
Round 2 :
Use thin black yarn to stitch a tiny crow or sleigh line silhouette across the sky; small length of chain stitch or embroidery is sufficient.
Info :
Adding tiny glass or metallic star beads stitched with strong thread will catch light beautifully. Bead placement should be sparse to avoid pulling the medallion out of shape.
— Poinsettia Motif (Make 4 large; clusters of smaller leaves too) :
Round 1 :
With deep red, ch 6, sl st to form ring, ch1. Petal 1: (sc, hdc, 3 dc, hdc, sc) in ring. Rep 5 more petals for 6 petals total. Fasten off leaving tail for sewing (6 petals)
Round 2 :
With a deeper red or variegated red, make second layer of petals: join behind first layer and work petals between first-layer petals using (sc, hdc, 4 dc, hdc, sc) in each position (6 larger petals)
Round 3 :
With gold, sew 5-7 small beads into the center for stamen cluster. Add tiny cream micro-puffs around base of petals to blend into snow background.
Info :
Sew poinsettia to outer edge of medallion using whipstitch under the petals. Arrange to overlap decorative leaves and be consistent among the four medallions for a balanced look.
— Leaf Cluster (Make 8 clusters per medallion) :
Round 1 :
With forest green, ch 7. Row 1: sc in 2nd ch from hook and across (6)
Round 2 :
ch1, turn, (sc, hdc, 3 dc, hdc, sc) across to form a leaf shape. Fasten off leaving tail for sewing.
Info :
Make leaves in two shades of green and a variegated green for natural depth. Cluster them around poinsettias in layered groups of 3-5; add a small red bead for berries where clusters meet.
— Small Berry Beads (Scatter) :
Round 1 :
Sew small red beads in groups of three at leaf junctions and along border centers for accent. Use strong beading thread and tie off securely with multiple passes.
Info :
Choose bead sizes 3-4 mm to keep scale pleasing. If runner will be washed, either remove beads or use strong glue and bar-tack sewing for durability.
— Border & Join (Final construction and scalloped border) :
Round 1 :
Lay medallions in desired sequence with about 2-3 sts overlap at join points. With cream yarn, join medallions using join-as-you-go sl st method: sl st through outermost round of medallion A, then through adjacent medallion B to link. Work along each join point with sl sts spaced evenly to create secure seam.
Round 2 :
Working around the outside edge of connected medallions in cream: *sc 3, picot (ch3, sl st to first ch)* rep to create small scallop foundation. Count across total: about 6-8 scallops per side segment depending on your medallion overlap.
Round 3 :
Change to red. Work a deep scalloped edge: *(3 dc, ch2, 3 dc) in next scallop; sl st in next 3 sc* rep around to create pointed star-like border. Fasten off and weave ends.
Round 4 :
With green, work a leaf-point round between each red scallop: attach yarn at base of scallop and work 6 ch, sl st back along chain base to form leaf loop, then single crochet into base to attach creating pointed leaf. Repeat between every scallop for a lush edge (total leaves equal to number of scallops).
Info :
At join seams, place a small cluster of beads and a mini leaf to hide the joint and mimic pictured clusters. For the final tip of runner, attach a decorative bell via a short loop of chain and small jump ring through a secure reinforced yarn loop sewn to the runner point.
Round 5 :
Block completed runner gently on blocking mat to even out scallops and allow sewn pieces to settle; pin to shape and spray lightly with water or steam-block as yarn permits. Allow to dry fully before removing pins and decorating table.
Info :
Optional: for a slightly stiffer runner that will sit flat, sew a length of light interfacing or thin felt to the underside of medallions using tiny whip stitches, avoiding visible stitches on the front. This helps keep bulbous puffs from flattening under weight.
— Finishing Touches & Assembly Notes :
Info :
Sew all appliques securely with hidden stitches and stitch through both medallion and applique base. Weave all ends at least 5 cm into the work before trimming to prevent unraveling. Add bead embellishments last so you can space them by eye for best effect.
Info :
For safety, avoid using small beads or bells if pattern is for small children. Consider embroidering metallic details instead. Care: spot clean only; remove decorative beads before gentle hand-wash if required and reattach after drying.
Completing this runner is like crafting a tiny winter village row by row — each medallion tells its own cozy story. The 3D cottages, snow-puffed banks and jewel-like poinsettias come together to create a centerpiece that glows with handmade charm. Add beads, a bell and a careful block to finish for a heirloom-quality result you will be proud to display. 🎄✨🧶