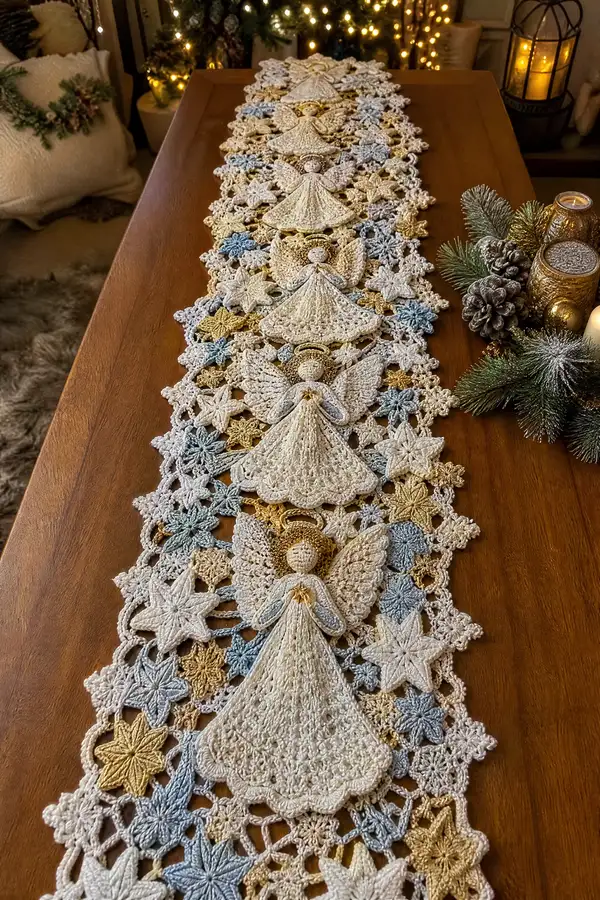
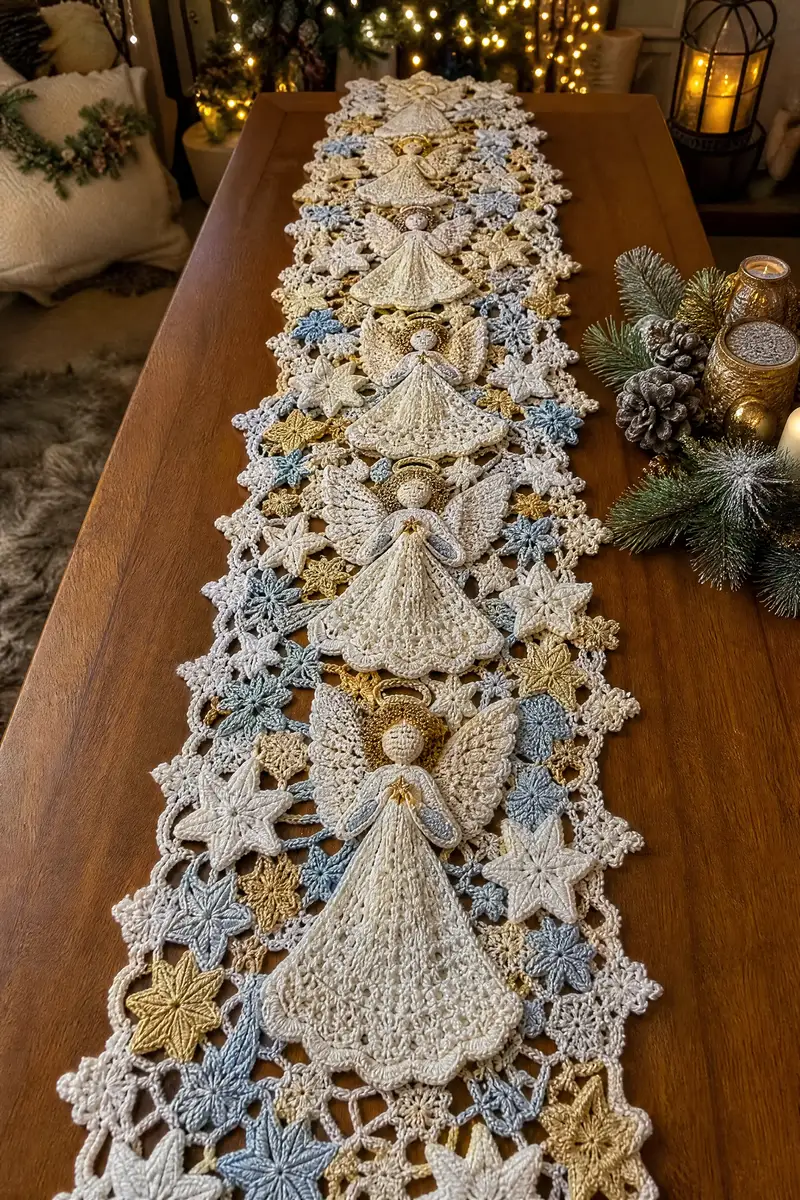
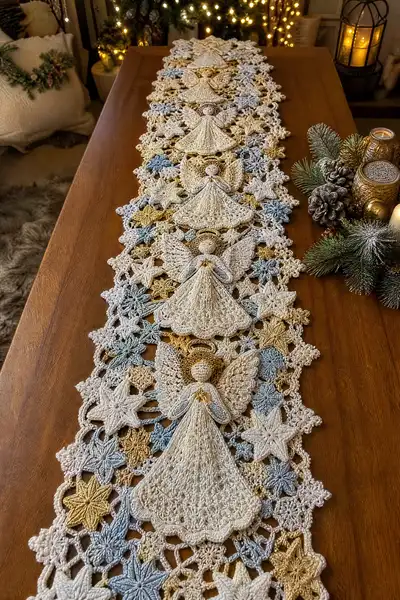
Create a gorgeously detailed table runner featuring a row of elegant crochet angels surrounded by stars and snowflake motifs. This layered lace design uses soft neutrals with accents of gold and icy blue to create a vintage holiday look. Perfect for a festive dining table or as a centerpiece, the runner is made from joined motifs and finished with a scalloped lace border. Detailed instructions guide you through each motif, joining and finishing technique.
Progress Tracker
0% Complete
— Notes & General Techniques :
Info :
This pattern is worked motif-by-motif. Each major element (angel dress, head, wings, star motifs, small flowers) is made separately and joined using join-as-you-go or sewn in place. Work tightly enough so stuffing will not show through if you choose to add very light stuffing to heads for depth. Block all motifs before final joining for best alignment.
Info :
Abbreviations used follow US crochet terminology. The rounds in each section start at 1 for that motif. Use stitch markers to mark round starts. For lace definition, use a slightly smaller hook than yarn label suggests.
— Angel Dress (Large Layered Cone) :
Round 1 :
Make a magic ring with main color (ivory). Ch2 (counts as first hdc), 9 hdc into ring. Join with sl st to top of ch2. (10)
Round 2 :
Ch2, hdc inc in each st around (work 2 hdc in each st). Join. (20)
Round 3 :
Ch2, (1 hdc, inc) x10. Join. (30)
Round 4 :
Ch2, (2 hdc, inc) x10. Join. (40)
Round 5 :
Ch2, (3 hdc, inc) x10. Join. (50)
Info :
These increases form the cone base. Keep tension even so rounds lie flat. If your cone cups, add stitches evenly; if it ruffles, reduce one increase repeat overall.
Round 6 :
Ch2, 1 hdc in each st around. Join. (50)
Round 7 :
Ch3 (counts as dc), (2 dc, ch1, sk next st) around to create scallop spacing — approx pattern: (2 dc, ch1, sk1) x16 then 2 dc in last two stitches to maintain count. Join. (50 effective base stitches; scallops formed)
Round 8 :
Change to slightly smaller hook if desired. Working into each ch1 space: (sc, hdc, 3 dc, hdc, sc) in each ch1 space across to create petal units forming the decorative skirt row — this will produce 16 petals. Join with sl st to first sc.
Info :
Each petal here will be the decorative scalloped edge of the skirt. Count petal units to make sure they are evenly spaced; adjust by adding a small ch space if needed.
Round 9 :
Working into each petal: ch1, sc around petal edge to create a defined rim for each scallop. Join. (16 sc units)
Round 10 :
Change to lace stitch: ch3, 1 tr in same st, *ch2, sk petal, in next petal work (1 tr, ch2, 1 tr)*; rep across creating lacy arches between petals. Fasten off and weave ends. (16 arches)
Round 11 :
Rejoin at top center of cone (inner opening) with main color. Ch3, (3 dc in next stitch, ch1) around inner ring to form slightly flared top for head attachment. Join. (approx 20 clusters)
Info :
Block the dress flat and shape the cone so it has a smooth fall. Stitch counts above are intentionally approximate for lace shaping — keep symmetry across all dresses you make so the row aligns well.
Round 12 :
Working from top ring downward to create texture layers: join yarn at top, ch2, (hdc in next 3 st, fpdc around next 2 sts) repeat around to add vertical ribbing. Join. (approx 40 stitches total working into the last rounds)
Round 13 :
Ch1, 1 sc in each st BLO around to emphasize seam line and create a faint ridge. Join. (40)
Info :
Use BLO to create visual ridges that look like pleats in the skirt. These ridges will allow you to stack a scalloped trim over them in the finishing rounds.
Round 14 :
Ch3, *sk1, (2 dc, ch1, 2 dc) in next st (picot fan over pleat), sk1, dc in next 2 sts*; rep around to form layered fan trims. Join. (Approx 10-12 fans)
Round 15 :
Working in front loops only of the fan: sc around each fan edge to create solid finishing rim. Fasten off and weave in tail. Dress complete for one angel.
Info :
Make 5 identical dresses for the runner. Block each dress and press gently. Keep them numbered so when joining to the background you place them in proper order.
— Angel Head (Small Rounded Orb) :
Round 1 :
With ivory, mr, 6 sc in ring. (6)
Round 2 :
Inc in each st around. (12)
Round 3 :
(1 sc, inc) x6. (18)
Round 4 :
(2 sc, inc) x6. (24)
Round 5 :
1 sc in each st around. (24)
Info :
Place a tiny stitch marker where the face front will be; you will attach the head to the top of the dress later aligning the face with the pleat ridges.
Round 6 :
(3 sc, inc) x6. (30)
Round 7 :
1 sc in each st around. (30)
Round 8 :
(3 sc, dec) x6. (24)
Round 9 :
(2 sc, dec) x6. (18)
Info :
Begin stuffing lightly here with polyester fill to give the head gentle roundness — do not overstuff; we want a soft, stitched look. Continue stuffing while you work decreases.
Round 10 :
(1 sc, dec) x6. (12)
Round 12 :
Fasten off leaving long tail for sewing. Weave in the small opening neatly and leave head tail long to sew to the dress top.
Info :
If you want a slightly larger head, add one or two even rounds of 1 sc in each st before beginning decreases — keep symmetry on all heads.
— Angel Wings (Pair per Angel) :
Round 1 :
With ivory, ch6, sl st to form loop or work mr with 8 sc if preferred. In this pattern we use ch6 loop as base: ch6, sl st to first ch to form ring, ch2 (counts as hdc), 7 hdc into ring. Join. (8)
Round 2 :
Ch2, (1 hdc, inc) x4. Join. (12)
Round 3 :
Ch3, 1 dc in same st, (2 dc in next, 1 dc in next) x4 across shaping a crescent. Join. (approx 24 dc)
Round 4 :
Ch1, sc around wing edge to create defined shape, placing 3 sc in outermost curve points to accent feather tips. Join. (approx 28 sc)
Info :
Work first wing mirror to create a pair. Blocking is important so both wings match and have symmetric curves.
Round 5 :
Rejoin at wing center top, ch3, *sk1, (2 dc, ch1, 2 dc) in next st*, repeat to create decorative fan feathers along the wing length. Join. (approx 8 fans)
Round 6 :
Working into each fan: sc around fan edge to neaten. Fasten off. Make 10 wings total (2 wings for each angel). Pair and block.
Info :
For depth, you may work two thin layers of wings and stitch them together at the center before attaching to the back of the dress, giving a fuller look.
— Halo (Small Metallic Accent) :
Round 1 :
With gold accent yarn, mr, 8 sc in ring. (8)
Round 2 :
Inc in each st around. (16)
Round 3 :
Ch1, sc around, then fold flat and sl st ends together to form a small flat ring. Press gently. Fasten off.
Info :
Sew halo to top-back of head so it peeks above. Use metallic thread for a subtle shine; secure ends neatly on the inside of the head to avoid catching on table linens.
— Large Star Motif (Primary Fillers) :
Round 1 :
With soft blue (or selected color), mr, 10 dc into ring. Join. (10)
Round 2 :
Ch3, (sk1, 2 dc in next) x10 creating 10 points. Join. (20 effective dc clusters forming point bases)
Round 3 :
Working into each point base: (sc, hdc, 3 dc, hdc, sc) to form star points — repeat for all 10 points. Join. (10 points)
Info :
Press and block each star flat. Make a mix of large and medium stars in gold, blue and taupe to create the layered look in the photograph.
Round 4 :
Ch1, sc around the entire star to tidy edges and create a uniform outline. Join and fasten off.
— Small Star / Snowflake Motif :
Round 2 :
(ch3, sl st in next st) x6 to create points (work in front loops to raise points slightly). (6 points)
Round 3 :
In each ch3 point, work (sc, hdc, 3 dc, hdc, sc) to fatten points. Join and fasten off. Make many in the three accent colors (gold, blue, taupe).
Info :
Use these small motifs as connectors between larger motifs when arranging the lattice background. Vary color to match photo: mostly cream with scattered gold and blue points.
— Mini Rosette Fillers (Tiny 6-petal flowers) :
Round 1 :
Ch4, sl st to form loop, ch2, work 6 hdc into loop. Join. (6 hdc)
Round 2 :
Into each st: (ch3, sl st) to make tiny petaled rosettes around. Fasten off. Make many of these in coordinating shades.
Info :
These tiny rosettes are the small stars seen filling the lace; they are quick to make and add texture. Make 40–60 of them depending on runner length.
— Joining Mesh & Layout Grid :
Info :
Layout guideline: the runner in the photo shows 5 central angel assemblies spaced evenly down the center. Around them, large star motifs and small stars fill gaps in an organic lattice. Pin a long strip of craft paper to measure the final dimensions (approximately 110-140cm long by 22-30cm wide depending on yarn and tension) and arrange motifs before joining.
Round 1 :
To create the basic open lattice tile (join-as-you-go connector): Ch8, sl st to form loop, ch3 (counts as dc), 11 dc into loop, join (12 dc ring). This tile will be used as a 12-point connector square between motifs.
Round 2 :
Ch1, sc in each dc, *ch5, sk 2 st, sc in next 3 sts*, rep to form arches for motif join points. You will have 6 arches along each side; these become anchor points for joining stars and rosettes. Fasten off if not joining immediately.
Info :
When join-as-you-go: on the final round of a motif, instead of finishing, work sl sts into adjacent motif arches or chain spaces to connect. Use matching color for invisible joins or contrasting for decorative chain bridges.
Round 3 :
For mesh rows between angel columns: ch6, sl st to form mini loop, work (sc, ch3, sc) into loop and connect loops between motifs with sl st to create a lacy net. This subtle net fills spaces without overpowering angels.
Info :
Pin each motif exactly where you want it, then join in the order that keeps piece flat — typically start in the center of the layout and work outward. Use small pins and blocking board to hold joins tight.
— Attaching Angel Components (Layering) :
Round 1 :
Place dress on blocked layout where you want it. Center head over the top ring of dress. With matching yarn tail from head, whip stitch head to dress top through the top dc ring. Use 8–10 evenly spaced stitches and pull gently to secure. Hide tail inside the head or dress and weave in.
Round 2 :
Sew wings to back of dress at upper sides, aligning wing center with the back top row of the dress. Use invisible whip stitch or mattress stitch for neat seam. Fasten ends securely and weave in.
Info :
Position halo slightly behind the head seam and tack with two small stitches so it floats above the head. If using metallic yarn, secure extra with clear glue or additional stitching on reverse for safety and durability.
Round 3 :
For hands/arms (stylized folded hands): with ivory, ch6, sc in 2nd ch from hook and across (5 sc), ch1 turn, 4 rows of sc to make a small tiny cuff; fold and seam to create a small rounded hand. Attach to front center of dress below the head with a few stitches. Embroider a tiny star at center using gold yarn if desired.
Info :
Make small hands consistently the same size across all angels. Sew them so they sit naturally near the dress front pleats for a unified look.
— Border & Scalloped Edge (Final Framing) :
Round 1 :
Once all motifs are joined into one long strip, work a single crochet rim around entire runner to tidy edges. Join yarn at one corner, ch1, sc evenly around placing 1 sc in each exposed stitch or 2 sc in corner points for smooth turning. Keep even tension. (Count will vary based on layout)
Round 2 :
Work a decorative scallop round: *sk 2 sc, in next sc work (5 dc), sk2 sc, sl st in next sc*; rep all around to form large scallops. Adjust sk/skips to keep scallops even on straighter edges. Fasten off and weave in ends.
Info :
For inner scallops around angel dresses, you can add a smaller picot edge before the outer scallop round to emphasize each angel skirt. Use BLO on the sc round if you want the scallops to sit on top of a ridge.
Round 3 :
Optional last round in gold: with metallic yarn, slip stitch evenly around scalloped edge just catching the top of each scallop to add a subtle highlight. Fasten off and weave carefully to hide ends on reverse.
— Finishing Touches & Embellishment :
Info :
Embroider tiny faces on heads if desired with brown embroidery thread: two french knot eyes and a small backstitched mouth. Alternatively leave faces plain for a more vintage doll-like look. Add small gold beads to dress centers or star tips for sparkle if desired.
Round 1 :
Blocking: wet-block the entire runner on a board to final measurements. Use rust-proof T-pins to shape scallops and angel skirts. Let dry completely. Apply light starch or fabric stiffener only if you want a more rigid centerpiece that will keep crisp folds.
Info :
Weave in all ends on the reverse side with a yarn needle; tie off securely but invisibly. Trim any stray fibers and press very lightly if needed — avoid direct heat on metallic yarns.
Round 2 :
Final inspection: ensure all joins are secure, motifs are flat and the runner drapes evenly. If any motifs are loose, reinforce with short stitches through the reverse connecting junctions.
Info :
This completes the runner. The total number of motifs you make will determine final length; the sample shows five angels with approximately 50–70 filler motifs. Keep counts of each motif type for reproducibility in future projects.
Finishing this runner is pure holiday joy — each motif builds into a beautiful, layered centerpiece that makes any table feel special. The layered angels with shimmering halos and scattered stars create a timeless festive vignette. Block, stitch, and style with care, and you'll have a one-of-a-kind heirloom centerpiece ready for the season. 🎄✨🧶