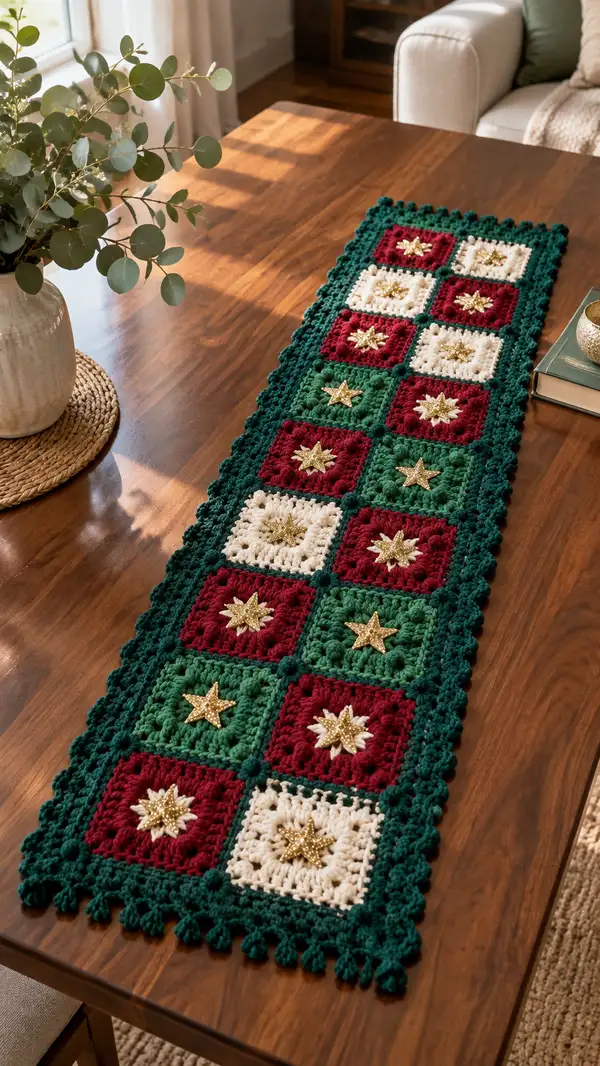
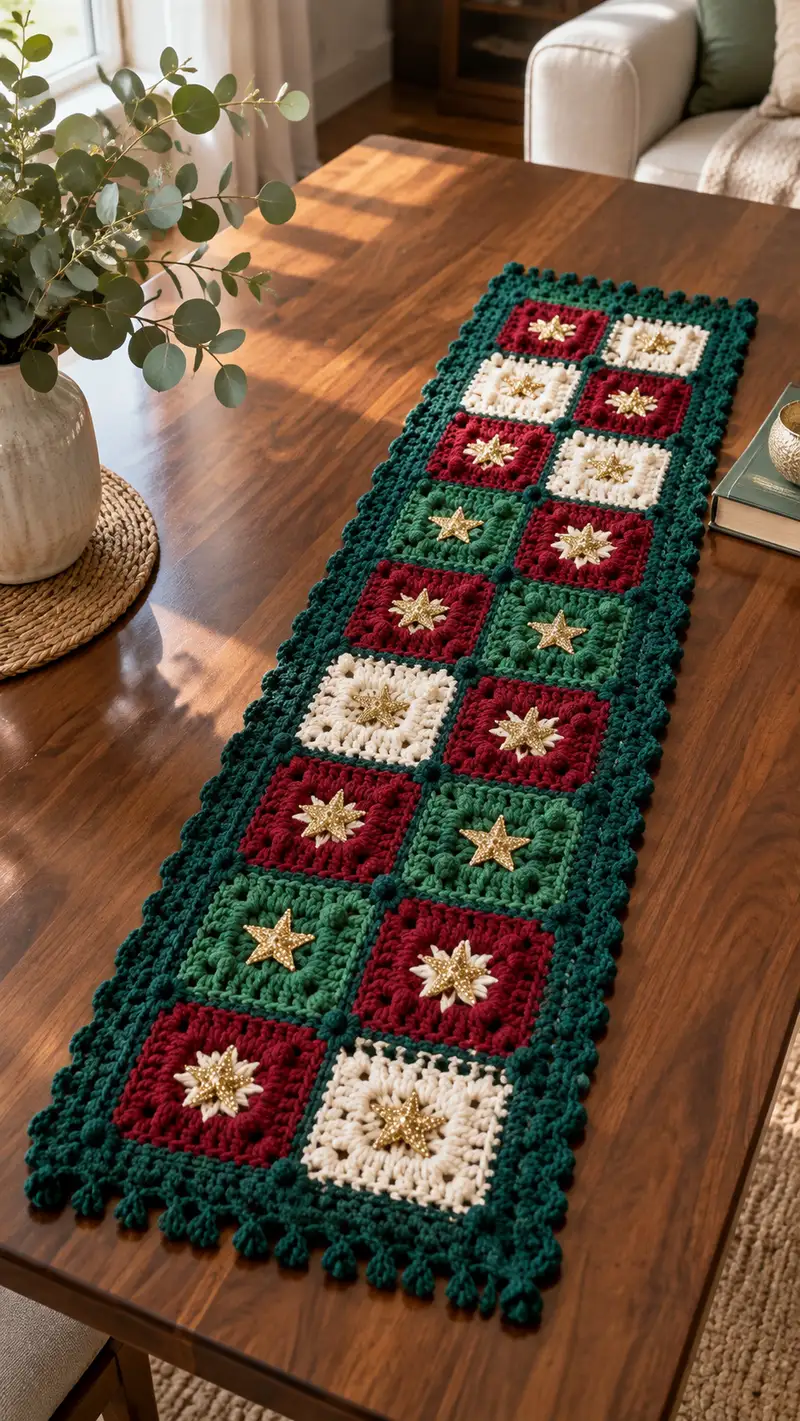
Create a warm, seasonal table runner made from stacked granny-style squares with a rich forest green border and scalloped bobble edge. This pattern uses deep red, evergreen green, and creamy ivory yarns and finishes with sparkling gold star embellishments for a festive, handcrafted centerpiece. Perfect for holiday gatherings or as an elegant seasonal accent, the runner lays flat and has a delicate textured border that frames each square beautifully.
Progress Tracker
0% Complete
— Overview & Notes :
Info :
This pattern uses a textured puff center followed by classic granny-style expansion rounds to produce a square about 4.5"–5.5" depending on your tension and yarn. I present a 3 x 7 layout (3 squares across × 7 down = 21 squares) as pictured – final measurements approximate 15" wide × 48" long before blocking and edging. Adjust the number of squares to fit your table as desired. Gauge is not strict for this project but consistent tension yields the best result.
Info :
Puff stitch used in this pattern: yo, insert hook, pull up a loop (repeat 4 times for a full puff), yo and draw through all loops on hook, ch1 to close the puff. If you prefer smaller puffs, you may reduce the number of times you pull up loops (3 loops instead of 4) but ensure consistency throughout.
— Single Square (Make 21 identical squares) :
Info :
Each square below is described in a 7-round sequence. Repeat Rounds 1–7 to make each square. For clarity and to give you an expansive set of rounds (to match layout), this pattern lists the rounds for 21 squares sequentially; rounds for every square are identical unless you change color. Change color at Round 1 for the square center where indicated in the layout.
Square 1 — Round 1 :
With chosen square color (burgundy, green, or cream), make magic ring. Ch1, work 8 puff stitches into ring, ch1 between each puff. Join with sl st to first puff. (8 puffs)
Square 1 — Round 2 :
Join new yarn tail or continue same color: Work into the ch1 space between every pair of puffs to form 4 corner clusters as follows: *(3 dc, ch2, 3 dc) in each 2-ch1 paired space* — you will form 4 corner groups around the circle. Fasten off or carry color if continuing. (24 dc, 4 corner ch2 spaces)
Square 1 — Round 3 :
Join same color (or change color if you prefer banded squares). Working into side spaces between corner clusters, place one 3-dc cluster in each side space and make corners as (3 dc, ch2, 3 dc) into each corner ch2. This round will significantly square up the piece — clusters along sides and corner clusters create 4 distinct sides. (approx. 48 dc clusters total including corners)
Square 1 — Round 4 :
Ch3, then work 3-dc clusters into every side space (including the ch1 spaces created in previous round), and in each corner ch2 work (3 dc, ch2, 3 dc). This increases the flat square shape and expands to a larger square. (approx. 72 dc)
Square 1 — Round 5 :
Work an even round of 3-dc clusters along each side space and repeat corners as (3 dc, ch2, 3 dc). Keep tension even; block lightly if needed to square up. (maintain approx. 72 dc)
Square 1 — Round 6 :
Info :
Square 1 — Round 6 :
Change to dark evergreen (join/joining color) now if you plan to join squares with the same border color. Work 1 dc in each stitch BLO around to create a subtle ridge where joins will happen. This creates a tidy join line for whip/flat joining. (1 dc in each st BLO, count approx. 72)
Square 1 — Round 7 :
Work 1 sc evenly around the square edge working 3 sc into each corner space (or into the ch2 corner) to maintain square corners. Fasten off leaving a 12" tail for seaming if you will sew squares together. (approx. 72 sc)
Info :
Finish Square 1 by weaving in inner tails or leaving a long tail for joining. If making a different colored center star in the square, crochet Round 1 puff in color A and Rounds 2–5 in color A, change to evergreen in Round 6 as shown. Repeat this 7-round sequence for each square below.
Square 2 — Round 8 :
Repeat Round 1 instructions for Square 2 (choose next square color); Magic ring, ch1, 8 puff stitches into ring with ch1 between. (8 puffs)
Square 2 — Round 9 :
Repeat Round 2: form 4 corner clusters (3 dc, ch2, 3 dc) around the puff ring to start squaring up. (24 dc, 4 ch2)
Square 2 — Round 10 :
Repeat Round 3: place 3-dc clusters in side spaces and corners as (3 dc, ch2, 3 dc) to develop sides. (approx. 48 clusters)
Square 2 — Round 11 :
Repeat Round 4: expand with 3-dc clusters into each side and corners. (approx. 72 dc)
Square 2 — Round 12 :
Repeat Round 5: even round of clusters to solidify the square. (maintain approx. 72 dc)
Square 2 — Round 13 :
Change to evergreen and work 1 dc in each st BLO around. (approx. 72)
Square 2 — Round 14 :
Sc around edge with 3 sc in each corner to finish; fasten off leave tail for joining. (approx. 72 sc)
Info :
Lay out squares on a flat surface in your desired color layout (I recommend alternating reds, creams and greens as in the photo). For a runner matching the image, use a 3×7 grid: three squares across, seven down (21 total). Use pins to keep layout stable.
Square 3 — Round 15 :
Repeat Square Rounds 1–7 for Square 3 following your color sequence. (Rounds 15–21 follow the same set of instructions as Rounds 1–7 for Square 1 with color choices for this square.)
Info :
Squares 4–21 — Repeat the same 7-round sequence per square. For brevity within this pattern, each set of 7 rounds is identical in construction. Ensure you alternate colors (burgundy, cream, forest green) in a pleasing checkerboard or column pattern similar to the image. Blocking each square lightly can help even out edges for a neater join.
Square 4 — Round 22 :
Repeat Round 1 (8 puff)
Square 4 — Round 23 :
Repeat Round 2 (corner groups)
Square 4 — Round 24 :
Repeat Round 3 (side clusters)
Square 4 — Round 25 :
Repeat Round 4 (expand)
Square 4 — Round 26 :
Repeat Round 5 (even round)
Square 4 — Round 27 :
Round 6 change to evergreen, 1 dc in each st BLO (approx. 72)
Square 4 — Round 28 :
Round 7 sc around, 3 sc in corners, fasten off leaving tail. (approx. 72)
Info :
Continue in the same way for Squares 5–21. The pattern for each square is identical; pick a color sequence and stick to it so the runner has a balanced, alternating look. If you prefer larger squares, add more granny expansion rounds before switching to the BLO and sc finishing rounds.
Square 5 — Round 29 :
Repeat puff center and expansion rounds per Square 1 instructions (puff center = 8 puffs into magic ring).
Square 5 — Round 30 :
Repeat corner clusters and sides.
Square 5 — Round 31 :
Change to evergreen Round 6 BLO and finish with sc round.
Info :
Work all squares with the BLO round in the same outset color (evergreen) so the subsequent join and completion round has a uniform height and texture for seaming and border application.
Square 6 — Round 32 :
Repeat the 7-round square sequence; keep recording which squares are which color in your layout map to avoid mistakes.
Square 7 — Round 39 :
Repeat 7-round sequence.
Info :
You should now have 21 finished squares (3 across × 7 down). If you end up with fewer or more, adjust the runner length by adding or removing rows before joining the squares permanently.
— Joining Squares :
Info :
Two recommended joining methods: whip stitch/sewing through back loops for invisible joins, or single crochet join for decorative raised seams. The instructions below use a single crochet join in evergreen for a framed look like the photo.
Joining — Step 1 :
Lay out your squares in final order flat on a table (3 columns × 7 rows). Make sure all sc rounds (Round 7 on each square) are facing you the same direction (RS up).
Joining — Step 2 :
With RS facing, join evergreen in the corner st of the first square. Align the edge of the adjacent square and work 1 sc through both loops of both sc edge stitches to join. Work sc stitches across the seam evenly, placing 3 sc across each corner section (or match stitch density to keep edges even). Continue joining across each row first (join columns together to make 3 wide strips then join strips lengthwise to form full runner). Use pins to hold squares in place as you go.
Joining — Step 3 :
When you reach the end of a row, fasten off and start the next seam to avoid excessive bulk. Weave in join tails neatly to the wrong side. Alternatively, join entire runner using a continuous single crochet seam by sewing along aligned edges; this gives a framed, uniform grid line in evergreen.
Info :
Double-check that all seams are flat and not pulling a corner before proceeding to border rounds. If the assembled runner puckers, gently block it flat and allow to dry before adding border rounds.
— Border & Scalloped Bobble Edge :
Border Round 1 :
With runner assembled and RS up, join evergreen yarn anywhere along outer edge. Ch1, work 1 sc evenly in each sc around the entire perimeter working 3 sc in each corner to keep corners square. Join with sl st to first sc. (approx. perimeter count will vary depending on squares and seam methods)
Info :
Maintain even stitch spacing. If your perimeter count is large, keep a consistent rhythm so subsequent scallops align; marking the middle of each side helps to make scallops symmetrical.
Border Round 2 :
Ch3 (counts as dc), *skip 2 sc, 5 dc cluster in next sc (shell), skip 2 sc, 1 dc in next sc; rep from * around to create deep textured shells. At corners, work 3 dc in corner sc to keep corners neat. Join with sl st to top of ch3.
Border Round 3 :
Ch1, sc in each st across the top of dc shells and around; in the center of each 5-dc shell work (sc, ch3, sc) to create picot points for the next bobble pass. Join with sl st.
Border Round 4 :
For the bobble scallop edge, work the following around: *in each (sc, ch3, sc) space from previous round work (sc, ch5, sc, bobble)* — the bobble stitch: (yo, insert, pull up loop) repeat 4 times, yo and draw through all loops, ch1 to close. The bobbles will hang slightly and create the dangling bobble motif seen in the image. Repeat around. Join with sl st and fasten off.
Border Round 5 :
Optional final finishing round: With a smaller hook (4.5mm) and evergreen, work 1 sc around the top of each bobble and around shells to tidy up. Fasten off and weave in all ends. This final tidying round helps stabilize bobbles and give a refined edge.
Info :
If you prefer a flatter edge with small scallops instead of bobbles, substitute Round 4 with: *in each (sc, ch3, sc) space work (sc, ch3, sc)*; join and finish.
— Center Star Embellishments (Make 21 or supply ornaments) :
Star Option A (Sewn glitter star embellishment) :
Purchase small glittered star ornaments (approx. 1.25"–1.75") and sew each star to the center of each square using a strong hand-sewing needle and matching thread. Use 3–4 passes through each star to secure to the square center. Secure knots on the wrong side and hide ends inside the join or weave inside the square.
Star Option B (Crocheted simple star applique) :
Using metallic gold thread or a small amount of worsted gold yarn: ch6, join with sl st to form ring. Round 1: *(ch2, dc, tr, dc) in ring, ch1, sl st in ring* rep 5 more times for 6 points. Fasten off leaving long tail for sewing. Block lightly and sew centered on each square. (6 points)
Info :
When attaching stars, place each star centrally over the small puff center created in Round 1. Use pins to ensure alignment and sew through a few underlying stitches from the wrong side to secure. For an extra hold, add a tiny dot of fabric glue under the star then sew over to fasten.
— Finishing :
Info :
Weave in all ends using a yarn needle. For a professional finish, block the runner lightly to flatten seams and even out the scalloped edge. If the runner will be used on a dining table, consider adding a thin interfacing or light stabilizer on the underside for extra stability (hand-stitched or iron-on fabric). Store flat or rolled — avoid folding to keep bobble edge crisp.
Final Check :
Inspect all seams, secure any loose embellishments, and trim all remaining tails. Press lightly on wrong side with a steam iron if desired (cover with damp cloth). Your runner is ready to display.
Info :
Notes on customizing size: To lengthen the runner, simply add more rows of squares repeating the 7-round square sequence for each added square. To widen, add more squares across and adjust joining and border counts accordingly.
Finishing this table runner brings together small, meditative stitches into something truly special — a handmade centerpiece you’ll be proud of. Each square becomes a tiny patch of texture and color framed by the deep evergreen border and playful bobble edge. Add the golden stars to complete the holiday sparkle and watch your table transform instantly. 🧶✨ Enjoy the process and the cozy glow it brings to your home! 🎄