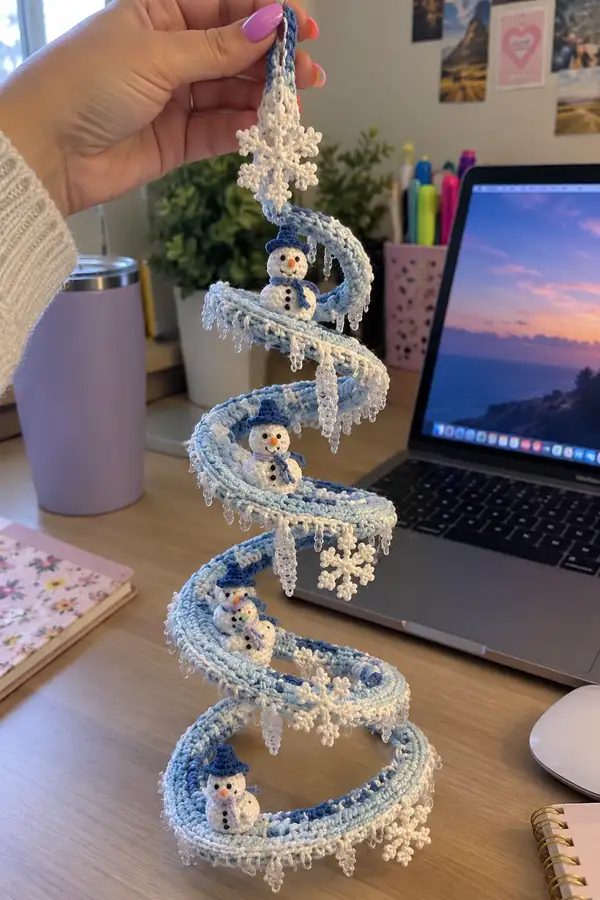
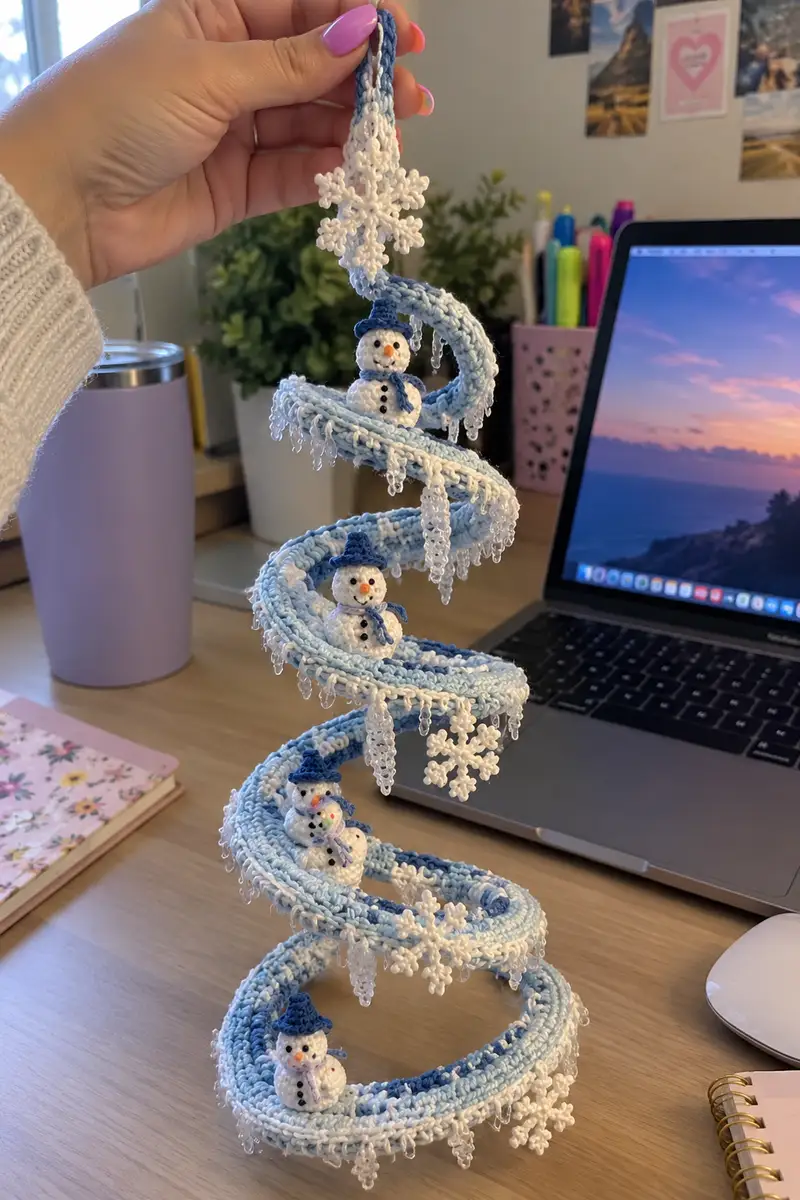
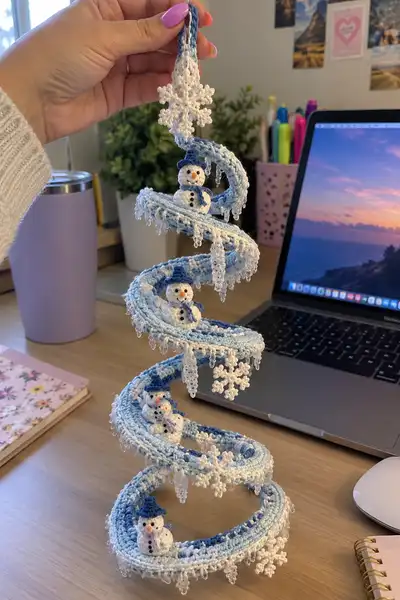
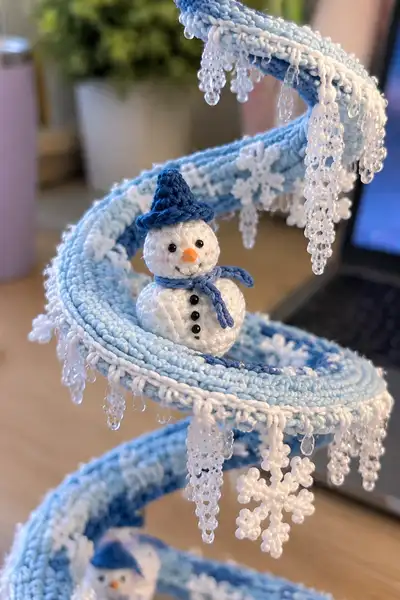
Create a delicate hanging spiral tree filled with tiny snowmen, sparkling bead icicles, and crocheted snowflakes. Worked in fine cotton thread with gradient blues and crisp white edges, this ornament hangs as a whimsical winter centerpiece. Includes step-by-step rounds for small snowmen, hats, scarves, the long spiral band, beaded icicles and snowflake motifs. A detailed pattern to reproduce the elegant, airy spiral and tiny plush characters shown.
Progress Tracker
0% Complete
— Snowman Head :
Round 1 :
6 sc in magic ring (6)
Round 3 :
(1 sc, inc) x 6 (18)
Round 4 :
(2 sc, inc) x 6 (24)
Round 5 :
(3 sc, inc) x 6 (30)
Info :
Use white thread. These heads are small — use a slightly smaller hook than recommended to keep the fabric tight and prevent stuffing from showing through.
Round 6 :
1 sc in each st (30)
Round 7 :
1 sc in each st (30)
Round 8 :
1 sc in each st (30)
Round 9 :
1 sc in each st (30)
Info :
Place eyes between rounds 7-8 about 6 stitches apart. For tiny snowmen use 3-4mm black beads sewn in, or very small safety eyes if preferred. Mark eye placement with pins before securing.
Round 10 :
(3 sc, dec) x 6 (24)
Round 11 :
(2 sc, dec) x 6 (18)
Round 12 :
Start stuffing head firmly but not overstuffed. Add small bits of fiberfill and shape into a rounded dome.
Round 13 :
(1 sc, dec) x 6 (12)
Info :
Finish stuffing and close the final hole. Leave a long tail for sewing the head to the body. Embroider a small stitched mouth using black thread now if convenient: a short horizontal stitch or a tiny smile under the nose position.
— Snowman Body :
Round 1 :
6 sc in magic ring (6)
Round 3 :
(1 sc, inc) x 6 (18)
Round 4 :
(2 sc, inc) x 6 (24)
Round 5 :
(3 sc, inc) x 6 (30)
Round 6 :
1 sc in each st (30)
Info :
The body is slightly larger than the head. Work a few even rounds to create a gentle neck indent. Use white thread and ensure rounds 6-9 are even to permit a neat join with the head later.
Round 7 :
1 sc in each st (30)
Round 8 :
1 sc in each st (30)
Round 9 :
1 sc in each st (30)
Round 10 :
(3 sc, dec) x 6 (24)
Round 11 :
(2 sc, dec) x 6 (18)
Info :
Stuff the body firmly but keep the top slightly narrower for a defined neck. Use small amounts of fiberfill and shape the lower belly round as you go. Leave a generous tail for sewing the head.
Round 12 :
(1 sc, dec) x 6 (12)
Info :
Fasten off, leaving long tail for sewing. Repeat to make three snowmen. Slight variations in stuffing and tension will create slight personality differences which is charming.
— Snowman Assembly & Details :
Info :
Sew head to body using the long tail and a ladder stitch, bringing head and body seams together neatly. Use a few stitches around to ensure security, but keep neck proportion balanced so snowmen sit nicely on spiral platforms.
Round 1 :
Sew tiny black seed beads vertically on each body front as 'buttons' (3 beads recommended per body). Secure with small knots and weave ends inside body.
Round 2 :
Embroider tiny carrot nose with orange thread. Use 3-4 straight stitches packed closely to form an orange nub projecting slightly.
Round 3 :
Blush cheeks lightly with a tiny dab of fabric-safe chalk or pale pink thread dot if desired.
— Mini Hat (Make 3) :
Round 1 :
Using navy/deep blue thread: 6 sc in magic ring (6)
Round 3 :
(1 sc, inc) x 6 (18)
Round 4 :
1 sc in each st (18)
Round 5 :
1 sc in each st (18)
Round 6 :
Fold base of hat and join with slip stitch around to create a small brim. Alternatively, work 18 sc around in BLO for a subtle brim ridge.
Info :
Make a tiny brim: ch1, sc around in BLO to create a neat turn under for the hat brim. Sew hat to top of head with a few stitches at the base for a neat fit.
— Scarf (Make 3) :
Round 1 :
With light blue thread: ch 12 (or length to fit around small neck) (12)
Round 2 :
Row: sc in 2nd ch from hook and across (11 sc). Fasten off leaving long tail for tying around neck.
Info :
Tie scarf around neck and secure with a few hidden stitches at the overlap. For a tied scarf end, make 2 small fringe loops by making tiny chains of 6 and knotting them to the scarf ends.
— Crocheted Snowflake Motif (Make 6-8) :
Round 1 :
Using white thread: ch 6, sl st to first ch to form a ring
Round 2 :
(ch 3 (counts as dc), dc, ch 3, sl st in ring) x 6 to create six spokes. Fasten off or continue to add detail.
Round 3 :
Refine each spoke: join white thread to a spoke base, *ch 3, sc in next ch, picot (ch 3, sl st in top of last ch), sc back to base, sl st to ring*; rep on all 6 spokes (creates delicate points) .
Info :
Make snowflakes flat by blocking lightly with a damp cloth and pinning to shape. Attach a small clear bead to centre of each snowflake if desired for sparkle.
— Beaded Icicle (Make many) :
Info :
String clear teardrop and round beads onto beading thread: pattern per icicle usually: small round bead, medium bead, small bead, teardrop bead. Leave long tail to tie into crochet loops. Prepare 30-40 icicles for full fringe coverage.
Round 1 :
Work a picot loop fringe across an edge: *ch 6, sl st into base round to form a loop; repeat* to create hanging loops. Do not cut yarn.
Round 2 :
Attach a beaded strand through each loop: fold beading thread through loop and tie tightly, bury tails inside spiral with needle and glue for permanence.
Info :
For longer icicles, use a longer chain loop and string a few extra beads. Secure bead knots with clear-drying glue for durability and trim ends close.
— Main Spiral Band (Work one long tube, approximately 120 rounds) :
Info :
This is the core structure of the hanging ornament — a long cylindrical band that will be shaped around a wire spiral. Crochet a firm, even tube using the smaller hook. Use a color plan: alternate 8-12 rounds of light blue then 2 rounds white rim to emulate the photograph's gradient and rim detailing. You will later shape the long tube around a pre-formed wire spiral.
Round 1 :
6 sc in magic ring (6)
Round 3 :
(1 sc, inc) x 6 (18)
Round 4 :
(2 sc, inc) x 6 (24)
Round 5 :
(3 sc, inc) x 6 (30)
Round 6 :
(4 sc, inc) x 6 (36)
Round 7 :
(5 sc, inc) x 6 (42)
Round 8 :
(6 sc, inc) x 6 (48)
Round 9-16 :
1 sc in each st (48)
Info :
These rounds form the body of the tube. Count carefully and place a stitch marker at the first stitch of each round. Switch color to a second blue at the start of round 13 if you wish to create a subtle gradient transition.
Round 17-24 :
1 sc in each st (48)
Round 25-32 :
1 sc in each st (48)
Info :
If you need the tube to be slightly wider in places to create small platforms for the snowmen to sit, work two successive rounds of (6 sc, inc) x 6 which will expand to 54 sts (do this only where needed), then resume even rounds.
Round 33-40 :
1 sc in each st (48)
Round 41-48 :
1 sc in each st (48)
Info :
Every 8-12 rounds, change to white thread for two rounds to create a rim/edge effect. Carry unused yarn along inside the tube neatly and stitch over it to lock it in place. When carrying, avoid creating bulk at the tube seams.
Round 49-56 :
1 sc in each st (48)
Round 57-64 :
1 sc in each st (48)
Round 65-72 :
1 sc in each st (48)
Info :
At the locations where snowmen will sit, widen the tube slightly to create a flat platform. To do this: Round A (platform base): (6 sc, inc) x 6 (54). Round B: 1 sc each st (54). Round C: (6 sc, dec)x6 (48) to return to standard tube width. Make these platform expansions spaced evenly along the long tube length.
Round 73-80 :
1 sc in each st (48)
Round 81-88 :
1 sc in each st (48)
Round 89-96 :
1 sc in each st (48)
Info :
To create the soft rounded edge on the outer rim of the spiral, work one or two rounds in BLO with white thread at the outermost orientation of the tube after the tube is shaped on the wire, then add a decorative row of picot loops for bead attachment.
Round 97-104 :
1 sc in each st (48)
Round 105-112 :
1 sc in each st (48)
Round 113-120 :
1 sc in each st (48)
Info :
Fasten off leaving a long tail. Insert a thin, flexible wire armature into the tube: shape an approximate spiral using thicker craft wire to create the long rising spiral form. Coil the wire into the spiral height you want (photo shows roughly 18-22 cm tall coil). Slide the crocheted tube over the wire. Adjust coils and position of platform widenings and seal each end by sewing the tube closed neatly around the end of the wire.
— Outer Rim & Beaded Fringe :
Round 1 :
With white thread, join at the outermost edge of the tube and work 1 round of sc in each st BLO to form a neat rim (48)
Round 2 :
Work picot loops around rim for bead attachment: *ch 6, sl st in next st* repeat across rim to create loops (48 loops)
Info :
To attach bead icicles: string beads onto beading thread in your chosen patterns before tying them to each picot loop. Tie securely, hide ends inside tube and anchor with a dab of glue if necessary. Alternate long and short icicles for a natural look.
— Decorative Snowflake Attachment :
Round 1 :
Sew crocheted snowflakes to the outer rim at spaced intervals using small stitches through the snowflake center and rim base. Add a small clear bead at the center for sparkle when desired.
Info :
Place snowflakes near icicle clusters for a cohesive icy look. Pin each snowflake before sewing to ensure symmetry and spacing.
— Small Base Loop / Top Hanging Loop :
Round 1 :
To create the top hanging loop, use two strands of gradient blue and white held together: ch 8, sl st into first ch to make a small ring. Work 8 sc rounds in spiral to create a sturdy loop base and sew to top coil. Reinforce with wire inside if desired.
Info :
Make sure the hanging loop is securely sewn and the inner wire tip is tucked and wrapped to prevent rough edges from piercing the threadwork.
— Final Assembly & Positioning of Snowmen :
Info :
Position the three snowmen onto three widened platform sections (made earlier) at even vertical spacing. Use pins to check visual balance before attaching permanently. The topmost snowman sits about 2-3 cm below the hanging loop, the middle one about halfway down the coil, and the lowest near the base coil.
Round 1 :
Sew each snowman through the base of its body into the tube platform area with the long tail, taking stitches through multiple rounds of the tube to anchor securely (6-8 passes recommended).
Round 2 :
Stitch hats and scarves in place on each snowman. Add extra decorative seed bead eyes/buttons if desired and secure all bead knots inside the figures.
Info :
After all pieces are attached, check the entire spiral for wobble. Tighten attachment stitches and adjust wire support if the spiral doesn't hold evenly. Trim and weave in all remaining tails. Optionally, apply a tiny dab of fabric glue where beads are tied for extra security.
— Optional Stabilizing & Finishing Touches :
Info :
For a heavier stable base, add a small flattened bead or coin inside the bottom coil and wrap in felt to avoid wire-to-thread contact. Spray lightly with fabric stiffener if you want a more rigid spiral. Add a few extra tiny white beads scattered along the inner spirals to mimic frozen droplets.
Completing this spiral snowman tree is such a joyful project — the tiny characters nested along the graceful spiral feel like a miniature winter world you made by hand. The bead icicles catch the light while the blue gradient thread gives a frosty, gentle look. Hang it by a window and watch it shimmer, or gift it to a friend who adores delicate handmade ornaments. 🧶❄️🎁