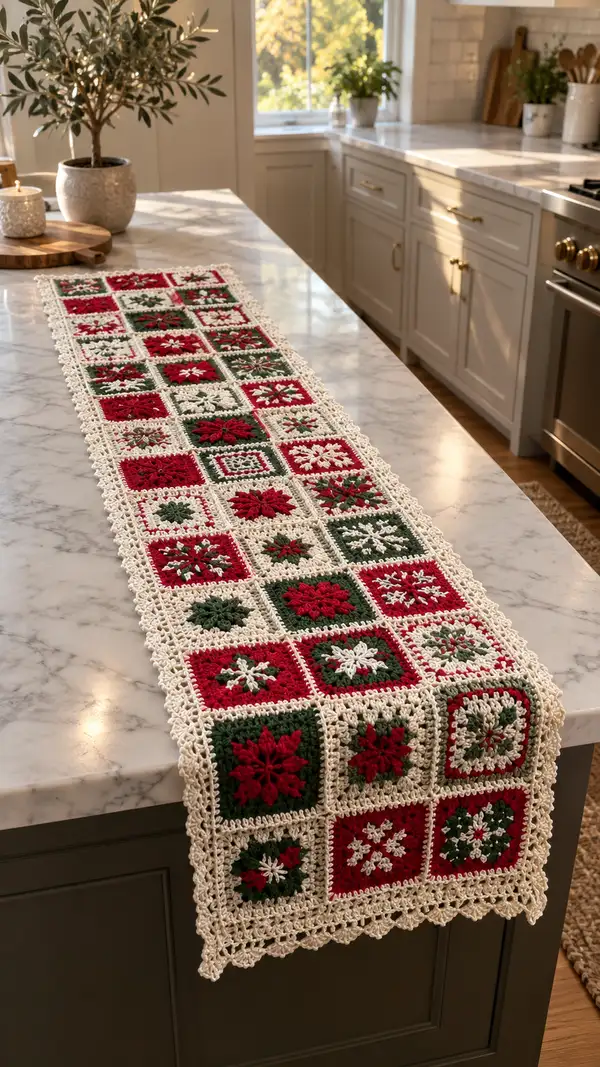
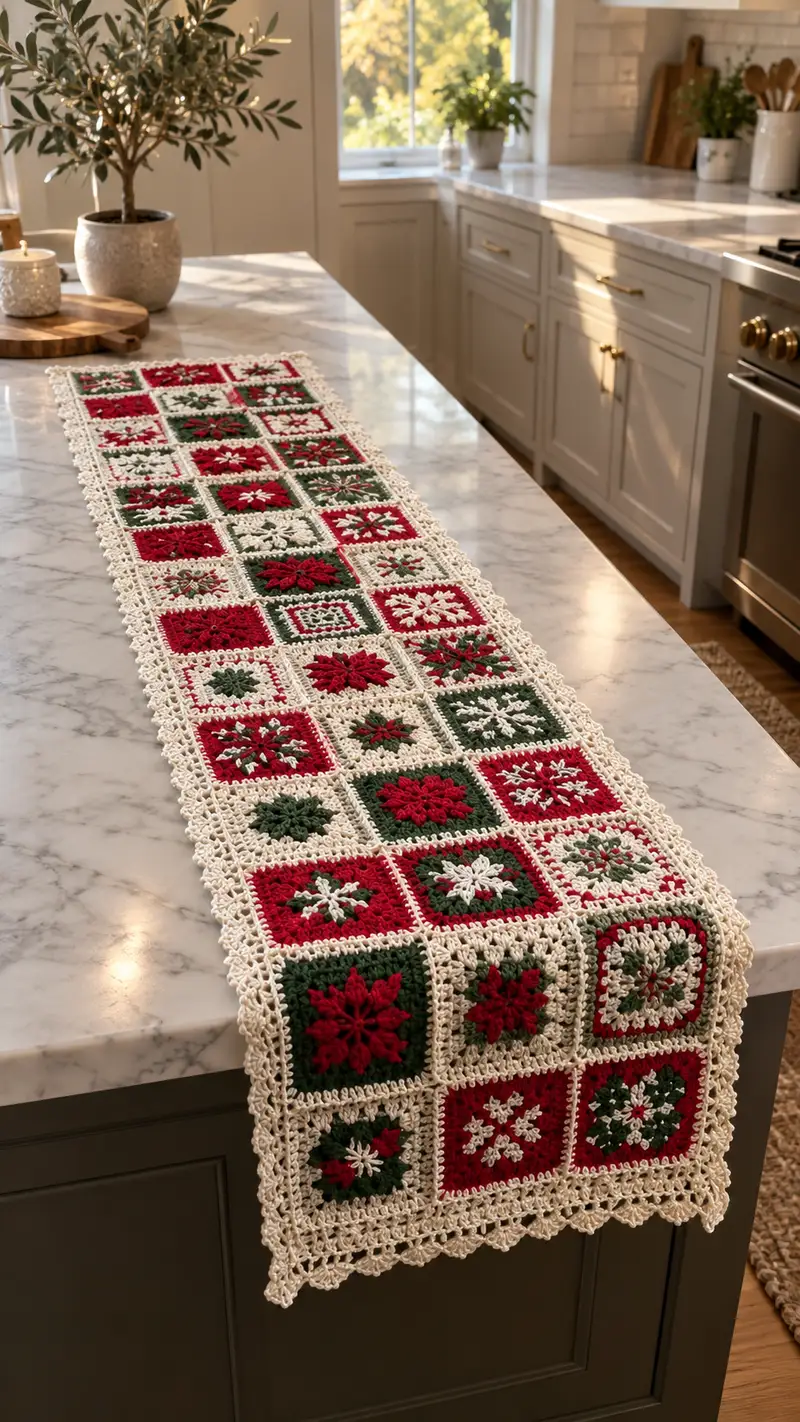
A long, elegant table runner made from festive granny-style squares in cream, deep red and forest green. Each square features seasonal star and snowflake motifs with textured puff and post stitches, joined together and finished with a lacy cream border. Perfect for holiday tables or seasonal decor — made to lay flat, drape gently over tabletops, and showcase handcrafted charm.
Progress Tracker
0% Complete
— Pattern Overview :
Info :
This runner is composed of alternating motif squares worked in worsted weight yarn. There are 7 columns of squares across the runner and 5 rows long in the pictured piece (35 squares total). You can increase or decrease length by adding or removing rows of squares. Each square finishes approximately 8-9 cm (3-3.5 in) after blocking using 4.0 mm hook and worsted yarn. Work motifs flat in rounds, finish each motif, block lightly, then join with the join-as-you-go (JAYG) method described below. Finish with a multi-round lace edging in the cream color.
Info :
Gauge (approx): One finished square = 8 cm across after blocking. If yours is different, adjust hook size to match or adjust number of squares for desired runner length. Maintain consistent tension across all motifs for uniform assembly.
— Special Techniques & Notes :
Info :
Puff stitch: Yarn over, insert hook, yarn over, pull through (repeat total 3 times to have 6 loops on hook), yarn over and pull through all 6 loops, ch1 to close puff. Popcorn stitch: Work 5 dc in same st, remove hook, insert into first dc of group, grab loop and pull through to form pop; ch1 to secure (alternative: finish with sl st in first dc).
Info :
Join-as-you-go tip: In the last round of a square, when at an edge that abuts a previously joined square, work a sl st into the corresponding ch-space or stitch on the neighboring square instead of completing the stitch into free space. This creates a neat seam and reduces sewing. When starting the first row, make a full square as the base; subsequent squares can be JAYG into that base row.
— Motif A: Snowflake Star Square (Make 12) :
Round 1 :
With motif color (red or green) make a magic ring, ch3 (counts as dc), work 11 dc into ring. Join with sl st to top of ch3. (12 dc)
Round 2 :
Ch3, dc in same st, *ch2, sk 1 dc, (dc, ch2, dc) in next st; rep from * around to create 4 corner points. Join with sl st to top of ch3. (Total: 8 dc groups and 4 ch-2 corners; visually 12 dc + 4 corners)
Info :
This round establishes 4 corner ch-2 spaces for square shaping. Place a stitch marker into the first ch-2 corner to mark round starts for later rounds.
Round 3 :
Change/continue color to contrasting accent (small white/cream star center if desired). In each ch-2 corner work: (3 dc, ch2, 3 dc). In each side ch-2 space from previous round work 1 dc. Join with sl st to top of starting ch. (Sides will now have 3 dc between corners; total dc approx 32)
Round 4 :
Change to motif color main (red/green). Ch3, dc in same st, *dc 3 in next side stitches, (3 dc, ch2, 3 dc) in corner ch-2 sp; rep from * around. Join with sl st to top of ch3. (This rounds increases square width by adding clusters; estimated total 48 dc)
Round 5 :
Work one round in puff/star texture: In the center of each side (midway between corners) make a 3-loop puff stitch (see special techniques). In remaining side dc work 1 dc each. In each corner, work (3 dc, ch2, 3 dc). Join with sl st. (Texture: 4 puffs total)
Info :
Puff placement: Make puffs centered on each side to create a subtle star effect; if using contrasting accent for the puffs, change yarn at end of round by fastening off and reattaching the next round color.
Round 6 :
Ch1, sc evenly around working 3 sc in each corner ch-2 space to square up edges. Join with sl st to first sc. (Estimated 60 sc)
Round 7 :
1 sc in each st BLO around to create defined ridged edges; join. (60 sc)
Round 8 :
Switch to cream for a narrow border: Ch2, hdc in each st around, working (hdc, ch1, hdc) in each corner to keep square. Join, fasten off leaving tail for blocking. (Approx 60 hdc)
Info :
Block this square now to exact desired size. Light spray and pin to square shape, letting dry before joining. Blocking evens puff texture and side lengths.
— Motif B: Raised Star Puff Square (Make 12) :
Round 1 :
With motif color (red or green) ch4, sl st to form ring. Ch3 (counts as dc), work 11 dc into ring, join. (12 dc)
Round 2 :
Ch3, dc in same st, *ch2, sk next dc, dc in next dc; rep around to form 6 pairs and 6 ch2 sps. Join with sl st. (12 dc, 6 ch-2 sps)
Round 3 :
Change to second motif color if desired and work into each ch-2: (3 dc, ch2, 3 dc) to form 6 corners. Between corners work 3 dc across each side. Join. (Now square begins; approx 48 dc)
Round 4 :
Change to contrasting color and create central raised star: Working into the top of selected dc groups, make puff stitches: *[yarn over, insert into dc, yarn over pull up loop] repeat 3 times total (6 loops on hook), yarn over pull through all 6 loops, ch1 to secure; rep in every other side mid-point.* Join. (6 puffs forming star points)
Info :
If you want an extra pronounced star, use a slightly thicker yarn for the puff color or use two strands held together for puff rounds. Be sure to keep tension loose enough on puff rounds to avoid unworkable loops.
Round 5 :
Return to motif main color: In each corner (3 dc, ch2, 3 dc), across sides 3 dc each; join. (Approx 60 dc total)
Round 6 :
Ch1, sc around, working 3 sc in each corner ch-2 space to square up. Join. (Estimated 60 sc)
Round 7 :
Switch to cream: Ch2, hdc in each st around; in corners work (hdc, ch1, hdc). Join, fasten off and weave in ends. (Approx 60 hdc)
Info :
Label this motif type 'B' as it pairs well in layout alternation with Motif A for visual rhythm. Block gently to match A size.
— Motif C: Classic 4-Point Star Snowflake Square (Make 6) :
Round 1 :
With cream or accent color ch4, sl st to form ring. Ch3 (counts as dc), work 11 dc in ring. Sl st to join. (12 dc)
Round 2 :
Ch3, dc in same st, *ch2, sk 1 dc, dc in next dc; rep around creating 6 ch2 spaces. Join. (12 dc + 6 ch-2 sps)
Round 3 :
Switch to green: In every other ch-2 sp work a 5-dc fan (5 dc in ch-2 sp). In remaining ch-2 spaces work (3 dc, ch2, 3 dc) to form corners. Between fans and corners work 2 dc. Join and fasten off color if desired. (Total dc about 48)
Round 4 :
Attach red and make 8 puff stitches arranged to form a snowflake overlay: in selected side centers make puff stitches as follows: *puff, ch1, skip 1 st, puff* across; join. (8 puffs)
Info :
This motif uses alternating fans and corners to create a detailed snowflake center. The puff overlay creates the delicate snowflake points; choose a bright contrast for visibility.
Round 5 :
Work 1 sc around in cream to unify motif; in corners work 3 sc into ch-2 spaces. Join. (Approx 56 sc)
Round 6 :
Ch2, hdc-round in cream around to bring the square to final size; work (hdc, ch1, hdc) in corners. Join and fasten off. (Approx 56 hdc)
Info :
Block square to match size of A and B. Because this motif has fans, it may be slightly larger; gently stretch and pin to match measurements of other motifs.
— Motif D: Simple Solid Granny Square (Make 5) :
Round 1 :
With chosen color ch4, sl st to form ring, ch3 (counts as dc), work 11 dc in ring, join (12 dc)
Round 2 :
Ch3, dc in same st, *ch2, 3 dc in next space (forming a corner) ; rep into 3 more corners so you have (3 dc, ch2, 3 dc) around. Join. (4 corner clusters)
Round 3 :
Ch3, (3 dc) in next ch-2 sp, ch2, (3 dc) in same ch-2 sp, *ch1, (3 dc, ch2, 3dc) in next corner; rep from * around. Join. (Square grows with 4 clusters per side pattern)
Round 4 :
Repeat Round 3 to expand square until square measures same as other motifs (typically 3 rounds of cluster expansion). Fasten off and weave ends. (Final cluster counts per side approx 3 clusters depending on expansion)
Info :
These solid squares are used as a calmer background between highly textured motifs. Work until square’s edge matches the size of the other motifs after blocking.
— Motif E: Center Medallion with Shell Corner Square (Make 0-Extra as needed) :
Round 1 :
With cream ch4 sl st to ring, ch3, 11 dc into ring. Join. (12 dc)
Round 2 :
Ch1, sc in same st, *ch3, skip 2 sts, sc into next dc; rep around forming picot-like spaces. Join. (12 sc + 12 ch-3 sps)
Round 3 :
Switch to motif color and in each ch-3 sp work (5 dc) shell. In sc spaces work 1 sc. Join. (Shells give a circular textured medallion)
Round 4 :
Turn your medallion into a square by working sc rows: In 4 positions evenly spaced work (1 sc, ch2, 1 sc) to start corners, then work sc evenly around making 3 sc into each corner ch-2 sp. Join and fasten off. (Square now approximated)
Info :
Use this motif to create occasional variation if you want a center focal square; not required for a standard repeat layout. Block as usual.
— Joining Squares: Layout & Join-As-You-Go (JAYG) :
Info :
Layout: The pictured runner has 7 columns x 5 rows. Suggested layout alternates motifs ABBA B AB pattern across rows to create a checkerboard of texture and color. Plan your layout before joining to balance red and green squares evenly.
Join Method Overview :
We use a JAYG slip-stitch seam in the final cream round of each square so the seam becomes part of the motif border and no additional seaming is required except for vertical seams at the ends and to attach border rounds.
Joining Round 1 :
Work the final round of the square in cream until you reach a side that should attach to an existing square. Instead of working regular stitches into the free space, join with sl st into the corresponding stitch or ch-space of the adjacent, already-joined square, then continue around. Where you attach to two squares at a corner, sl st into both adjacent corners as needed to form a neat corner join.
Info :
When starting the first square of the first row, work full final round without joining. For the first row, join each subsequent square to the previous adjacent square along one side only (left or right depending on direction). When working the second row, join the lower edge of each square to the top edge of the square below using sl sts into corresponding stitches; where squares touch at four points, secure both seams for stability.
Joining Round 2 :
Maintain even tension in JAYG joins. If the join pulls the square inward, use fewer sl sts and leave slightly more room between joins. If the join is too loose, add an extra sl st in the middle of side to tighten seam.
Info :
Mathematics note: Each final cream round contains approximately the same number of hdc/sc stitches. When you sl st into the adjacent square you are replacing one stitch with a join; this keeps counts consistent. Keep track of corner ch-2 spaces and match them to the neighboring square corner ch-2 spaces to avoid mismatched edges.
— Assembling the Runner (Row by Row) :
Row Assembly Step 1 :
Make first full square for Row 1, Column 1. Place on blocking mat and pin to shape. Complete its final cream round fully (no joins) and fasten off tail if desired.
Row Assembly Step 2 :
Make Square for Row 1, Column 2. In its final cream round, when at the side that touches Column 1, replace the corresponding stitches by sl st into Column 1's final round to attach. Continue and finish the square. Repeat for Columns 3-7 to complete Row 1.
Row Assembly Step 3 :
For Row 2 begin with Square Row 2, Column 1. In its final round, join to the back edge of Row 1, Column 1 where they meet: sl st into the top round of the square above at corresponding positions. Proceed across the row, joining each square to the square above and to the previous square in the same row when appropriate (two joins for interior squares).
Info :
When two squares meet at a corner, secure both with a sl st to the corner ch-2 spaces of the neighbor for a tidy corner with no gaps. For end squares along the length, you will have an exposed outer edge that will be finished by the lacy border later.
— Edge Preparation Before Border :
Info :
Once all squares are joined into an assembled rectangle/strip, weave in ends and press lightly with blocking steam (not iron directly). Pin outer edges flat and measure to ensure the rectangle is square and edges are even before beginning border rounds.
— Lacy Border: Round-by-Round (Cream) :
Round 1 :
With cream, join yarn at any corner ch-2 space; ch1, 1 sc in same sp, *work sc evenly along edge in each stitch and space; in each corner ch-2 space work (sc, ch2, sc). Join with sl st to first sc. (Edge sc count will correspond to perimeter stitches; corners have ch-2s)
Round 2 :
Ch3 (counts as dc), dc in same st, *skip 2 sts, (dc, ch1, dc) in next st to create shell spacing across; in corner ch-2 do (dc, ch2, dc). Repeat around. Join. (Shell pattern appears; maintain symmetry across lengths)
Round 3 :
Ch1, sc across each stitch and in each ch-1 space around. In corner ch-2s work (sc, ch2, sc). Join. (This evens base for final scalloped edge)
Round 4 :
Switch to decorative scallop: *In next sp work (5 dc) shell, sl st in next sp; rep across; in corners work (5 dc, ch2, 5 dc) to accent corner. Join and fasten off. This creates an elegant shell scallop along the entire perimeter.
Info :
If you prefer a narrower edge, stop after Round 2 or 3. For a more ornate finish add an additional round of picots: ch3, sl st in next, ch3, sl st, spaced between shells.
Round 5 :
Optional: Work a delicate looped border by placing (sc, ch4, sc) into the top of each shell and (sc) between shells. Join and fasten off. Weave in ends and lightly block the finished runner to emphasize scallops.
— Finishing Touches & Blocking :
Info :
Weave in all tails with a yarn needle, burying ends through several stitches for durability. Block runner to final measurements: dampen lightly, pin shells to create an even scalloped edge, allow to dry completely. This will flatten joins and allow star/puff textures to sit nicely.
Info :
Care: Hand wash gently in cool water, reshape and dry flat. Avoid hot water or agitation which can distort puff texture or cause bleeding in red/green yarns. For long-term storage, keep rolled or flat wrapped in acid-free tissue paper to avoid creases.
Completing this runner is a joyful process: watching each textured star and snowflake come together into a long, lacy strip is wonderfully rewarding. The cream border ties the festive reds and greens into a refined holiday centerpiece you’ll be proud to display. 🧶✨ Lay it across your table, add candles and greenery, and enjoy handmade charm all season long. Happy stitching — your table is about to get very cozy! 🎄