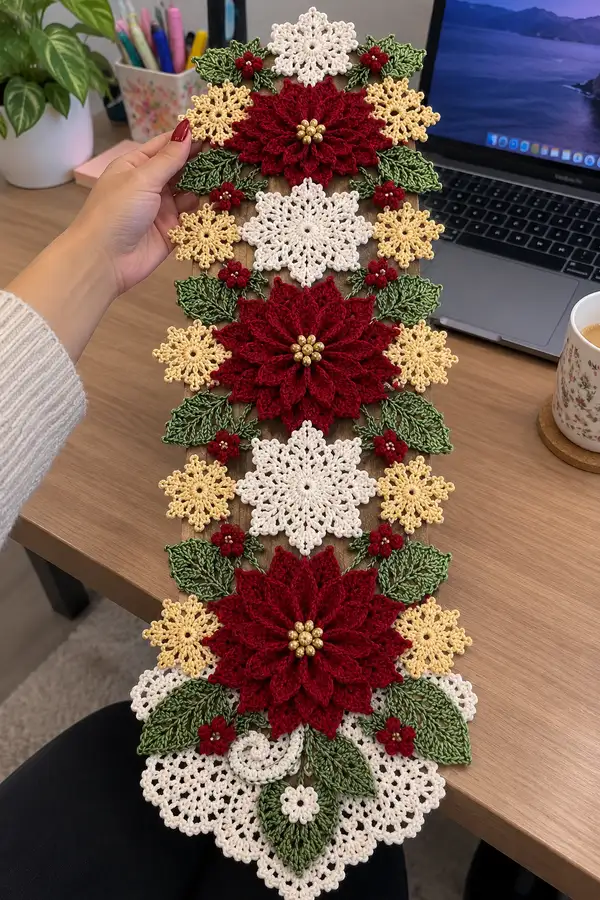
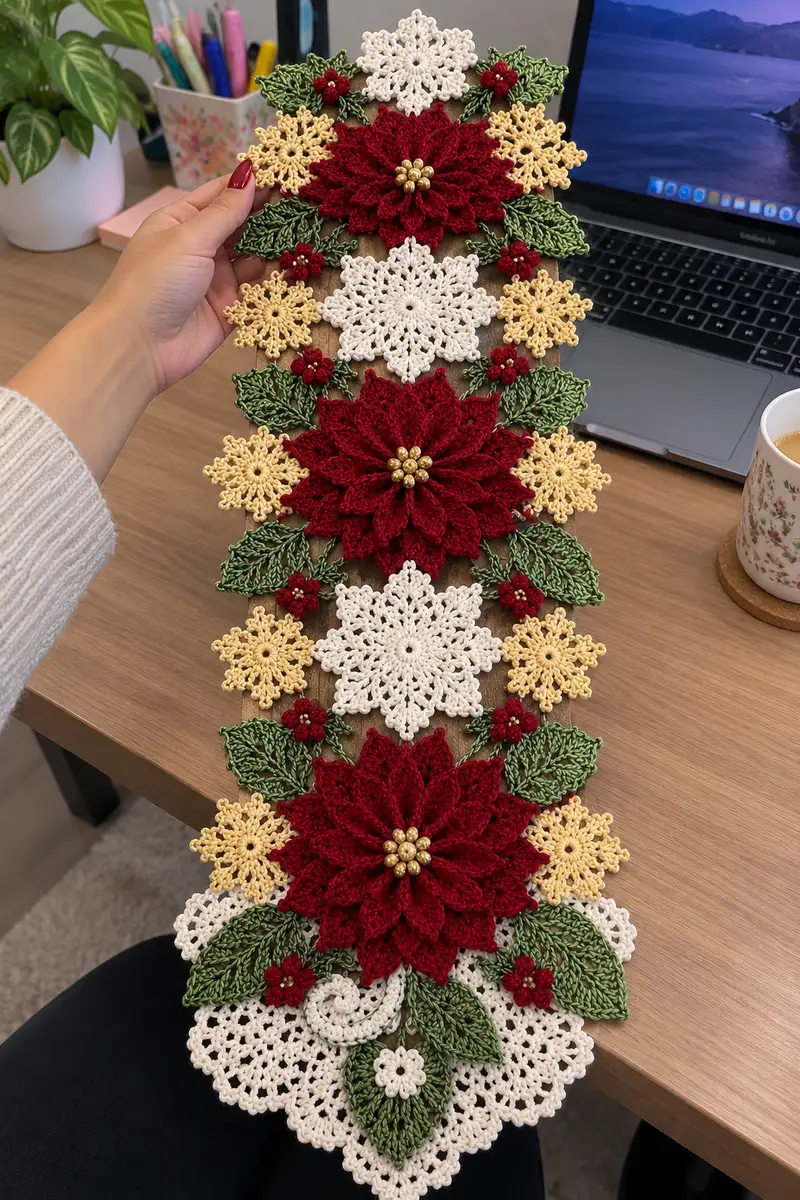
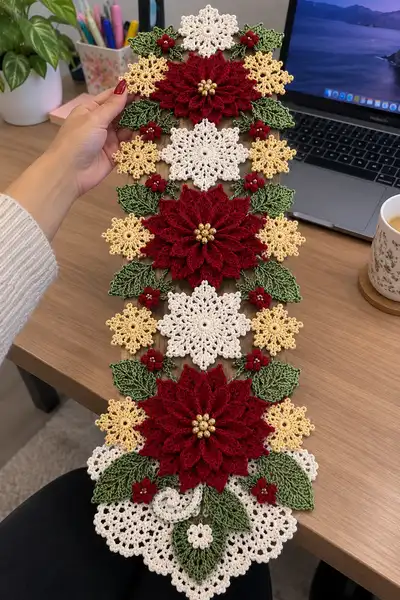
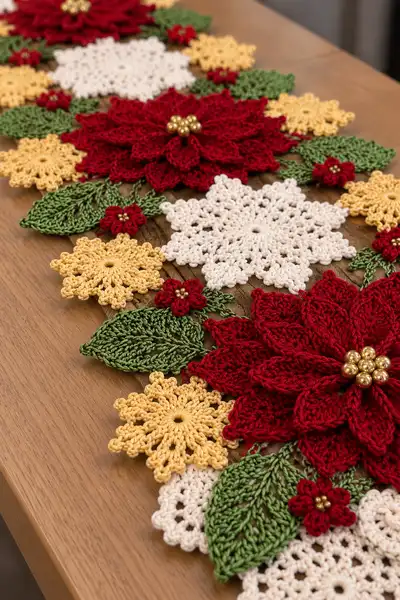
Create a stunning holiday table runner featuring layered poinsettias, lacy snowflake motifs, delicate golden stars and leafy vines. This long, decorative runner is worked motif-by-motif in mercerized cotton or cotton-blend yarn and assembled into a festive centerpiece. The contrasting cream, gold, deep red and green motifs create a traditional seasonal palette that dresses any table. Detailed stitch-by-stitch instructions and placement tips guide you through making and joining each element for a professional finish.
Progress Tracker
0% Complete
— Pattern Overview :
Info :
This pattern is written motif-by-motif: large layered poinsettia (make 3), large lace snowflake/doily (make 3), small star snowflake (make 8), leaves (make 18), tiny 5-petal flowers (make 10), and a scalloped base doily section (make 2). All motifs are made flat and blocked before joining. Use 3.5mm hook as recommended for the yarn listed. Work tightly enough to keep lace stable but with enough give to block effectively.
— Materials & Tension Notes :
Info :
Gauge is not critical because motifs are joined and blocked, but for consistency: a finished large poinsettia should measure approx. 15-17cm (6-6.75in) across when blocked. If motifs differ more than 5% between repeats, adjust tension or hook size to match.
— Poinsettia (Large Layered Flower) - Make 3 :
Round 1 :
With deep red, ch 4, join with sl st to form a ring, or work mr. ch3 (counts as dc), 11 dc into ring, join with sl st to top of ch3 (12 dc)
Round 2 :
ch3 (counts as dc), dc in same st, 2 dc in each st around, join (24 dc)
Round 3 :
ch1, sc in same st, (ch3, sk next st, sc in next) repeat around to create 12 ch-3 loops, join (12 loops)
Info :
These loops will form the base for the first petal layer. Use stitch marker at start of each round for consistent placement of petals.
Round 4 :
Work first petal round into each ch-3 loop: (sl st into loop, ch1, sc, hdc, 3 dc, hdc, sc) in each loop; join end of each petal to base with sl st (12 petals; petal tip = 3 dc)
Round 5 :
ch1, sc around base joining stitches between petals into each base st and around petals' inner join to stabilize (approx 36 sc) - count and adjust to maintain even round
Round 6 :
ch5 (counts as tr+ch2), *sk next sc, tr in next sc, ch2; rep from * to end (12 tr with ch-2 spaces) join
Round 7 :
Work second larger petal into each ch-2 space: (sl st into space, ch1, sc, hdc, 5 dc, hdc, sc) in each space (12 larger petals)
Info :
Second layer petals are larger to create depth. Block each petal with pins if needed to open them flat before continuing.
Round 8 :
ch1, sc around petal joins (approx 48 sc). Adjust to keep count even across petals.
Round 9 :
ch4 (counts as tr), tr in same st, *sk 2 sc, 2 tr in next sc; rep around (48 -> forming 24 tr-pairs), join
Round 10 :
Work third smallest petal layered between pairs: into the space between the tr pair work (sl st, ch1, sc, 3 dc, sc) to create small pointed petals (24 small petals)
Round 11 :
ch1, sc around all joins to stabilize (approx 72 sc). Weave in ends but leave tail for final sewing if desired
Round 12 :
Flip flower and with BLO on the very center round, work (ch2, hdc) around center to create a raised cup for beads (approx 24 sts) and secure with sl st
Info :
Place bead cluster now: with beading needle and thin thread, sew 7 gold beads into a tight circular cluster through the center cup. Secure thread and weave in tail on the back. Alternatively, glue beads lightly from back for extra security but avoid excess glue.
Round 13 :
Optional surface slip stitch around petal edges to add texture: with contrasting darker red or same, sl st around petal edges at tip points, approx 72 sl sts
Info :
Block the finished flower flat, pinning each petal to the desired shape. Allow to dry fully before assembly. Repeat to make 3 identical poinsettias ensuring bead centers are centered and petals arranged evenly.
— Large Lace Snowflake / Medallion (Cream) - Make 3 :
Round 1 :
With cream, ch4, join into ring, ch3 (counts as dc), 11 dc into ring, join (12 dc)
Round 2 :
ch3, dc in same st, 2 dc in each st around, join (24 dc)
Round 3 :
ch1, sc in same st, (ch5, sk next st, sc in next) around to make 12 ch-5 loops, join (12 loops)
Round 4 :
Into each ch-5 loop: sl st, ch1, sc, (ch2, 3 dc, ch2, sc) - this forms a lacy petal; rep around (12 petals)
Round 5 :
ch3, *3 dc in ch-2 space of petal, ch1, sc between petals; rep around (approx 48 dc + sc joins), join
Info :
These early rounds set the snowflake arms; keep loops even. Use blocking heavily on this motif to open lacework and form crisp points.
Round 6 :
ch1, sc into top of each 3-dc cluster and sc between clusters to create a solid ring (approx 72 sc)
Round 7 :
ch5 (counts as tr+ch2), tr in same st, *sk 2 sc, tr in next sc, ch2; rep around to form extended arms (24 tr with ch-2 spaces), join
Round 8 :
Into each ch-2 space: sl st, ch1, sc, hdc, 3 dc, hdc, sc to form pointed star arms (12 larger points)
Round 9 :
ch1, sc around joins to stabilize (approx 96 sc counting small joins). Ensure points are symmetrical
Round 10 :
ch3, dc in same st, *ch3, skip next 2 sc, (2 dc, ch1, 2 dc) in next sc, ch3; rep to create small lobes between arms, join (creates 12 lobes)
Round 11 :
Work picot edging on points: into each outermost dc group, (sc, ch3, sl st in 3rd ch) creating decorative picots around all 12 points (approx 12 picots)
Info :
After completing, pin the snowflake to blocking mats with pins in each point and lobe. Spray lightly with water or a starch solution for crispness. Leave to dry fully before unpinning and joining.
Round 12 :
Optional: Work one final round of sl st around to even edges and create firm outline, approx 120 sl sts
— Small Gold Star / Snowflake Motif - Make 8 :
Round 1 :
With gold, ch4 join, work 12 dc into ring, join (12 dc)
Round 2 :
ch1, sc in same, (ch4, sk next dc, sc in next) around to make 6 ch-4 loops, join (6 loops)
Round 3 :
Into each ch-4 loop: sl st, ch1, sc, hdc, (3 dc, ch2, 3 dc), hdc, sc to form star point (6 points)
Round 4 :
ch1, sc around joins and in between points approximately 36 sc. Fasten off and weave ends. Block lightly to open points.
Info :
These small stars sit in the gaps between larger motifs and help fill negative space. Make 8 and block them to equal sizes for tidy assembly.
— Leaf Motif (Large) - Make 18 :
Round 1 :
With green, ch7, work on one side of chain: sc in 2nd ch from hook, hdc next, dc next, 3 tr in next, dc next, hdc next, sc in last ch; turn and work same stitches down the other side into base of first sc; join with sl st at base to form leaf (approx 14 sts shaped)
Round 2 :
ch1, sc in base join, *ch3, sk 1, sc in next along outer edge to create decorative veins; rep around outer edge then inner edge to form symmetric holes; join (approx 20 loops)
Round 3 :
Switch to BLO for raised vein effect: (ch2, hdc) in stitches along midline only to create prominent central vein (approx 6-8 sts), join and weave in ends
Info :
Block leaves gently to create a slight curve. Stagger stitch markers if you plan to stitch multiple leaves in a layered arrangement under poinsettias.
Round 4 :
Optional surface slip stitch veins: with contrasting darker green, surface sl st from base to tip following central vein for definition
— Tiny 5-Petal Flower (Berry) - Make 10 :
Round 1 :
With berry red, mr, ch1, work 10 sc into ring, join (10 sc)
Round 2 :
*ch3, sl st into next st; rep around to form 5 ch-3 petals, join (5 loops)
Round 3 :
Into each ch-3 loop: (sl st, ch1, sc, picot (ch3, sl st in 3rd ch), sc) to make tiny pointed petals; join and leave long tail for sewing. Sew 3 small gold beads into center with thin thread
Info :
Tiny flowers are used as accent berries around the runner. Use a beading needle to attach seed beads securely and weave ends through back of petals to hide yarn tails.
— Scalloped Base Doily Section (Cream) - Make 2 :
Round 1 :
With cream, ch6 join to ring, ch3 (counts as dc), work 23 dc into ring, join (24 dc)
Round 2 :
ch1, sc in same, *ch5, sk 1, sc in next; rep around to make 12 ch-5 loops, join (12 loops)
Round 3 :
Into each ch-5 loop work (sl st, ch1, sc, hdc, 5 dc, hdc, sc) to form 12 scallops, join
Round 4 :
ch1, sc around scallop bases approx 72 sc to stabilize edge
Round 5 :
Edge picot: *sc, ch3, sl st in 3rd ch across top of each scallop to create delicate points; rep around; fasten off and block
Info :
These two scalloped doily halves form the ends of the runner. Block them to match size precisely; this helps the center medallions sit evenly between them.
— Spiral Vine & Filler Scroll - Make 4 :
Round 1 :
With green, ch30 (or desired vine length), turn and in 2nd ch from hook sc, hdc, dc, dc, hdc, sc across forming a graduated curve (approx 28 sts). Fasten off leaving long tail
Round 2 :
Wrap central portion with chain loops for fern effect: join yarn, *ch6, sl st into vine every 4-5 sts to create looped fern; rep along vine length; fasten off
Info :
Vines act as connectors between motifs. Leave long tails to stitch them invisibly to the backs of motifs when assembling. Pin vines into a natural flowing curve when laying out runner.
— Assembly & Joining Motifs :
Info :
Lay out all motifs on a flat blocking board or on a table covered with a towel. The sample layout is: scallop base - small gold star clusters and leaves - large white medallion - leaves and gold stars - large red poinsettia - repeat pattern up to three repeats and end with scallop base. Ensure spacing of approx 1-2 cm between primary motifs. Pin motifs in place before sewing.
Round 1 :
Sew motifs together using invisible ladder stitch or whip stitch with yarn tail left on each motif. Attach leaves underneath layered poinsettias to create natural overlap: sew leaf bases to rounds where petals join (under petal round 5) so leaves peek out naturally (use approx 8-10 small stitches per leaf)
Round 2 :
Attach vines by stitching vine tails to the backs of motifs and catching the connector loops on the front where visible. Use small backstitches along vine to secure against daily handling
Round 3 :
Sew small gold stars into gaps between larger motifs: position star points touching petals and tack with two or three tiny stitches so they appear to float above the runner base
Info :
If you prefer a single continuous runner fabric instead of motif-on-board, join motifs with slip-stitch join or single crochet join through both motif edges, keeping join stitches tidy and consistent. For a stronger join, sew then slip-stitch over the seam for decorative border.
Round 4 :
Edge finish: once all motifs are joined, work a single round of sc around entire outer edge catching both motif edges to create unified border (approx counts depend on final assembled size). Add a finishing picot round for extra crispness: *sc, ch3, sl st in 3rd ch; rep along outer edge.
Info :
Weave in all ends from the right side where possible or hide on back of motifs. Use blocking once more after assembly to coax seams flat and ensure a polished, uniform appearance.
— Detailed Poinsettia Petal Variation (Alternate Layering) :
Round 1 :
Alternate deeper petal shaping: after Round 3 base loops, work elongated petals: (sl st, ch1, sc, hdc, 7 dc, hdc, sc) for deeper petals (12 deep petals)
Round 2 :
Follow with intermediate petals into the ch-2 spaces between deep petals: (sl st, ch1, sc, hdc, 4 dc, hdc, sc) to create three visible layers; join and secure with sc rounds between layers
Info :
This variation increases bulk and shadowing. If you make this version, you may want to block petals individually before sewing them together so they maintain separation and dramatic overlap.
— Stitch Math & Troubleshooting Info :
Info :
Always verify math when shaping petals and points. Example: 12 base loops x 6 sc join points = 72 sc approximate. If you get 70 or 74, recount petal joins and add/subtract sc evenly around round to maintain symmetry. Use stitch marker at start of each round for accuracy.
— Finishing Touches :
Round 1 :
Attach extra beads to leaf bases or flower centers as desired. Add a touch of fiber-friendly fabric paint or soft chalk blush to petal edges for subtle shading (test on scrap first).
Info :
For a more durable runner, attach motifs to a narrow backing strip of fabric or felt using small stitches hidden behind leaves; this also allows easy removal for washing individual motifs if needed.
Round 2 :
Final pressing: after all beads are sewn and ends woven in, steam block on low to preserve shape (avoid direct iron contact with beads and metallic threads). Allow to dry completely before use.
This festive runner brings classic holiday flowers and lacy snowflakes together in a single, elegant piece. Each motif is a little work of art and the layered textures create beautiful depth across your table. I hope you enjoy making, blocking and assembling these pieces — the final result is a lovely heirloom you can use year after year. 🌟🧶