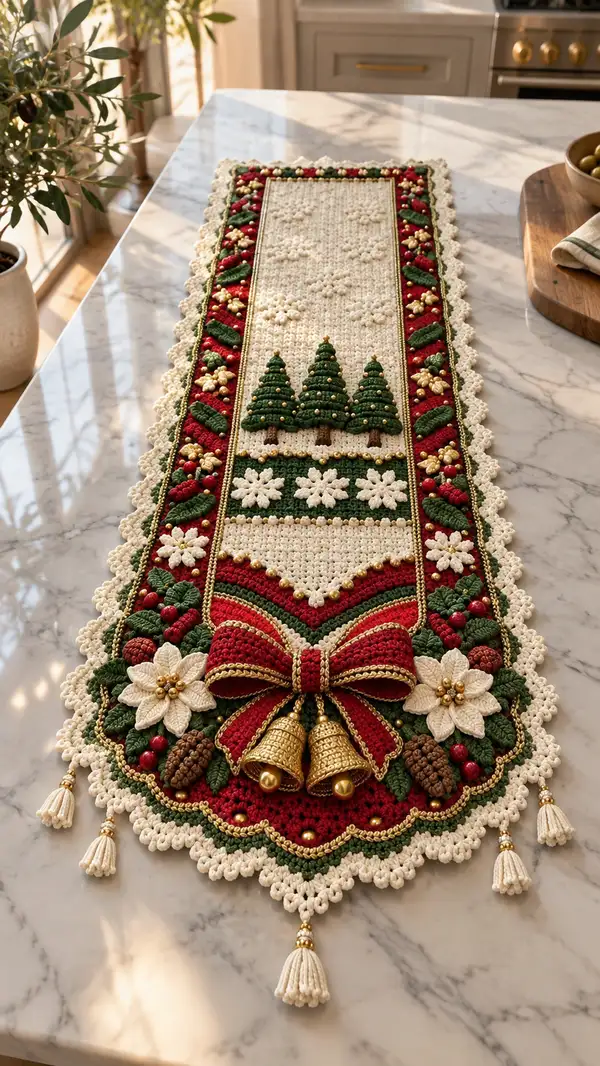
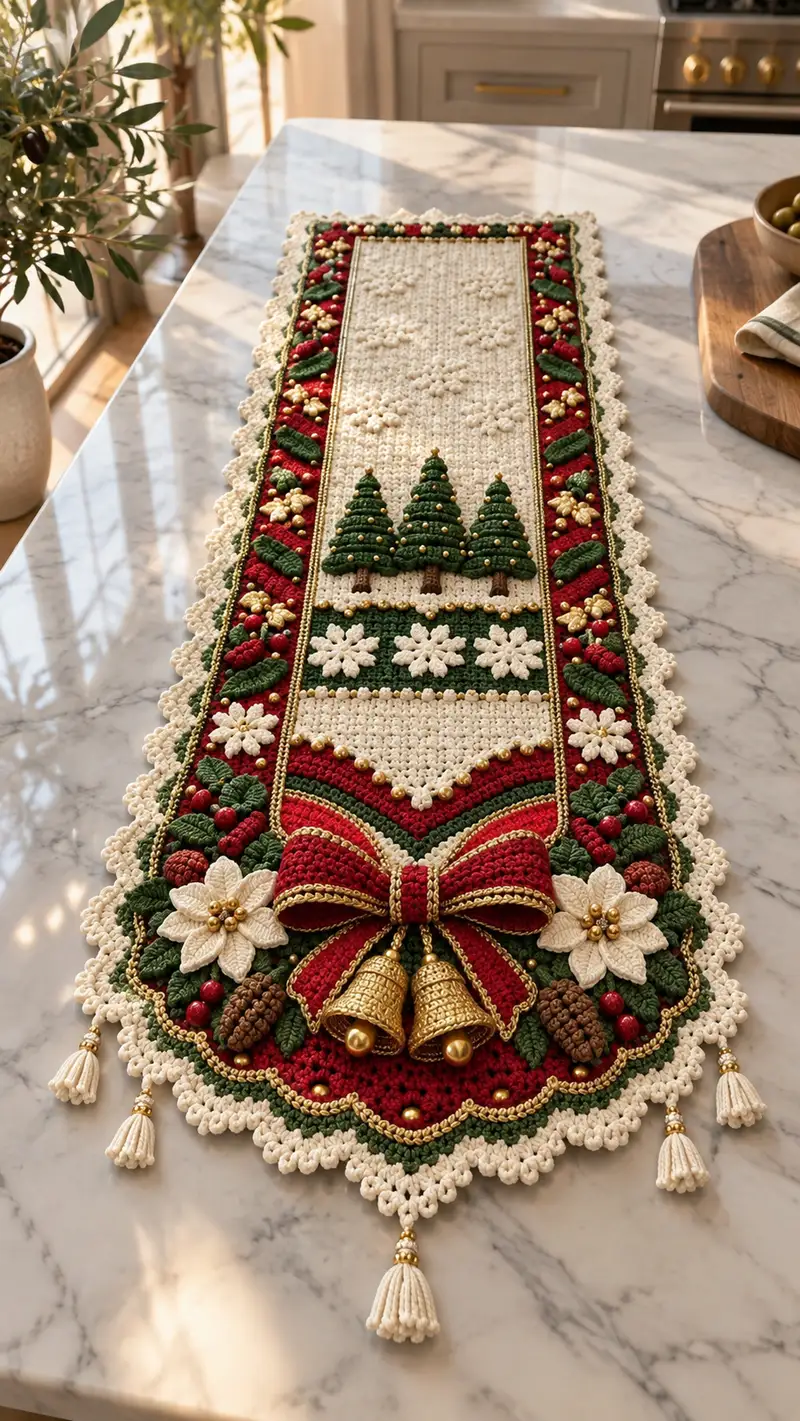
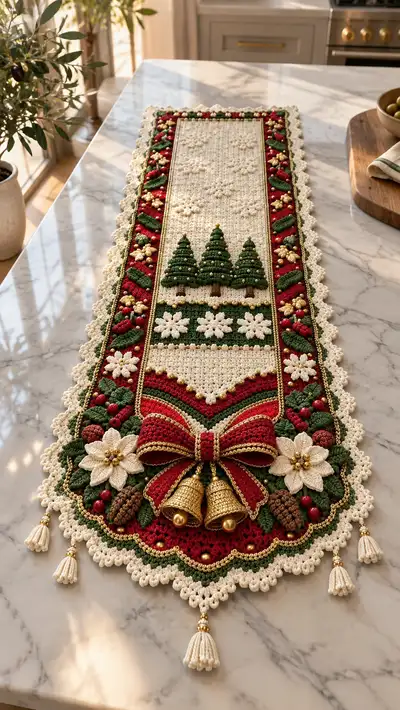
A richly textured holiday table runner featuring a central cream panel with raised snowflake bobbles, three dimensional evergreen trees, poinsettias, pinecones, and a sculpted bow with dangling bells and tassels. Deep red, forest green, cream and metallic gold accents combine for a luxurious seasonal centerpiece. The pattern includes textured stitches, crochet appliques, beadwork placement and finishing tips for a polished heirloom look.
Progress Tracker
0% Complete
— Center Panel :
Round 1 :
Foundation: Ch 61, turn (this creates 60 working sts across) — counts referenced below assume 60 sts per row
Round 2 :
Row 1 (RS): Sc in 2nd ch from hook and in each ch to end (60) Turn
Round 3 :
Row 2 (WS): Ch1, sc in each st across (60) Turn
Round 4-7 :
Work 4 rows: Ch1, sc in each st across (60). These create a solid base for textured bobbles
Info :
Use cream yarn. Keep tension tight so bobbles are defined and stuffing does not show through. Place a stitch marker at the first stitch of each RS row to keep track of edges.
Round 8 :
Row 7 (RS): Ch2 (counts as hdc), hdc in next st and in each of next 59 sts across (60 total hdc), turn
Round 9 :
Row 8 (WS): Ch1, sc in each st across (60) Turn
Round 10 :
Row 9 (RS): Ch1, sc in first 10 sts, *popcorn bobble over next 5 sts (see notes), sc in next 10 sts, rep from * across to end (placement: 4 bobble clusters across row). End so row total remains 60. Turn
Info :
Popcorn (pc) = work 5 dc into same st, drop loop from hook, insert hook in top of first dc of the 5, pick up dropped loop and sl st to close. Each popcorn occupies the space of 5 sts; adjust sc counts between popcorns to keep 60 sts total.
Round 11 :
Row 10 (WS): Ch1, sc in each st and around each popcorn (treat popcorn as 1 st) (60) Turn
Round 12 :
Row 11 (RS): Ch1, sc 6, *pc, sc 12, pc, sc 6; rep across if needed so pattern centers (60) Turn
Round 13-18 :
Rows 12-17: Continue in pattern of sc across with occasional pc placements to create a staggered snowflake field. The following repeats give a balanced look: Sc rows alternating with rows containing 3-4 pc clusters centered. Always ensure you end the row with total 60 sts by treating each pc as 1 st in counts. (60 each row)
Info :
Place safety beads or small gold beads into the center of some popcorns before closing the popcorn loop if you want a beaded center. Use a fine needle to catch the bead and position it under the popcorn before closing it fully.
Round 19 :
Row 18 (RS): Ch1, sc in every st across (60) Turn
Round 20 :
Row 19 (WS): Ch1, sc in each st across (60) Turn
Round 21 :
Row 20 (RS): Ch1, (sc in next 5, fpdc around next st) x 10 to create subtle vertical ribs across field. This maintains 60 total stitches. Turn
Round 22-28 :
Rows 21-27: Sc in each st across (60) Turn. These rows create vertical height for the center panel to allow for applique trees placement later.
Info :
Measure length as you go. The center panel in the sample measures approximately 26-28 inches long for a medium runner. Adjust the number of even sc rows for a longer or shorter runner. Keep track of number of rows so left and right borders will match when attaching.
Round 29 :
Row 28 (RS): Ch1, sc 12, *hdc 4, sc 16; rep once more across, sc to end (60) Turn
Round 30-36 :
Rows 29-35: Work 7 rows of sc across (60), forming a clean rectangular panel. (60)
Info :
Block the center panel flat before attaching border motifs. Pin to blocking board keeping edges straight and steam lightly if using cotton-blend yarn, or wet-block for cotton. Blocking helps appliques sit flat when sewn on.
— Side Border Strip (Make 2 — left and right identical) :
Round 1 :
Foundation: Ch 21, turn (20 working sts) — each border strip will be joined to the center along its long edge; strips should match center length when complete
Round 2 :
Row 1 (RS): Sc in 2nd ch from hook and in each ch across (20) Turn
Round 3 :
Row 2 (WS): Ch1, sc across (20) Turn
Round 4 :
Row 3 (RS): Ch2, hdc across (20) Turn
Round 5 :
Row 4 (WS): Ch1, sc across (20) Turn
Info :
Use deep red as the background color for border strips. The strip width (20 sts) aligns so when sewn along the center's edge the entire runner width becomes ~100 sts including both borders and center—adjust as you prefer.
Round 6 :
Row 5 (RS): Ch1, sc across (20) Turn
Round 7 :
Row 6 (WS): Ch1, sc in each st across (20) Turn
Round 8 :
Row 7 (RS): Ch1, sc 3, *make leaf motif across next 6 sts (leaf pattern described in separate section), sc 11; this anchors first leaf cluster near top edge. Adjust spacing if needed (20)
Info :
Leaf motif: worked in green yarn, created as small 3D leaf applique in-situ — see Leaf Applique section for the exact rounds for each leaf. Each leaf is sewn into place on the strip as you progress so the piece remains balanced.
Round 9-28 :
Rows 8-27: Repeat alternating rows of sc with inserted leaf and berry clusters. For a strip length matching center panel, you will work approximately 40-50 rows total — continue until strip equals center panel length. Every 6-8 rows place a cluster of 3 leaves + 3 berries with small gold bead in the middle flower between leaves. Maintain 20 sts count each row by treating appliques as attached, not added to stitch count. (20 each row)
Info :
Use small red beads to create berries — stitch them into place using needle and thread as you attach each berry stitch. Also add tiny gold beads between leaf clusters for sparkle. Keep spacing symmetrical on both strips.
— Leaf Applique (Make 20 for both borders) :
Round 1 :
Magic ring: Ch1, 6 sc in magic ring, pull tight (6) — composited as a base for a small leaf
Round 2 :
Ch1, sc in first 6 sts (6) — arrange ring into elongated shape (no increase) Turn
Round 3 :
Working along one long side: Ch1, sc, hdc, dc, tr, dc, hdc, sc along side; work same along opposite side to meet at base, sl st to join. This creates a pointed leaf shape (approx 12 sts around)
Round 4 :
Edge: Ch1, *sc in each st around the leaf working 1 sc per tall stitch and 2 sc in smaller gaps to keep counts even — finish with sl st (approx 14-16 total - treat as 1 attached element)
Info :
Sew leaf to border strip with a lengthwise center vein using a running stitch in matching green yarn. Place a small gold bead at the leaf base for highlights when attaching to strip.
— Berry and Gold Seed Cluster (Make 40 berries, 30 gold clusters) :
Round 1 :
Ch2, 6 sc in 2nd ch from hook (6) Alternatively work magic ring 6 sc and leave short tail (6) Fasten off leaving long tail for sewing
Info :
Use red yarn for berries, attach small round red beads to some berries, and sew them into clusters of 2-3 among leaves along the border strips. Gold seed clusters are made from metallic thread forming tiny french knots on a small backing circle (4-6 knots).
— Pinecone Applique (Make 2) :
Round 1 :
Magic ring: Ch1, 6 sc in mr (6) Tighten and join with sl st (6)
Round 2 :
Ch1, inc in each st around (12) Join and turn
Round 3 :
Ch1, (sc 1, inc) x6 (18) Join
Round 4 :
Ch1, sc 2, *pc (popcorn) over next 5 sts, sc 1; rep 2 more times to create 3 rows of scales; treat each pc as 1 st in counts. Maintain overall shape by adjusting sc spacing so final round has 18 st-equivalents
Round 5 :
Ch1, sc around to tidy, leaving opening at base for a little fiberfill; stuff lightly and close with sl st and fasten off with long tail for sewing (18)
Info :
Use medium brown and work popcorns in darker brown for scale contrast. Sew pinecone at border base near bow area; anchor with multiple passes for weight.
— Poinsettia Flower (Make 2 large flowers) :
Round 1 :
Magic ring: Ch1, 8 sc in mr; pull tight (8)
Round 2 :
Ch2, (dc, tr, dc) in each st around to create 8 petals—each petal worked into a single base st (24 petal-stitches counted as 8 petal groups) Fasten off petals leaving tail
Round 3 :
With cream yarn, sew a smaller 5-petal centre: mr, 5 sc, work small picot on each petal (5) Attach to centre and add gold beads in center cluster (5 small gold beads sewn tightly)
Info :
Each poinsettia has layered petals — make one outer layer in cream and a slightly smaller inner layer offset by one petal so that petals overlap pleasingly. Add cluster of gold beads in center when sewing flower to border.
— Three-Dimensional Tree Applique (Make 3 trees) :
Round 1 :
Trunk base: Ch4, sl st to form small loop; with brown, sc 6 in loop (6) Fasten off leaving tail for sewing trunk later
Round 2 :
Tree tier 1 (bottom): With green, make a small cone. Magic ring: 6 sc in mr (6)
Round 3 :
Ch1, inc in each st around (12) (this creates a small flared cone) Do not join
Round 4 :
Ch1, (sc 1, inc) x6 (18) — shape increases to form bottom tier of tree
Round 5 :
Fold cone slightly and work a round of dc around to create a textured edge, pull cone into three-dimensional shape
Round 6 :
Second tier: Join green at a st about 4 sts up from base; ch1, sc 12 in the row around to create the mid-tier (12)
Round 7 :
Ch1, (sc 1, inc) x6 (18) — flare out the mid-tier slightly
Round 8 :
Third tier (top): Join green, sc 10 in next rounds decreasing slightly to form tip: sc 10, then (sc 2tog) twice to taper. Stuff tiers lightly so tree stands proud but not overfilled (approx 14-16)
Info :
Sew brown trunk to bottom of tree and position three trees evenly across center panel lower third. Add gold bead baubles randomly across tree tiers by sewing through the fabric and securing on backside.
Round 9 :
Work surface crochet of tiny star or bead on tree tops: With gold thread, embroider a French knot or sew a small gold bead at tree tip. Fasten off and leave long tails for sewing to center panel (trees are appliques, not worked into center directly).
— Decorative Bow & Bells :
Bow Round 1 :
Foundation: Ch 31, turn (30 sts) Use deep red yarn
Bow Round 2 :
Row 1: Sc in 2nd ch from hook and each across (30) Turn
Bow Round 3 :
Row 2: Ch2, hdc across (30) Turn
Bow Round 4-9 :
Rows 3-8: Sc in each st across (30) Turn — this creates a flat wide band; make two identical pieces (these will be folded to make bow loops)
Bow Round 10 :
Make bow center: Ch8, work sc back across to create short band, fasten off leaving long tail for cinching and sewing
Info :
Fold each 30-st band accordion-style into a loop and wrap the center band around tightly; secure with yarn tail by stitching through multiple layers to hold the bow shape. Use gold thread to stitch decorative lines down bow loops before final assembly for metallic trim.
Bells :
Attach three small metallic bells to center bottom of bow using a short length of reinforced cord or chain stitch in gold yarn. Each bell should be sewn through its crown and anchored with multiple passes into the bow center. Slide a gold bead above each bell as finished in photo.
Info :
If you prefer not to use real bells, crochet bell-shaped cones in gold yarn and insert a small bead to simulate clappers. Secure to bow with strong thread and backstitching.
— Scalloped Edge and Gold Cord Trim :
Round 1 :
With cream yarn, attach to runner edge at corner. Ch3, (2 dc, ch2, 3 dc) in same st to form corner shell. Continue along long edge as follows: *skip 2 sts, (5 dc) in next st, skip 2, sl st in next st; rep to corner. This forms larger scallop shells spaced evenly. (Spacing and counts vary depending on total runner width)
Round 2 :
Work a round of single crochet along very edge to tidy and create a base for gold cord: Ch1, sc in each st and in ch2 spaces across scallops (count approx 180 sc around entire runner) Join
Round 3 :
Gold cord: Using metallic thread held double, chain a cord the length needed and whipstitch it into the scallop valley following scallop contours on either side of runner center and border seams. Secure every 5-8 cm to prevent shifting.
Info :
Edge counts must be adapted to your finished width. Work neatly and block the scallop edge after sewing to encourage crisp points. Use small gold beads sewn along scallop centers for additional sparkle as shown in the photo.
— Tassels (Make 6) :
Round 1 :
Create tassel body: Wrap cream yarn around a 4cm card 40 times, remove card, tie top loop with a short strand of yarn, cut bottom loop to form tassel, even ends to 5cm length
Round 2 :
Make top cap: Using gold yarn, wrap tightly around top 6-8 times and stitch base of tassel securely. Add gold spacer beads above tassel and secure with a knot. Repeat for all 6 tassels and attach to scalloped points using reinforced thread loops.
Info :
Attach tassels at scallop tips evenly spaced — photos show three on each long end with one in the central point and two at the outer scallops. Use heavy-duty thread for durability as tassels may be handled when moving runner.
— Assembly & Attachment of Appliques :
Round 1 :
Layout: Pin center panel flat on table and position both side border strips along long edges evenly. Ensure both border strips line up top-to-bottom with center panel — they should be identical length after blocking.
Round 2 :
Sewing center to border: With matching thread and a blunt tapestry needle, mattress stitch along the seam joining center panel edge to border strip, working from RS with small even stitches and pulling seams taut but not puckering. Work one long seam per side.
Round 3 :
Attach trees: Position three tree appliques centered across lower third of center panel with spacing of roughly 8-10 sts between tree edges. Sew each tree securely through trunk and base tiers to the center panel with multiple passes. Add gold bead star at each tree tip.
Round 4 :
Attach poinsettias: Place two poinsettia flowers one on each lower corner of the runner above the bow area. Sew through all petal layers and anchor with gold bead cluster in the center.
Round 5 :
Sew pinecones and berries: Tuck pinecones near the bow base and add berry clusters around them. Secure with multiple passes and anchor threads to the border strip backing so weight is distributed.
Info :
When stitching heavy elements like bells and pinecones, reinforce by stitching into the border seams and tying off on the WS. Consider adding a small felt patch behind heavy appliques for extra stability and to protect the stitches.
— Final Finishing :
Round 1 :
Weave in all ends: Use tapestry needle to weave tails into underside of runner, trimming close but not cutting into finished knots (leave small tail end tucked).
Round 2 :
Blocking and steam: Lightly block whole runner flat and re-position tassels and scallops so points are even. If using cotton, wet block and pin until fully dry. For delicate metallic thread avoid direct heat—steam lightly from the back.
Round 3 :
Quality check: Check every bead and bell to ensure secure stitching. Add extra passes under heavy stress points and apply a tiny dot of fabric glue behind a bead if looseness is detected (glue rarely needed).
Info :
Final runner length in example measures about 36 inches long by 10 inches wide (90cm x 25cm). Your measurements will vary with yarn and tension. Photograph your layout before sewing for reference and to help position symmetrical elements.
This festive table runner brings holiday elegance to any table with layered crochet details and three-dimensional appliques. Each stitch builds texture—from popcorn snowflakes to sculpted tree tiers, poinsettias, and a dramatic bow with gold bells. The finishing touches of beads, cord trim, tassels and a scalloped edge make this a standout centerpiece you’ll be proud to display. 🧶✨ Add it to your holiday décor or gift a handmade heirloom to someone special! 🎄