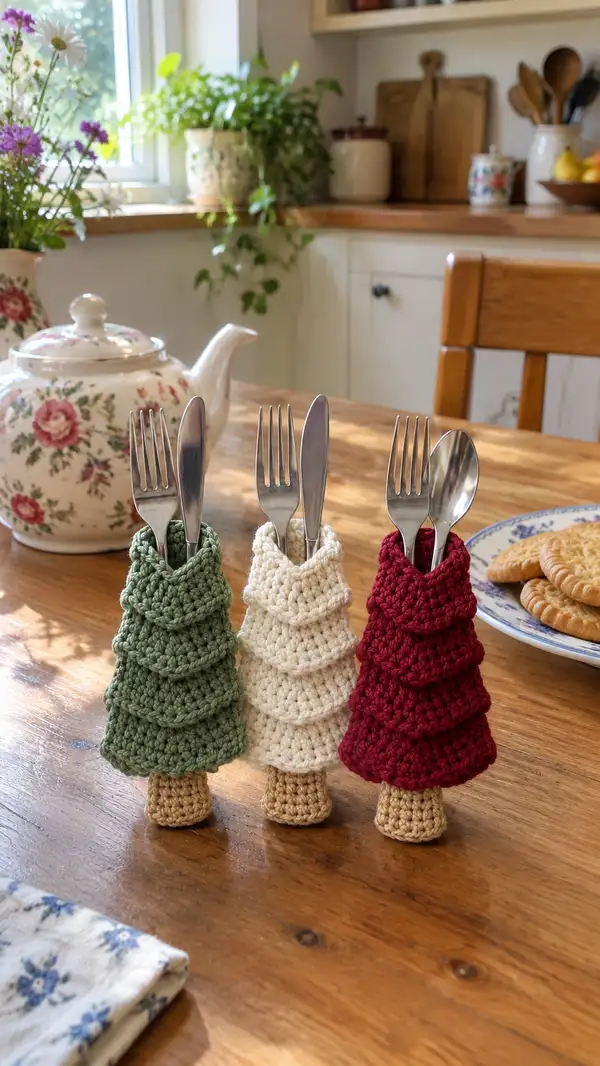
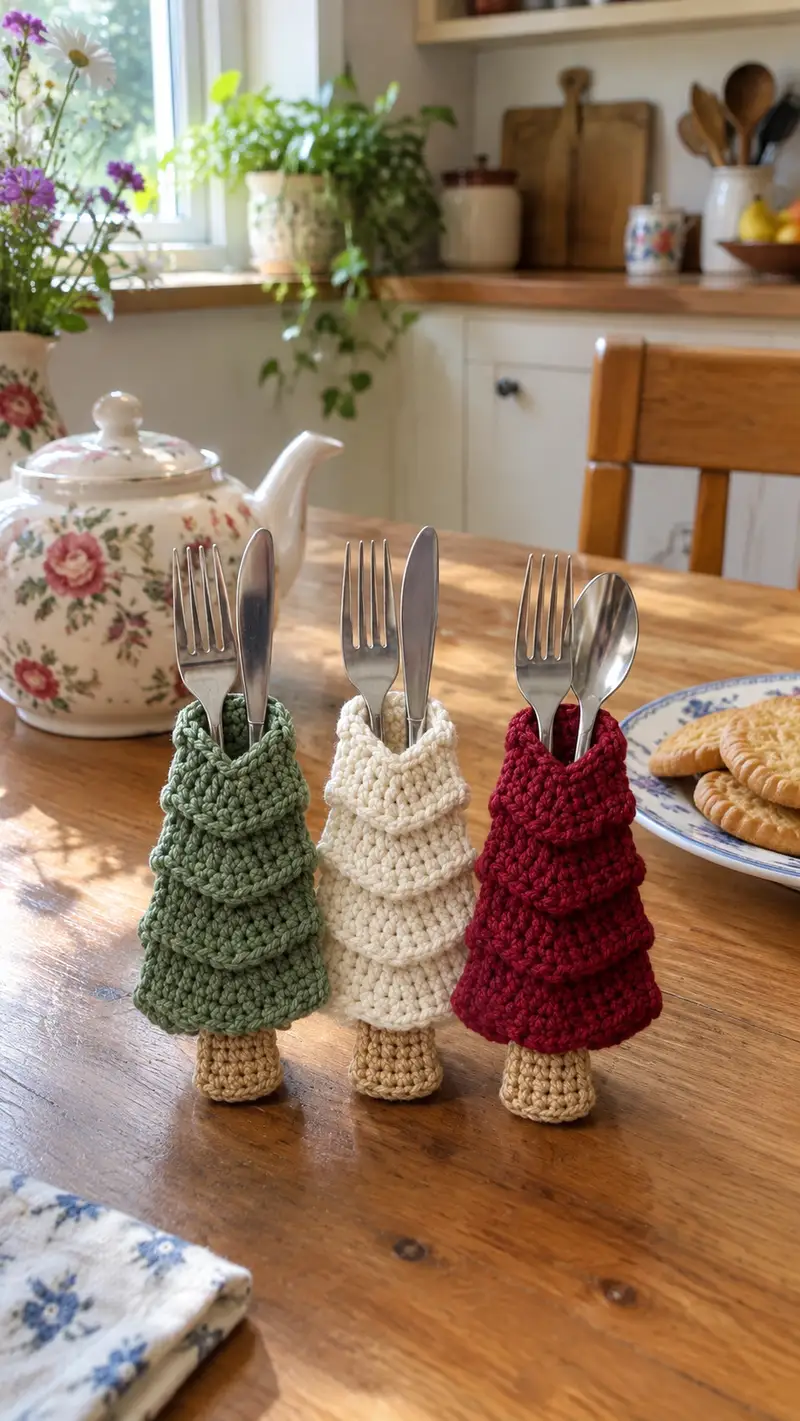
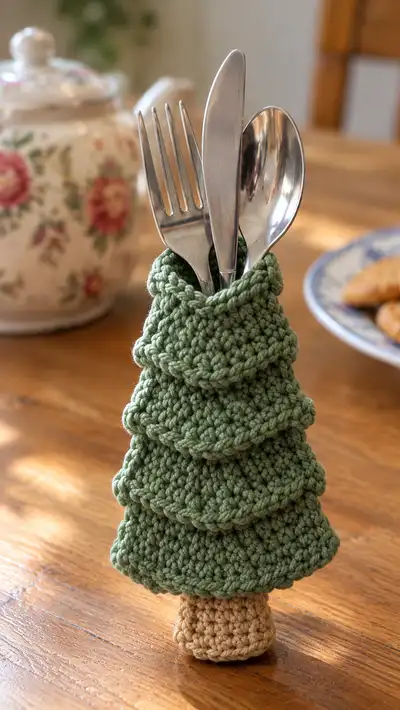
Create charming little stacked-tree cutlery holders perfect for holiday place settings. These small crocheted trees have a sturdy trunk and five layered scalloped tiers that fold into a neat cone, forming a cozy pocket for fork, knife and spoon. Shown in evergreen, cream and berry red, they make a delightful handmade table decoration or hostess gift. The pattern uses simple stitches and modular tiers so you can customize color and size easily.
Progress Tracker
0% Complete
— Trunk :
Round 1 :
6 sc in magic ring (6)
Round 3 :
(1 sc, inc) x 6 (18)
Round 4 :
(2 sc, inc) x 6 (24)
Round 5-8 :
1 sc in each st (24)
Info :
These rounds create the trunk diameter. Stuff the trunk lightly after round 6 to help it stand. Use fiberfill sparingly so stitches remain closed and tidy.
Round 9-12 :
1 sc in each st (24)
Info :
Work rounds 5-12 as a straight cylinder for a sturdy trunk. If you prefer a slightly narrower trunk, stop at round 10. For a taller trunk, add rounds of 1 sc in each st.
Round 13 :
Insert a long tail and sl st across next 6 sts to create a flat base edge. Fasten off leaving long tail for sewing (24)
Info :
Weave a few small stuffing pieces into the base to give weight. Fold the bottom edge under if desired and whip stitch closed for a neat base. Leave the top of trunk open to sew tiers onto it.
— Inner Sleeve (Cutlery Pocket) :
Info :
This inner sleeve is an optional structural insert that slips inside the tree between tiers to keep cutlery upright and protect lining stitches. It can be worked in a slightly thinner hook to fit snugly.
Round 1 :
6 sc in magic ring (6)
Round 3 :
(1 sc, inc) x 6 (18)
Round 4 :
(2 sc, inc) x 6 (24)
Round 5 :
(3 sc, inc) x 6 (30)
Round 6-14 :
1 sc in each st (30)
Info :
The inner sleeve is worked to a cylinder of 30 stitches to fit inside the cone formed by tiers. Try the sleeve inside the growing tree as you assemble to ensure a snug, non-bulging fit. Adjust rounds for taller or shorter cutlery sets.
Round 15 :
1 sc in each st BLO (30)
Round 16 :
Work one decorative round: (sc in next 2 sts, ch1, skip next st) around to create a small interior ridge (30)
Round 17 :
1 sc in each st (30)
Round 18 :
Fasten off leaving long tail. Slip sleeve inside tree later and tack gently to trunk at three equidistant points.
— Base Tier (Tier 1 - Largest) :
Round 1 :
6 sc in magic ring (6)
Round 3 :
(1 sc, inc) x 6 (18)
Round 4 :
(2 sc, inc) x 6 (24)
Round 5 :
(3 sc, inc) x 6 (30)
Round 6 :
(4 sc, inc) x 6 (36)
Round 7 :
(5 sc, inc) x 6 (42)
Round 8 :
(6 sc, inc) x 6 (48)
Round 9-12 :
1 sc in each st (48)
Info :
These rounds form the widest tier. Work in worsted cotton for crisp scallops. If you prefer a narrower base, stop increasing at round 7 (42 sts) and proceed.
Round 13 :
1 sc in each st BLO (48)
Round 14 :
(5 sc, shell) x 8 around — shell = 5 dc in next st (48)
Info :
Shell round: work 5 dc into one stitch where directed; do not increase stitch count. Working shells onto single stitches every 6th stitch creates 8 scallops spaced evenly across 48 stitches.
Round 15 :
sl st in top of next dc to sit on outer edge, ch1, *1 sc in each of next 5 dc of shell, 1 sc in each of next 5 sc; rep from * to end (48)
Round 16 :
Fold the shell row outward and work single crochet across the folded edge by inserting hook through both layers where the shell fold forms (48)
Info :
Folding and crocheting into both layers forms a crisp petal fold. Pin the scallop outward and sew or crocheted join will secure the shell so the layer stands away from the body, creating the stacked look.
Round 17 :
1 sc in each st around across both layers to secure the fold (48)
Round 18 :
Fasten off and leave long tail for sewing to trunk.
— Tier 2 :
Round 1 :
6 sc in magic ring (6)
Round 3 :
(1 sc, inc) x 6 (18)
Round 4 :
(2 sc, inc) x 6 (24)
Round 5 :
(3 sc, inc) x 6 (30)
Round 6-8 :
1 sc in each st (30)
Info :
Tier 2 is slightly narrower than the base and will be attached above it. Check alignment before finishing. Work rounds 6-8 evenly to create a stable band for shell placement.
Round 9 :
1 sc in each st BLO (30)
Round 10 :
(4 sc, shell) x 6 — shell = 5 dc in next st (30)
Round 11 :
sl st into outer edge, ch1, *1 sc in each of next 5 dc of shell, 1 sc in each of next 4 sc; rep from * to end (30)
Round 12 :
Fold shell outward and sc in both layers across fold (30)
Round 13 :
Fasten off leaving a long tail for attaching to trunk. (30)
— Tier 3 :
Round 1 :
6 sc in magic ring (6)
Round 3 :
(1 sc, inc) x 6 (18)
Round 4 :
(2 sc, inc) x 6 (24)
Round 5-6 :
1 sc in each st (24)
Round 7 :
1 sc in each st BLO (24)
Round 8 :
(3 sc, shell) x 6 — shell = 5 dc in next st (24)
Round 9 :
sl st to outer edge, ch1, *1 sc in each of next 5 dc, 1 sc in each of next 3 sc; rep from * to end (24)
Round 10 :
Fold shell outward; sc across both layers to secure (24)
Round 11 :
Fasten off leaving long tail (24)
Info :
Tier 3 will sit above tier 2. The shells are more frequent relative to circumference so scallops will appear more compact and layered.
— Tier 4 :
Round 1 :
6 sc in magic ring (6)
Round 3 :
(1 sc, inc) x 6 (18)
Round 4-5 :
1 sc in each st (18)
Round 6 :
1 sc in each st BLO (18)
Round 7 :
(2 sc, shell) x 6 — shell = 5 dc in next st (18)
Round 8 :
sl st into outer edge, ch1, *1 sc in each of next 5 dc, 1 sc in each of next 2 sc; rep from * to end (18)
Round 9 :
Fold shell outward and sc across both layers to secure (18)
Round 10 :
Fasten off leaving long tail (18)
— Tier 5 (Top - Smallest Tier) :
Round 1 :
6 sc in magic ring (6)
Round 3 :
(1 sc, inc) x 6 (18)
Round 4 :
1 sc in each st (18)
Round 5 :
1 sc in each st BLO (18)
Round 6 :
(1 sc, shell) x 6 — shell = 5 dc in next st (18)
Round 7 :
Fold shell outward and sc in both layers around to secure (18)
Round 8 :
Round of decorative slip stitches around top edge: sl st in each st to finish edge (18)
Round 9 :
Fasten off leaving long tail for sewing (18)
Info :
Top tier forms the small collar that frames the cutlery. You can add a tiny star or bead on top by sewing it to the center after assembly.
— Decorative Ridge & Finishing Rounds (applied to each tier) :
Round 1 :
When joining shell to fold, work one round of sc across both layers as described in each tier to secure the fold (same stitch counts as each tier)
Round 2 :
Optional: work one round of hdc in FLO to create a soft ridged edge on the bottom of each tier (matching stitch count)
Info :
Adding an hdc round in the FLO on the outside gives an attractive ridge that enhances the layered effect and makes the scallops stand away from the body more clearly.
— Assembly & Stacking :
Info :
Assembly is modular. Each tier is made flat in the round then a shell row creates a scallop which is folded and secured to create the layered silhouette. Sew tiers to the trunk from largest to smallest, leaving space between layers for the shell fold.
Step 1 :
Position trunk upright and pin Tier 1 (largest) around the trunk top so that its inner opening sits just above the trunk top by 2-3 stitches. Use the long tail and yarn needle to whip stitch evenly around the trunk attaching the tier securely. Repeat for tiers 2-5, staggering so shells overlap attractively.
Step 2 :
Place the inner sleeve into the cone and align its top edge with the inside top of Tier 3 or Tier 4 depending on how tall you want the pocket. Tack sleeve to trunk in three places to prevent shifting (use small stitches through sleeve and trunk).
Info :
Leave about 6-10 mm between tier joins so the scallops can fold without restriction. Check the outer shape frequently and adjust by shifting sewn points if any tier sits crooked.
Step 3 :
Weave in all ends. Pin any scallops if necessary and add a small stitch under each shell to keep the fold consistent. If desired, add a tiny seam on the underside of each shell every 3-4 stitches to maintain the fold.
Step 4 :
Add optional embellishment: a tiny crochet star, bead garland, or embroidered dots across tiers. Sew beads on before final sewing of tiers to avoid awkward threading afterwards.
Info :
Test-fit cutlery as you assemble. Adjust inner sleeve height or trunk top position to ensure forks and spoons stand upright without flaring the top tier outward too far.
— Optional Star/Topper (small) :
Round 1 :
ch 4, join with sl st to form ring; ch1
Round 2 :
(sc, ch2, 5 dc, ch2, sc) in ring to create one point; rep to make 5 points total, sl st to join
Round 3 :
Fasten off and leave tail. Sew star to top center of tier 5.
Info :
Small star or bead adds a finished look. If making many, consider metallic embroidery thread for a subtle shimmer.
— Variation: Single-piece Cone (for faster make) :
Round 1 :
6 sc in magic ring (6)
Round 3 :
(1 sc, inc) x 6 (18)
Rounds 4-10 :
Work successive even rounds increasing gradually to reach 48 sts as in Base Tier (stop increasing at desired circumference) then work successive shell rounds spaced every 6 sts as described earlier, folding and securing each shell row to form tiers within a single piece (use BLO rounds between shell rows to define folds)
Info :
This method shortcuts assembly by creating the cone and layers in one long piece. It is faster but less modular, and color changes or repairs are more complicated.
— Final Finishing :
Info :
Block lightly if using cotton by misting and shaping the scallops. Avoid overheating; press gently if needed. For acrylic, steaming with care helps set shape. Add small drops of clear fabric glue on the inside attachment points if you want extra security for a frequently used table piece.
Step :
Insert cutlery: position fork in center, spoon and knife on each side so they sit neatly inside the pocket. Adjust scallops to frame the utensils attractively.
Info :
When making a set, alternate colors and trimmings to create a cohesive tablescape. The pattern easily scales up by adding more tier repetitions or decreasing hook size for a tighter, smaller tree.
Finishing these little stacked-tree holders is such a cheerful way to personalize your holiday table. They come together quickly with simple repeats, and the layered scallops create an elegant, handmade look that guests will notice. Make a set in coordinating colors for place settings or craft several to give as thoughtful hostess gifts. 🎄🧶 Each stitch contributes to a charming, compact decoration that’s both useful and festive — enjoy making them and happy holidays! 🎁