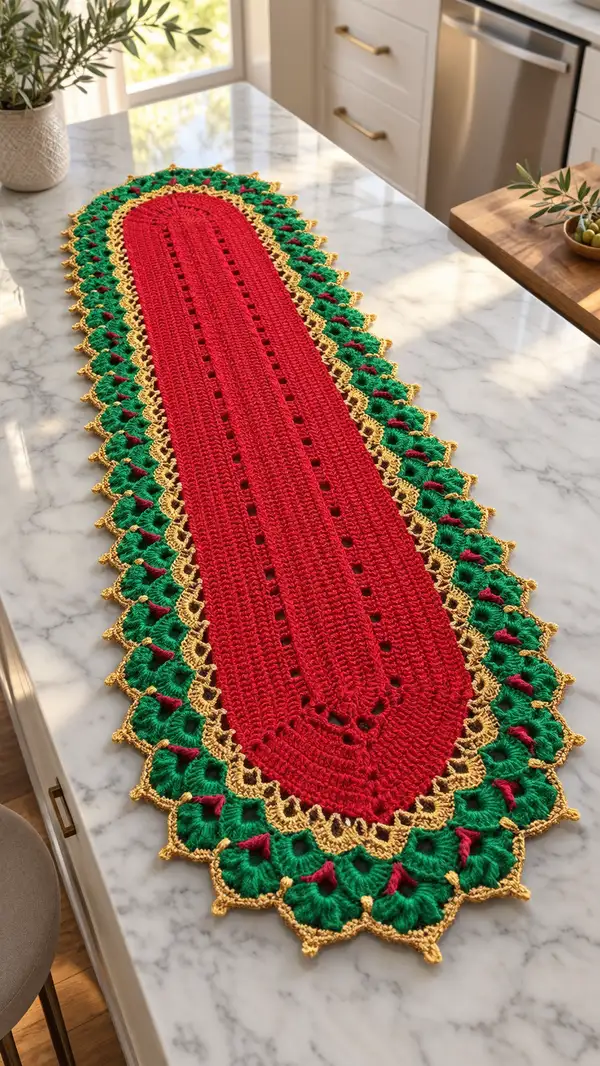
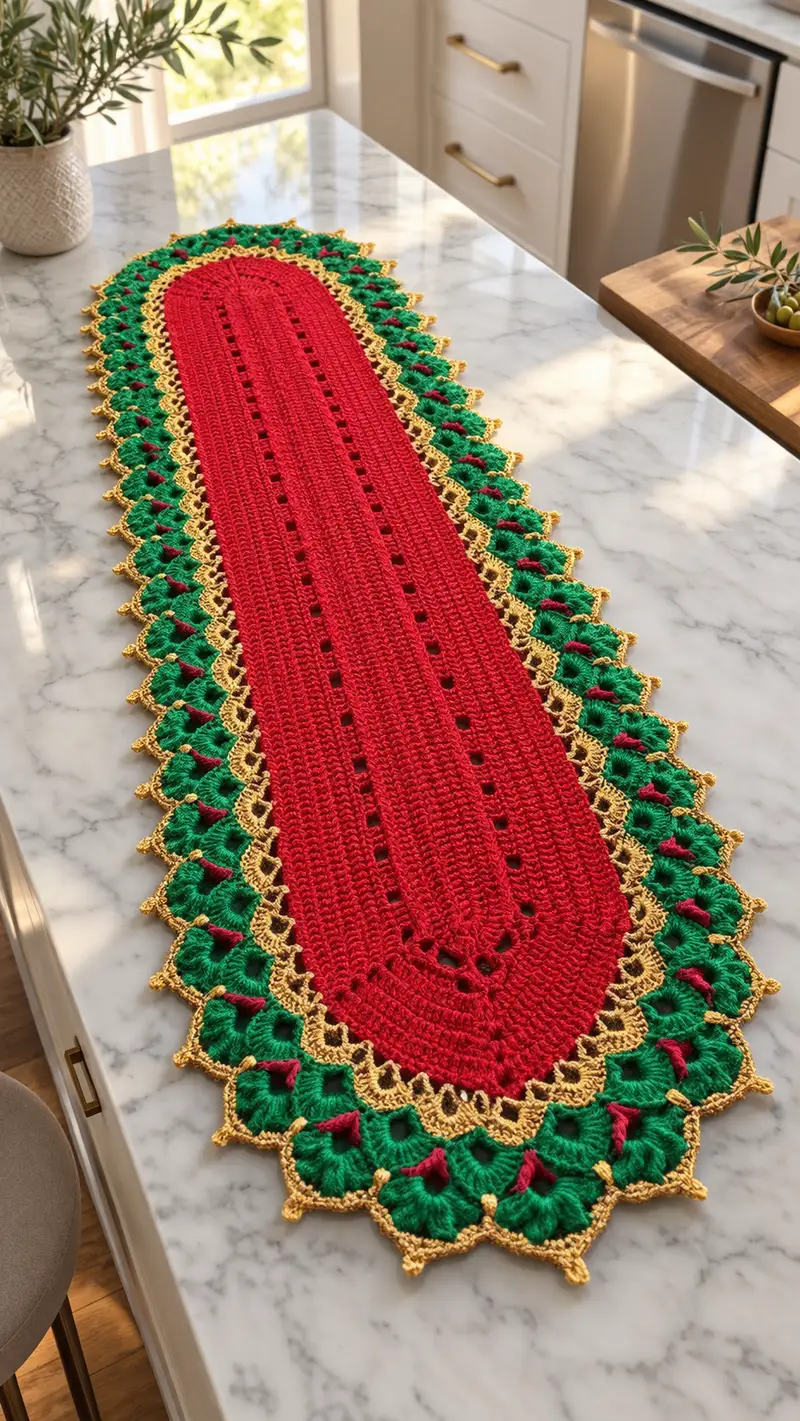
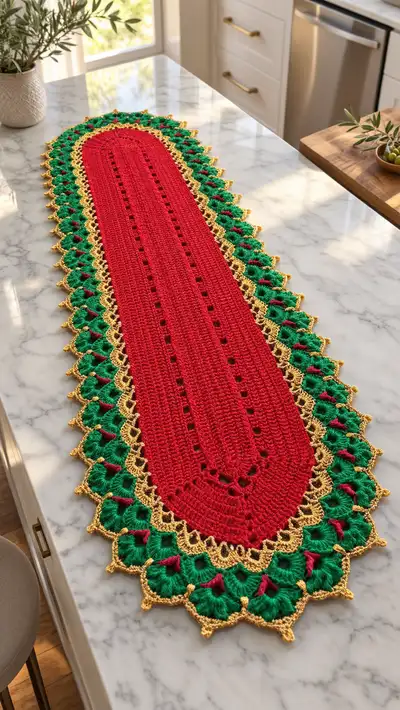
A long, elegant oval table runner featuring a solid red center, green scalloped floral border and a delicate gold lace picot edge. This festive runner is perfect for holiday tables or year-round color. The design uses textured ribbing, eyelet rows and layered shell motifs to create depth and movement across the length of the runner. Clear, step-by-step instructions guide you through the center panel, scalloped border, embroidery-like red accents and the final gold lace trim.
Progress Tracker
0% Complete
— Materials & Gauge :
Info :
Gauge is flexible for a table runner. For reference, using worsted cotton and a 4.0mm hook, sample swatch 10 cm (4 in) = 14 sc x 18 rows. This runner finished approximately 40 cm (16 in) wide at widest point and 150 cm (59 in) long in the photographed sample — adjust foundation chain to alter final length.
— Center Base (Oval Foundation) :
Round 1 :
With red yarn, ch 40. Work 1 sc in 2nd ch from hook and across the chain until you reach the last chain (38 sc). In the last chain work 5 sc to turn the end (5). Continue along opposite side of foundation chain with 1 sc in each remaining chain (38 sc). In the final chain (the first chain you started in) work 5 sc. Join with sl st to first sc. Total stitches after Round 1 = 86
Info :
This establishes an oval. The two 5-sc groups at each end create semicircular caps. Keep your tension even; work the 5 sc into the same end chain without twisting the chain.
Round 2 :
1 sc in each st around (86)
Round 3 :
1 sc in each st around (86)
Round 4 :
1 sc in each st around (86)
Info :
Place a stitch marker in the first stitch of each round to keep track; the oval has 4 symmetry points roughly opposite one another. Mark them if it helps for later border alignment.
Round 5 :
1 sc in each st around (86)
Round 6 :
1 sc in each st around (86)
Round 7 :
1 sc in each st around (86)
Round 8 :
1 sc in each st around (86)
Info :
Check the oval shape often — if one end looks puckered, re-distribute stitches along the semicircle by slipping an extra sc into the next end stitch to open the curve. Maintain 86 stitches per round to keep edge neat.
Round 9 :
1 sc in each st around (86)
Round 10 :
1 sc in each st around (86)
Round 11 :
1 sc in each st around (86)
Round 12 :
1 sc in each st around (86)
Info :
These rounds build the flat central field. Keep your hook and tension consistent; the more even the stitches, the less blocking will be required at the end.
— Center Texture & Vertical Eyelet Rows :
Round 1 :
Continue with red. Ch1, sc in same st, *sc 7, ch3, sk 3 (this ch3 creates an eyelet but we will return to the same number of stitch spaces by working the next st in the next top loop), sc 7; rep from * across to reach the semicircle end. Work sc into each of the 5 semicircle stitches. Join with sl st to first sc. Total stitch count still measured as 86 working spaces (86)
Info :
Although a ch3 is used, you are still working one 'working space' where the chain was made by skipping 3 chains and later working into the next top loop. For the purposes of consistent stitch counting we will refer to 86 working spaces per round; do not worry about the chain top loops altering the count.
Round 2 :
Ch1, 1 sc in each st and in each ch3 space around (86)
Round 3 :
Ch2 (counts as hdc), hdc in next st and each st around, working 2 hdc into the ch3 spaces to keep spacing even (86 hdc-equivalents)
Round 4 :
Ch1, sc in each st around maintaining eyelet spaces (86)
Info :
Work these textured rounds for several repeats to create subtle vertical ribs and a column of regularly-spaced eyelets down the center length. The eyelet columns align vertically because each round uses the same pattern of ch3 spaces.
Round 5 :
Rep Round 2 (86)
Round 6 :
Rep Round 3 (86)
Round 7 :
Ch1, 1 sc in each st around (86)
Round 8 :
Ch2, hdc in each st around (86)
Info :
Repeat this 8-round texture cycle (Rounds 1-8 in this section) 3 times total to achieve approximately the pictured runner height of the central panel. That is 24 rounds of textured fabric built on top of the initial base rounds.
Round 9 :
Repeat Round 1 of this section (eyelet placement) (86)
Round 10 :
Rep Round 2 (86)
Info :
At the end of your last textured repeat, work 2 rounds of sc in red to smooth the surface before beginning the border join. This gives a tidy joining edge for the green scallops.
Round 11 :
1 sc in each st around (86)
Round 12 :
1 sc in each st around (86)
— Transition Round: Preparing for Border Join :
Round 1 :
With red, ch1 and sc in next 2 sts, *ch2, sk 2, sc in next 4 sts* across to remainder of round so that you create small looping spaces evenly around (these chains will be used to attach green shells). Adjust location of ch2 spaces by ±1 st if necessary so you have 43 ch2 spaces total around the oval. Join with sl st to first sc. (86 working top loops remain)
Info :
Count your ch2 spaces — you will use these as placement markers for green shell motifs. The sample uses 43 shell positions around the runner; your exact number may vary slightly depending on tension. Mark the first shell boundary at the middle of a semicircular end so shells are symmetric.
— Green Scallop Border: Round-by-Round Build (Make 43 Shells) :
Round 1 :
Join green yarn with a sl st into the first ch2 space from the previous round. *Ch3 (counts as dc), 8 dc into the same ch2 sp (total 9 dc shell into that space), sl st into the top of the sc 2 sts away to anchor shell (this forms one scallop). Move to next ch2 space, sl st to join and repeat from * around. You will work one shell into each ch2 space; work final shell and join with sl st to base of beginning shell. New stitch positions around the shell round = 43 shells (each shell occupies a single former ch2 space)
Info :
Each shell cluster is formed into the ch2 loop you created on the transition round. A 9-dc shell gives a dense petal — if you prefer a lacy petal, reduce to 7 dc instead. For exact look as pictured, use 9 dc as written.
Round 2 :
Ch1, sc in top of first dc of each shell to anchor (into top of the 1st dc of the 9-dc shell), *ch3, sc in top of central dc of the next shell (this ch3 will create a small open arch between shells), repeat from * around. Join with sl st. You will have alternating anchored sc and ch3 loop arches between shells. Total anchor points = 43 sc + 43 ch3 spaces
Round 3 :
Work 1 sc in each sc anchor and in each ch3 loop around (these are working spaces created last round) to tidy and even the border (86 working spaces approximate; exact working spaces = 43 anchors + 43 arches = 86)
Info :
Round 3 evens the edge and creates a stable base to add the red triangular accent into each scallop. If you find the shells pull the central field, loosen tension by using the next hook size up just for the border rounds.
Round 4 :
Switch temporarily to burgundy (small accent). Into each shell center (work into the space at top of center dc of the shell), work: sl st to center, ch1, 1 sc into center, ch3, 1 sc into center (this creates a small V/tiny triangular accent standing up from the shell). Fasten off burgundy after each small V or carry it inside shells if you prefer. Work across all 43 shells. This does not change the count of anchors; you are adding decorative stitches anchored to those positions (working spaces remain equivalent to previous total)
Info :
These small burgundy accents appear as little petals in the photograph. You can embroider tiny knotted stitches instead if you prefer not to change yarn during this border round.
Round 5 :
With green again, ch3 (counts as dc), 2 dc in same anchor at base of each V, *sk to next shell base and work (3 dc, ch1, 3 dc) into the arch area between shells to form a connecting fan (this fan is worked into the ch3 arch created earlier)*. Repeat around, join. You will have formed alternating raised fans connecting adjacent shells. Count of new dc and fans produces a fuller scallop edge; treat each repeat as occupying the prior arch and shell bases (no single 'stitch count' change is required for pattern reading)
Round 6 :
Ch1, sc in top of every 2nd dc and sc in ch1 spaces across the fans to tidy; this produces a chain of small loops around the outer edge. Join with sl st.
Info :
At the conclusion of Round 6 you should clearly see a rounded scallop petal repeated around the runner. Count shells and fans to ensure symmetry: 43 scallops in the sample. If you need to add or remove a shell, do so evenly at both ends to maintain oval balance.
Round 7 :
Ch 1, 1 sc in each sc and in each ch1 space around the scallops to build a tidy ridge for the subsequent gold lace rounds. Work 2 sc into the top of each fan peak for stability when encountered. Join. (approx 172 working scs; exact number will vary based on your fan-stitch density)
Info :
Because shells and fans add extra top loops, your stitch count here will be roughly double the central panel count. This round is important: it gives a uniform surface for the gold lace edging so your picots and arches sit evenly.
Round 8 :
Ch2, hdc in each st around working 2 hdc in fan peaks for continuity; join with sl st. (approx same working space count as Round 7)
Round 9 :
Ch1, sc in each st around. Place stitch markers at every 10th stitch to help maintain count and place the final gold petal points evenly. Join.
Info :
At this stage we have a broad scalloped border in green with small burgundy accents. Take a moment to check the running symmetry: stand back and verify that both ends of the oval match (you can flip runner 180 degrees to easily compare both ends).
— Gold Lace Connecting Round (Bridging) :
Round 1 :
Switch to gold yarn. Ch3 (counts as dc), dc into next st, *ch2, sk 2, dc 3 into next st (this will create small picot bases between shells), repeat from * around. Where you encounter a fan peak, work: dc, ch3, dc (to make a slightly larger arch). Join. Approximate total stitches now depend on exact shell/fan count but will be roughly 2x central stitch count (estimate 170-180 stitches in sample).
Info :
The gold yarn contrasts sharply and gives a filigree look; keep tension a bit looser to allow the lace to lie flat over the green scallops.
Round 2 :
Ch1, sc in each dc and in each ch2 space around. Where ch3 arches were made, work 3 sc into that arch to stabilize the larger loop. Join.
Round 3 :
Ch3 (counts as dc), *dc in next st, ch2, sl st into top of adjacent sc to form small picot connectors; repeat around working a sl st into the anchors between fans so that you create a continuous gold lace scallop. Finish with sl st join.
Info :
These rounds build a delicate lace bridge that sits just outside of the green scallops. Keep your gold rounds neat — the metallic sheen shows tension inconsistencies quickly.
Round 4 :
Reserve this round for optional decorative beads or small embroidered dots. If you want to add tiny beads, slip a bead onto the gold yarn before working each picot sl st and secure the bead in the picot space. Otherwise, proceed to the outer picot finishing rounds.
— Outer Gold Picot Edge (Final Decorative Border) :
Round 1 :
Ch1, sc in same st, *ch5, sl st into the 3rd ch from hook (making a picot chain), skip 2 sts, sc into next st; repeat from * around so that small 5-ch picots form points at the outer rim of each scallop. Where fan peaks occur, work ch6 and picot to make a slightly taller point. Join with sl st. The number of picot points equals number of outer arches (approx 86-92 depending on earlier shaping)
Info :
Picots define the delicate star points along the edge. If you prefer smaller points, use ch3 picots. If you prefer more pronounced points, use ch6 and a slightly larger hook for this round only.
Round 2 :
Work a small sc round through the bases of the picots to anchor them: ch1, sc around into the base of each picot and adjacent sc, join with sl st. Fasten off and weave in ends. This secures the edge and prevents picots from unraveling.
Info :
Weave in ends on the back side carefully — bury tails under nearby stitches or through the foundation shell clusters. Use a matching gold yarn tail to hide the end in the lacework for a cleaner finish.
— Optional Decorative Row: Tiny Gold Bead Points :
Round 1 :
If you like, rejoin gold and work sl st into every 2nd picot base and add a small seed bead before pulling yarn through to secure. Work across outer rim adding bead at every other point for a subtle sparkle. Fasten off and hide tails.
Info :
Test bead placement on a small sample to ensure beads sit correctly and don’t pull the picots out of alignment. Small glass seed beads are best; ensure holes are large enough for your yarn or use beading thread to pre-string beads onto yarn.
— Finishing & Blocking :
Info :
Wash the runner gently by hand or steam-block. Pin the runner flat on blocking pins, arrange scallops evenly and allow to dry. Light steam from an iron held above the fabric will open the lace without flattening the shells if needed. Press picots to point slightly outward and re-pin until dry.
Info :
Trim any excess tails and weave all ends securely into the reverse side of the lace. If any scallop seems loose after blocking, add a few anchoring stitches (tiny sc) on the inner portion of the shell to pull it gently into place.
— Alternate Size/Length Notes :
Info :
To lengthen the runner, increase the starting foundation chain by increments of 6-8 chains and repeat center textured rounds until desired length. Add shells to match the new perimeter; keep shells evenly spaced by counting ch2 spaces along the final sc round and placing shells into those spaces.
Info :
To shorten the runner, reduce initial ch by symmetrical reduction and maintain the same number of semicircle end stitches (5 sc in end chains) so the oval stays balanced.
— Troubleshooting & Tips :
Info :
If scallops look triangular instead of rounded, add one additional dc at each side of the shell peak to increase fullness. If the lace edge warps, re-block with slightly more tension on the picots. When carrying small accent yarns (burgundy), loosely carry along back of shell to avoid long floats. Add small securing stitches every 3-4 shells if carrying.
Finishing this runner is such a rewarding moment — the bold red field and layered scalloped border come together to create a dramatic seasonal statement. The gold lace trim adds just the right touch of sparkle while the green shells bring a botanical, petal-like edge. Once blocked, the scallops stand proudly and the whole runner reads as a handmade heirloom. I hope it brightens your table and inspires more colorful crochet adventures! 🧶✨