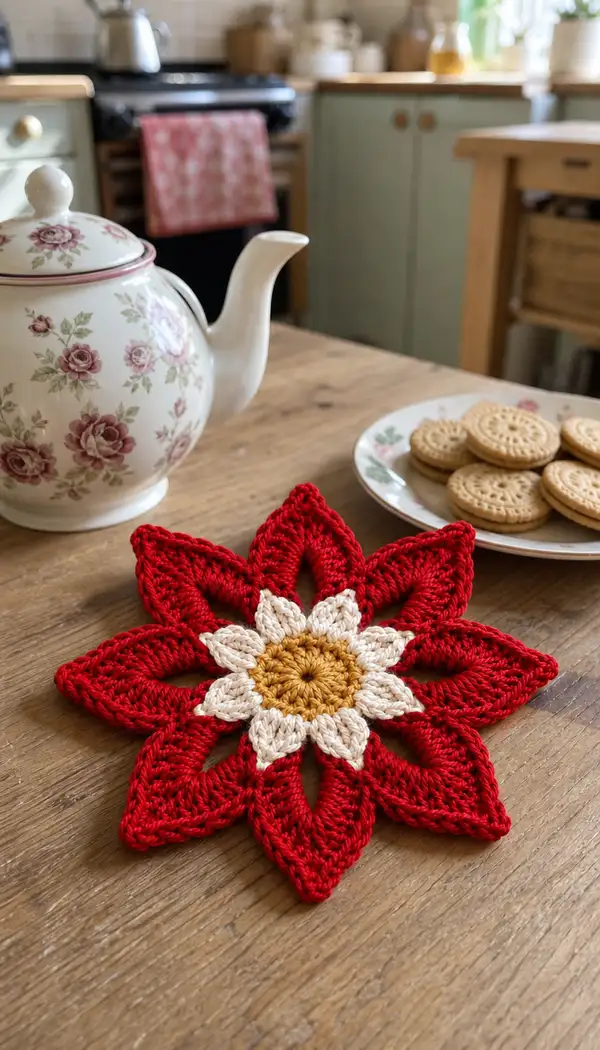
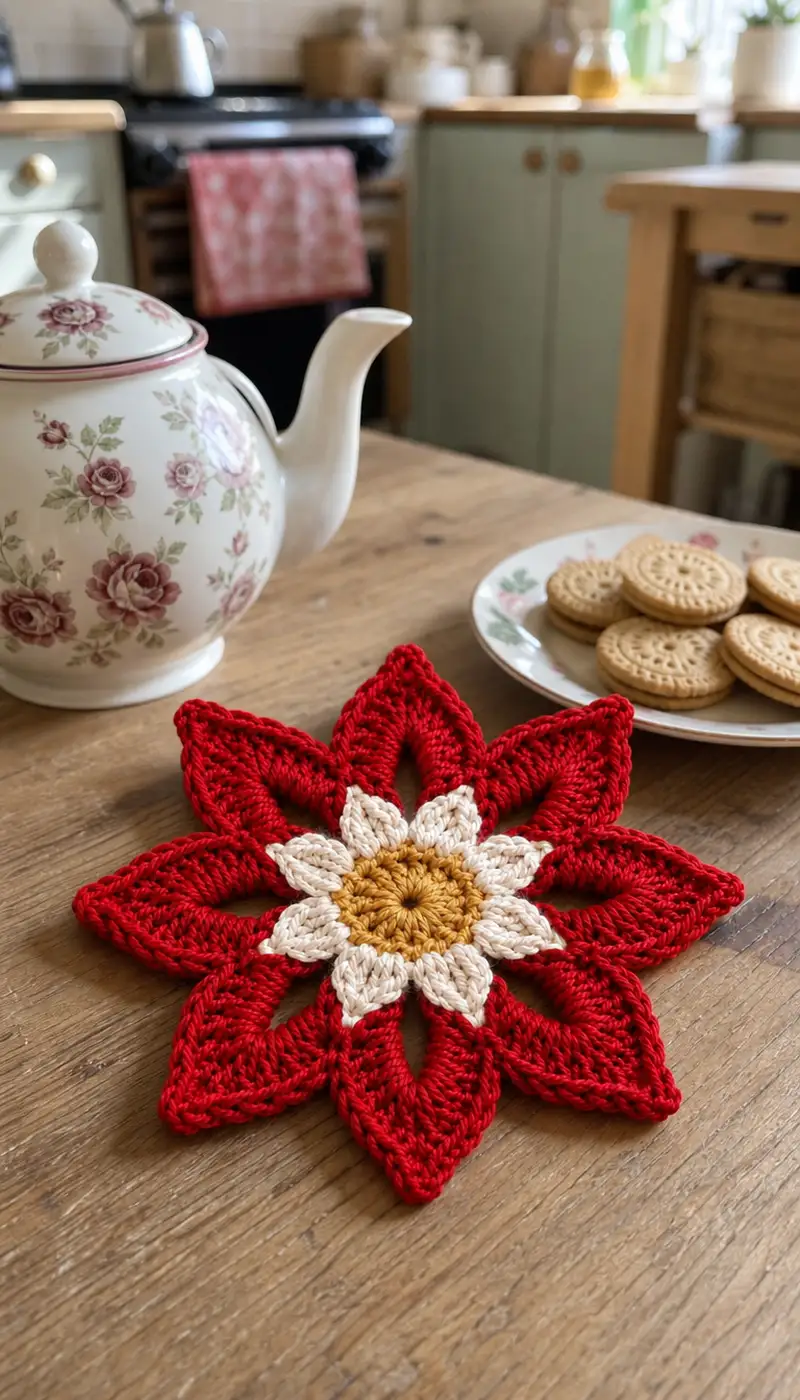
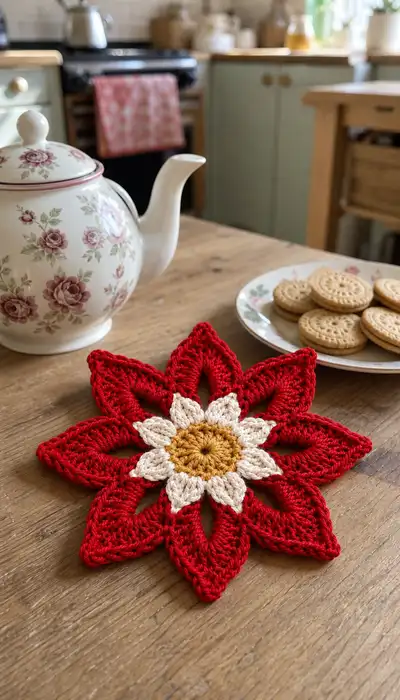
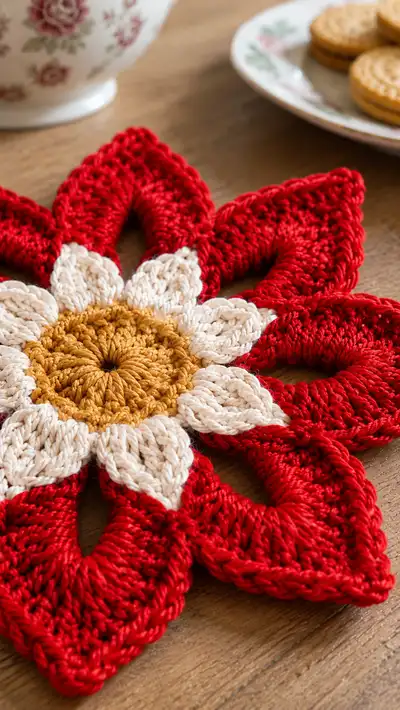
A layered poinsettia-style crochet trivet that doubles as a decorative doily or table centrepiece. This piece features a textured mustard centre, a ring of creamy inner petals and eight bold red outer petals with sculpted depth. Worked flat in rounds with post and cluster stitches for dimension — perfect for holiday decor or a colourful everyday accent.
Progress Tracker
0% Complete
— Notes :
Info :
This pattern is worked flat in rounds. Each 'Round' indicates a complete circuit around the centre. You will change colors twice: mustard (center), cream (inner petals), then red (outer petals). Use stitch markers for round starts and for petal anchor points. Puff stitches are worked as grouped cluster stitches that close into one stitch—treat each puff as one stitch for counting. Work tightly with cotton yarn so the piece is sturdy for use as a trivet.
— Center (golden mustard) :
Round 1 :
6 sc in magic ring (6)
Round 3 :
(1 sc, 1 inc) x 6 (18)
Round 4 :
(2 sc, 1 inc) x 6 (24)
Round 5 :
(3 sc, 1 inc) x 6 (30)
Round 6 :
(4 sc, 1 inc) x 6 (36)
Info :
Keep your tension even. This centre will be dense and textured—use a slightly smaller hook if your stitches are loose. Place a stitch marker at the start of each round.
Round 7 :
(5 sc, 1 inc) x 6 (42)
Round 8 :
(6 sc, 1 inc) x 6 (48)
Round 9 :
1 sc in each st (48)
Round 10 :
1 sc in each st (48)
Round 11 :
1 sc in each st (48)
Info :
We will add texture to the centre using puff stitches on the next round. Puff stitches will be worked into every 4th stitch to create a circular textured medallion while keeping an even count of 48.
Round 12 :
(3 sc, puff in next st) x 12 (48)
Info :
Puff stitch: yarn over, insert hook into indicated stitch, yarn over and pull up a loop, repeat 3 times (you should have 7 loops on hook), yarn over and pull through all loops, ch 1 to close puff. Each puff counts as one stitch for the round count.
Round 13 :
1 sc in each st (48)
Round 14 :
1 sc in each st (48)
Info :
Finish the golden center. Fasten off and weave in the tail, or join cream yarn with a standing sc (preferred) to begin building the inner petal anchors. Ensure you have 48 evenly spaced stitches which will be used to anchor 8 inner petals (48/8 = 6 stitches per petal anchor area).
— Inner Petals (cream) — create 8 small petals around centre :
Info :
Join cream yarn in any stitch on the outermost round of the centre using a standing sc. We will create 8 chain-space anchors; each anchor is spaced across 6 stitches (work across 48 stitches total). Place a removable marker at each anchor point if you like: count 6 stitches to place each marker so you have 8 markers in total.
Round 15 :
*Sc in next 5 sts, ch 5, sc in next st* x 8 around (48)
Info :
The 'ch 5' loops will be the foundation for each inner petal. Maintain stitch count of 48 because each ch5 is worked between anchor stitches; the sc after ch5 anchors back into the centre round.
Round 16 :
*Sc in next 5 sts, (sc, hdc, 3 dc, hdc, sc) into ch-5 space, sc in next st* x 8 (48 + petals)
Info :
When making petals, work all stitches into the chain space you created. The group '(sc, hdc, 3 dc, hdc, sc)' forms a small rounded petal; each set sits above the centre and will not change the base stitch count because the petal stitches are worked into the ch-5 space.
Round 17 :
*Sc in each of next 5 sts, sl st into base between petals to stabilize* x 8 (48)
Round 18 :
*Slip stitch into the top of the small petal, ch 2, work 5 dc into the top of the petal, ch 2, sl st back at base* x 8 (this creates a small raised scallop on top of each inner petal)
Info :
These top dc groups add dimension to the inner petals and help visually separate the cream ring from the forthcoming outer petals. Adjust the number of dc if your ch-5 loop is tighter or looser—keep petals visually even.
Round 19 :
1 sc around entire round, working 1 sc into each anchoring sc and 1 sc into the top of each petal group where indicated (48)
Info :
Fasten off cream or carry the cream to the back and pick up red at the next round start. Use a long tail to weave in later or bury the tail under the inner petals so it doesn't show through the red outer petals.
— Join round and spacing for outer petals (prepare for red outer petals) :
Round 20 :
Join red yarn in a base stitch between two inner petals with a sl st, ch 1, sc in same stitch (this is the start of the outer petal anchor round) *sc in next 5 sts, ch 7, sc in next st* x 8 (48)
Info :
The ch-7 loops will form the base for the larger outer petals. You are still keeping a base count of 48 anchor stitches around the centre. Place markers at each of the ch-7 loops if you like; you'll work into them on the following rounds.
— Outer Petal Construction (red) — base shaping :
Round 21 :
*Sc in next 5 sts, (sc, hdc, 5 dc, hdc, sc) into ch-7 space, sc in next st* x 8 (48)
Round 22 :
1 sc around entire round into each sc and top of each petal grouping to stabilize (48)
Info :
Each petal sits above a 6-st anchor area and uses the ch-7 space for height. Keep your stitches even; when working 5 dc into the ch-7 loop, maintain tension so the loop does not stretch too wide.
Round 23 :
*Sc in next 4 sts, (sc, fpdc around 2nd dc of previous petal to create forward ridge, 7 dc in the central area of the petal forming a taller centre, bpdc around a previous dc to create depth, sc) into the same ch-7 area, sc in next 2 sts* x 8 (48)
Round 24 :
1 sc around (48)
Info :
Rounds 23-24 begin sculpting the height of the petal using front and back post double crochets (fpdc/bpdc). Convention: fpdc = front post double crochet; bpdc = back post double crochet. These create the vertical ridges visible on the bold outer petals.
Round 25 :
*Sc in next 3 sts, (sc, fpdc around next post, 3 tr in a fan, 3 dc, 3 tr, bpdc around previous post, sc) into petal space, sc in next 3 sts* x 8 (48)
Round 26 :
1 sc around (48)
Info :
Use tall stitches (tr, dtr as needed) to form the peak of each petal. The fans (3 tr) help shape the pointed top. Keep each petal symmetrical by counting your stitches within the petal carefully.
Round 27 :
*Sc in next 3 sts, (sc, fpdc around next post, 5 tr in a fan, 5 dc across centre top, 5 tr, bpdc around previous post, sc) into petal space, sc in next 3 sts* x 8 (48)
Round 28 :
1 sc around (48)
Info :
By round 27 you will have formed a very tall petal. Adjust the number of tr/dc if your petals are too wide or narrow. The sc rounds (24, 26, 28) stabilize the work so the petals sit crisp and defined.
Round 29 :
*Sc in next 2 sts, (sc, fpdc around post, 7 tr in fan, 7 dc centre, 7 tr, bpdc around post, sc) into petal space, sc in next 2 sts* x 8 (48)
Round 30 :
1 sc around (48)
Info :
At this point each petal will be quite large and starting to form the open point seen in the photo. If your petals are too floppy, use a slightly smaller hook for these rounds or add a holding chain under the petal tip to pull it tighter.
Round 31 :
*Sc, 3 sc in next stitch to create a small increase at the base, (3 dc, 5 tr, 3 dc) in the top area of petal worked across the fan area, 3 sc in next stitch, sc* x 8 (48)
Round 32 :
1 sc around (48)
Info :
Rounds alternate between a shaping round (petal increases/tall stitches) and a stabilization round (single crochet all around) so the motif stays flat. Continue this rhythm to build more height or adjust slenderness of petals.
Round 33 :
*Sc in next 4 sts, ch 3 and work 9 dc into the top centre of the petal, ch 3 and sl st into base, sc in next 4 sts* x 8 (48)
Round 34 :
1 sc around (48)
Round 35 :
*Sc in next 2 sts, (2 sc in next st to create a small ridge), (hdc, 5 dc, hdc) across top of petal in a tighter group for a more defined tip, sc in next 2 sts* x 8 (48)
Round 36 :
1 sc around (48)
Info :
Use BLO (back loops only) on the '1 sc around' rounds every few rounds if you want an inner ridge along the base of the outer petal; this will make the petal stand slightly above the inner petal ring.
Round 37 :
*Sc in next 3 sts, (sc, fpdc around last tall dc to create deep groove, 3 tr, 7 dc, 3 tr, bpdc around previous tall dc, sc) into petal space, sc in next 3 sts* x 8 (48)
Round 38 :
1 sc around (48)
Round 39 :
*Sc in next 4 sts, ch 5, sl st back into base creating an open triangle in the petal giving a visual hollow similar to the photo, sc in next 4 sts* x 8 (48)
Info :
Create the open slot as shown in the images by making small ch-spaces near the base or center of each petal. This provides the layered negative space between inner and outer petals.
Round 40 :
1 sc around (48)
Round 41 :
*Sc in next st, (fpdc around next post, 11 dc in an arched fan to widen the petal, fpdc around next post), sc in next st* x 8 (48)
Round 42 :
1 sc around (48)
Info :
Stop frequently and hold the work flat to check that petals lie correctly. If one or two petals pull inward, adjust by adding one extra dc in the fan on subsequent rounds for that petal only so it matches neighbors.
Round 43 :
*Sc in next 2 sts, (3 sc in next st to create small cluster), ch 3, 5 dtr in the top area of petal to give a pointed high peak, ch 3, 3 sc in next st, sc in next 2 sts* x 8 (48)
Round 44 :
1 sc around (48)
Info :
Rounds with dtr on the petal tops create an elongated point. If dtr is too tall for your yarn, substitute with tr for a slightly softer point.
Round 45 :
*Sc in next 3 sts, (sc, hdc, 9 dc, hdc, sc) in the petal top forming a broad flat area, sc in next 3 sts* x 8 (48)
Round 46 :
1 sc around (48)
Round 47 :
*Sc in next 4 sts, ch 6 and work 1 sc into mid-top of petal to create a small decorative picot-like loop, sc in next 4 sts* x 8 (48)
Info :
This decorative loop mimics the layered texture apparent in the outer petal photograph. Adjust the ch length for proportion.
Round 48 :
1 sc around (48)
Round 49 :
*Sc in next 2 sts, (sc, fpdc around next post, 3 tr, 11 dc, 3 tr, bpdc around previous post, sc) into petal space, sc in next 2 sts* x 8 (48)
Round 50 :
1 sc around (48)
Info :
Continue alternating shaping rounds with stabilization rounds. By round 50 the outer petals should be nearly full-size and mirror the layered look in the photos. If they appear too flat, add more tr rows; if too wavy, reduce tr counts on subsequent shaping rounds.
Round 51 :
*Work a decorative ridge: sc in next st, (hdc in next st BLO, hdc in next st FLO) across the petal base to add subtle ribbing, sc in next st* x 8 (48)
Round 52 :
1 sc around (48)
Round 53 :
*In top of each petal, work (picot, sc, picot) across the very point to create a crisp edge; sc into base after each picot set* x 8 (48)
Round 54 :
1 sc around (48)
Info :
From rounds 51-54 you are adding internal texture. Using BLO and FLO selectively helps the petal read as layered and sculpted on a flat surface.
Round 55 :
*Sc in next 3 sts, (3 dc, 7 tr, 3 dc) across top of petal to reemphasize point, sc in next 3 sts* x 8 (48)
Round 56 :
1 sc around (48)
Round 57 :
*Sc in next 4 sts, ch 3, sl st into the back of the tall fan to form a recessed line in the petal centre, sc in next 4 sts* x 8 (48)
Round 58 :
1 sc around (48)
Info :
Perform a frequent flat check. If the motif begins to cup upward, add a sc round worked tightly and block flat before proceeding. These stabilization rounds are essential to keep the trivet flat.
Round 59 :
*Create a final petal shaping round: sc in next st, (fpdc, 9 tr, 9 dc, 9 tr, bpdc), sc in next st* x 8 (48)
Round 60 :
1 sc around (48)
Info :
At round 60 the outer petals should be full height matching the visual in the image. Take time to even out any petals by adding or subtracting a stitch inside just that petal area to match neighbours.
— Outer Petal Edge and Finishing Rounds :
Round 61 :
*Sc in each st, but in the tip of each petal work (sc, picot, sc) to produce a neat point* x 8 repetitive anchors making (48)
Round 62 :
1 sc around (48)
Round 63 :
*Work a shell along the outermost petal perimeter: in the topmost cluster work (5 dc), skip 1, sl st* around each petal tip then sc between shells to keep count at (48 anchors)
Round 64 :
1 sc around (48)
Info :
The shell edge provides a graceful scalloped finishing look similar to the photo where the outer petal edges are softly rounded. You can substitute 3 dc shells if 5 dc shells look too wide on your yarn.
Round 65 :
*Surface crochet a tidy outline around each petal: sl st in next 2 sts, hdc in next 2 sts, sl st across the shell edge, hdc across the inner ridge* x 8 (48)
Round 66 :
1 sc around (48)
Info :
Surface crochet can be used to emphasize petal veins and rims. Use a contrasting color thread to highlight details if desired — but the pictured piece uses uniform red with the center and inner petals providing contrast.
Round 67 :
*Create a neat piped edge: bpsl (back post slip) around the very outer loops: insert hook behind post and sl st to create rope-like border* around each petal (48)
Round 68 :
1 sc around (48)
Round 69 :
*Final decorative edging: (ch 3, sl st into base) around entire outside giving small picot joining every 3 chains. Repeat across the petal edge* (visual finish)
Round 70 :
Fasten off, weave in ends and gently steam-block the finished trivet to flatten and shape each petal by pinning them into place on a blocking mat
Info :
Blocking: dampen lightly, pin each petal tip out to form an even 8-point star, leave to dry completely. Use mild starch if you want a stiffer trivet surface for actual hot pads.
— Alternate extra texture rounds (optional) :
Round 71 :
If you want extra depth, pick up red yarn and work 1 round of 1 sc BLO around to create an inner ridge (48)
Round 72 :
Then work a final round of crab stitch (reverse sc) around the very edge to make a twisted cord finish (48)
Info :
These optional rounds provide a professional finish and help the trivet resist curling. Crab stitch is worked left-to-right when viewed from the front, producing a rope-like border.
— Final finishing and optional embellishments :
Info :
Weave all tails into the back of the work under petals. Use small, invisible stitches to sew the inner cream petal base down if any petals lift. For a festive look add small embroidered beads or metallic thread to the yellow centre after blocking.
Round 73 :
Optional: Use metallic gold embroidery thread to stitch small French knots in the mustard centre for extra sparkle (visual finish)
Info :
Check centering and symmetry: count eight petals and ensure they are equidistant. If one is off, unravel the last few rounds for that petal and rework to adjust tension.
This poinsettia-style trivet is a beautiful way to add handmade charm to your table decor. Each textured center and sculpted petal comes together to create a timeless, festive accent. Pin and block carefully to give each petal the sculpted shape you see here — the result is a bright, joyful motif perfect for gifts or seasonal decorating. 🧶🌺✨