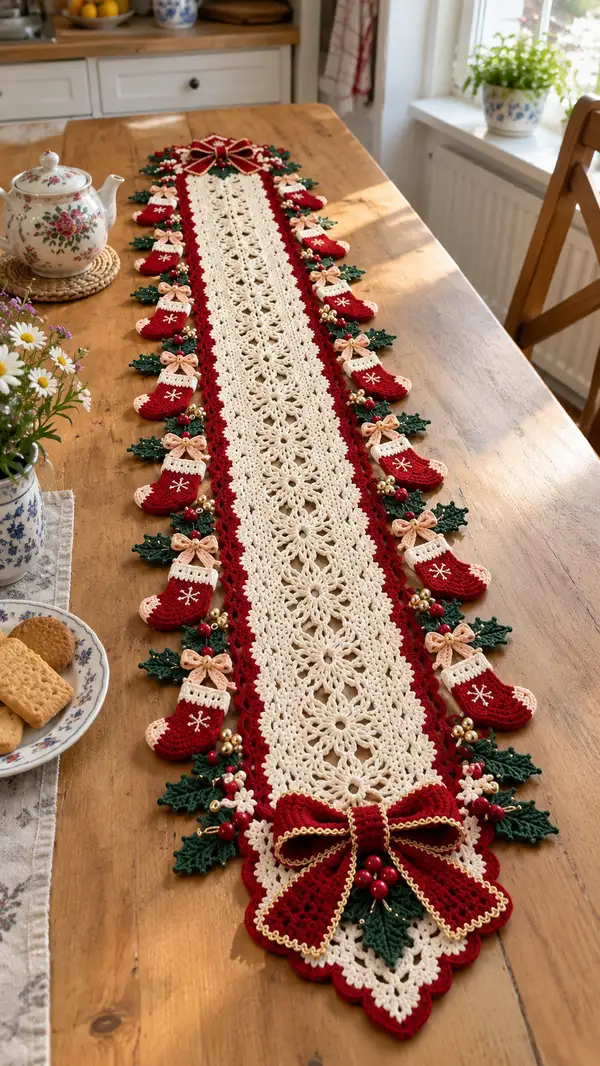
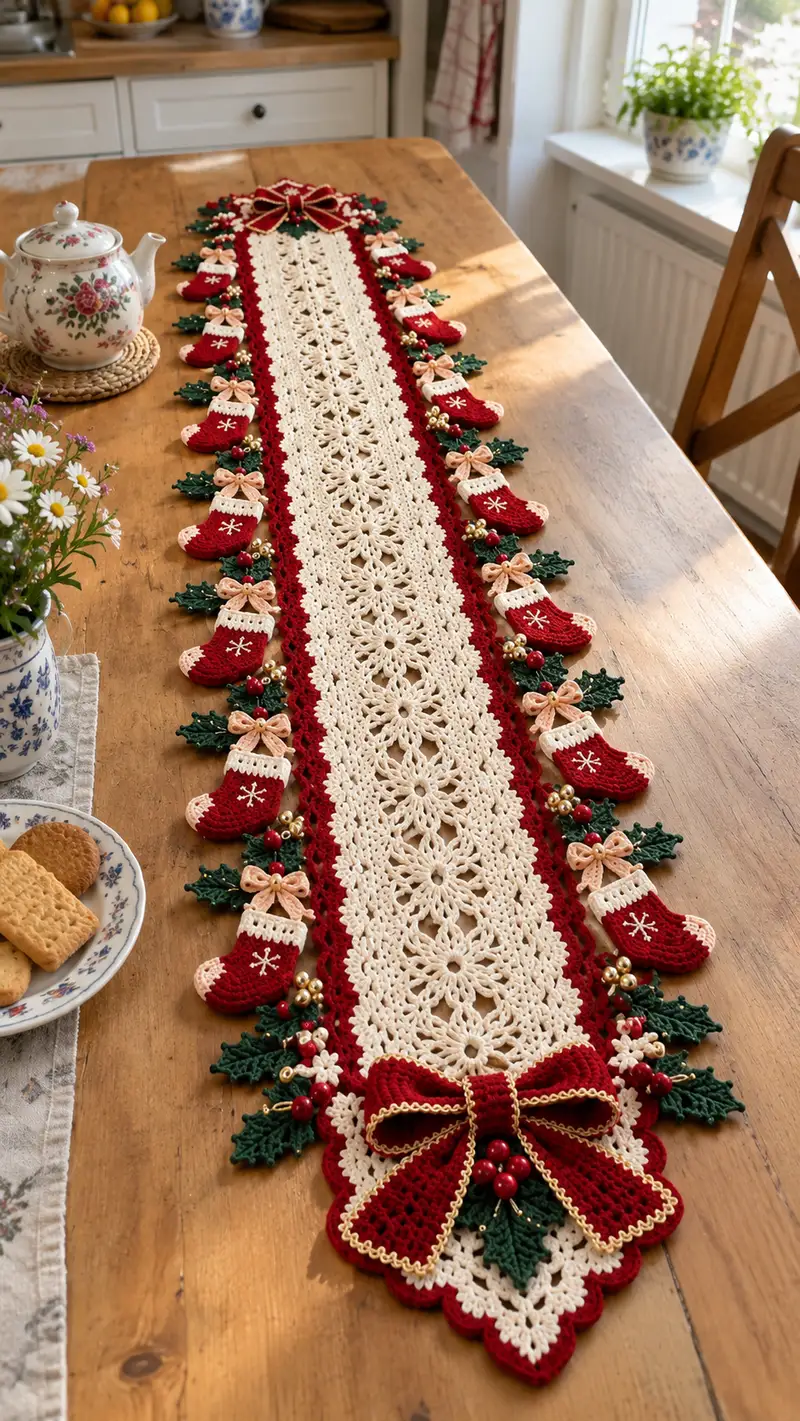
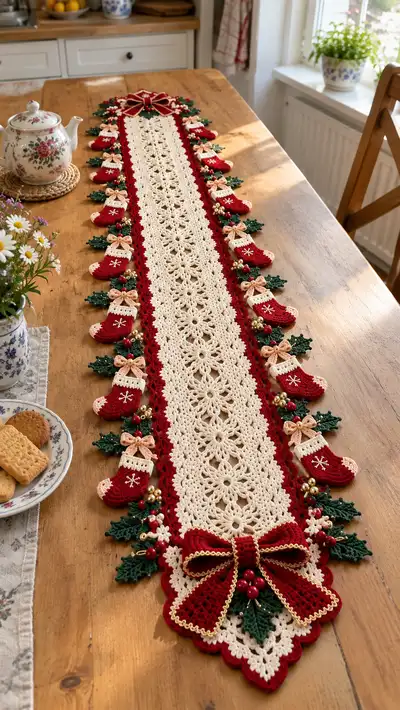
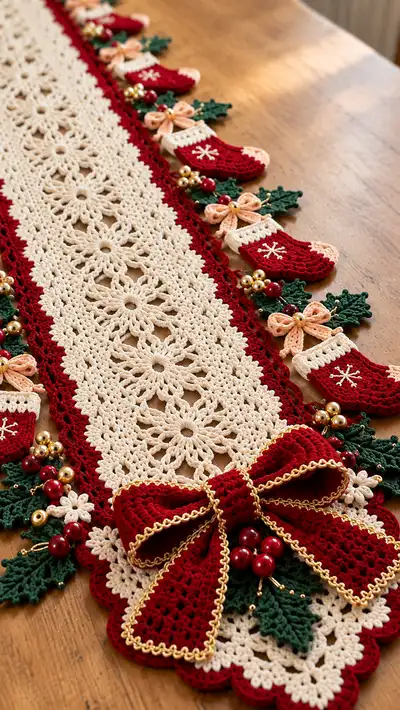
A festive, lace-centered table runner trimmed with scalloped red edging, tiny crochet stockings, holly leaves, peach bows and a large decorative bow at each end. The runner features a delicate cream floral lace strip down the center with rich cranberry accents and gold bead clusters for a warm, traditional Christmas look. Perfect as a holiday centerpiece to dress a dining table or sideboard.
Progress Tracker
0% Complete
— Materials & Gauge :
Info :
This pattern is designed using worsted weight cotton yarn and a 3.5mm hook. Gauge is not critical for decorative use but aim for approx 18 sc = 10 cm to keep trim proportions. Work tightly for 3D appliques so stuffing does not show.
— Center Floral Motif (Make 10, join-as-you-go) :
Round 1 :
MR, ch1, 8 sc in ring, sl st to first sc to join (8)
Round 2 :
Inc in each st around (16)
Round 3 :
(1 sc, inc) x 8 (24)
Round 4 :
(2 sc, inc) x 8 (32)
Info :
These first four rounds form a tight center. Keep tension even; block motifs after completing round 12 to square them and allow consistent joins later.
Round 5 :
*Ch4, sl st into next st; ch4, sl st into next st* around to create 16 small chain loops. End with sl st to first ch loop (16 loops)
Round 6 :
Working in ch-loops: *(sc, hdc, 5 dc, hdc, sc) in each ch4 loop* around. Fasten with sl st to first sc (16 petals)
Info :
This round creates the layered petal effect. Keep the 5 dc cluster centered in each loop to form an even petal shape. If petals flare, block later to shape.
Round 7 :
Ch1, *sl st to the middle dc of petal, ch5, sl st to same middle dc* around to create 16 ch5 picot loops, sl st to join (16 picots)
Round 8 :
Working in picot loops: *(sc, (ch3, sc) x2, sc) into each ch5 loop* around. This forms a lacy outer ring (32 small arches)
Round 9 :
Ch2 (counts as hdc), hdc in next st, *ch2, sk 2, (3 dc in next sp), ch2, sk 2, hdc in next 2 sts* repeat around to form spaced arches that will join as a rectangular array. End with sl st to top of ch2 (32 joining points)
Info :
At this stage motifs are roughly circular; block each motif to a flattened oval to ease joining. Place markers where you plan to join motifs end-to-end: mark 4 equidistant joining points per motif (top, bottom, left, right if you view circle as oval).
Round 10 :
Ch1, sc in each st and (sc, ch3, sc) in each 3-dc group to form small corner loops for join-as-you-go connection (approx 64 sc/loops total)
Round 11 :
Working into corner loops: *(sc, ch4, dc, ch4, sc) in each corner loop*; this deepens petal separation and prepares flat edges (counts will vary slightly per motif shape)
Round 12 :
Ch1, sc around evenly placing (sc, ch2, sc) at the four main join points to leave small ch2-loops for joining. Fasten off and weave in ends. Block motifs flat to final measured size (approx 8 x 9 cm per motif after blocking).
Info :
Make 10 motifs total for the runner shown. You can make more or fewer to lengthen or shorten the table runner. Lay motifs in a row of 10 before join-as-you-go to confirm orientation (petal seams matched).
— Join Center Motifs into Central Strip :
Round 1 :
With two motifs A and B positioned petal to petal lengthwise, join-as-you-go: attach cream yarn to join point on motif A with sl st, ch1, sc into loop on A, then sc into corresponding loop on B, *sc next st on A, sc next st on B* across the join seam. Join all 10 motifs sequentially to form one long lace strip.
Round 2 :
Once motifs are joined, work sc evenly around the entire assembled panel to tidy the outer edges: 1 sc in each st, placing (sc, ch2, sc) at each joining gap to keep edge square (approx 320 sc around assembled strip depending on motif count)
Info :
Check length after joining motifs and before adding the colored border: blocking and gentle steam can normalize any slight unevenness. The assembled cream center should be a long rectangle of repeated floral medallions.
— Narrow Red Inner Border (Crimson) :
Round 1 :
Join crimson yarn at one short end; ch1, sc evenly around the cream center panel working 1 sc in each sc and 1 sc in each ch2 corner space to create a narrow red frame (approx 320 sc)
Round 2 :
1 sc in each st around (320)
Round 3 :
To add a subtle decorative ridge work 1 sc in each st BLO around to create a ridge effect (320)
Info :
This narrow crimson border sits directly against the cream panel and forms the base for the wide scalloped edge. Work tightly here for a crisp joining point for scallops and appliques.
— Wide Scalloped Edge (Make in Crimson) :
Round 1 :
With crimson yarn, *skip 2 sc, 5 dc in next st, skip 2 sc, sl st in next st* repeat around to form 40 scallops evenly spaced along both long edges and scallops at ends. Adjust by adding or reducing scallops to fit motif counts (approx 40 scallops total)
Round 2 :
Into each 5-dc shell, work (ch1, sc, ch1) in center dc to define scallop ridge and give a neat finished look (40 scallops)
Round 3 :
Edging finish: sl st in each st around and fasten off. Weave in ends securely.
Info :
Scalloped spacing is critical so the small stockings and foliage sit evenly. If scallops bunch, adjust spacing by adding an extra sl st or skipping an additional stitch between shells.
— Small Stocking Applique (Make 24 - 12 per side) :
Round 1 :
Using crimson, MR, ch1, 6 sc in MR, sl st to join (6)
Round 2 :
Inc in each st (12)
Round 3 :
(1 sc, inc) x 6 (18)
Round 4 :
(2 sc, inc) x 6 (24)
Info :
These initial rounds form the rounded toe of the stocking. Keep stitches tight; stockings are small dense pieces to be sewn onto the scalloped edge.
Round 5 :
Ch1, 1 sc in next 10 sts (working one short side), 2 sc in next 2 sts (turning at heel base), 1 sc in next 10 sts (other short side) (24)
Round 6 :
Work evenly around for a slightly oval shape: 1 sc in each st (24)
Round 7 :
Change to peach/soft peach for small bow accent on stocking top: sl st to change, ch1, 1 sc in each of next 6 sts to form cuff area across top, fasten off peach leaving tail to sew bow details later
Round 8 :
Work in crimson again: 1 sc in each st around for 2 rounds to stabilize shape (24)
Round 9 :
Begin shaping ankle: (3 sc, dec) x 4 (20)
Round 10 :
1 sc in each st (20)
Round 11 :
For cuff: change to cream yarn, ch1, sc around top 6 sts forming a folded cuff when sewn; leave long tail for sewing to scallop (6)
Round 12 :
Fasten off leaving tails to sew stocking to scalloped edge. Embroider a small white snowflake on front using 6 straight stitches radiating from center or use cream yarn to stitch a star motif.
Info :
Make 24 stockings total — 12 for each long side of the runner. You can vary the number depending on runner length. Pin each stocking onto scallop before sewing to ensure even spacing (approx 3-4 scallops between stockings in the pictured version).
— Peach Decorative Bow (Small) for Stockings (Make 24) :
Round 1 :
Using soft peach, ch10, sc in 2nd ch from hook and across (9)
Round 2 :
Ch1, turn, sc across (9)
Round 3 :
Repeat Round 2 for 4 total rows creating a small rectangle. Fasten off leaving long tail to sew into a bow shape by wrapping center and stitching through sides. Add a small golden bead in the center.
Info :
Bow loops are made by folding the rectangle into a bow and wrapping with a short piece of peach yarn; sew securely and tack to stocking cuff above snowflake motif.
— Holly Leaf Applique (Make 24 clusters of 2 leaves each) :
Round 1 :
With holly green, ch6, sc in 2nd ch from hook, hdc in next, 3 dc in next, hdc next, sc last ch — turn working along other side of chain: hdc, 3 dc, hdc, sc. Sl st to first sc. This produces a single leaf (approx 10 sts)
Round 2 :
Ch1, sc around leaf making 3 small pointed picot scallops along edge by *(sc, ch3, sl st in same st)* at three equal points. Fasten off. Make a second leaf and block lightly.
Info :
Make two leaves for each cluster. Tacking leaves together with a few stitches and hiding tails between them creates a fuller holly leaf cluster. Add small gold bead clusters and red beads for berries during assembly.
— Beaded Berry Clusters :
Info :
Use small red wooden or acrylic beads and round gold beads. Thread 3 red beads and 3 gold beads onto a short length of thin thread or craft wire and knot or twist tightly, leaving a short tail to sew into the holly cluster. Make 24 berry clusters matching number of stocking groupings.
— Large Decorative Bow (Make 2, for runner ends) :
Loop Construction Round 1 :
Using crimson, ch60, sc in 2nd ch from hook and across to form a long strip (59)
Loop Construction Round 2 :
Ch1, turn, sc across (59)
Loop Construction Round 3 :
Repeat Round 2 until you have 8 rows total creating a wide strip approximately 8 cm wide. Fasten off leaving long tail for assembly. Make two identical strips for two large loops each bow.
Loop Construction Info :
Fold each strip into a loop and sew short ends together; lightly stuff each loop with fiberfill to retain shape. Shape loops into bow form and secure center with a narrower band made from 12 ch, worked in sc rows to create a wrap.
Tails Construction Round 1 :
With crimson, ch30, sc across (29)
Tails Construction Round 2 :
Ch1, turn sc across for 6 rows total to create two tails. Sl st and fasten off. Finish tails with gold thread whip at edges or sew gold trim along perimeter.
Center Band Round 1 :
Ch12, sc across, join ends to form band, wrap around bow center and sew closed. Attach three large red bead berries below the knot for visual weight. Add gold decorative chain or narrow gold trim along outer edge if desired.
Info :
Make two large bows and attach one at each end of the runner so that they overlap the scalloped border and hide motif join seams at the ends. Stuff loops moderately firm and shape loops evenly before final fastening.
— Small Cream Flowers (Make 20) :
Round 1 :
MR, ch1, 6 sc in ring, sl st (6)
Round 2 :
Ch2, (3 dc in next st, ch2, sl st in same st) x6 to form 6 petals. Fasten off and weave in ends.
Info :
Use these flowers as fillers between leaves and stockings along the scalloped edge. Add a small gold bead in flower centers while sewing for sparkle.
— Assembly & Placement of Trim Elements :
Step 1 :
Block entire central strip flat. Lay runner on flat surface and pin in place. Align scallops evenly and mark positions for stockings based on scallop centers. Photographed version places stockings with approximately 2 scallops between each stocking cluster; space evenly across both sides.
Step 2 :
Pin each stocking appliqué centered on chosen scallop so toe points outward and cuff aligns with top of scallop. Sew stockings in place using matching crimson yarn, mattress or ladder stitch through both stocking back edge and scallop ridge to create secure attachment. Use small, close stitches to make seam invisible.
Step 3 :
Arrange two holly leaves behind each stocking cuff with a bead cluster overlapping the junction. Sew leaves together and then tack to the runner just behind the stocking top. Sew bead clusters through leaves and runner with strong sewing thread, knotting thread ends discreetly on underside.
Step 4 :
Sew a small peach bow on each stocking cuff using the prepared small bow rectangle; secure with a few stitches and place a tiny golden seed bead in the center of each bow for shimmer.
Step 5 :
Attach small cream flowers between stocking clusters, tacking centers with gold beads. Use pinning to adjust spacing and symmetry before sewing final attachments.
Info :
Attach all small pieces from the center outward so that overlapping pieces (leaves, beads, bows) sit naturally and cover any visible sewing stitches. Reinforce all beads with at least two passes of sewing thread and a knot on underside.
— Final Edge Touches & Gold Trim :
Round 1 :
If using gold decorative thread, slip it under the outer edge of the scallops and hand-stitch a thin gold running stitch to highlight edge. Alternatively sew a narrow purchased gold trim along scallop edge using small, even stitches.
Round 2 :
Weave in and trim all yarn ends. Lightly press or steam-block the assembled runner once more to set shape. Attach large bows at each end by sewing centers securely through all layers of scallop and the last motif so bows will not shift during handling.
Info :
Make sure the underside is neat — there will be visible dinner table items placed on top. Hide knots and thread ends between layers or under beads to keep the finished underside tidy.
— Optional: Securing Runner for Use :
Info :
To prevent slipping on polished tables, sew small looped ribbon tabs under the runner at quarter points, and use museum putty for temporary hold. Avoid glue directly on yarn to allow laundering.
— Care & Finishing :
Info :
Spot clean beads and trims with mild soap and damp cloth. If washing is required, hand wash gently in cool water, reshape and lay flat to dry. Remove or secure bows and bead sprays before laundering to protect them.
This festive table runner is a beautiful combination of lace and 3D embellishments that bring holiday charm to any table. The cream floral center motifs paired with a deep red scalloped border feel both traditional and elegant. Tiny stockings, holly clusters and ribbon bows add playful detail and depth — perfect for creating a cozy holiday atmosphere. I hope you enjoy making this heirloom-worthy runner and sharing it at holiday gatherings! 🎄🧶