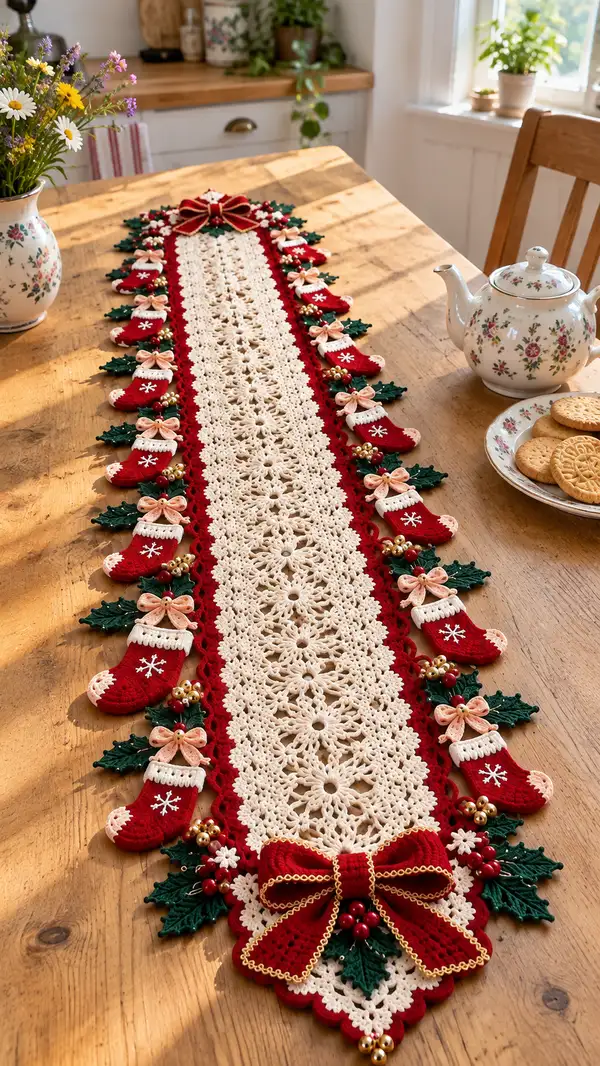
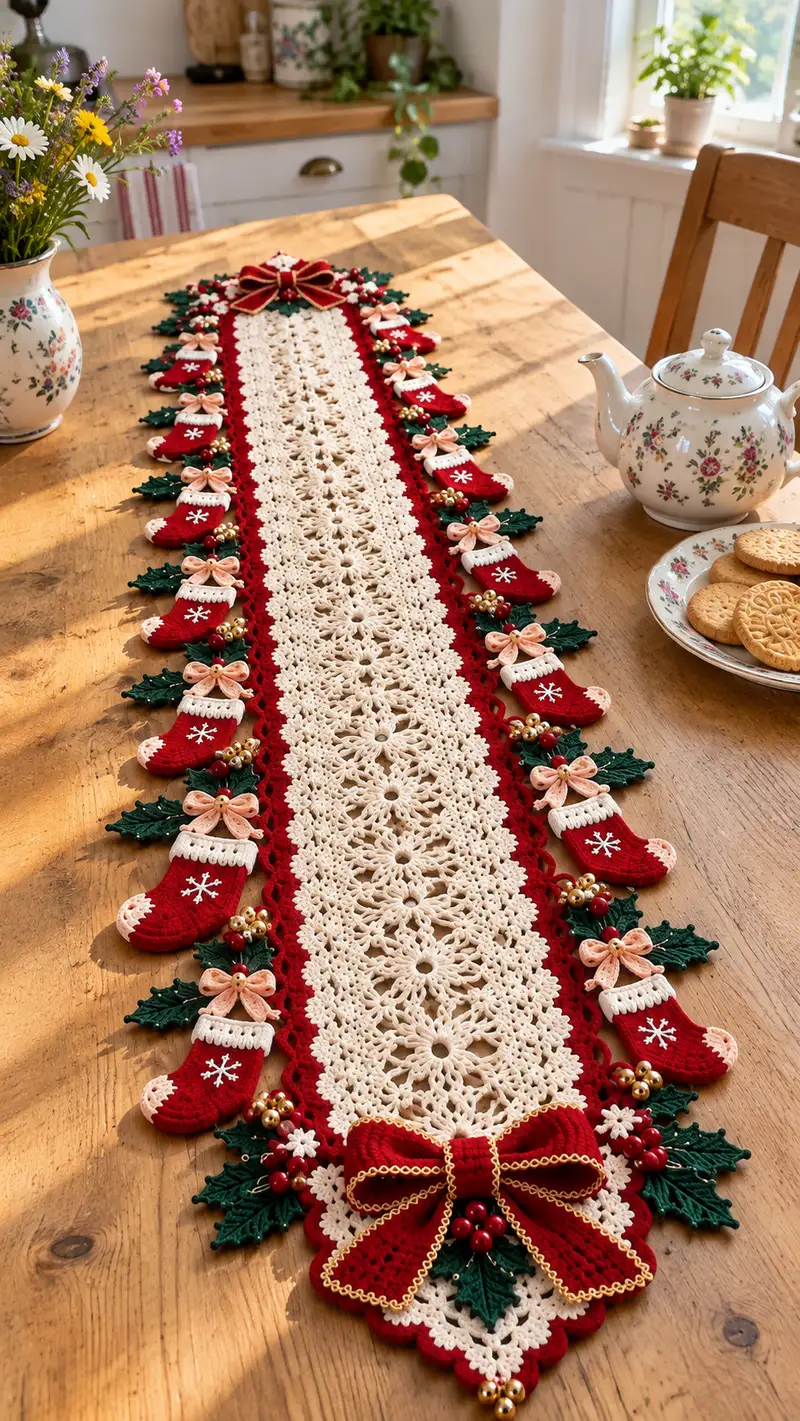
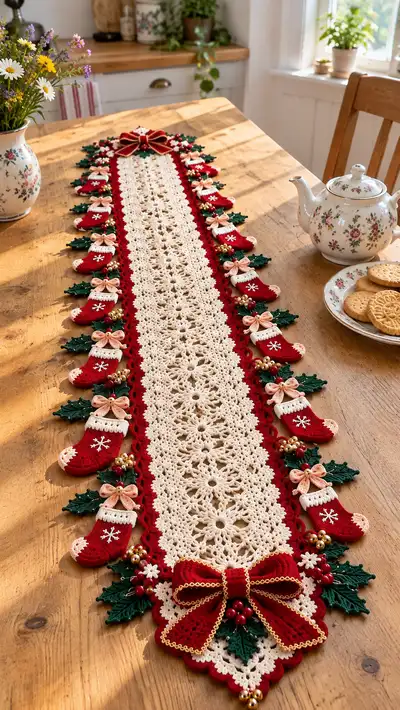
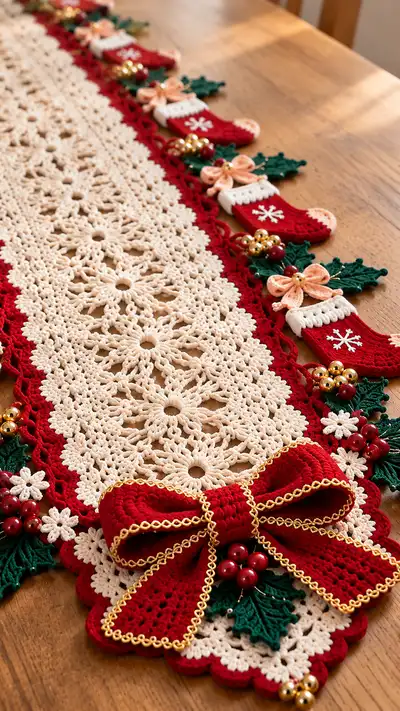
— Center Panel Finishing Rounds (Work after joining full column) :
Round 1 :
With cream yarn attached at one short end, ch1, 1 sc evenly around the entire long rectangle edge working 1 sc in each sc or top of arch; at corners place (1 sc, ch2, 1 sc) to maintain flatness. (Maintain stitch count equal to edge length; mark midpoint)
Round 2 :
1 sc in each st around, join with sl st to first sc. This creates a neat, closed edge for the subsequent red border (stitch count same as Round 1)
Info :
Count your stitches and write down the total – you'll need this to proportionally work the red scalloped edge so scallops sit evenly. Add/subtract a few stitches on Round 1 if necessary to make stitch count divisible by the scallop repeat (see border instructions).
Round 3 :
Optional decorative round: ch3, (1 dc, ch1, 1 dc) into every 6th sc to begin a subtle picot-laced line; join with sl st. This is decorative and may help the red scallop pick-up points align.
Info :
Press and block the entire cream panel flat. This ensures the red border stitches are placed evenly and the border lies flat when attached.
— Red Scalloped Border :
Round 1 :
With red yarn, join at an edge stitch of the cream panel. Ch1, 1 sc in same st, *skip 2 sc, 5 dc in next sc, skip 2 sc, 1 sc in next sc* repeat around to create scallops. Ensure scallop repeats equal the divisor you set earlier. Join with sl st to first sc.
Info :
Adjust skip numbers to make scallop repeats even based on your stitch count. Typically pattern pictured uses (skip 2, 5 dc cluster, skip2, sc) repeat which yields a medium-large scallop suitable for the runner size.
Round 2 :
Ch2, 1 hdc in each st along the back of scallops to create a clean side; in each 5-dc cluster work (ch2, 3 dc) into the center dc to form elevated scallop point; join with sl st. (stitch count varies by repeats)
Round 3 :
Ch1, 1 sc around working 1 sc in each hdc and 3 sc into the top of each scallop point to accentuate the curve; join with sl st. This readies placement for appliques between scallops.
Info :
Mark every scallop center with a stitch marker so when attaching stockings and holly you place them symmetrically between scallops. The pictured runner places one stocking per scallop pair on each side which yields a very full border.
Round 4 :
Decorative picot line: *ch4, sl st into 2nd ch from hook to form a picot loop, sl st into next sc* repeat across scallops to create delicate loops for additional embellishment (optional). Fasten off and weave tails.
Info :
If you prefer a simpler border, stop at Round 3. The picot line on Round 4 gives the runner the distinct looped edge seen near the mini stockings and helps conceal the join points of appliques.
— Mini Stocking Applique (Make 24, 12 per side) :
Overview :
Stockings are small 3D appliques worked in rounds with color changes for toes and cuffs. The pattern below makes one stocking approximately 7 cm long and 4.5 cm wide. Work tightly so the stocking maintains its shape and can be lightly stuffed for slight dimension.
Round 1 :
With red yarn MR, ch1, 6 sc into MR, sl st to first sc (6)
Round 2 :
Inc in each st around (12)
Round 3 :
(1 sc, inc) x6 (18)
Info :
These first rounds form the toe's rounded base; keep tension tight. If you like a more elongated toe, add one more increase round: (2 sc, inc)x6 to reach 24 before proceeding.
Round 4 :
1 sc in each st around (18)
Round 5 :
Ch1, turn to work back-and-forth for foot shaping: 8 sc across for foot length, continue working in rows across the body portion to create a slight toe-to-foot shape. (Work 8 sc rows for 3 rows total)
Round 6 :
Resume continuous rounds: pick up stitches along sides of the worked foot rows and continue in the round, 1 sc in each st around (approx 18)
Round 7 :
(sc in next 6, dec) x2, sc in next 4 (16)
Round 8 :
1 sc in each st around (16)
Round 9 :
Shape heel: (sc4, dec) x2 (14)
Round 10 :
1 sc in each st around (14)
Round 11 :
Change to white yarn for cuff. Ch1, 1 sc in each st around for 2 rounds to build cuff (14)
Info :
Optionally work cuff in ribbed BLO: ch1, 1 sc in each st BLO for a stretchy cuff. If you want the cuff to fold over, work 4 rounds in the cuff color and then fold before attaching decorations.
Round 12 :
Switch back to red if needed to finish top edge, or finish in white for visible cuff. Fasten off leaving a long tail for sewing. Embroider a snowflake on the main stocking body with white yarn using surface slip stitch or simple satin stitch (see embroidery info).
Info :
If you want little toe highlights in pale peach as pictured, work a very small round of pale peach at the toe tip while the stocking body is still open: attach peach and sc 6 sts across toe area, then fasten off and weave in ends.
— Stocking Embroidery & Finish :
Snowflake Embroidery :
Using white yarn and yarn needle, stitch a simple six-point snowflake: bring thread up at center, create 6 short straight stitches radiating to equal length, then cross stitch small lines between outer points. Secure backing knots on the wrong side and trim.
Loop for Hanging :
Leave a short chain loop on the inside top of stocking (2-3 ch) stitched into the cuff to create a small hanging loop for sewing to the scallop edge.
Info :
Make 24 stockings, matching left and right orientation so toe curves outward when attached. Block lightly if needed and press cuff into shape before final assembly.
— Holly Leaf Applique (Make 24 clusters of 3 leaves) :
Round 1 :
With dark green yarn MR, ch1, 6 sc in MR, sl st to first sc (6)
Round 2 :
Inc in each st (12)
Round 3 :
(1 sc, inc) x6 (18)
Info :
These rounds build a small disc that anchors the leaf base. Leaves are worked individually from the base outward to produce pointed lobes with raised veins.
Round 4 :
Ch3, turn and work along a straight edge: 1 tr, ch2, 1 tr into next st, ch2, 1 tr into next st to begin first point; work back along base with scs to next starting point and repeat for three lobes producing a classic holly silhouette. Fasten off after three lobes. Each leaf is worked as a small fan ~7-9 sts wide.
Leaf Vein Detail :
Using the tail or surface slip stitch in matching green, work one central line down each leaf from base to tip to mimic a vein. Optionally use a slightly darker green for subtle contrast.
Info :
Cluster three leaves by sewing their bases together with green yarn to create one holly cluster. Position clusters between scallops and slightly under each stocking to create fullness.
— Small Decorative Flower (Make 30) :
Round 1 :
MR, ch1, 6 sc into MR; sl st to first sc (6)
Round 2 :
Slip into next st, ch3, (2 tr, ch1, 3 tr) in same st for a petal, *skip next st, (3 tr, ch1, 3 tr) in next st* repeat for 3 small petals; sl st and fasten off (3 petals)
Info :
These small blossoms are used as fillers between holly clusters and around the big bow. Make plenty and pin into composition before final sewing.
— Berry Clusters :
Assembly :
Use small red round wooden or acrylic beads (6-8 mm) grouped in 3s for berries. Thread beads on short lengths of sewing thread or fine wire and anchor through the knit fabric by sewing through the cream and red layers into the runner back; secure knots on wrong side and apply a dab of fabric glue for extra security. Combine gold metallic beads in clusters of 3 as accent next to red berries to mirror the photo.
Info :
Position berry clusters near the base of the holly leaf clusters for authentic holiday look. Use multiple passes when sewing beads to ensure they remain secure during handling and washing.
— Pale Peach Ribbon Bows (Make 24 small bows) :
Round 1 :
Chain 18 with pale peach yarn, sl st to form a loop; ch1, work 1 sc in each chain across creating a flat strip (18 sc). Fold into a bow shape and wrap a short length of yarn around the middle to secure, sew a small gold bead onto the bow center for the photo-like finish.
Info :
Sew bows on top of holly clusters between the stocking cuff and holly for a delicate layered appearance. Make sure bows are consistent in size by counting chains and keeping even tension.
— Large End Bow (Make 2 for both ends) :
Round 1 :
Using red yarn, ch 36. Row 1: 1 sc in 2nd ch from hook and across (35 sc). Row 2-6: ch1, turn, 1 sc in each st across (35) to create a sturdy strip for bow loops.
Round 2 :
Fold strip in half widthwise and whipstitch along short edge to create long tube; turn right side out. Optionally stuff lightly with polyester fiberfill to give loft to the bow loops.
Round 3 :
Create two loops by folding the tube into a bow shape and binding the center tightly with red yarn. Wrap additional yarn around the center to form a firm center knot. Add gold trim by gluing or sewing a narrow gold braid to the bow edges as pictured and stitch three large red beads into the center base for berry clusters.
Info :
Make two large bows, one for each runner end. Secure bows to the runner using heavy-duty thread and several passes through the runner fabric to prevent sagging. Add a felt backing behind each bow to distribute weight and protect stitches from beads digging in.
— Edge Embellishments and Final Scallops :
Round 1 :
With red yarn, revisit scalloped border and work an outermost picot round: *ch5, picot (sl st into 3rd ch of chain)* across each scallop peak to create decorative loops that echo the runner photo. Join and fasten off neatly.
Round 2 :
Optional gold chain trim: Using narrow gold braid or metallic thread, hand-stitch the braid along the outer edge of the bow areas to mimic the gilded bow edging in the photo. Secure ends on the reverse and catch every 1/2 cm to keep braid flat.
Info :
When adding heavy trims or beads, always anchor through multiple layers of crochet and distribute weight over several stitches to avoid distortion or pull in the lace panel.
— Assembly and Placement Guide (Pin before attaching) :
Step 1 :
Lay runner on table and place all appliques (stockings, holly clusters, bows, flowers) without sewing. Position each stocking such that toe curves away from center panel and cuff aligns with scallop top; the sample uses one stocking per scallop on each long side with roughly 2-3 cm between stocking tips.
Step 2 :
Place small holly clusters under each stocking base, add berry groups to the center of each leaf cluster, and place a pale peach bow atop the holly. Add small flowers in gaps to balance the composition. When satisfied with placement, mark positions with pins.
Info :
Take photographs of your layout before sewing so you can reproduce symmetrical placement when attaching the opposite side or making another runner.
Step 3 :
Sew each applique in place using matching yarn and a yarn needle. For stockings, use the long tail left from fasten-off at the cuff to whipstitch through the red scallop loop and the runner edge for a secure attachment. For holly leaves, stitch the base disc to the runner back and catch a few stitches through the scallop edge to anchor. Sew beads using sewing thread and tie secure knots on the reverse.
Info :
Sew slowly and make several passes for each bead cluster to ensure longevity. Hide knots by pushing them inside the runner fabric and securing with a small drop of fabric glue if needed.
Final Finishing :
Weave in all ends on the wrong side of the runner. Block the entire finished runner again, taking care around beads and metallic braid—if blocking with steam, do not steam the beads or metallic braid directly; instead use light steam from a distance. Allow to dry completely before use.
Care Instructions :
Spot clean small stains with a mild detergent; hand wash gently in cool water if necessary. Remove bead clusters if you wish to machine-wash delicate items, but hand washing and flat drying is recommended to preserve shape and attachments.
This gorgeous holiday table runner brings together lacy vintage charm and cheerful seasonal motifs for a centerpiece you'll be proud to display. Each medallion, scallop and stocking builds into a lovingly layered composition, finished with bows and berry clusters for a warm, festive look. 🧶 Make it for your own table or as a thoughtful handmade gift — it’s a truly special piece that says 'holiday' in every stitch. Happy crocheting and enjoy the sparkle this runner adds to your celebrations! 🎀✨