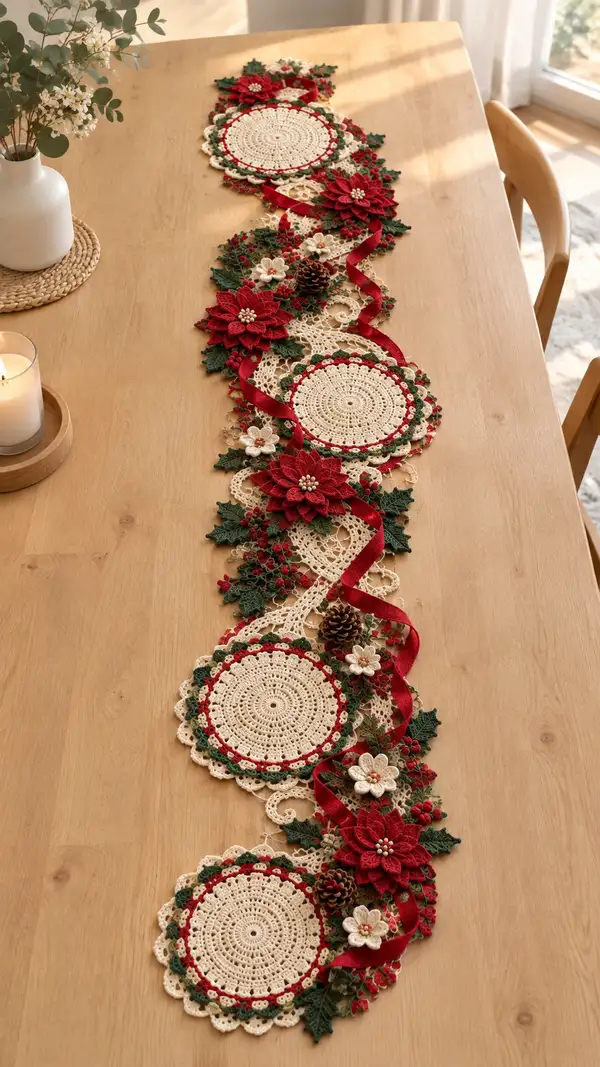
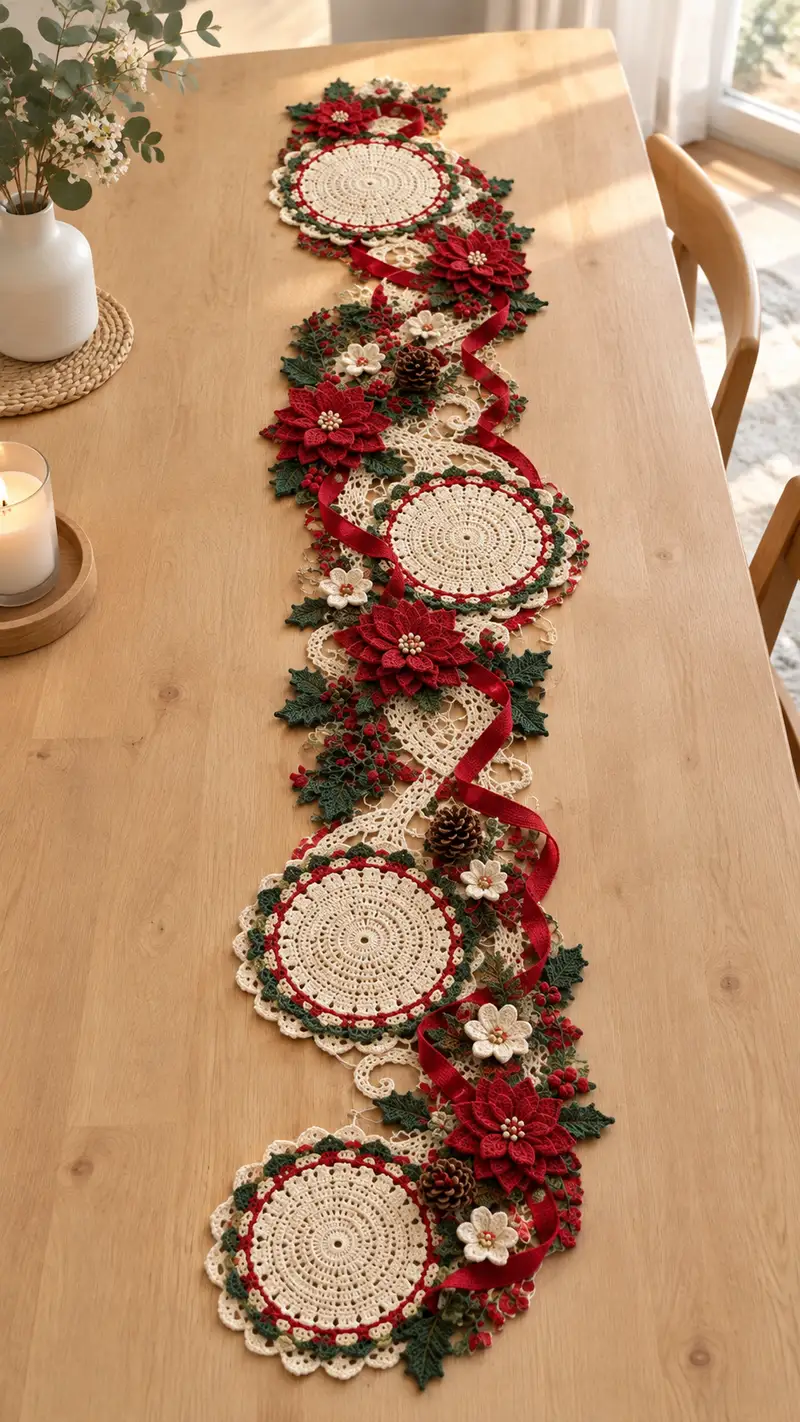
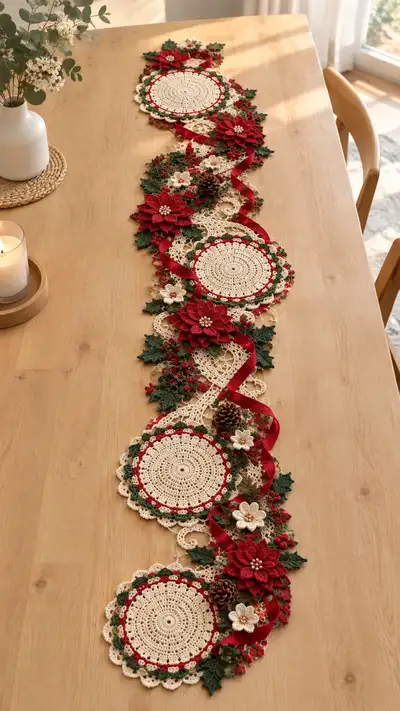
An elegant, heirloom-style crochet table runner inspired by classic lace doilies and holiday poinsettias. This runner features circular lace motifs, layered poinsettia flowers, holly leaves, tiny blossoms and berry clusters in cream, deep red and forest green. Finished with a ribbon woven through scalloped edges, it creates a warm, festive centerpiece for holiday dinners and seasonal decor.
Progress Tracker
0% Complete
— Overview and Modular Plan :
Info :
This runner is made from repeating circular doily motifs (Make 6 or desired number), layered poinsettia flowers (Make 6), small five-petal blossoms (Make 10), holly leaves (Make 30), berry clusters (Make many small clusters), and connecting lace strips. Work pieces separately, block flat, then assemble with decorative joinery and a ribbon threaded through scalloped edges. Read all sections before starting; maintain consistent tension and use recommended hooks for best fit.
— Circular Lace Motif (Make 6) :
Round 1 :
6 sc in magic ring (6)
Round 3 :
(1 sc, inc) x 6 (18)
Round 4 :
(2 sc, inc) x 6 (24)
Round 5 :
(3 sc, inc) x 6 (30)
Round 6 :
(4 sc, inc) x 6 (36)
Round 7 :
(5 sc, inc) x 6 (42)
Round 8 :
(6 sc, inc) x 6 (48)
Round 9 :
(7 sc, inc) x 6 (54)
Round 10 :
(8 sc, inc) x 6 (60)
Info :
All increases so far follow a 6-start increase principle: each round adds 6 stitches total. Count at the end of each round to ensure correct shaping. Keep stitches tight to avoid gaps in the center.
Round 11 :
(9 sc, inc) x 6 (66)
Round 12 :
(10 sc, inc) x 6 (72)
Round 13 :
(11 sc, inc) x 6 (78)
Round 14 :
(12 sc, inc) x 6 (84)
Round 15-18 :
1 sc in each st (84)
Info :
Now we begin to add openwork for lace texture. Change to decorative stitches but maintain overall stitch placements so motifs remain round. If you prefer a denser doily, continue with sc rounds instead of lace rounds.
Round 19 :
*dc in next 2 sts, ch3, sk 2 sts* rep around. This creates chain-3 loops; count is equal to number of cluster repeats (28-30 depending on spacing). Fasten off if switching color to accent later (see Info).
Info :
Change to cream for base motif if required. Carry or fasten off inner yarn as preferred. If adding a colored scallop edge, switch to accent color now (red or green) for the edging rounds.
Round 20 :
Join new color in any ch3 loop, *(2 dc, ch2, 2 dc) in ch3 sp (shell made), sk to next ch3 sp* rep around. The number of shells equals the number of ch3 loops from prior round. Keep shells evenly spaced.
Round 21 :
Ch1, sc in each dc and ch2 space around to create a tidy base for next decorative row. (St count equals previous dc total; treat each shell as 4 sts for counting)
Round 22 :
*Ch3, sl st into top of next shell center, ch3, sc between shells* rep around to form picot-like arches. Maintain even tension for uniform arch size.
Round 23 :
Switch to cream. Working into picot arches, *(sc, hdc, 3 dc, hdc, sc) in arch* rep around to form scalloped edge. This increases the visual circumference but counts are managed by working per arch.
Round 24 :
Work a refined edging: *sl st in next 2 sts, picot (ch3, sl st in first ch), sl st next 2 sts* rep around, creating a delicate picot border. Fasten off and weave ends.
Info :
Block each circular motif flat. Lightly spray starch if you want a crisp, lace-like finished look. These motifs are the central anchor pieces—ensure they are identical in size for easy joining.
— Lace Connector Strips (Make 5, length as desired) :
Round 1 :
Ch 60 (or a multiple as needed to span between circles). Join with sl st to form a long loop if making continuous strip, or work rows if making a flat connecting strip. For table runner we will make long scalloped strips worked in rounds to attach later.
Round 2 :
Working in rounds along chain foundation: ch3 (counts as dc), dc in next 2 ch, *ch2, skip 2 ch, dc in next 3 ch* rep to end. Join with sl st. This establishes a series of arches for decorative motifs.
Round 3 :
Ch1, sc in every st and ch space around to stabilize foundation (st count equals length of previous round). Work evenly to avoid curling.
Info :
Use BLO on one or two rounds to create a raised ridge that helps the strip sit slightly above the table and add dimension. If you want the strip to be flexible, skip stiffening rounds.
Round 4 :
Switch to cream and work decorative chain loops: *ch5, sl st in next sc* around to create decorative openwork loops to which leaves, berries and small blossoms will be stitched later.
Round 5-8 :
Work 4 rounds of sc in each st to form a sturdy base for applique attachment (do not fasten off). Keep the strip long enough to fit between your circular motifs—measure against blocked circles before finishing.
Info :
Block strips gently so they curve slightly and nestle under circular motifs when assembled. These connectors allow for creative placement of flowers and leaves and make the runner visually continuous.
— Layered Poinsettia Flower (Make 6) :
Info :
Poinsettia has three layers of petals: small inner petals, medium middle layer, and large outer petals. Each petal is crocheted individually and joined at the center. Use deep red thread for petals and cream or gold beads for the center cluster. Work 8 inner petals, 8 middle petals, 8 outer petals for fullness.
Petal Construction — Inner Petals (Make 8) Round 1 :
Ch 6, sc in 2nd ch from hook, hdc in next, dc in next 2, tr in last ch; rotate to work on opposite side of foundation chain: dc in next 2, hdc in next, sc in last, sl st to base (counts: petal sp shape). Fasten off. Repeat 8 times.
Info :
Inner petals are small and slightly pointed. Make 8 and block them gently with a little starch so they curve upward slightly when assembled.
Petal Construction — Middle Petals (Make 8) Round 1 :
Ch 8, sc in 2nd ch, hdc in next 2, dc in next 3, tr in next 2; return along opposite side: dc 3, hdc 2, sc 1, sl st to join. Fasten off. Repeat 8 times.
Info :
Middle petals are larger; leave long tails for sewing to center disc. Slightly curve petals by blocking with pins over a template to ensure consistent shape.
Petal Construction — Outer Petals (Make 8) Round 1 :
Ch 10, sc in 2nd ch, hdc in next 3, dc in next 4, tr in next 3; return: dc 4, hdc 3, sc 1, sl st to join. Fasten off. Repeat 8 times.
Info :
Outer petals provide the dramatic silhouette. Use slight starch to support them. You may add 1 row of crab stitch (reverse sc) around each petal edge for a finished look in contrasting red if desired.
Round 2 :
Create a small center disc: mr, 8 sc into ring (8), sl st to join, then ch1 and work *sc, ch2* around into spaces to create a tiny ruffled disc. Fasten off leaving long tail for sewing.
Assembly :
Sew inner petals evenly around the center disc using long tails. Layer middle petals on top, offsetting them between inner petals, then attach outer petals. Sew securely with matching thread. Add bead cluster to center: attach 7-9 small seed beads and embellish with a small knot behind center disc for stability.
Info :
When sewing layers, use small whip stitches from the underside so front appearance remains neat. Stack petals so they are slightly offset for fullness rather than perfectly stacked.
— Small Five-Petal Blossom (Make 10) :
Round 1 :
mr, ch1, 5 sc in ring (5), sl st to first sc to close (5)
Round 2 :
*ch4, sl st in next sc* repeat around to make 5 looped petal bases. Fasten off and weave tails for sewing.
Round 3 :
With cream or off-white: join in each ch4 loop and work (sc, hdc, dc, hdc, sc) into loop to form rounded petals. Repeat for 5 petals. Fasten off leaving long tail for attachment. Add a single small bead or French knot of thread to center for dimension.
Info :
These tiny blossoms add delicate points of contrast. Make ten and arrange them throughout the runner between larger poinsettias and along lace connectors.
— Holly Leaves (Make approx 30) :
Round 1 :
Ch 12, sc in 2nd ch from hook, hdc in next 2, dc in next 3, hdc in next 2, sc in next, sl st in last. Work along opposite side of chain: sc, hdc 2, dc 3, hdc 2, sc, sl st to join at base. Fasten off (leaf shape completed).
Round 2 :
Join in base and work 1 round of sc through both leaf layers to strengthen. Optional: work a round of crab stitch around leaf edge to add definition in BLO. Block with jagged pins to create serrated holly edge.
Info :
To achieve the characteristic holly silhouette, pinch the sides while wet and block with T-pins to create three pronounced points per leaf. Use darker green for leaves and a lighter green for accents if desired.
— Berry Clusters (Make many small clusters) :
Round 1 :
mr, 6 sc into ring (6). Fasten off and pull center tight to form small berry. Make clusters of 3-7 berries by sewing small berries together at base with short tails.
Info :
For dimensional clusters, use tiny bits of stuffing or a dab of glue inside each berry before closing. Attach clusters in groups next to leaves and flowers for natural arrangement.
— Pinecone Accent (Optional) :
Round 1 :
With taupe or brown, mr, ch1, 6 sc into ring (6)
Round 2 :
Work small sc bobble stitches around: *sc in next, bobble in next* rep around for textured surface. Continue 3-4 rounds to build cone. Stuff lightly and close with sl st. Secure with stitches to base. This decorative element can be substituted with small real pinecones if desired.
Info :
Pinecone shapes are optional but add a natural woodland touch. If making many, reduce size to keep balance with lace work.
— Edging and Ribbon Channels :
Round 1 :
With cream yarn, join at runner edge and work a uniform scallop edge around all motifs and connector edges: *(sc 2, ch3, sc 2) in next spacing* rep to create scallops sized to accommodate ribbon.
Info :
Make scallops large enough to pass your ribbon through easily. Try a 15mm ribbon with 3-4 scallops per motif side. If you want a tighter ribbon, reduce ch3 to ch2 accordingly.
Round 2 :
Work a tidy round of sc around each scallop to reinforce channel: sc in each st and sc in ch spaces. Fasten off and weave ends.
Round 3 :
Thread ribbon through alternate scallops along the edge in a flowing S shape across the runner. Secure ribbon ends under back side with a few hand stitches or hidden tack stitches so ribbon moves but stays generally in place.
Info :
Do not permanently glue the ribbon if you wish to launder the runner; instead tack it lightly with thread so it can be removed for washing.
— Assembly and Decorative Placement :
Info :
Before assembly, block every motif, flower, leaf and strip. Decide on motif spacing: lay out your circular motifs with connectors and position poinsettias and leaves. The sample runner alternates circle, flower cluster, circle to create visual rhythm.
Step 1 :
Place first circular motif on flat surface. Position lace connectors to meet edge points where scallops align. Pin connectors in place through the blocked fabric, spacing evenly.
Step 2 :
Sew connector strips to circular motif by slip-stitching through back loops only or sewing by hand with tapestry needle using matched thread for invisible joins. Work slowly and keep tension even to avoid puckering.
Info :
Use small backstitches or a whip stitch depending on your comfort; for heavier use, add two rows of sewing for strength. Keep stitches small and close to the edge to preserve lace appearance.
Step 3 :
Arrange poinsettia flowers between circles; pin them so petals overlap the circle edge slightly. Sew centers tightly to the runner through the center disc, catching connector and base motif for stability.
Step 4 :
Sew holly leaves in clusters around each poinsettia—3 to 5 leaves per cluster depending on size. Attach berry clusters adjacent to leaves and beneath petals for realistic composition.
Info :
For an organic look, offset clusters slightly and vary leaf angles. Sew on tiny five-petal blossoms in groupings of 1-3 near berry clusters to break up strong reds with cream highlights.
Step 5 :
Add bead centers to poinsettias: using beading needle and thread, sew 7-9 seed beads in a tight cluster at the center of each poinsettia disc. Tie off at the back and hide tails under the center disc stitches.
Step 6 :
Thread the ribbon through scallops across entire runner in a flowing S pattern, tie gentle loops and secure ends under the runner with small stitches. Trim ribbon ends at an angle and fray-stop with a tiny dot of clear nail polish or a small stitch.
Info :
If you prefer not to use beads, create a French-knot cluster using cream thread for a soft center. Test different center options on a spare flower before applying to finished pieces.
— Final Finishing Touches :
Round 1 :
Spray the entire assembled runner lightly with a starch or fabric stiffener if you desire a crisp look. Allow to dry fully on a flat surface with additional pins to maintain shapes.
Round 2 :
Inspect underside and secure any loose ends. Add a few reinforcement stitches to high-wear areas where the ribbon threads through scallops or where motif joins are close to the table surface.
Info :
Always launder gently by hand or spot-clean; remove ribbon before washing. Store flat or rolled with tissue paper to avoid crushing the three-dimensional petals.
— Sizing and Variation Notes :
Info :
To make a shorter or longer runner, add or remove circular motifs and adjust connector strip length. You may also change the number of poinsettias between circles to match your preferred visual rhythm. Using a thicker thread and larger hook will produce a proportionally larger runner but may change the delicate lace look.
This festive table runner brings holiday warmth and handcrafted charm to your home. Each motif and poinsettia layer adds depth and tradition, creating a centerpiece you'll be proud to display. Gather your thread, take your time with each delicate petal, and enjoy the slow, satisfying process of making something beautiful by hand. 🎀🧶 Your holidays will feel that much cozier with this special finishing touch — happy crocheting!