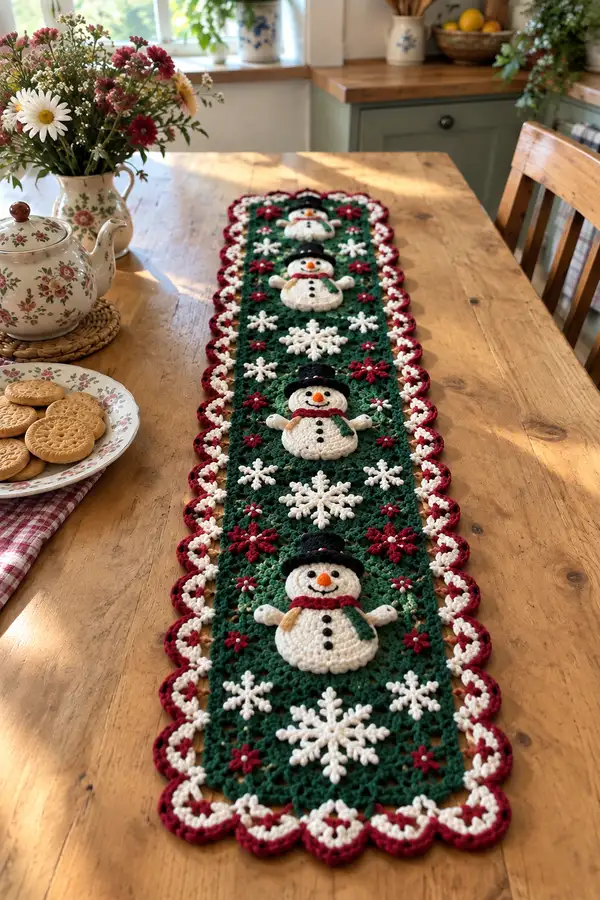
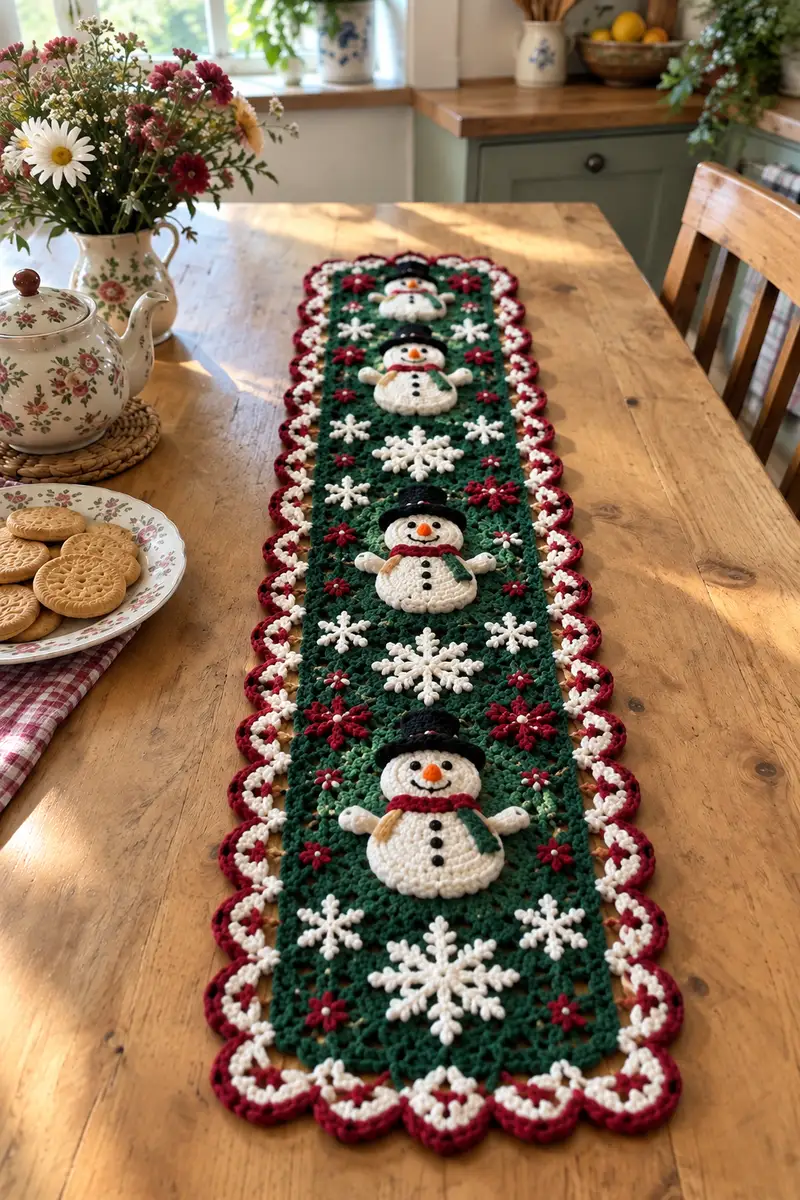
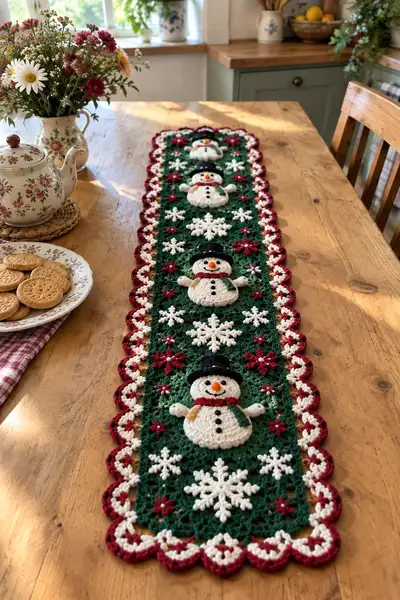
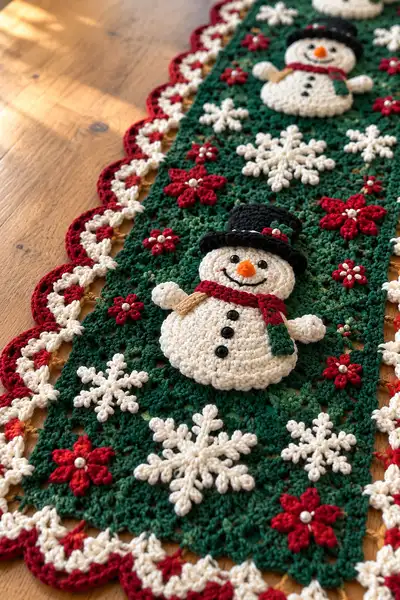
Create a cozy, vintage-inspired Festive Snowman Table Runner featuring three dimensional snowman appliques, delicate snowflakes and poinsettia accents on a deep green granny background. This pattern uses classic worsted yarn colors—forest green, cream, cranberry and black—and a scalloped, two-tone border for a finished, heirloom look. Perfect for decorating a dining table or sideboard, the runner is rich in texture with raised motifs and pearl bead accents.
Progress Tracker
0% Complete
— Pattern Overview :
Info :
This runner is worked modularly as four repeating rectangular granny panels joined lengthwise. Each panel is worked in rounds from the centre out to form a solid green square-like rectangle. Appliques (snowman upper head, torso, hat, arms, scarf) and decorative pieces (snowflakes and poinsettias) are made separately and sewn on. Border scallops are added last. The pattern below gives detailed round-by-round instructions for each component so you can reproduce the look in the photos. If you want a longer or shorter runner, repeat or remove panels as desired.
— Gauge & Finished Size :
Info :
Gauge is not critical for this decorative runner, but for reference: 14 dc x 8 rows = 10cm (4in) worked in worsted yarn with 3.5mm hook. Finished runner as written measures approximately 90-100cm (35-39in) long and 18-20cm (7-8in) wide. Change yarn weight or hook to adjust size.
— Panel Base (Make 4 panels) :
Round 1 :
6 dc in magic ring (6)
Round 3 :
(1 dc, inc) x 6 (18)
Round 4 :
(2 dc, inc) x 6 (24)
Round 5 :
(3 dc, inc) x 6 (30)
Round 6 :
(4 dc, inc) x 6 (36)
Info :
Switch to working clusters to create a granny texture. Change to forest green if not already using it. Work loosely but evenly so panels lie flat.
Round 7 :
*ch3 (counts as first dc), dc2 in same st, ch2, skip 2 sts, dc3 in next st; rep from * around, slip to top of ch3 to join (forming granny-cluster rounds). Adjust spacing to keep rounds square-like.
Round 8 :
Continue granny clusters: dc3 in each ch2 sp, ch2 between clusters, join (approx clusters: 12 - adjust to keep panel width)
Info :
From round 7 onward we maintain our granny-cluster pattern and expand in a rectangular fashion to set the panel dimensions. Work additional partial clusters on two opposite sides to form a rectangle rather than a perfect square—this will create the long narrow look of the runner panels.
Round 9 :
On two short sides work (dc3, ch2, dc3) in corner spaces; on long sides work dc3 clusters into each ch2 space, ch2 at corners (maintain 36 clusters total roughly) (panel keeps increasing)
Round 10-14 :
1 dc3 cluster in each ch2 sp, ch2 around, join - (maintain layout until panel reaches approx 22cm x 9cm). Keep counts consistent to get four identical panels.
Info :
Block each panel flat to exact dimensions before adding appliques; blocking evens the stitches and makes joining far easier.
Round 15 :
1 dc3 cluster in each ch2 sp, ch1 between clusters on long edges to tighten fabric slightly, join (panel now at desired size) (count clusters to ensure all panels match)
— Snowman Head Applique (Make 4) :
Round 1 :
6 sc in magic ring (6)
Round 3 :
(1 sc, inc) x 6 (18)
Round 4 :
(2 sc, inc) x 6 (24)
Round 5 :
(3 sc, inc) x 6 (30)
Info :
Work flat in the round to create a slightly domed circle for the snowman head. Use cream yarn. Place stitch marker at beginning of each round to keep count easy.
Round 6 :
1 sc in each st around (30)
Round 7 :
1 sc in each st around (30)
Round 8 :
1 sc in BLO around to create slight ridge at neck base (30)
Info :
If you prefer a slightly puffed head effect, add a touch of fiberfill into the centre at the end of round 8. For completely flat appliques, do not stuff.
Round 9 :
(3 sc, dec) x 6 (24)
Round 10 :
1 sc in each st (24)
Round 11 :
(2 sc, dec) x 6 (18)
Round 12 :
1 sc around (18)
Round 13 :
(1 sc, dec) x 6 (12)
Round 14 :
6 dec (6) - finish closed with small opening
Info :
Fasten off leaving a long tail for sewing. If you wish to keep the head slightly three dimensional, before fully closing add a very small amount of stuffing then finish decreases and close with whipstitch.
— Snowman Torso Applique (Make 4) :
Round 1 :
6 sc in magic ring (6)
Round 3 :
(1 sc, inc) x 6 (18)
Round 4 :
(2 sc, inc) x 6 (24)
Round 5 :
(3 sc, inc) x 6 (30)
Round 6 :
(4 sc, inc) x 6 (36)
Info :
To achieve the slightly oval, layered look of the snowman body, we will use popcorn/cluster stitches at the outer rounds to thicken and create texture. Work flat and keep shape slightly wider than the head.
Round 7 :
1 sc around (36)
Round 8 :
BLO: 1 sc in each st (36)
Round 9 :
(5 sc, inc) x 6 (42)
Round 10 :
1 sc around (42)
Info :
Switch to working small bobble/popcorn stitch clusters on the outermost round to give a puffy textured hem for the torso that resembles layered snow. Use surface slip stitches later to create costume details if desired.
Round 11 :
*popcorn in next st (make 5 dc in same st, remove hook, reinsert in first dc of group and pull loop through), ch1, skip 1, sc in next 2 sts* rep around - approx 14 popcorns (texture forming)
Round 12 :
1 sc in each st around (maintain 42)
Round 13 :
(3 sc, dec) x 10 + 2 sc (32) - shape inward slightly at waist
Round 14 :
1 sc around (32)
Round 15 :
(2 sc, dec) x 8 (24)
Info :
Fasten off leaving a long tail for sewing to the panel. If you want a very subtle padded effect, add a thin disk of fiberfill between rounds 10 and 11 before closing the waist area.
— Snowman Arm (Make 8 small arms, 2 per snowman) :
Round 1 :
6 sc in magic ring (6)
Round 3 :
1 sc in each st (12)
Round 4 :
(2 sc, dec) x 3 (9)
Round 6 :
1 sc in next 4 sts, ch8 (for arm extension), turn and sc back along chain (skip first ch), sl st to base; fasten off leaving tail for sewing
Info :
These are short stubby arms typical of snowman motifs. You can make longer chains for twig-like arms or insert pipe cleaners for poseability before sewing to the torso.
— Snowman Hat (Make 4) :
Round 1 :
6 sc in magic ring (6) with black yarn (or replace with dark gray)
Round 3 :
(1 sc, inc) x 6 (18)
Round 4 :
1 sc around (18)
Round 5 :
BLO: 1 sc around (18) - this creates a finished brim ridge
Round 6 :
Change to slightly larger brim: ch3, dc1 in next st, dc around for 18 dc across brim, join (18)
Round 7 :
1 sc around brim edge for a neat finish (18)
Info :
Optional: work a small contrasting holly leaf or applique for the side of the hat. Sew hat to top of head using long tail and small whip stitches; place slightly off centre for charm.
— Scarf (Make 4) :
Round 1 :
With cranberry or red yarn ch 18 (or length to wrap around head once), sl st to join for small loop
Round 2 :
Ch1, sc in each ch around for 2 rounds to build thickness
Round 3 :
Optional: change to holly green at the last 6 sts for contrast, sc across to create the striped end
Info :
Make scarf ends slightly longer by adding 6-8 sts length. Fringe can be added by cutting 4-5 short lengths of yarn and knotting to each end.
— Carrot Nose (Make 4) :
Round 1 :
4 sc in magic ring with orange yarn (4)
Round 2 :
(inc, sc) x 2 (6)
Round 4 :
Dec twice then fasten off leaving a tail. Shape into tapered cone and sew to head center. Stuff lightly if desired.
— Snowflake Motif (Make multiple per panel) :
Round 1 :
6 sc in magic ring (6) with cream yarn
Round 2 :
(ch4, sl st in next st) x 6 to form 6 spokes (12 sl st joins counting the chain tips)
Round 3 :
Work 6 petals: in each ch4 sp work (sc, hdc, 3 dc, hdc, sc) then sl st to next sp (each petal is the arm of snowflake)
Round 4 :
To add twig-like points, on each of the 6 arms: sl st to 3rd dc of the 3 dc group, ch3, sl st back (tiny point) - repeat on opposite side for symmetry (this creates 12 small points)
Info :
Blocking the snowflakes on a flat surface with pins helps arms open neatly. Glue or sew a small pearl bead in the centre for a delicate finish.
— Poinsettia Flower (Make 12 small flowers per runner) :
Round 1 :
6 sc in magic ring with cranberry yarn (6)
Round 2 :
*(ch3, treble, ch3, sl st) in same st to form petal* rep 6 times around, fasten off (6 petals)
Round 3 :
Sew a small cream bead in the centre or work a small French knot with cream yarn.
Info :
Make several flowers to scatter between snowmen on the panels. They are small visual accents and look very crisp with pearl centres.
— Assembly of Appliques onto Panel (per panel) :
Info :
Lay blocked panel flat and mark placement positions with removable pins or water-soluble stitch markers. Space the central vertical line with three evenly spaced snowman positions and fill gaps between them with alternating snowflakes and poinsettias as shown in the photos. Typical spacing between snowman centres is approx 20-22cm along the panel's long axis.
Round 1 :
Position and baste the torso first: center the torso applique where desired on the panel (use 6-8 small basting stitches around edge)
Round 2 :
Position the head directly above the torso leaving a 1-2 cm overlap at neck - baste in place
Round 3 :
Sew hat on top of head with hidden whipstitch using long tail from hat. Sew carrot nose centrally, then embroider a smile with black yarn or sew small black bead eyes and three black buttons on torso.
Info :
Sew arms to the sides of the torso so they point slightly outward. Attach scarf around neck with a couple of tiny stitches at back and secure ends so they drape over torso. Sew poinsettias and snowflakes in remaining spaces using pearl beads as flower centres.
— Joining Panels into Runner :
Info :
Arrange the four panels in a straight line forming the runner length. Use mattress stitch or single crochet join for a visible ridge. For an invisible flat join use whipstitch with matching yarn and hide tail inside seams.
Round 1 :
Join panels with single crochet: place panels RS together and sc through both loops across full side edges, matching clusters at corners. Continue joining remaining panels to form a long runner.
Round 2 :
After joining, turn runner and work one round of sc in cream around entire outer edge to create a neat base for scallops (work 3 sc in each corner cluster to maintain shape)
Info :
Pin scallop foundation round every 2-3 stitches before crocheting if your runner tends to ripple—this ensures uniform scallops.
— Scalloped Border (Two-Tone) :
Round 1 :
With cream yarn: 1 sc in each st around runner edge, work (3 sc) in corner spaces to keep corners rounded (maintain consistent stitch count along length)
Round 2 :
Change to cranberry yarn: *skip 2 sc, 7 dc in next sc (shell), skip 2 sc, sl st in next sc* rep around to form shells. At corners, place 9 dc shells to keep curves (approx total shells depends on runner length)
Round 3 :
Switch back to cream: sl st to mid-dc on each shell and work 5 sc centered on shell to form pointed scallop edge; sl st into next sc between shells to reposition and repeat (this creates alternating cream picot-like scallops)
Info :
If desired, add a final round of slip stitches in cranberry over the peaks of the cream scallops to highlight the two-tone effect. Weave in all ends and block runner again to set the border.
— Finishing & Embellishments :
Info :
Sew on any remaining beads and buttons. Use a contrasting thread to embroider small smile lines, hat berries and scarf stripes. Trim and weave ends through the back of appliques. If you used safety eyes, ensure they are locked before final sewing.
Round 1 :
Lightly block the entire runner one last time to flatten seams and set scalloped edge. Use cool steam and pins; do not over-steam yarn.
Info :
Optional: Stiffen the runner slightly with diluted fabric stiffener if using as a strict centerpiece, but avoid making it too rigid—keep some drape so it sits naturally on the table.
This Festive Snowman Table Runner brings a nostalgic, handcrafted touch to your holiday table—each snowman and snowflake is a tiny piece of winter cheer. The two-tone scalloped edge and pearl-centred poinsettias elevate the runner to an heirloom-quality decoration. Enjoy assembling the panels and watching the runner come to life with every applique you sew on. 🎄🧶 Let it become a seasonal favourite that sparks smiles every year!