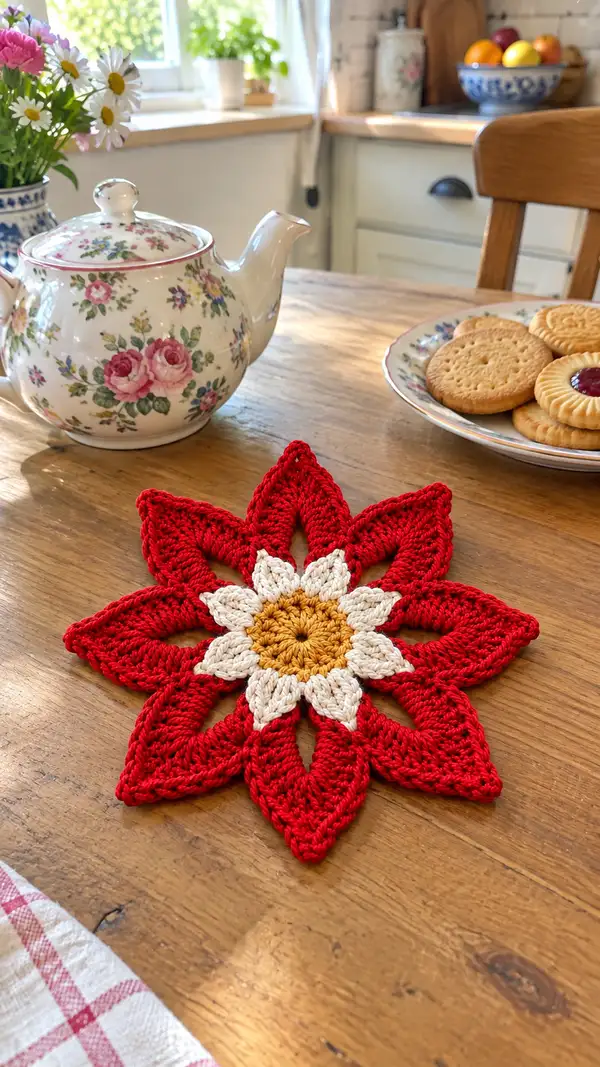
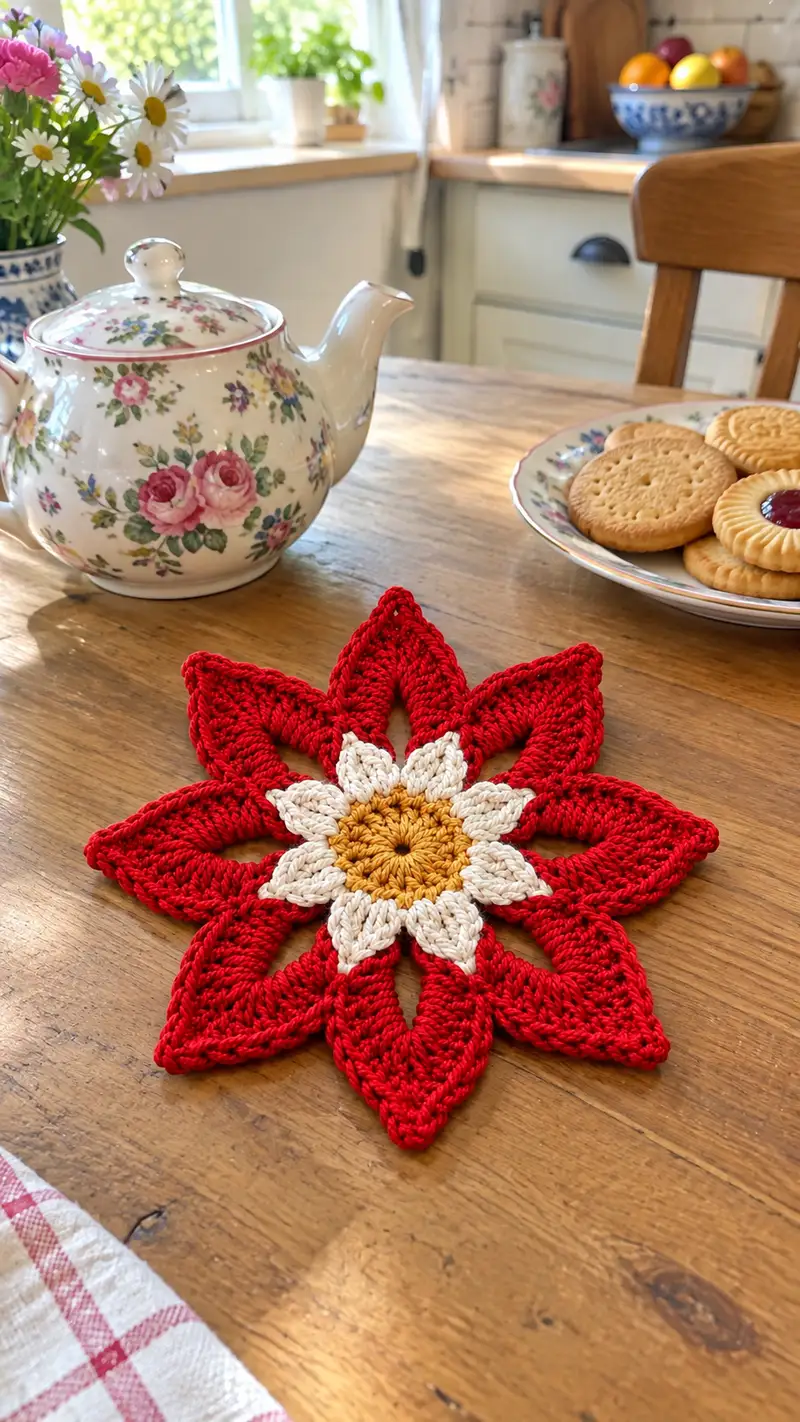
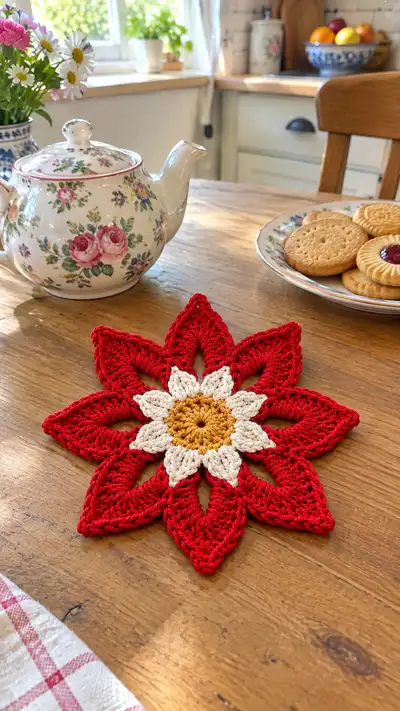
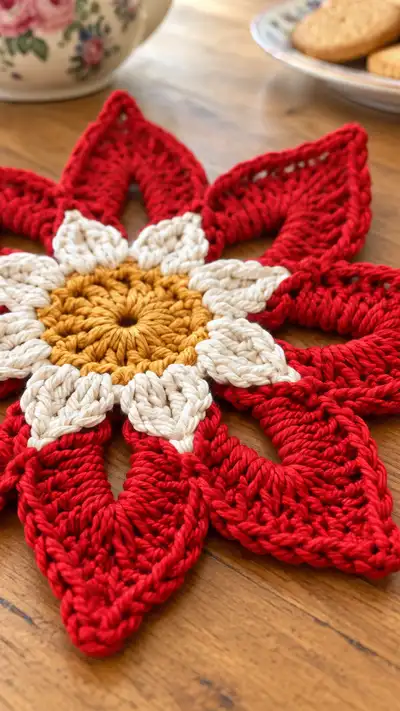
Make a vibrant poinsettia-style star doily/trivet with layered petals in warm mustard, cream and bright red. This decorative centerpiece features a dense textured center, eight sculpted inner petals and eight large dramatic outer petals that create a starburst effect. Worked in worsted yarn, the finished piece lies flat and makes a lovely holiday table accent, coaster, or wall decoration. Includes step-by-step rounds, color-change tips and blocking/finishing notes.
Progress Tracker
0% Complete
— Materials & Gauge :
Info :
Gauge is not critical for this decorative motif, but for similar size use worsted weight yarn and a 3.5mm hook. The sample measures approximately 9–10 inches (23–25 cm) across from petal tip to tip. Adjust hook or yarn weight to change final size.
— Center (Mustard) :
Round 1 :
Make a mr, ch1, 6 sc into ring. Pull ring tight. (6)
Round 2 :
Inc in each st around (2 sc in each st). (12)
Round 3 :
(1 sc, inc) x6. (18)
Round 4 :
(2 sc, inc) x6. (24)
Info :
Change to a slightly tighter tension for the center to avoid gaps. If you prefer a firmer center, switch to a 3.0mm hook for Rounds 5–8 then switch back.
Round 5 :
1 sc in each st around. (24)
Round 6 :
1 sc in each st around. (24)
Round 7 :
To add texture: *ch1, (hdc, dc) in next st; sk next st;* rep around to create 12 textured clusters. (24 posts/12 clusters)
Round 8 :
sl st to first cluster base, ch1, 12 sc evenly across cluster tops (work 1 sc between clusters into the chain/spaces created), finishing with sl st to join. (12)
Info :
Round 8 produces 12 small anchor points for the cream inner petals. Use stitch markers to mark these anchor points so the inner petals sit evenly (mark every stitch used for the 12 sc).
— Inner Petals (Cream) — make 8 petals around center :
Info :
We will work 8 small inner petals that sit on the center ring. These are worked as clusters into the anchor points from Round 8. There are 12 anchor sc; we will pair them to form 8 petals. The pattern anchors two stitches per petal in places where petals share anchors—follow counts carefully and use markers.
Round 9 :
Attach cream in the sc that will be petal 1 base (choose a marker). Ch2 (counts as first hdc), 2 hdc in same st, ch1, sl st in next sc to close that small gap—this starts the first petal base. Move to next petal anchor and repeat for all 8 petals. (8 small base clusters)
Info :
Structure: Each inner petal is worked over three rounds to create a small rounded petal. Work one petal cluster fully before moving to the next to keep counts clean.
Round 10 :
For Petal 1: ch2, (2 dc, ch1, 2 dc) all into base cluster (a small shell). Sl st to base to anchor the petal. Repeat same shell for each of the remaining 7 petals into their bases. (8 shells)
Round 11 :
Petal shaping: In each petal shell: sl st to center of shell, ch2, (hdc, dc, hdc) in center top of shell to round the tip, sl st back to base. Repeat around. (8 small rounded petals)
Info :
Make sure each inner petal is oriented with its tip pointing outward; flatten the center while working to keep petals even. Pin each petal out if you prefer as you work the first round of the outer join.
Round 12 :
Work a finishing sc round around the base of the inner petals: sl st to next base ch, ch1, 1 sc around the base stitches and in the small gap between petals to create a tidy joining ring. Join with sl st. Total stitches will vary depending on how many sc you place between petals — aim for an even, tidy join of approximately 24 sc around (approx). (approx 24)
Info :
This round establishes the join that the large outer petals will attach to. Keep it neat: the outer petal stitches will be worked into these spaces and into the spaces between inner petals. If you have ~24 sc, plan each outer petal to use 3 sc anchors (24/8=3 anchors per petal).
— Transition & Color Change :
Round 13 :
Change to main red color at the last sl st: attach red with sl st, ch1, work 1 sc into the same stitch and evenly around each join stitch to prepare for outer petal anchors. Work 24 sc evenly around (24).
Info :
We are creating anchor points for 8 outer petals. With 24 sc around, place markers every 3 sts to divide into 8 equal sections. These marked sections are where outer petals will be worked. Place markers now: marker every 3 stitches (3,6,9...24).
— Outer Petal Base & First Layer (Red) :
Round 14 :
Petal anchor setup: *Into next marked group of 3 sc: (sc, ch3, sc) all into same group to make a tall loop for petal base; sk to next group* Repeat 8 times making 8 ch-3 loops. Join with sl st. (8 loops)
Info :
These ch-3 loops are the scaffolding for each outer petal. The petals will be worked on top of these loops in the next rounds. Keep the ch-3 loops tall but even; if yours slump, use a slightly smaller hook for the next round.
Round 15 :
Into each ch-3 loop work: sl st into loop, ch2 (counts as first hdc), 7 hdc into loop (total 8 hdc per petal). Sl st to base and move to next loop. (8 petals x 8 hdc = 64 hdc total)
Round 16 :
Petal shaping round: For each petal: ch2, (2 dc, 2 tr, 2 dc) across the top of the hdc row to create a tall petal body. Turn back with sl st to base. Repeat for all petals. Each petal now has a raised fan of 6 stitches (per petal). (8 petals)
Info :
At the end of Round 16 each petal should stand up from the center forming a deep loop. If any petals are uneven, adjust by adding an extra dc into the wider petals' top row next round.
Round 17 :
Work a turning round across the tops of petals: Join to the topmost stitch of petal 1, ch1, 1 sc into each top stitch across the fan (approx 6 sc per petal) then sl st to base and move to next petal. Total ~48 sc across all petals. (approx 48)
Round 18 :
BLO round around petal stems: With the piece facing, work 1 sc BLO in each st around the joining ring and across the petal bases to create a strong ridge where inner and outer petals meet. Aim for 24 sc BLO around the central join and 48 sc across petal tops where needed - maintain even distribution. (total approx 72)
Info :
This BLO ridge helps reinforce the base between inner and outer petals so the piece lays flat. If your piece curls, block it now to flatten before proceeding with vertical petal shaping.
— Outer Petal Sculpting: Layer 1 (Rounds 19-30) :
Round 19 :
Attach yarn at the base of petal 1: ch3 (counts as first dc), 3 dc in next st, ch2, 4 dc in next st of the same petal to form a long petal spine, sl st to base. Repeat for each petal. Each petal will have an initial 7 dc arc. (per petal 7 dc; total 56 dc)
Round 20 :
Ch3, turn: For each petal: into the top of the 7-dc arc work (2 dc, tr, 2 dc). This raises the center of the petal. Sl st to base and move to next petal. (per petal 6 stitches; overall 48)
Round 21 :
Edge the petals: For each petal work 1 sc around the sides of that petal (work sc into side stitches and into the spaces formed between petals) to unify the outer edge—approx 14 sc per petal including sides. (8 petals x 14 = 112 sc total)
Info :
Round 21 builds the width of each petal. Take your time counting sc per petal to keep petals balanced. Use pins to shape the petal as you go.
Round 22 :
Ch2, work a decorative ridge: For each petal work (hdc, dc, hdc) across the center top of petal to create a raised central cord. Sl st to base. (per petal 3 stitches; overall 24)
Round 23 :
To widen: In each petal side space work (sc, hdc, sc) into the side loops formed in R21. This flares the petal edges. (approx 18 sts per petal; total 144)
Round 24 :
Work a decorative chain-lace opening: At the base between petals, ch5 then sl st to the inner join to create a wide keyhole. Repeat between each petal to create 8 open windows. (8 ch-5 windows)
Info :
The keyhole openings create the sculptural negative space seen in the sample. Keep ch loops consistent; if too loose, reduce to ch4. If too tight, ch6.
Round 25 :
Stabilize windows: Work 1 sc into each ch-5 loop edge (5 sc around each loop) and 1 sc into the inner join to anchor. This creates a firm border for the opening. (per window approx 5 sc; total approx 40)
Round 26 :
Form deeper texture: For each petal top, work (tr, tr, dc, hdc, sc) descending from tip to base to add layers and a ribbed look. Anchor with sl st to base and continue around. (per petal 6 stitches; overall 48)
Round 27 :
Work a reverse ridge: In BLO around petal outer edges, 1 sc in each st around to visually lift the petal edges and create separation from adjacent petals. (approx 112)
Info :
At this stage start shaping the petals by gently pinning them outward on a blocking mat. The shaping here is subtle but creates the deep, sculpted look of the sample. Ensure symmetry across all petals by using the previously placed markers.
Round 28 :
For added height, in each petal top work (ch2, 3 tr, ch2) into the very tip to create a pointed tip. Sl st to base. (8 tips)
Round 29 :
Edge finishing: Work 1 sc around entire outer petal edge (working into sides and tip rows) keeping petals separated and tidy. Count per petal approx 18 sc; total approx 144 sc.
Round 30 :
Slip stitch round to tidy joins: sl st in each st around, smoothing any uneven joins. Join and fasten off color if desired, weave ends. (total matches previous round)
Info :
If you plan to add an additional shaping round (a second outer layer), keep the red yarn attached for the following rounds; otherwise fasten off and weave ends before blocking.
— Outer Petal Layer 2 & Deepening (Optional thicker petals) :
Round 31 :
Optional thicker layer: If you want the petals extra bold like the sample, reattach red at a base point and ch1, 1 sc into each st around to re-establish base count. Work 144 sc around. (144)
Round 32 :
For each petal, ch3 and work (dc, dc, tr, tr, dc, dc) across the petal top to add bulk. Sl st to base. (per petal 6-8 dc/tr; overall approx 64-96 posts)
Round 33 :
Work a high-contrast edge row in BLO: 1 hdc BLO in each st around the petal outer perimeter to create a defined silhouette. (approx 144)
Info :
This second layer is what in the sample creates the pronounced red sculptural petals. It adds bulk and depth. If you skipped R31 you will still have a defined petal from R19–30.
Round 34 :
Round of smoothing: sl st in each st around to reduce bulk and tidy edges. Join and fasten off when satisfied. (total equals previous round)
Info :
Take time to weave long ends from inner and outer petals into the back of the work. If you like clean lines, trim tails close after weaving. Weave tails at least 2 inches into the piece to secure.
— Decorative Raised Inner Petal Edging (Cream accent repeat) :
Round 36 :
Rejoin cream at the base between inner and outer petals to create a raised inner edge: ch1, sc around inner petal tips and into the small gaps—work approximately 2 sc per inner petal side, creating an even cream scallop across all 8 inner petals. (approx 32 sc)
Round 37 :
For each cream petal tip, work (hdc, dc, hdc) into the top of the petal to make it prominent. Repeat for 8 petals. (per petal 3 sts; total 24)
Round 38 :
Ch1, 1 sc around the base of each cream petal to anchor them firmly to the red petal bases. Work evenly and aim for a total of approximately 32 sc. (approx 32)
Info :
These three rounds reproduce the crisp white/cream inner petals layered on top of the red base. Make sure cream petals lay slightly above the red petal base for dimension — block and pin as you go.
— Final Outer Petal Sharpening & Tip Edge :
Round 39 :
Using red, re-attach at an outer edge mid-petal. Ch3, then work 1 tr in next 2 sts, ch1, 1 tr in next 2 sts, then 1 dc into tip to sharpen. Repeat around each petal to create a serrated ridge along each outer petal. (per petal ~7 posts; total ~56)
Round 40 :
Work 1 sc around the very outermost edge to finish with a firm border (approx 18 sc per petal; total 144). Keep tension relaxed to avoid curling.
Round 41 :
Work a slip-stitch picot edge for a decorative finish: *(ch3, sl st into last sc) into every 6th st across edge* repeat around for a subtle beaded look. (approx 24 picots)
Info :
Picot edge is optional but gives a finished look. If you prefer a clean silhouette, instead work a single row of sc then fasten off.
Round 42 :
Fasten off and weave all ends neatly. Trim tails close after weaving. The main structural work is now complete.
Info :
Now check symmetry: count petals and ensure each of the 8 outer petals matches in width and height. If one petal is smaller, layer an extra dc/tr round into that petal until even.
— Blocking & Finishing :
Info :
Wet-blocking: Dampen the finished piece or spritz lightly, pin each petal tip to a blocking mat to achieve even spread. Shape inner petals and windows to the proportions in the sample. Let dry completely. Use rust-proof pins to keep points sharp.
Round 45 :
Steam finish: Alternatively, use a steam iron held above (do not press) to gently set the shape and then pin until cool. For crisp edges, spray with diluted fabric starch before pinning.
Info :
Blocking makes a dramatic difference to the petals' sculpted look—do not skip. If using cotton yarn, starching produces a very crisp trivet effect.
— Alternate Size & Color Notes :
Info :
To make a larger star, use bulky yarn and a larger hook (4.5–6.0mm). For a smaller coaster, use sport weight yarn and a 3mm hook, adjust rounds 14–30 by reducing repeats in petal arches. Color swaps: try deep green outer petals for a different seasonal look.
Info :
If you want to create a hanging ornament, add a ch20 loop in one section attached with secure stitches; hide ends by weaving into the back of the work.
Info :
Throughout the pattern, check for even stitch counts and symmetry. Keep markers handy to divide the piece into 8 equal wedges — this is the key to a balanced star.
Info :
Endnote: This written pattern intentionally shows per-petal and overall stitch guidance so you can adapt counts to your tension and yarn. If your totals differ slightly from the sample counts, prioritize symmetry and even distribution across all 8 petals.
This festive poinsettia star combines classic crochet stitches with layered petal shaping to create a stunning seasonal centerpiece. Every round adds to the sculptural petals until the finished star is ready to shine on your table. Blocking and finishing bring out the crisp points and delicate negative-space windows — such satisfying details! 🧶✨ I hope making this pattern brings you joy and a little holiday sparkle. Happy crocheting! 🎄