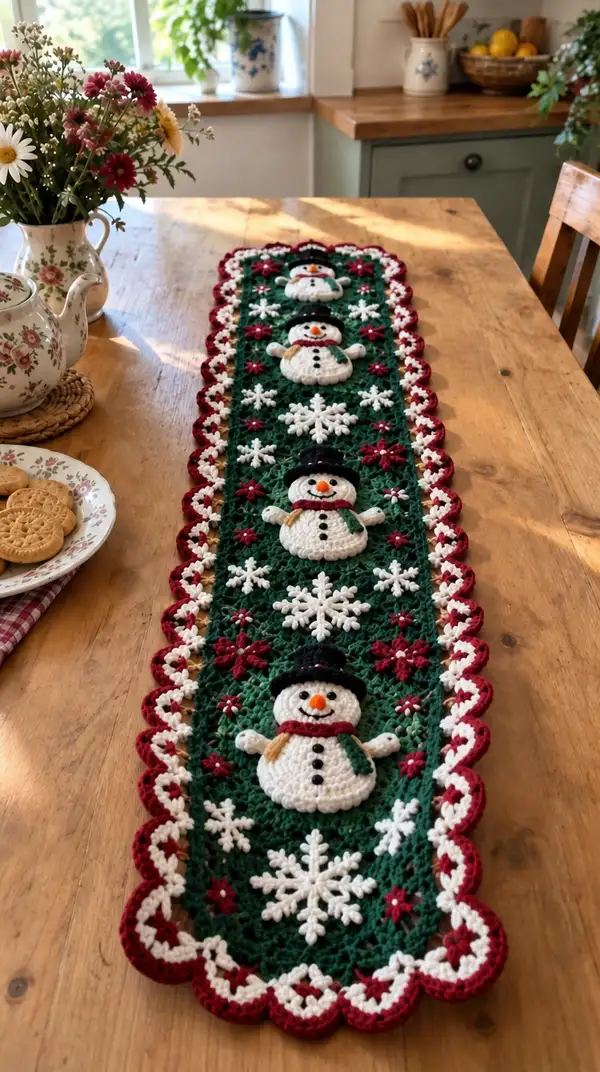
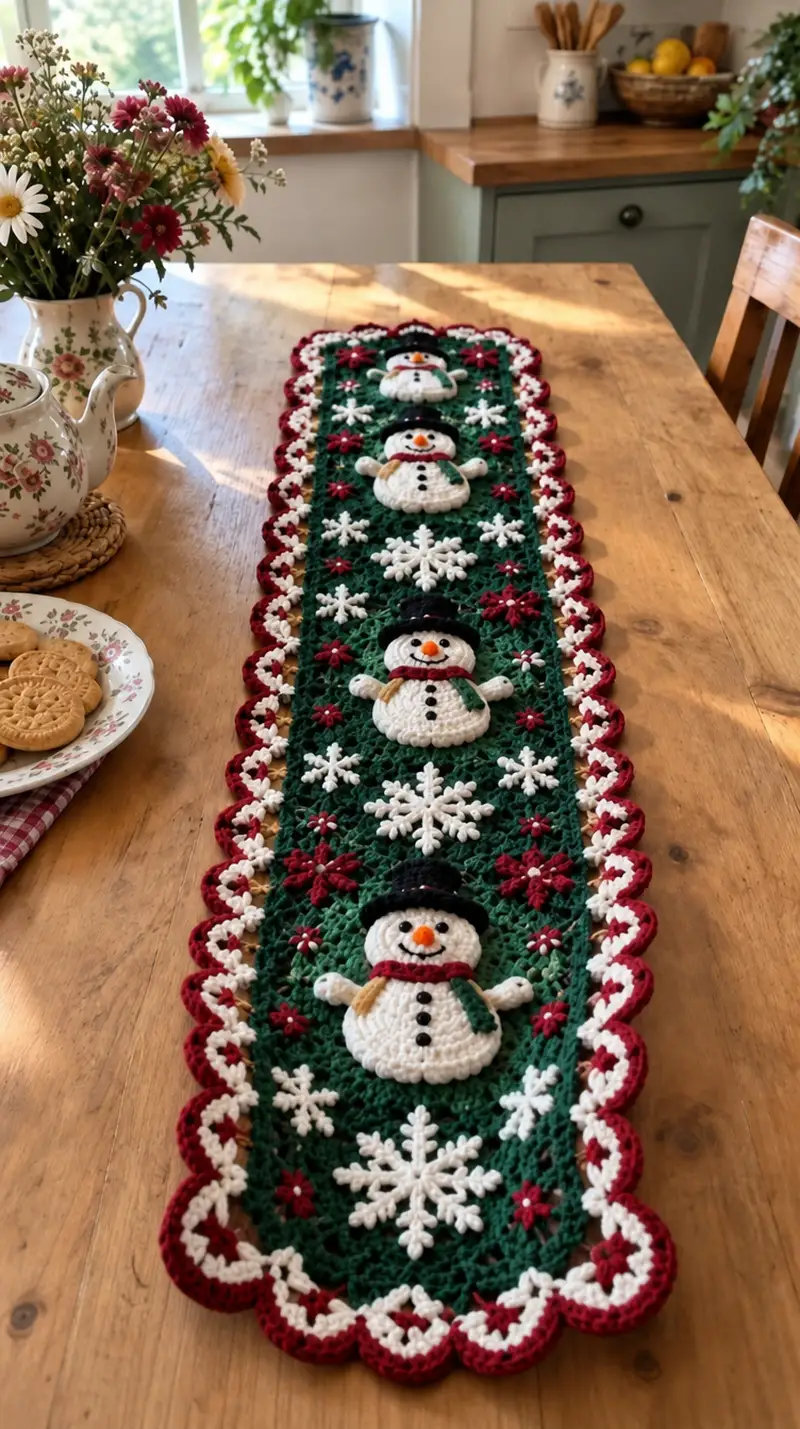
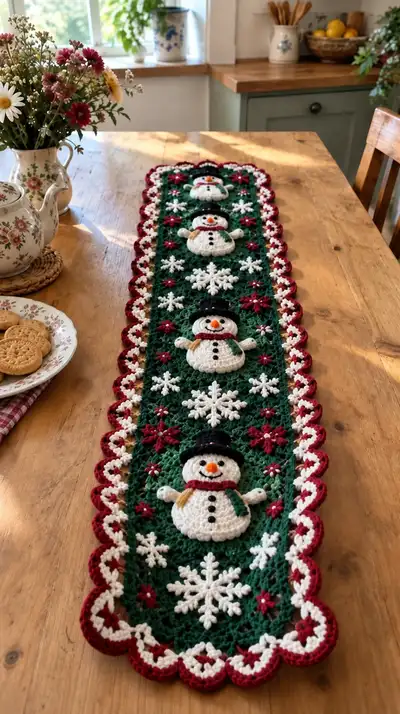
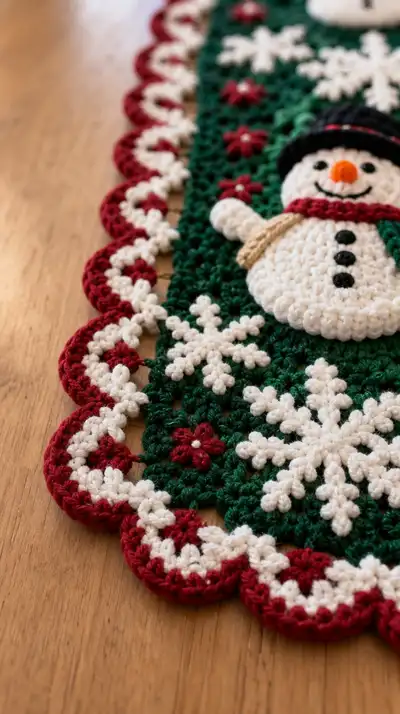
This long, festive table runner features three raised snowmen applique9s, delicate snowflake motifs, and a scalloped red-and-white border on a deep evergreen background. Perfect for holiday tables, it uses textured clusters and layered applique to create depth and charm. The runner is designed to lie flat and can be customized in length or color to suit your home. Detailed instructions, placement guides and assembly tips included for a polished finish.
Progress Tracker
0% Complete
— Materials & Gauge :
Info :
Gauge: 14 dc x 8 rows = 10cm in granny/cluster pattern using 4.0mm hook and worsted weight yarn. Finished runner shown approximately 10cm wide x 90-100cm long with three snowmen; adjust rounds for desired length.
— Center Panel (Main Field) :
Round 1 :
Using deep evergreen, ch 31, join with sl st to form a loose ring being careful not to twist (31 foundation ch)
Round 2 :
Ch3 (counts as dc), dc in same st, *ch1, skip 1 ch, 2 dc in next ch; rep from * across to last ch, dc in final ch, turn and work into foundation edge to make a rectangular granny strip; end with 63 dc clusters approx (see Info)
Info :
This panel is worked in rows of cluster/dc groups to create a rectangular openwork panel. The foundation ch length is for a narrow table runner—adjust by adding multiples of 2 ch to widen.
Round 3 :
Ch3, turn. Work 1 dc in first st, *ch1, skip 1 ch-space, 2 dc in next dc; rep across, ending with dc in top of turning ch (maintain edge stitch count). This establishes the lacy grid (approx 63 clusters)
Round 4-6 :
Repeat Round 3 for a total of 6 rows. Keep tension even; this will form the base depth for one motif section (6 rows)
Info :
Mark the center column of the panel after row 6 so you can place snowman applique9s evenly. Measure from each short edge and mark center with pins; the runner will have three equally spaced snowmen along this centerline.
Round 7 :
Ch3, *2 dc in next dc, ch1, skip next ch-space; rep across. This tightens clusters slightly to provide contrast behind applique9s (63 clusters)
Round 8-12 :
Work even in established pattern (1 dc in each dc, 2 dc in cluster spaces as established). Keep panels flat by working a consistent turning chain of ch3 at row starts (63 clusters)
Info :
After row 12 the first snowflake placement will be worked on top of this field. Continue central rows until you have three motif rows spaced about 22-24 rows apart (measured from top of one motif to top of next). Adjust as needed for runner length.
Round 13-18 :
Continue even in pattern. At Row 16 mark positions for small starflowers which occupy the small open spaces between clusters. Use a removable stitch marker to note every 8th cluster for symmetrical placement.
Round 19-24 :
Work even for additional background depth (6 rows). This area will sit between snowman motifs. The panel height for each motif area should be about 8-10 rows of openwork above and below the applique9 for balance.
Info :
When working long panels, keep your chain tension consistent. If you notice curling, block the piece gently by wetting and pinning to shape after finishing the center panel rounds before adding applique9s.
Round 25-36 :
Repeat established granny/cluster rows until the panel length accommodates three snowmen placements: typically total of 72-78 rows for the full runner depending on spacing (each motif block ~22-24 rows). End on a right-side row; fasten off and weave ends.
Info :
If you prefer, work the center panel in joined motifs (granny squares) and join-as-you-go instead of continuous rows. The continuous-row method produces a long, neat rectangle ideal for table runners.
— Snowman Applique (Make 3 identical) :
Round 1 :
With cream/white and 3.5mm hook, make magic ring, ch1, 6 sc in ring (6)
Round 3 :
(1 sc, inc) x6 (18)
Round 4 :
(2 sc, inc) x6 (24)
Info :
This creates the snowman's lower (larger) belly base. For a slightly puffed look, work this round with a slightly smaller hook if needed.
Round 5 :
1 sc in each st (24)
Round 6 :
(3 sc, inc) x6 (30)
Round 7 :
1 sc in each st (30)
Info :
At this stage you can lightly pad the belly for subtle dimension by inserting a small flat piece of batting or two loose tufts of stuffing; keep it flat so the applique lays well on the panel.
Round 8 :
Switch to cream and continue: (4 sc, inc) x6 (36)
Round 9 :
1 sc in each st (36)
Round 10 :
Fasten off white; join new cream for head base: make separate smaller circle for head. Magic ring, 6 sc (6)
Round 12 :
(1 sc, inc) x6 (18)
Round 13 :
(2 sc, inc) x6 (24)
Info :
Create head separately to allow precise placement. Slightly flatten head by working the last rounds with a gentle tension to avoid a fully spherical shape.
Round 14 :
1 sc in each st (24); fasten off leaving long tail for sewing; position head about 6-8 sts above top of belly when attaching to the panel
Round 15 :
Arms (Make 2): With cream, ch6, sc in 2nd ch from hook and across (5 sc), turn, ch1, sc across for 4 rows to make short mitten tube, sl st back to base and fasten off (approx 4 rows producing small flat arm)
Round 16 :
Hat crown: With black, magic ring, 6 sc (6)
Round 17 :
(1 sc, inc) x3 (9)
Round 18 :
1 sc in each st around (9)
Round 19 :
Brim: Join black at any stitch, ch1, work 18 sc evenly around base of crown working 2 sc in some sts to flatten brim as needed, sl st to join; fasten off (18 brim sts)
Info :
Sew hat brim to head top with small tacking stitches; you can add a thin ribbon or red embroidery above brim for a decorative band.
Round 20 :
Scarf: With deep red, ch 24, sc in 2nd ch and across (23 sc), ch1, turn and work 4 rows of sc to create a narrow scarf strip (4 rows x 23 sc). Fasten off leaving long tail to wrap and sew around neck between head and belly.
Round 21 :
Mittens fringe and feet (optional): With tan, ch6, sc across to make 3 rows for mitten effect; make 2 and sew to sides of belly as small mittens; fasten off (each mitten approx 5 sts)
Round 22 :
Facial features & buttons: Embroider eyes with two small black French knots or sew tiny black beads for eyes; stitch a small orange cone nose using spiral single crochet of 6 sts decreasing to a point. Sew three small black buttons or French-knot buttons along belly center.
Info :
Use a slightly smaller hook or tighter tension for facial details so the stuffing and sl st knots are not visible. Position facial features symmetrically by marking center of head before stitching.
Round 23 :
Assemble applique: Sew head to top of belly with whip stitch all around, then sew arms to side stitches just under neck area. Add scarf by placing around neck and securing ends with a few small stitches on the side.
Round 24 :
Repeat for remaining two snowmen to make three identical applique9s. Block lightly if needed and press gently with steam from a distance to flatten.
— Snowflake Motif (Large) (Make 4) :
Round 1 :
With cream/white, ch6, join with sl st to form a ring, ch3 (counts as dc), work 12 dc into ring, join (12)
Round 2 :
Ch1, *sc in next dc, ch5, skip next dc; rep around to form 6 ch-loops, sl st to first sc (6 loops)
Round 3 :
*(sc, hdc, 3 dc, hdc, sc) in each ch-5 loop; rep around to make 6 points; sl st to join (each point shaped)
Info :
Secure each point with a tiny slip stitch at tip if you want extra firmness. Use a smaller hook for snowflakes to keep points crisp.
Round 4 :
Add secondary tiny branches: In space between points, ch4, sl st at second chain from base to create small picot-style branch; repeat between each point for delicate detail. Fasten off and weave ends.
Round 5 :
Sew large snowflakes onto center panel in positions between snowmen, aligning tips with the cluster openings so they sit flat. Use small invisible stitches at the base of each point to secure.
— Snowflake Motif (Small) (Make 12) :
Round 1 :
With cream, ch5, sl st to form ring. Ch2, work 6 hdc into ring, join (6)
Round 2 :
*Ch3, sl st into next hdc to make 6 tiny loops; rep around. Fasten off. Embellish centers with a tiny bead or French knot if desired and sew into background spaces.
Info :
Small snowflakes are used as spacers and to add texture in the openwork field. Place them symmetrically around each snowman for balance.
— Little Star-Flower Accent (Make approx 18) :
Round 1 :
With deep red, ch4, sl st to ring, ch2, work 5 dc into ring, join (5)
Round 2 :
*Ch3, sl st into next dc to create 5 petal loops; rep around. Fasten off leaving tail to sew. Add a tiny cream bead or French knot in center for pop.
Info :
These flowers fill negative spaces and echo border color. Place them on each side of snowmen and between snowflakes for a cohesive look.
— Border Scallop (Outer Edge) :
Info :
Border consists of three rounds: a base join round in evergreen, a cream scallop, and a final deep red scallop edge worked as large shells.
Round 1 (Join) :
With evergreen, join at corner with sl st, ch1, work a round of sc evenly around entire rectangle, working 3 sc in each corner to keep edges square. Maintain stitch count so border has a multiple of 6 along long edges (approx 216 sc along each long side depending on panel length).
Info :
Place 3 sc in each corner to avoid puckering. Measure stitch count along each long edge and calculate how many scallops you'll need; scallop repeats should be divisible evenly along the sides to avoid awkward final scallop.
Round 2 (Cream scallop base) :
Join cream in first sc of long edge, *skip 2 sc, (5 dc, ch2, 5 dc) all in next sc to create a shell, skip 2 sc, sl st in next sc; rep across. At corners work (5 dc, ch2, 5 dc) across corner sc to turn the shell without splitting. This creates a layered pocket for the final red scallop (each shell uses 1 repeat).
Round 3 (Red scallop outer) :
Join deep red in the center top of each cream shell: *ch1, sl st into center ch2 space, ch3, (dc, tr, dc) all into same ch2 space to make a pronounced scallop; sl st to tip of next cream shell and rep. Work rounded shells along all sides and sew final sl st at the corner to finish. Fasten off and weave ends.
Info :
For neat scallops, make sure the number of cream shells divides evenly along each side. If adjustments are needed, add an extra sc at even intervals along the join round to increase or decrease repeats.
— Decorative Trim (Inner White Pick-up) :
Round 1 :
Between main join round and cream scallop, add a filet-style chain row: join cream, *ch3, skip 3 sc, sl st in next sc; rep across to create small arches that add visual separation. Fasten off.
Info :
This inner trim helps the scallops sit cleanly and gives the runner a crisp layered look in red and cream against the green field.
— Placement & Sewing of Applique9s :
Info :
Lay the completed center panel flat, measure and mark the centerline and three equally spaced motif positions. Mark the center of each snowman belly and pin the applique9s in place before stitching.
Round 1 :
Place each snowman so the base of the belly sits approximately 2-3 rows into a motif block, leaving equal top and bottom margins. Typically measure 24 rows between each snowman center for the pictured length.
Round 2 :
Sew snowman bellies to panel using mattress stitch or whip stitch along the edges; use matching cream thread and small stitches to make seam invisible. Add a couple of tacking stitches through the padded center only to prevent lifting.
Round 3 :
Sew hats, arms, scarves and small flowers after belly is attached to ensure perfect alignment and a flat finish. Embroider facial features and buttons last to avoid snagging during sewing.
Info :
When sewing snowflakes onto a lacy granny field, work stitches through the chain spaces and the top of clusters to avoid distorting the background stitches. Use pins to flatten snowflake points while sewing.
— Finishing & Blocking :
Round 1 :
Weave all tails to reverse side and trim. Pin the runner on blocking mats pulling gently to straighten edges and open lacy stitches. Spray lightly with water and allow to dry overnight.
Info :
Blocking is essential for a neat scalloped edge and flat layout. If you wish a stiffer runner for tableware, use a light fabric stiffener applied to the reverse side once dry.
Round 2 :
Optional: Add a thin felt backing to protect surfaces by cutting felt to runner dimensions and hand stitching along inner cream trim to secure. This also hides sewn ends and adds body.
Info :
Use a slip stitch and small whip stitches to attach felt; if adding backing, check that scallops still lie flat and adjust as necessary before final stitches.
This Festive Snowmen Table Runner is a beautiful blend of openwork, texture, and applique9 charm—perfect for holiday tables and cozy seasonal decor. The combination of deep evergreen, crisp cream snowflakes and cheerful red scallops creates a classic, warm holiday feel. I hope you enjoy making each snowman and watching the runner come together stitch by stitch! 🧶❄️🎄