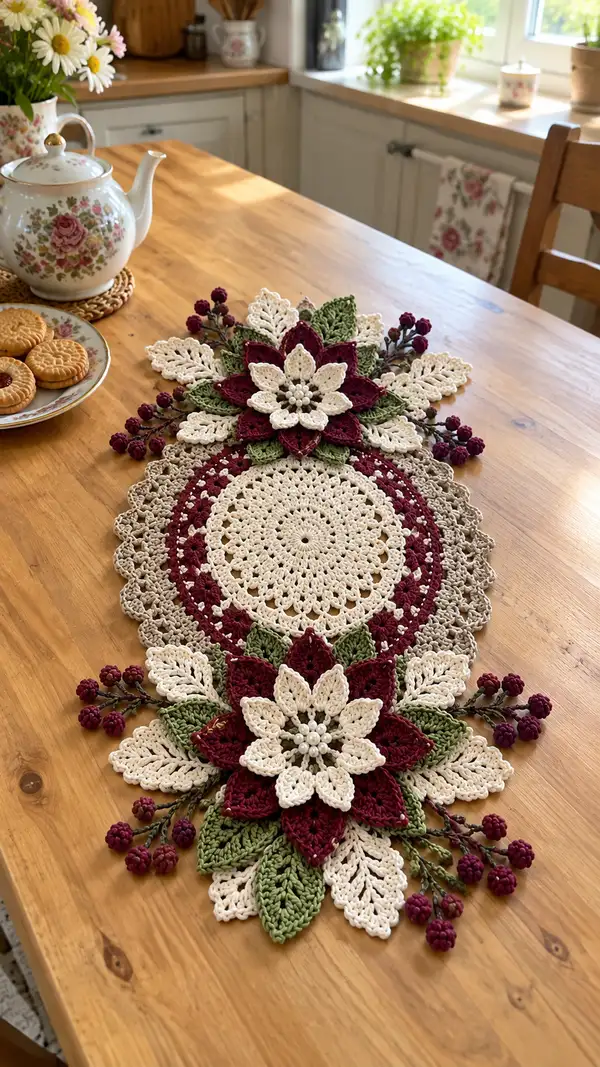
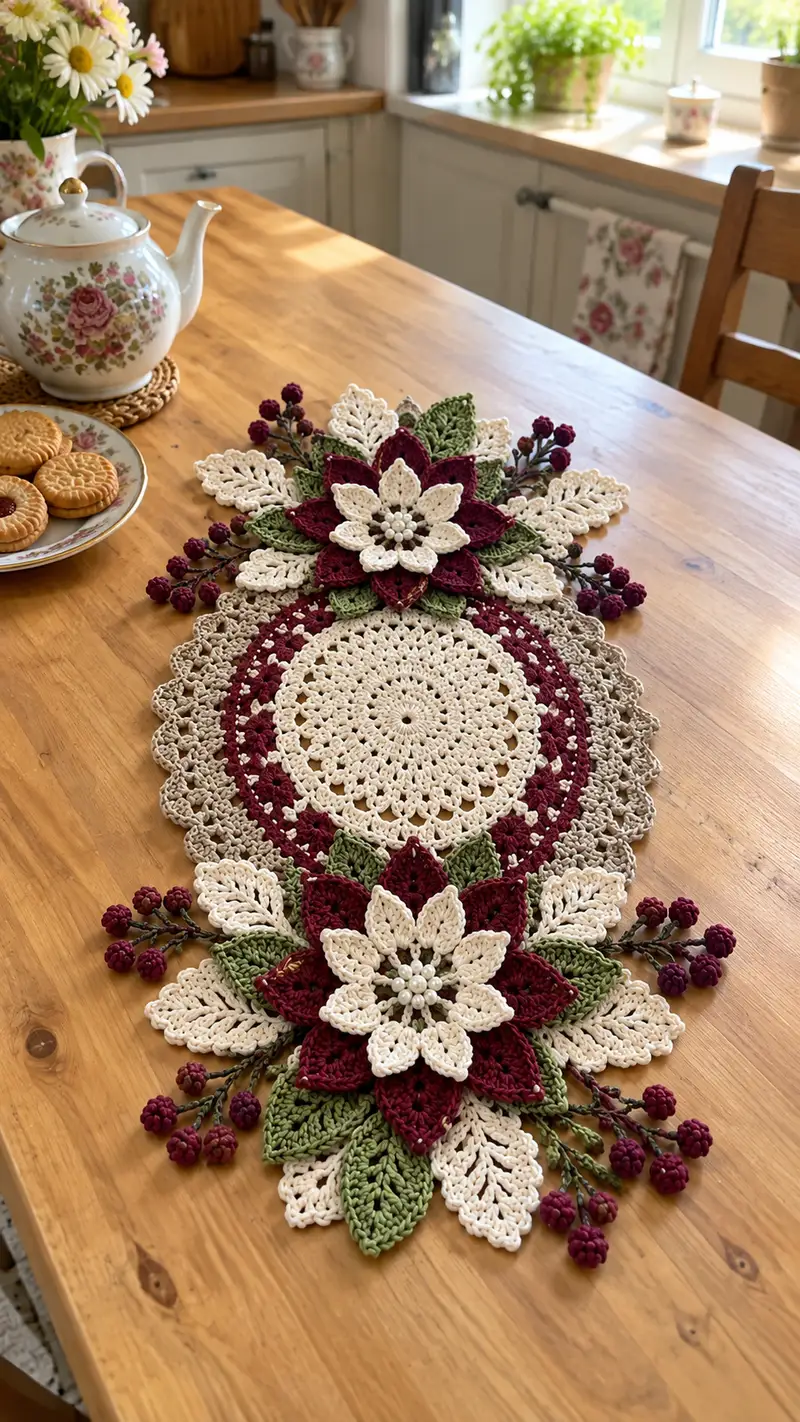
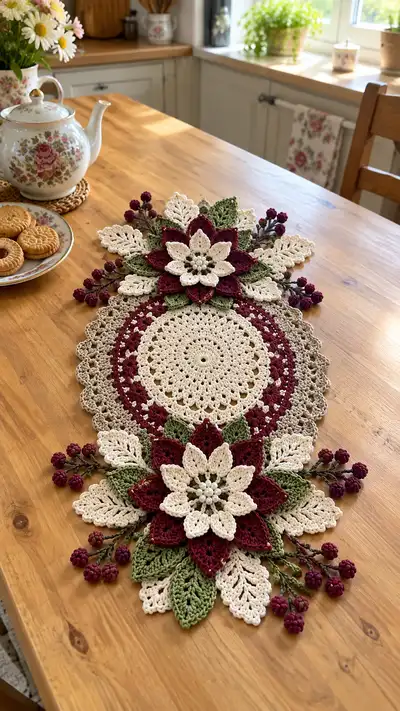
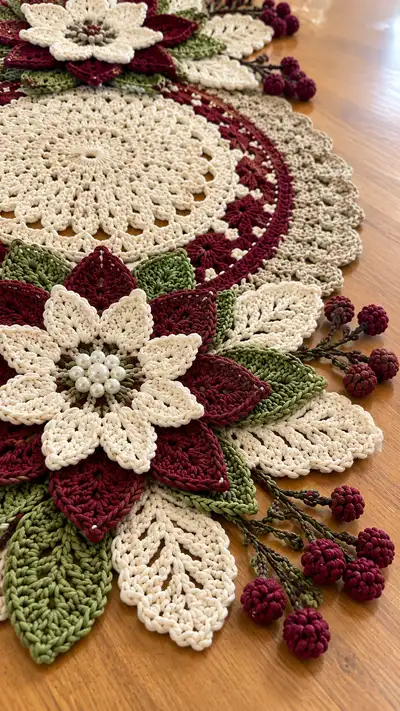
Create a stunning layered poinsettia table runner with rich burgundy blooms, creamy ivory accents and warm green leaves. This elegant runner features a central lacy oval doily, scalloped edging and dimensional layered flowers with bead centers and tiny berry clusters — perfect for seasonal decorating or a special holiday table. The pattern uses worsted/aran weight cotton or cotton-blend yarn and clear step-by-step instructions to guide you through each motif, leaf and assembly.
Progress Tracker
0% Complete
— Center Oval Doily :
Round 1 :
6 sc in magic ring (6)
Round 3 :
(1 sc, 1 inc) x 6 (18)
Round 4 :
(2 sc, 1 inc) x 6 (24)
Round 5 :
(3 sc, 1 inc) x 6 (30)
Round 6 :
(4 sc, 1 inc) x 6 (36)
Round 7 :
(5 sc, 1 inc) x 6 (42)
Round 8 :
(6 sc, 1 inc) x 6 (48)
Info :
Begin with ivory/cream colour. Work tightly for a stable doily centre. Place a stitch marker at the first stitch of each round and move it up as you work.
Round 9 :
(7 sc, 1 inc) x 6 (54)
Round 10 :
(8 sc, 1 inc) x 6 (60)
Round 11 :
(9 sc, 1 inc) x 6 (66)
Round 12 :
(10 sc, 1 inc) x 6 (72)
Round 13 :
(11 sc, 1 inc) x 6 (78)
Round 14 :
(12 sc, 1 inc) x 6 (84)
Info :
At this stage the circle has expanded; we will begin to shape an elongated oval by working increases at four points. Mark points at the 3rd, 9th, 21st and 27th stitch from your marker to help shape the oval in later rounds.
Round 15 :
*[Work to first marked point] 1 sc in each st to marker; at marker: (1 sc, inc, inc, 1 sc) into same st to create an elongating cluster; continue 1 sc in each st to next marked point and repeat cluster* Repeat 4 times total (92)
Round 16 :
1 sc in each st (92)
Info :
Now we begin a decorative open-lace round. If you prefer a denser fabric, replace V-stitches with dc clusters. Keep stitch count the same by treating each V-stitch as one 'stitch position' for counts.
Round 17 :
*ch3 (counts as dc), sk1, dc in next st, ch2, sc in next st* repeat around (92 positions) ending with sl st to top of ch3
Round 18 :
1 sc in each st (92)
Round 19 :
*[dc shell] 5 dc in next st, sk 3, sc in next st* repeat around (92 shells counted as 92 positions)
Info :
Before continuing, block the centre gently to open the lace. Pin to a flat surface and mist with water to shape. This will help later rounds sit evenly when joining coloured bands.
Round 20 :
1 sc in each st (92)
Round 21 :
Change to burgundy for accent band. Ch1, 1 sc in each st around (92)
Info :
Change to burgundy yarn using a neat join; leave a 6-8cm tail to weave later. This narrow band provides contrast for the floral border.
Round 22 :
*ch4, sk 2, sc in next st* Repeat around to create small arch spaces (92)
Round 23 :
Switch back to ivory. 1 sc in each st (92)
Round 24 :
*(sc, ch3, sc) in arch spaces from last round to form picot-like loops* Repeat around (92 loops)
Round 25 :
1 sc in each st (92)
Round 26 :
Change to taupe/beige. Work a filet-ish round: *dc, ch2, sk1* around to expand base for scallop (92)
Info :
At this point your oval is well established. We will add a larger scalloped edging in taupe to create a warm border. Ensure tension on these rounds is slightly looser to allow scallops to open.
Round 27 :
*sc in next 2 sts, 7 dc in next st (scallop made), sc in next 2 sts, sl st in next st* repeat around (92 scallop anchor positions)
Round 28 :
Work 1 sc around each dc and space of previous round to refine scallop (92)
Round 29 :
*(2 sc, ch2, 2 sc) in top of each scallop to create a shallow fan* Repeat around (92)
Round 30 :
1 sc in each st (92)
Info :
For a lacy finish, you can add a picot row here: *sc, ch3, sl st into 3rd ch* across each fan peak; this is optional and will slightly stiffen the edge.
Round 31 :
Optional picot row: *sc in next st, ch3, sl st into 3rd ch* repeat around (92)
Round 32 :
Fasten off taupe and weave in ends. At this point the central oval should measure approximately 28-32cm across at widest point depending on yarn and hook tension.
Info :
Block the entire oval flat and pin scallops neatly to shape. Allow to dry before attaching floral motifs. Blocking will help when aligning holes for sewing flower bases later.
— Large Layered Petal Motif (Make 2 floral groupings, each with 8 outer petals, 8 inner petals and bead center) :
Petal Big - Round 1 :
Ch8, sl st into 2nd ch from hook to form loop, ch1 (foundation loop counted as round start)
Petal Big - Round 2 :
Work along chain: sc in first 2 ch, hdc in next 2 ch, dc in next 2 ch, tr in next 1 ch, reverse and work back down: dc in next 2 ch, hdc in next 2 ch, sc in final 2 ch. Join with sl st to join base (18 sts total when counted as chain-affixed positions)
Info :
Petals are worked flat and later gathered at the base. Maintain slightly tighter tension on the tip (tr area) for a pointed look. Use a smaller hook if petals look floppy.
Petal Big - Round 3 :
*Ch2 at base, 2 sc across the base to reinforce, sl st to next starting point of petal* Repeat to make 8 petal bases around a small central ring (work 8 petals for one layer) (8 bases)
Petal Big - Round 4 :
Join petals into a ring by slip-stitching through each base point; pull tight so petals sit upright. Fasten off burgundy and weave ends (assembly will secure petals further).
Petal Big - Info :
Make 8 big petals for the outer layer of each flower. Blocking these petals on a flat surface with pins helps keep a consistent shape before assembling to the doily.
Petal Small - Round 1 :
Ch6, sl st into 2nd ch from hook to form loop, ch1
Petal Small - Round 2 :
sc in first 2 ch, hdc in next 2 ch, dc in next 2 ch, reverse: hdc in next 2 ch, sc in final 2 ch. Join with sl st to base. Make 8 for inner layer (12 positions if you want a fuller center)
Petal Small - Info :
Small petals are worked similarly to large petals but with fewer stitches for a layered effect. Use ivory/cream yarn for the topmost small petals to contrast with burgundy base layer.
Petal Small - Round 3 :
Secure 8 small petals into a ring using sl st through bases; adjust spacing so small petals sit slightly above and in between large petals.
Petal Small - Round 4 :
Fasten off and weave in ends. Lightly block small petals to obtain crisp points.
Info :
To create a layered flower, stitch the small ivory petals onto the burgundy petal layer by sewing at the base only, leaving tips free for dimension. Use ladder stitch to secure bases invisibly.
Bead Center - Round 1 :
With small ring of olive or contrast colour, ch6, join to form ring, ch1; 8 sc into ring (8)
Bead Center - Round 2 :
*Ch2, sl st into next st* repeat around to create small stalks for beading (8 positions)
Bead Center - Round 3 :
Sew pearl beads into the center using yarn needle; arrange 7–9 beads snugly and stitch through the motif so beads are secure. Fasten off and hide tails.
Info :
Alternatively, string beads on a short length of thread and sew them as a cluster, then use the same thread to anchor the cluster to the center base of the small petal ring.
— Leaves (Make 12 large leaves and 12 small leaves) :
Large Leaf - Round 1 :
Ch20 (foundation), sc in 2nd ch from hook and across to tip (19 sc)
Large Leaf - Round 2 :
Turn, ch1, sc in next 6 sts, hdc in next 5 sts, dc in next 4 sts, hdc in next 2 sts, sc in last 2 sts (19)
Large Leaf - Round 3 :
Turn, work back along opposite side of foundation chain: sc in next 2 sts, hdc in next 2, dc in next 4, hdc in next 5, sc in next 6; finish with sl st into base to form pointy leaf (19)
Large Leaf - Round 4 :
Ch1, work a textured ridge: *sc in next st BLO around entire leaf to create a defined centre vein* (19)
Large Leaf - Round 5 :
Optional decorative round: *sc, ch3, sl st into 3rd ch across edge points for lacy detail* Repeat along edges as desired. Fasten off and block.
Info :
Make 12 large leaves in olive/green. Because leaves are worked flat, block them with pins to achieve identical shapes and allow easy sewing under flower bases.
Small Leaf - Round 1 :
Ch14, sc in 2nd ch from hook across (13)
Small Leaf - Round 2 :
Turn, ch1, sc 4, hdc 3, dc 3, hdc 2, sc 1; work back along opposite side mirroring increases (13)
Small Leaf - Round 3 :
Sc in BLO around centre for vein detail (13). Fasten off and make 12 in ivory to provide contrast under petals.
Info :
Leaves will be layered under flowers: arrange 3 large leaves and 3 small leaves per floral grouping in a fan arrangement. Use a few strategically placed whip stitches through the petal base to anchor leaves invisibly.
— Berry Clusters (Make approx. 24 small berries + stems) :
Berry - Round 1 :
Make a tiny ball using burgundy: mr, 6 sc into mr (6)
Berry - Round 2 :
6 inc (12)
Berry - Round 3 :
1 sc in each st (12)
Berry - Round 4 :
*(sc, dec) x 4* (8)
Berry - Round 5 :
1 sc in each st (8)
Berry - Round 6 :
Fasten off, leaving a 10cm tail to sew. Make small tight stuffing inside berry as you finish so it keeps a plump round shape.
Info :
Make 18–24 berries depending on desired fullness. Group berries in little stems of 3–5 and attach to short lengths of floral wire or crocheted stems using slip-stitch chains and whip stitch for stability. If using wire, fold ends back to avoid poking.
— Decorative Connecting Stems and Small Sprays :
Stem - Round 1 :
Ch30 in olive/green for main connecting stem. Turn, sl st into each ch back to start to create a thick cord-like stem. Fasten off and repeat several times for each floral grouping (make 6-8 stems per side).
Info :
For a textured look, you can work stems as i-cord: ch30, sc in 3rd loop from hook and across, creating a tiny tube. Or, twist two crocheted cords together and sew them into place for extra visual interest.
Small Spray - Round 1 :
Ch10, sl st back to form twig. Add berries by slip-stitching a berry base stitch into ch at desired intervals and sew on berry balls. Make 6–10 sprays for each runner end.
Info :
Arrange sprays asymmetrically for a natural look. Leave small loop tails to tuck under flowers for sewing later.
— Outer Scallop Border Extensions (to elongate runner and marry motifs) :
Border Ext - Round 1 :
Join taupe at one long edge of central oval; ch1, sc in each st across side edge to reach one end scallop anchor (count depends on your oval width; maintain same number of sts as central round 32 anchor positions).
Border Ext - Round 2 :
*sc in next 3 sts, 5 dc in next st (make scallop), sc in next 3 sts* repeat along long edge until you reach floral grouping anchor point. Turn and work back across to opposite side to mirror scallops. Keep scallop counts symmetric left to right.
Border Ext - Info :
This extension builds a wide oval runner effect. Work scallops evenly on both sides; count scallop anchors to make sure both sides match. Blocking after this round is helpful to shape the runner length.
Border Ext - Round 3 :
1 sc around entire extension (including scallops), join with sl st and fasten off. Weave in ends. If you want a longer runner, repeat extension rows before final scallops.
— Assembly & Attachment of Floral Groups :
Info :
Arrange the floral groupings at both ends of oval; each grouping consists of one large layered flower (8 burgundy outer petals + 8 ivory inner petals), 3 large leaves and 3 small leaves and several berry sprays. Use pins to place and check symmetry before sewing.
Assembly Step 1 :
Position outer petal ring on top of doily at desired anchor point; baste in place with long yarn tail using running stitch through petal bases and doily lace foundation. Check that petals are centered over the oval scallop edge so petals overhang the table edge slightly.
Assembly Step 2 :
Sew small ivory petals on top of burgundy layer using ladder stitch through the petal base only; avoid sewing through the petal tips to keep 3D effect (8 small petals per flower).
Assembly Step 3 :
Attach large leaves beneath the flower by sewing through leaf bases to the doily; arrange 3 large leaves on each side in a fan shape, then tuck small leaves between large leaves and secure.
Assembly Step 4 :
Attach berry sprays by sewing their short stem bases under the leaf layers. For extra security, stitch the exposed stem into the doily under several loops to anchor.
Assembly Step 5 :
Sew the bead cluster to the center of the small petal ring with sturdy thread; ensure beads are snug and secure with several passes of the needle. Fasten off and hide ends.
Info :
When stitching motifs onto lace, use matching yarn for invisible joins. Make small, tight stitches; do not overstuff or pull fabric tight — the goal is a secure but flat join that still allows dimensional petals to stand.
— Final Edge Finishing and Blocking :
Final Round 1 :
With taupe, sc around entire outer edge of runner including floral attachments, working evenly to smooth any uneven transitions. For every place where petal base meets lace, work small sc that catches both pieces and secures them (approx. 3–4 sts per petal base junction).
Final Round 2 :
Optional decorative chain loops: *ch5, sl st into next st* around outermost edge to create delicate picot loops where desired.
Info :
Final blocking: wet-block the entire runner on a blocking board, pinning scallops and petals in natural open shapes. Allow to dry fully to lock shape. This step will dramatically improve the flatness and crispness of the lace and petals.
Final Round 3 :
Weave in any remaining ends, trim tails, and apply a small dot of craft glue to the back of bead clusters if desired for extra security (allow to dry before handling).
Info :
Optional embellishments: add small french-knot-style embroidered veins on leaves with contrasting thread, or attach tiny sequins sparingly around scallops for soft shimmer. Keep enhancements subtle to preserve the vintage-lace aesthetic.
This layered poinsettia table runner blends lacy vintage doily work with sculptural petals and natural leaf sprays for a show-stopping centrepiece. The combination of burgundy, cream and olive creates a warm, festive palette that looks beautiful on holiday or everyday. Each element — from scalloped edges to bead-cluster centres — is crafted to sit proudly on your table and become a treasured piece. 🧶🌿 Add your own personal touches and enjoy the satisfaction of handmade elegance! 🎀