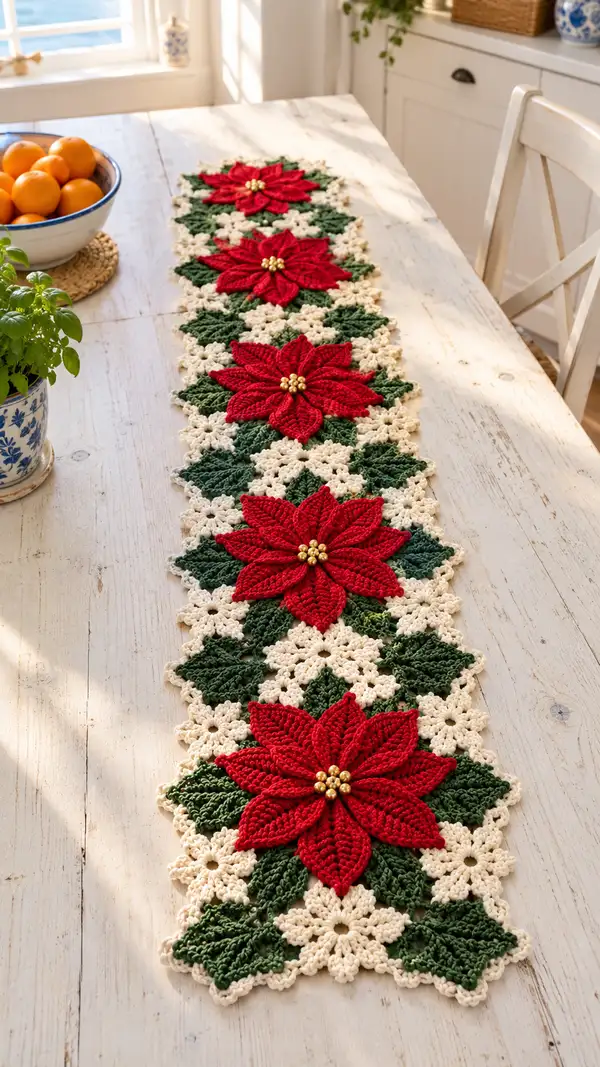
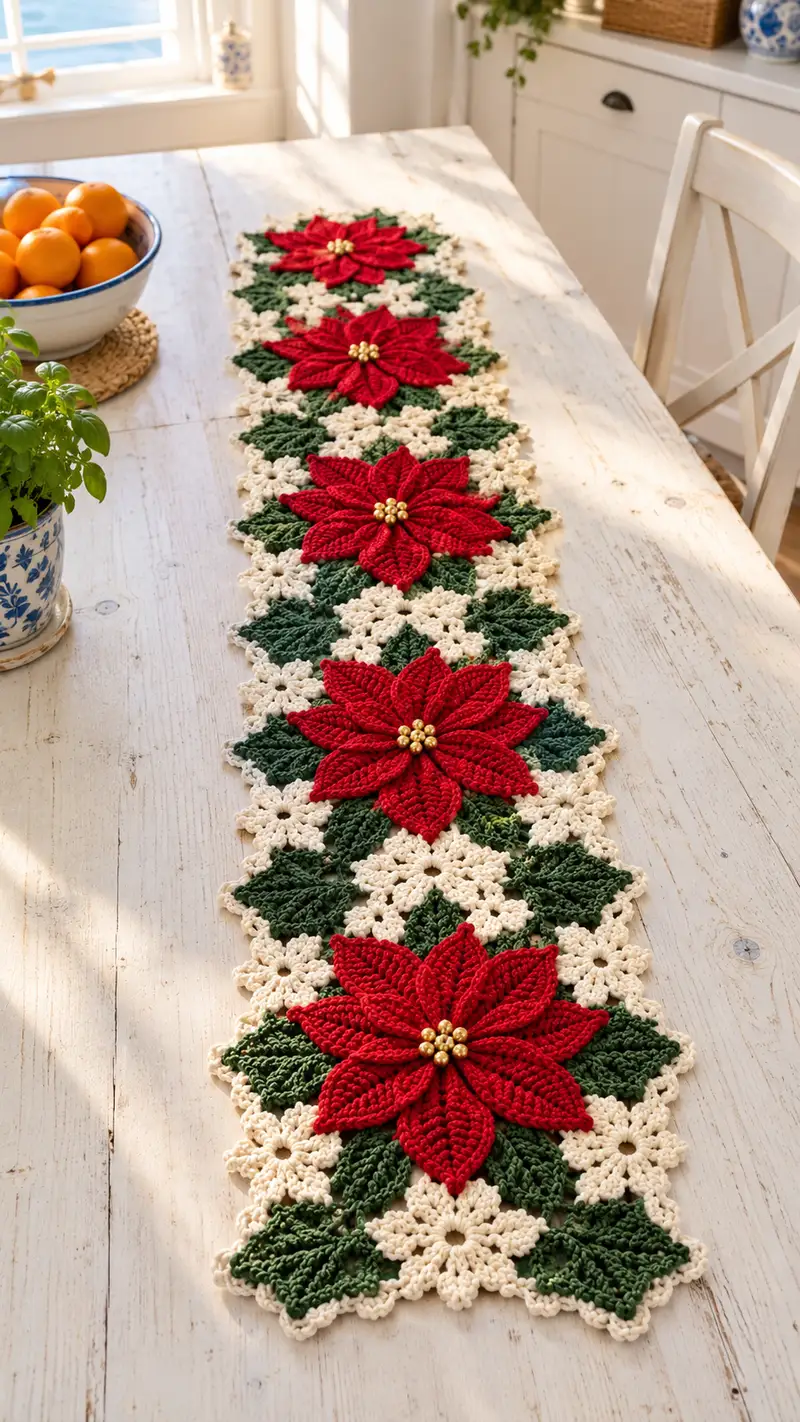
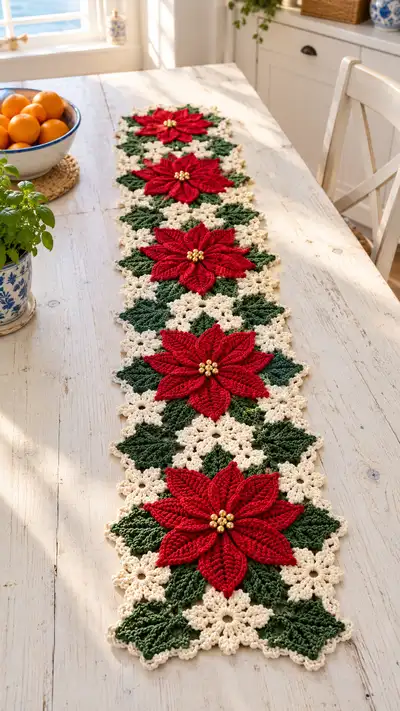
A long, elegant table runner made from interlocking poinsettia motifs in classic holiday colors. This runner features bold red layered petals, textured deep-green leaves and delicate cream connectors that form a lacy background. Gold bead centers add a sparkling finishing touch. The pattern uses standard worsted-weight yarn and modular motifs that are crocheted and assembled for a beautiful holiday centerpiece.
Progress Tracker
0% Complete
— Overview :
Info :
This table runner is constructed from repeated modular elements: a Poinsettia Flower motif (one central round base plus 8 sculpted petals and a beaded center), Leaf Diamonds (two-leaf units placed around flowers) and Small Lace Connector motifs that form the cream grid. Work all motifs flat and assemble with a whip or mattress stitch. The sample runner in the photo uses 5 full poinsettia motifs linked lengthwise with half-motif ends - make as many motifs as needed for your table.
Info :
Gauge note: Using worsted weight (#4) yarn and a 4.0mm hook, each completed poinsettia unit measures approximately 9.5-10 inches (24-25 cm) across at the widest point; adjust hook size if you need smaller or larger motifs. Keep tension consistent between motifs for neat joins.
— Poinsettia Flower Base :
Round 1 :
MR, ch1, 8 sc in magic ring; pull tight (8)
Round 2 :
2 sc in each st around (16)
Round 3 :
(1 sc, inc) x8 (24)
Round 4 :
(2 sc, inc) x8 (32)
Round 5 :
1 sc in each st around (32)
Round 6 :
For petal anchors: *ch3, sk1, sc in next st* repeat 8 times around creating 8 ch-3 anchor loops. End with sl st to first anchor sc (8 ch-3 loops)
Info :
Place a stitch marker at the beginning of this round to identify the first petal anchor. These ch-3 loops become the placement guides where each petal is attached; keep tension even so anchors are evenly spaced.
— Poinsettia Petals (Make 8) :
Round 7 :
Attach red yarn in first ch-3 loop with sl st. Petal work is built into each anchor loop to create sculpted petals. Petal 1: ch2 (counts as hdc), 1 hdc in same loop, 1 dc, 3 tr in same loop, ch1, 3 tr in same loop (mirror), 1 dc, 2 hdc; sl st to base. Fasten off petal. (This creates a single layered sculpted petal approximately 8-10 cm long depending on tension)
Round 8 :
Move to next ch-3 loop; repeat the petal instructions exactly for Petal 2 (attach, same sequence). Fasten off.
Round 9 :
Repeat petal sequence in each remaining ch-3 loop until you have made 8 petals around the base (petals 3-8). After final petal, weave in ends but leave tails for securing petals to base. At this point you will have a single-layer petal set. (8 petals total attached to the base)
Info :
Work each petal with the same tension and identical stitch sequence for uniform petals. After making each petal, gently shape it by pinching and adjusting stitches while warm or damp; if desired, block individual petals on pins to hold shape before final sewing.
Round 10 :
Optional second petal layer (adds depth): With the wrong side of the flower facing you, join red yarn at the base between two petals on the inner ring. ch3, (hdc, dc, 3 tr, dc, hdc) in same join point to make a slightly shorter petal that sits between two outer petals. Fasten off. Repeat every other gap to add 4 inner petals.
Round 11 :
Repeat Round 10 for the remaining inner gaps to end with 8 inner petals (total 16 petals: 8 outer + 8 inner). Fasten off and weave ends. If you prefer a single layer, skip Rounds 10-11.
Info :
Many makers prefer two petal layers for a fuller flower. The inner petals are worked slightly shorter so they tuck underneath the outer petals for a realistic look. Pin layers before sewing centers to maintain symmetry.
Round 12 :
Turn flower to RS, join gold thread (or matching yarn) in center and wrap 6-8 beads tightly across the central circle. Sew beads to center through the base circle multiple times to anchor. Knot securely and hide ends under center stitches.
Info :
If using metallic thread to secure the beads, stitch twice with a strong embroidery needle and a small knot at the back to prevent slipping. Alternatively, use a small drop of fabric glue at the base of the beads for extra hold (allow to dry fully before assembly).
— Leaf Diamond Motifs (Make 8 per flower cluster; two per side) :
Round 1 :
With green yarn, MR, ch1, 6 sc in MR; pull tight (6)
Round 2 :
Inc in each st around (12)
Round 3 :
(1 sc, inc) x6 (18)
Round 4 :
1 sc in each st around (18)
Round 5 :
Start shaping leaf: *ch4, sk1, sl st into next st* around to create 6 ch-4 loops for leaf veins (6 loops)
Round 6 :
Work leaf body into first ch-4 loop: attach in loop, ch2, 3 hdc, 3 dc, ch1, 3 dc, 3 hdc, ch2; sl st to leaf base. Fasten off and repeat for each loop to create 6 small petal-like lobes. When all lobes are complete, shape leaf diamond by flattening pairs of opposite lobes together and sewing their bases to form pointed leaf diamonds. (This yields a single diamond made from six small lobes)
Info :
The leaf diamonds are designed to sit between petals and create the green backdrop. After making each leaf diamond, block them lightly to enhance point definition before joining to the flower base.
Round 7 :
Make a second green diamond (same as Rounds 1-6) for the opposite side of the flower. You will place these diamonds equidistant between petals so that each flower has approximately 6-8 leaf diamonds surrounding it depending on spacing choice.
Info :
You can vary the number of leaf diamonds between each flower to match the visual density in the sample photo: place 4 larger diamonds near the base and 4 smaller ones between them for a fuller look. Keep consistent counts across all flowers for even edges.
— Small Cream Connector Motif (Make many to form background lace) :
Round 1 :
With cream yarn, MR, ch3 (counts as dc), 11 dc in ring; sl st to top of ch3 (12 dc)
Round 2 :
*ch5, sl st in next dc* repeat 12 times to create 12 ch-5 loops around centre; sl st to join (12 loops)
Round 3 :
Into each ch-5 loop: sl st, ch3, 2 dc, ch2, 3 dc, sl st to ring (creates small flower petal clusters). Repeat in all loops. After final petal cluster, fasten off and weave ends. This motif creates a small 6-point lace flower approx 3-3.5 inches across.
Info :
These small cream motifs become the filler grid between poinsettias. Make enough small motifs to form the lattice: in the sample, there are roughly 8 small motifs between each pair of poinsettias (measure as you go and add or subtract to fit your table length).
— Joining Plan and Layout :
Info :
Lay out complete poinsettia flowers with accompanying leaf diamonds and small cream motifs in the order you want them joined. The sample runner is five full poinsettias long with cream connector motifs between and around the flowers to make the lacy background. Use pins on a blocking mat to hold placements aligned. Join motifs while flat to keep edges tidy.
Round 1 :
Join technique (visible mattress stitch): Place two cream connector motifs wrong sides together with their edges aligned; thread yarn needle with cream yarn, whip from back to front through corresponding outer loops creating a seam that looks like a continuous cream line. Repeat down the runner length to form the primary grid.
Round 2 :
Attach leaf diamonds to flower base: With green yarn and yarn needle, position a leaf diamond so that two of its points nestle between two outer petals. Sew through the base of the leaf and the back of the petal base using small, close stitches. Repeat for all diamonds around each flower to create consistent green framing.
Info :
Sew leaf diamonds on first, then use the cream connectors to fix the background grid. This makes it easier to keep petal and leaf points unobstructed by seams. Pin each piece before sewing to be sure of placement.
— Assembly Rounds (Detailed Steps Count as Rounds) :
Round 3 :
Sew each full poinsettia to adjacent small cream motifs at four equidistant points (top, bottom, left, right) using cream yarn where a motif meets a cream loop; pick up the outer ring of cream connector motifs and secure to the flower base with small mattress stitch passes to create a smooth transition.
Round 4 :
Where leaf diamonds neighbor the cream motifs, catch one or two cream loops into the seam to fully integrate leaves into the lace grid. Use green yarn for these small joins so the seam is not visible on the cream side.
Round 5 :
Continue joining motifs along the length of the runner: alternate joining a full poinsettia cluster then a strip of small cream motifs so that the layout repeats consistently. Work left to right or right to left to keep assembly method consistent.
Info :
Take frequent breaks to examine both RS and WS of the assembly to ensure joins lie flat. If a seam starts to pull a petal out of alignment, remove a few stitches and re-pin the pieces more loosely before continuing.
Round 6 :
Sew bead centers down more securely after final layout: re-stitch bead clusters from the underside passing through the base ring and alternating around each bead 3 times. Hide tails into the center and clip close. This prevents beads from working loose after repeated handling.
Round 7 :
Edge alignment: check that all points of petals and leaves create a scalloped edge along both long sides of the runner. If necessary, adjust spacing by moving small cream motifs inwards or outwards and re-sewing until the runner edges look even on both sides.
Info :
Blocking the entire runner on a flat surface with pins and a damp cloth can help relax yarn and even out edges. Use steam blocking carefully for synthetic yarns (check yarn care instructions).
— Decorative Scalloped Border (Optional Detailed Rounds) :
Round 1 :
With cream yarn, attach at any outer join point. Work a round of sc evenly around the outer edge of the assembled runner, placing 1 sc in each exposed stitch or chain loop. Where there is a corner point or petal point, work 3 sc into the same stitch to create gentle scallops. Continue around entire runner and sl st to join.
Round 2 :
Ch3, *skip next sc, 5 dc in next sc (shell), skip next sc, ch1, sl st in next sc* repeat around aligning shells over petal points and small shells over leaf tips. End with sl st to join. Fasten off and weave ends.
Info :
Use shells (5 dc clusters) over petal points for a decorative finish that mimics the petal shapes. If your runner edge is very irregular due to uneven joins, add or remove small connecting motifs to correct the shape before working the border.
— Finishing and Pressing Rounds :
Round 1 :
Weave in all ends on wrong side with yarn needle using invisible weaving technique. Double-check that bead centers are secure and that leaf diamonds are stitched firmly around the perimeter.
Round 2 :
Lightly steam-block on a flat surface (place a towel between iron and motifs if needed) to shape petals and open lacework. Pin petal tips and leaf points to desired positions and allow to cool thoroughly before removing pins.
Info :
Final blocking is optional but recommended for a uniform, polished look. Do not over-stretch when pinning; gently nudge points into neat positions to avoid distorting motif shapes permanently.
— Variations & Scaling :
Info :
To lengthen the runner, add another full poinsettia and a set of connecting motifs. To make a shorter runner, use half or quarter motifs at the ends. For a fuller bloom, add one or two inner layers of petals (follow the inner-petal instructions above) or make larger petal clusters by increasing tr counts in the petal sequences.
Info :
To change the mood from classic Christmas, swap red for burgundy or coral, green for olive or teal, and cream for soft gray. Metallic yarn or thread can be used for subtle shimmer in the lace background.
This poinsettia table runner is a stunning combination of texture, color and traditional holiday charm — a true centerpiece for any seasonal table. Each modular motif comes together to create a crisp, lacy grid that highlights the sculpted red blooms and lush green leaves. Whether you're making it for family dinners or as a special handmade gift, the process of building each flower and joining them into a long runner is as satisfying as the finished piece. 🎄🧶 The gold bead centers add a little sparkle that catches the light and elevates the design. Enjoy every step and the warm glow it brings to your home! ✨