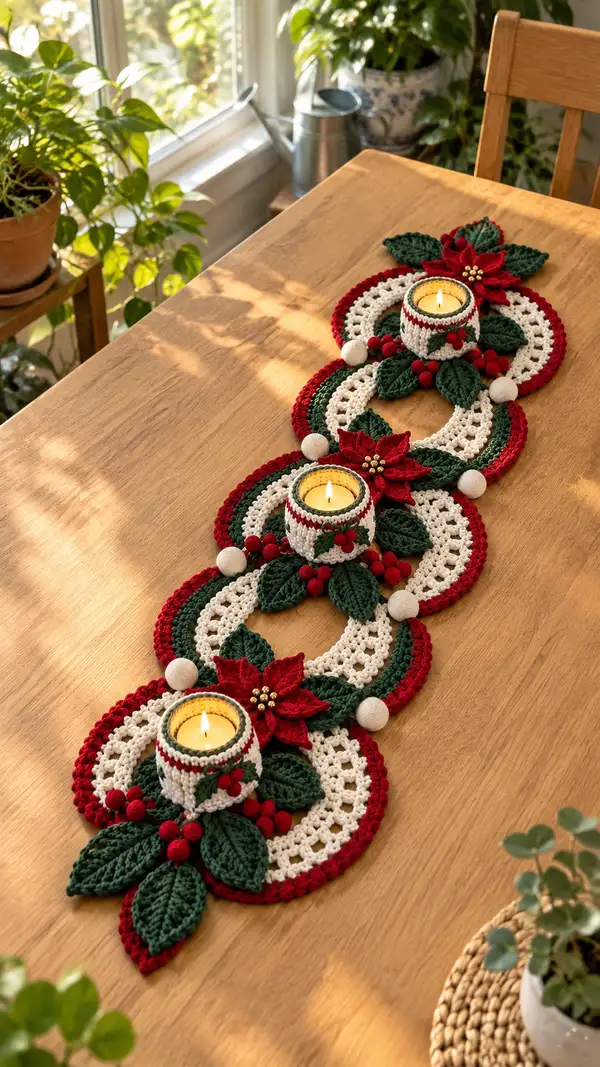
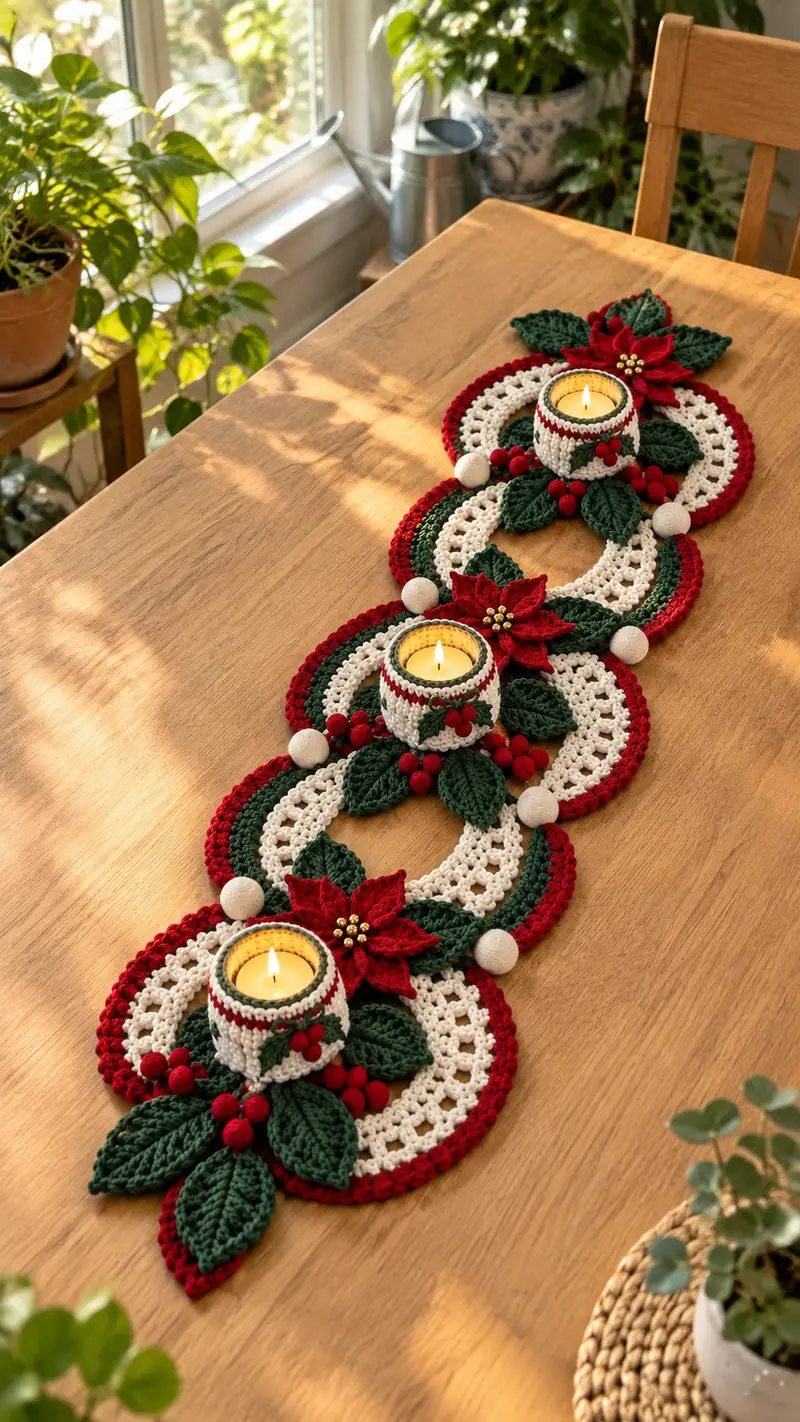
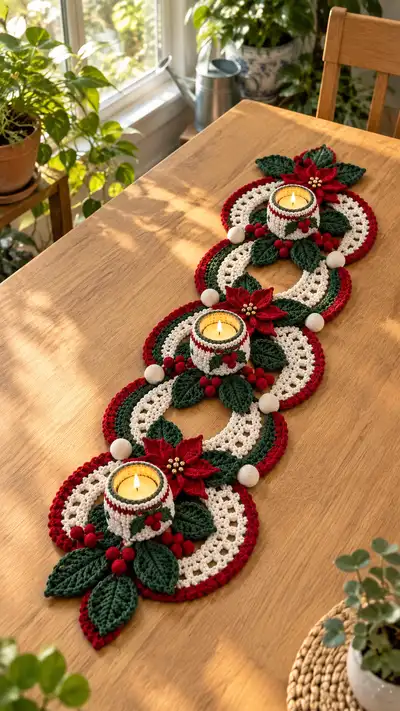
A warm, festive table runner featuring three scalloped crochet doilies joined with layered poinsettias, textured leaves, and cozy candle cup cozies. Worked in classic holiday colors — deep evergreen, rich red, and soft cream — this runner brings handcrafted charm to your table. Includes detailed instructions for doily motifs, poinsettia flowers, leaves, berry clusters, and candle holders with assembly tips.
Progress Tracker
0% Complete
— Main Doily Circle (Make 3) :
Round 3 :
(1 sc, inc) x 6 (18)
Round 4 :
(2 sc, inc) x 6 (24)
Round 5 :
(3 sc, inc) x 6 (30)
Info :
This establishes a firm, closed center for the doily. Tight tension here prevents a hole in the center and gives a stable base for lace rounds.
Round 6 :
(4 sc, inc) x 6 (36)
Round 7 :
(5 sc, inc) x 6 (42)
Round 8 :
(6 sc, inc) x 6 (48)
Round 9 :
1 sc in each st around (48)
Info :
Change to soft cream yarn now for the lacy center. Fasten off green if desired and join cream in any st. Carry green inside if you prefer to keep color ends hidden.
Round 10 :
*ch3 (counts as dc), sk 1 st, dc in next st; rep from * around to create a spaced dc ring (approx 24 dc clusters). Join with sl st to top of ch3 (48)
Round 11 :
Join: ch1, *(ch3, sk next dc cluster, sc in next dc cluster) - works as alternating ch spaces and sc; rep around. End with sl st to join (48)
Round 12 :
Work a lacy mesh: *ch3, sk 2, sc in next st; rep around, join with sl st (48)
Info :
Use this round to gently block the cream center flat; pin if necessary. This makes later joining smoother and helps the candle cup sit evenly.
Round 13 :
*(dc, ch1, dc) in ch-space, sk next ch-space, sc in next sc; rep around. This builds a delicate lace ring (48)
Round 14 :
1 sc in each st and into ch-spaces to tidy edge and prepare for joining rounds (48)
Round 15 :
Switch to green yarn: ch1, 1 sc in same st, *(ch3, sk 1, sc in next 2 sts) repeat around; join (48)
Round 16 :
1 sc in each st around (48). Work this round tightly to create a firm surface for the outer border to attach.
Info :
Place a stitch marker at the first sc of this round for orientation; the outer red scallop will align to these stitches.
Round 17 :
Change to red: join yarn in any st, ch1, *sc in next 3 sts, (5 dc shell in next st) repeat around placing shells evenly (48 base spaces, shells sit every 4 sts)
Round 18 :
Work shells: sl st to center of each shell, ch1, (sc, hdc, 3 dc, hdc, sc) in shell center to create a raised scallop. Repeat for each shell (12 scallops)
Info :
Count scallops as you go; each scallop occupies a shell placement. Blocking scallops with pins will help them keep an even curve.
Round 19 :
1 sc in each stitch around working through the back loop of the scallop base to create a neat edge (approx 72 sc)
Round 20 :
Optional picot edge: *sc in next 3 sts, ch3, sl st into last sc to form picot; rep around for a decorative finish (72)
Round 21 :
Finish: 1 sc around to tidy and fasten off. Weave in ends and lightly block motif to shape (72)
Info :
Make 3 of these main doily circles. Block each to identical diameter; these will be slightly overlapped when joined for the runner layout.
— Candle Cup Cozy (Make 3) :
Round 1 :
Using cream yarn, 6 sc in mr (6)
Round 3 :
(1 sc, inc) x 6 (18)
Info :
This bottom forms the base of a small tea-light cozy; keep tension tight so the cozy holds its shape. Use a 3.5mm hook if you want denser fabric.
Round 4 :
(2 sc, inc) x 6 (24)
Round 5 :
1 sc in each st around (24)
Round 6 :
Change to green: 1 sc in each st around (24)
Round 7 :
Change to red stripe: (1 sc in next 2 sts, sc2tog) x 6 (18) - slight taper to fit snug around tea light (18)
Info :
Try the cozy over a tea light cup at this point to confirm fit; adjust last round decreases if needed for snugness. Place cup in to check height.
Round 8 :
1 sc around in BLO to create a defined rim (18)
Round 9 :
Join cream in top loop: ch1, sc in each st around (18)
Round 10 :
Decorative row: *ch2, skip 1, sc in next; rep around to create small chain points (18)
Round 11 :
Return to red: 1 sc around to tidy (18)
Round 12 :
Attach 3 small green leaves around the base of the cozy: make small loops of ch4 and sc back; sew or crochet in place at 0, 120, 240 degrees
Info :
Optionally add small crocheted berries (see berry section) clustered at leaf bases. Sew securely so they won't catch on flames or the cup itself.
Round 13 :
Fasten off, weave in ends. Make 3 cozy covers. If you prefer a taller cozy, continue 1 sc rounds until desired height (each extra round adds ~3-4 mm).
— Poinsettia Flower (Make 3 flowers; 7 petals each) :
Round 1 :
Using red, make a small center disc: 6 sc in mr (6)
Round 3 :
1 sc in each st around (12)
Info :
This small disc is the anchor for attaching petals. Sew gold beads into the center now or leave a small opening to tack beads after petals are attached.
Petal (Make 7 petals per flower) - Round 1 :
Ch8, sc in 2nd ch from hook, hdc in next, dc in next 3, hdc in next, sc in last; sl st to center disc to anchor (creates one petal)
Petal - Round 2 :
Work into petal tip for shape: ch1, (sc, hdc, 3 dc, hdc, sc) across the petal tip; sl st back to center disc to secure
Info :
Repeat petal sequence 7 times spaced evenly around the center disc. Pin petals into position to ensure even spacing before sewing.
Petal - Round 3 :
Edge each petal with slip stitches in back loops only for a slight curl. After completing all 7 petals, fasten off and weave ends (7 petals attached)
Round 4 :
Optionally add a second layer of smaller petals: attach a 5-petal inner layer between main petals following same pattern with ch6 base (5 small petals)
Info :
Sew six small gold beads tightly into the very center to mimic poinsettia stamens. Use strong thread and knot securely on the back of the disc.
Round 5 :
Blocking the finished flower on a flat surface with pins helps flatten petals and gives a polished look. Steam or spray lightly and pin until dry.
— Leaves (Make 12-16) :
Round 1 :
Using green, ch8, sc in 2nd ch from hook, hdc in next, dc in next 3, hdc, sc into last (7 sts in spine)
Round 2 :
Turn leaf and work on opposite side of foundation chain: sc in first st, hdc, dc 3, hdc, sc (mirror of first side). Join to tip with sl st. This produces a small leaf shape (14)
Round 3 :
Work BLO ridges for veining: ch1, sc in same st BLO, *(ch2, sc in next st BLO) repeat across both sides to create ridged vein texture. Fasten off (approx 14)
Info :
For larger leaves, ch10-14 for a longer foundation, increasing the number of dc in the center to 5-7. Pin leaves slightly curved when blocking for realistic shape.
Round 4 :
Optional edging: attach a small sc border around leaf edge to give definition. Work evenly to avoid puckering (approx 18 sc)
Round 5 :
Make multiple leaf sizes: 4 large (ch12 base), 8 medium (ch8 base), 4 small (ch6 base). This variety creates a natural cluster beneath each poinsettia.
— Berry Balls (Make clusters for each motif) :
Round 1 :
Using red, mr and 6 sc in mr (6)
Round 3 :
1 sc in each st around (12)
Info :
Stuff lightly with fiberfill to make a small firm ball. These tiny berries are decorative accents and should be firmly secured with stitches when attaching to the runner.
Round 4 :
Round 4: (1 sc, dec) x 4 (8) - shape the berry into a rounded form
Round 5 :
Dec x 4 (4) - ensure firm stuffing and close with sl st; fasten off leaving tail for sewing
Round 6 :
Make clusters of 5-7 berries for each doily junction. Use small beads if you prefer a more rigid berry look.
— Joining and Runner Assembly :
Info :
Decide layout: three doilies in a row with slight overlap. Mark centers and mock up positions on a blocking mat to ensure spacing before sewing. Each doily will overlap about 1/3 of its diameter with neighbors.
Round 1 :
Align two doilies at desired overlap. Using matching red yarn, whip stitch through outer red scallop edge of both doilies at even intervals (stitch every 4 sc or at scallop seams). Make 12-14 secure stitches along overlap.
Round 2 :
Repeat joining between second and third doily to form a continuous runner. Ensure the centers line up in a straight line.
Info :
For a neater finish, use mattress stitch between scallops so the seam is nearly invisible on the top side. Keep tension even to avoid pulling the edges in.
Round 3 :
Sew leaves in clusters at each overlap: arrange 3-5 leaves under each poinsettia position and tack them at the base with green yarn. Use small whip stitches through the leaf centers to secure firmly.
Round 4 :
Sew on berry clusters among the leaves using the long tail left from berries. Anchor each berry individually and stitch stems to the base to prevent movement.
Round 5 :
Sew the poinsettia centers on top of leaf clusters, aligning petals to sit naturally. Reinforce by sewing through the flower base and doily for stability (use 6-8 secure stitches).
Info :
Add small gold beads to the center of the poinsettia using strong thread; knot on the back and hide the knot under stitches. This gives a polished, festive center.
Round 6 :
Attach candle cup cozies centered in each doily, sewing through the cream mesh to hold the cozy firmly in place if desired. Check fit with a tea light cup before securing permanently.
Round 7 :
Finish by adding small off-white wooden or crocheted balls at the outermost join points between doilies to create visual anchors. Sew through the center of each ball into the border securely.
Info :
Weave all loose ends on the back of the runner. Trim threads close. Use a few fabric glue dots on thread knots if desired for additional security around bead centers and berry clusters.
— Finishing Touches and Optional Embellishments :
Round 1 :
Add embroidered veins with a strand of darker green through selected leaves for depth. Use a fine yarn needle and whip a simple straight stitch along the leaf center vein and a few side veins.
Round 2 :
Optional metallic thread: work a few surface slip-stitches in gold around the flower center for shimmer. Keep stitches small and sparse for a subtle effect.
Info :
Display caution: if using real candles, place the tea light in a proper glass cup and never leave burning candles unattended. The crochet cozy is decorative and should not touch flame.
Round 3 :
Final blocking: lay runner flat, pin into final position, and steam lightly with an iron held above fabric (do not touch directly) to set shape. Allow to dry completely before using.
Round 4 :
Store flat or gently rolled with tissue between layers to maintain shape between seasons.
Info :
Congratulations — your runner is complete. Adjust spacing or add more small embellishments to suit your decor. Take photos and enjoy your new holiday centerpiece!
Completing this runner brings a real sense of holiday cheer and handmade warmth to your table! Each carefully crocheted doily, leaf, and poinsettia layers into a beautiful, cohesive centerpiece that you can be proud of. The removable candle cozies add practicality while the gold bead centers give just the right festive sparkle. Enjoy the process and the lovely glow it creates during special meals and gatherings. 🧶✨🎄