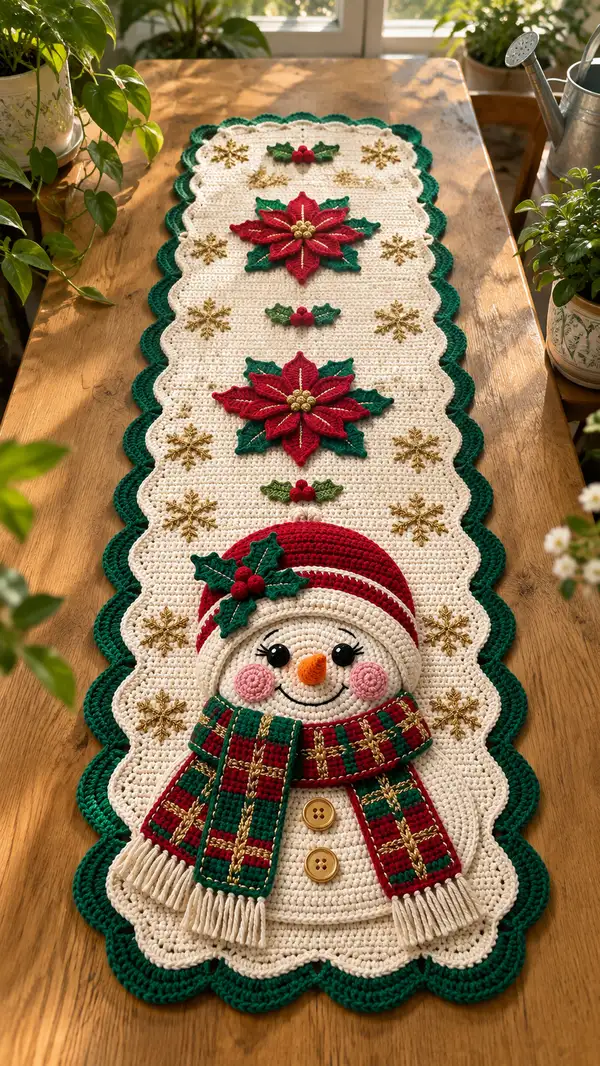
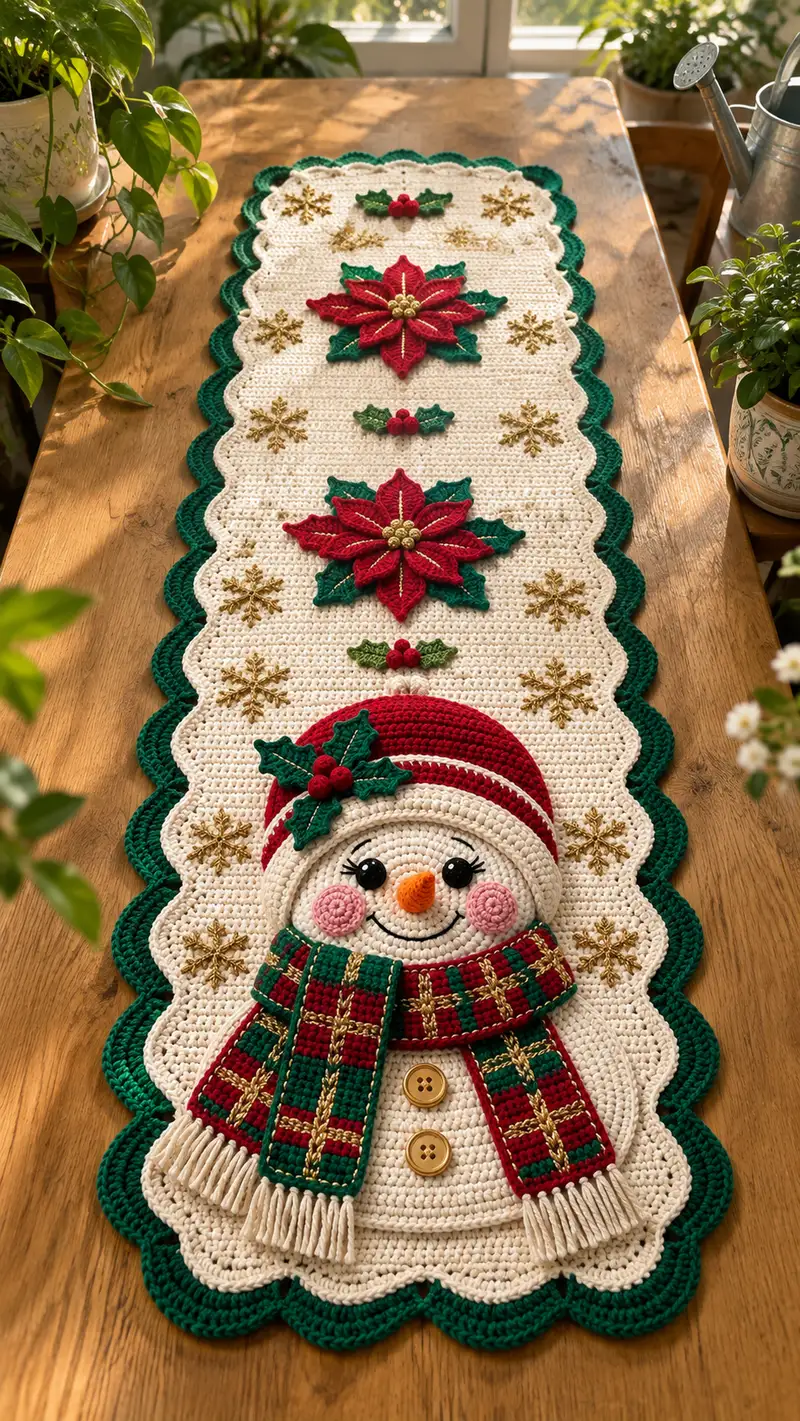
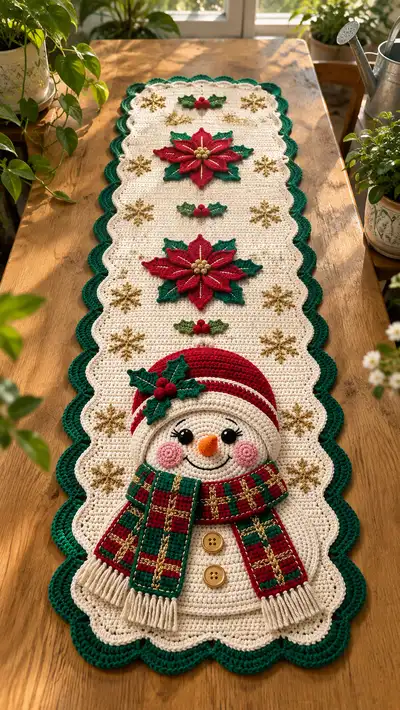
A charming holiday table runner featuring a smiling snowman, layered poinsettia appliques, holly accents and glittery gold snowflakes. Worked in warm cream with deep green scalloped edging and bright red details, this runner is perfect for festive tabletops and gift-making. The pattern includes full instructions for the rectangular background, scalloped border, the snowman head and hat, scarf with fringes, poinsettia flowers, holly clusters, and embroidered gold snowflakes. Clear assembly and finishing tips make this a rewarding project for makers who love decorative detail.
Progress Tracker
0% Complete
— Materials & Gauge :
Info :
Use worsted weight yarn and a 4.0mm hook for a dense, table-friendly fabric. Gauge is not critical for fit but important for motif placement: 12 sc x 14 rows = 10 cm (4 in) in single crochet worked in rows. Adjust hook size to match gauge. Keep tension consistent to avoid rippling.
— Base Runner (Background Panel) :
Round 1 :
Foundation: ch 101 (or chain to desired width; this chain produces a runner about 28-32 cm / 11-12.5 in wide after blocking). Turn and sc in 2nd ch from hook and in each ch across (100 sc).
Round 2 :
Ch 1, turn. Sc in each st across (100)
Round 3 :
Ch 1, turn. Sc in each st across (100)
Round 4-10 :
Repeat Round 3. Keep fabric flat and even; these rows form the lower section where the snowman will be placed (100)
Info :
Mark the center line of the runner by counting 50 stitches from either edge; this center column is where the snowman face and vertical motif alignment will be placed.
Round 11-18 :
Ch 1, turn. Sc in each st across for 8 rows (100)
Info :
At the end of Round 18 you will have completed the lower panel. This is a good point to lay out the appliques to check spacing: reserve ~10 rows between motifs for even visual balance.
Round 19-26 :
Ch 1, turn. Sc across for 8 more rows (100)
Round 27 :
Ch 1, turn. Work 2 rows of hdc to create a subtle texture change which helps the motifs sit; hdc in each st across (100)
Round 28-34 :
Return to sc: Ch1, turn. Sc in each st across for 7 rows (100)
Info :
Place temporary pins where you want the two poinsettia motifs to sit (approximately at row 36 and row 60 counting from the bottom) and the snowman head at the lower end (rows 4-24 from bottom). Adjust spacing so motifs are balanced vertically.
Round 35-44 :
Continue sc rows: ch1, turn. Sc across for 10 rows (100)
Round 45-60 :
Sc across for 16 rows (100). This creates the central long panel that carries the top poinsettia and upper snowflake placement.
Info :
The background panel now measures approximately the full intended length before border (roughly 90-110 cm depending on yarn); block flat before adding appliques for best results.
— Scalloped Border (worked in the round around rectangle) :
Round 1 :
With deep green, join with sl st to any stitch along one long edge (RS facing). Ch1, work sc evenly along long edge placing 1 sc in every row end; work 100 sc along each long edge, and 1 sc in each stitch across short ends until you return to start. Exact count will equal the perimeter; aim for even spacing (perimeter approx. 400 sc).
Info :
Place 3 extra sc in corners to help curve; make note of total sc count for scallop spacing measurement.
Round 2 :
Ch3 (counts as dc), *skip next 2 sc, 5 dc in next sc (shell made), skip next 2 sc, dc in next sc; rep from * around. At corners adjust by placing extra dc between shells to keep scallop shape consistent.
Round 3 :
Sl st into center of each shell, ch1, sc in shell center, ch3, sl st to same center to accentuate scallop. Fasten off and weave ends. Fasten off and block shell edge gently to set scallops.
Info :
If your scallops are too large or small, frog and adjust spacing by changing the number of skipped stitches between shell clusters; aim for visually even scallops along both long edges.
— Snowman Head (Applique) :
Info :
Snowman head is worked in rounds using cream yarn. It is slightly raised and sewn onto the lower end of the runner. Work tightly. Make two round pieces for layered depth (face + backing). Pin in position before sewing.
Round 1 :
Using cream, MR, 6 sc in MR (6)
Round 3 :
(1 sc, inc) x6 (18)
Round 4 :
(2 sc, inc) x6 (24)
Round 5 :
(3 sc, inc) x6 (30)
Round 6 :
(4 sc, inc) x6 (36)
Round 7 :
1 sc in each st (36)
Round 8 :
1 sc in each st (36)
Info :
Place safety eyes at this stage (if using) between Rounds 6-8, spacing roughly 8-10 stitches apart centered on the upper half of circle. If embroidering eyes later, mark with pins.
Round 9 :
(4 sc, dec) x6 (30)
Round 10 :
(3 sc, dec) x6 (24)
Round 11 :
(2 sc, dec) x6 (18)
Round 12 :
(1 sc, dec) x6 (12)
Round 13 :
6 dec (6) - Fasten off leaving long tail for sewing. Lightly stuff to give subtle 3D effect; do not overstuff to keep face flat enough for scarf and hat attachment.
Info :
Make a second identical disk for backing if you want a padded, sandwich-style snowman head. Sew both together leaving the last 8-10 stitches open then lightly stuff and close.
— Snowman Face Details :
Round 1 :
Carrot nose: With orange, MR, 5 sc in MR (5)
Round 2 :
(1 sc, inc) x1, sc in next 3 sts (6) - shape slightly conical; fasten off leaving tail for sewing.
Info :
Embroider smile with black yarn across lower third of head: use chain of small backstitches to form a gentle smile. Cheeks are small pink circles: MR, 6 sc, 1 round dec to 3 sc, flatten and sew slightly to the sides of the smile.
Round 2 :
Eyes: use 10mm safety eyes or embroider closed lashes with black yarn on either side above the smile; position approximately 6-8 stitches apart depending on desired expression.
Info :
Sew the nose centered between eyes and above the smile using the tail. For cheeks, sew lightly with a couple of stitches so they sit flush; if you want puffier cheeks, place a tiny bit of fiberfill behind them.
— Snowman Hat (Striped Beanie) :
Info :
The hat is worked as a shallow dome topped with a folded brim. Alternate red and cream stripes for a festive look. Work two halves that fold to form rim, then sew onto head.
Round 1 :
With red, MR, 6 sc in MR (6)
Round 3 :
(1 sc, inc) x6 (18)
Round 4 :
(2 sc, inc) x6 (24)
Round 5 :
(3 sc, inc) x6 (30)
Round 6 :
1 sc in each st (30)
Round 7 :
Change to cream (Info: join cream yarn with a sl st into next st). Ch1, sc across (30)
Round 8 :
Change to red. Sc across (30)
Round 9 :
Change to cream. Sc across (30)
Round 10 :
Change to red. Sc across (30)
Info :
Work 4-5 stripes in total depending on desired beanie height. Arrange stripes so the hat covers the top of the head and creates a folded brim when attached.
Round 11 :
Fold hat edge and seam using surface slip stitch to make a neat brim: fold lower 6 sts height inward and join with sl st along fold (30)
Round 12 :
Make holly accent for hat: With dark green, ch6, 1 sc in 2nd ch from hook, (hdc, dc, hdc) along chain, sl st to base to secure leaf. Make three leaves and join at base; add three small red bobble berries (make MR with 4 sc) and sew to hat brim.
Info :
Sew the hat to the top front of the snowman head, overlapping the forehead by 2-3 rounds. Secure with mattress stitch and hide tails inside the head.
— Snowman Scarf (Plaid Scarf with Fringes) :
Info :
The scarf is made as two long rectangular panels for the hanging ends plus a shorter neck wrap. Use tapestry-style colorwork by carrying yarn or working intarsia strips to create the plaid. Add gold embroidered lines with metallic yarn.
Round 1 (Neck Wrap) :
With red, ch 28, sc in 2nd ch from hook and across (27 sc). This shorter strip wraps around the neck. Work back and forth 6 rows of sc (27)
Round 2 (Ends - Make 2) :
With red, ch 50 (or desired length for an 18-20 cm hanging end), sc in 2nd ch and across (49 sc). Turn and sc across for 20 rows to make a long panel (49)
Round 3 :
Change color to dark green every 4th row to create block stripes; work two red rows, two green rows, repeating for a plaid base. For neat color joins, carry unused yarn along the row and catch with small overcasting stitches.
Round 4 :
Once panels are complete, edge each long side with 1 row of sc in contrasting cream to frame the plaid (49)
Round 5 :
Add gold embroidered vertical and horizontal lines: using metallic gold yarn and embroidery needle, make straight running stitches at regular intervals to create a plaid grid. Secure ends and weave them inside the scarf edges.
Round 6 :
Create fringe: cut 3-inch strands of cream yarn. Fold in half and use a crochet hook to pull fold through edge stitches along the short ends every 2 stitches; make even groups for tidy fringe. Trim evenly.
Info :
Sew the neck wrap around the snowman head base, then pin the two hanging ends so they overlap at the chest and sew their inner ends to the backside of the head to secure in place. Add two wooden buttons sewn to the body below the scarf as a decorative finishing touch.
— Poinsettia Applique (Make 2 Large Flowers) :
Info :
Each poinsettia is layered: first a set of green leaves, then two tiers of red petals, then a gold-beaded center. Work petals flat and shape with BLO rounds to give a curled edge.
Round 1 (Center Disc) :
With red, MR, 6 sc in MR (6)
Round 4 (Petal Base) :
*(Ch6, sl st in 2nd ch from hook, hdc in next, dc in next, tr in next, sl st into next sc of center disc) - repeat from * x6 to create 6 petals attached to center.
Round 5 :
Fasten off red. Switch to darker red for second petal layer positioned between first-layer petals: attach at base between petals and repeat ch7 cluster for slightly larger petals (6)
Round 6 :
Green leaves: attach green yarn to underside of base disc and make 6 leaves: ch6, sc, hdc, dc, hdc, sc across chain, sl st to base (6 leaves). Fasten off and block petals slightly pinched to add dimension.
Round 7 :
Gold bead center: sew 6 small gold beads (or make 6 tiny gold bobbles using metallic yarn MR 4 sc) to center using embroidery needle. Secure tightly and weave ends.
Info :
Make two poinsettias and position them on the runner centered on the left-right center. One near the upper third and one near the middle third; pin and baste before final sewing to ensure even placement.
— Holly & Berries Appliques (Make 3 clusters) :
Round 1 :
With dark green, ch6, sc in 2nd ch, hdc, dc, hdc, sc, sl st to join. Make three leaves per cluster and join their bases by a few slip stitches. Make small red berries by MR with 6 sc, stuff lightly and close (3 berries per cluster).
Info :
Sew small clusters between the poinsettias and near the snowman hat as shown, spacing them about 6-8 rows apart vertically for balance. Sew berries securely and hide ends inside runner fabric.
— Gold Snowflake Embroidery (Scatter 8-10 Snowflakes) :
Info :
Using metallic gold yarn and an embroidery needle, embroider snowflakes of two sizes across the background. Mark positions with pins first. Use basic straight stitches and small french knots for centers.
Round 1 (Small Snowflake) :
Bring metallic yarn up at center, make 6 straight stitches radiating outwards at equal angles (approx. 8-10 mm), then add tiny french knot at center. Optionally add V-shaped short stitches between rays for decorative detail.
Round 2 (Larger Snowflake) :
Make 8 radiating spokes using longer straight stitches (approx. 12-18 mm). At midpoints, stitch small forks (a V or small branch) using two short stitches to form the classic snowflake arms. Secure and weave in ends on WS.
Info :
Stitch snowflakes before sewing heavy appliques to ensure your needlework does not get obstructed by bulky motifs. Use small tacking stitches to hide the thread behind appliques when sewing them on top.
— Small Decorative Rounds and Buttons :
Round 1 :
Buttons: attach two wooden buttons on the snowman torso area about 8-10 stitches below the scarf. Sew with strong thread and through both runner fabric and light backing disc to stabilize.
Round 2 :
Optional: Add small raised bobble clusters to mimic holly berries elsewhere: bobble stitch (yarn over 4 times pull through, etc.) following your preferred bobble method. Make symmetrical groupings for a pleasing look.
Info :
Secure heavy beads with a few drop of fabric glue under the knot for extra security before finishing weaving in tails.
— Finishing & Assembly :
Round 1 :
Block the runner flat and the appliques separately to ensure they sit neatly and do not distort the background. Use spray starch lightly if you want a crisp finish (test on scrap).
Round 2 :
Pin appliques (snowman head, two poinsettias, three holly clusters) to the background according to your earlier layout marks. Use fine pins and baste with small sewing stitches to keep them immobile for final stitching.
Round 3 :
Sew each applique using a matching yarn and small whip stitch or ladder stitch. For the snowman head, sew around entire edge through background and head backing to prevent gaping. For layered items (poinsettia), sew from the underside of each layer so stitches are invisible.
Round 4 :
Weave in all ends through multiple stitches and trim close. On WS, add a piece of felt or lightweight cotton backing if you want extra protection for the table surface and to hide knot ends.
Round 5 :
Final blocking: once appliques and embroidery are completed, re-block the entire runner to ensure scallops lay flat and motifs are set. Allow to dry completely before use.
Info :
Store the runner flat or rolled with tissue between folds to protect beads and embroidery. Spot clean lightly; hand wash only when necessary and reshape while wet.
Completing this Festive Snowman Table Runner turns an ordinary table into a holiday centerpiece full of handmade charm! The raised appliques and embroidered gold snowflakes add delightful texture and sparkle, while the scalloped green border frames the design beautifully. Every careful stitch contributes to a lasting, gift-worthy heirloom. 🧶😊🎄 Happy crafting — enjoy placing this runner on your table and sharing the festive cheer!