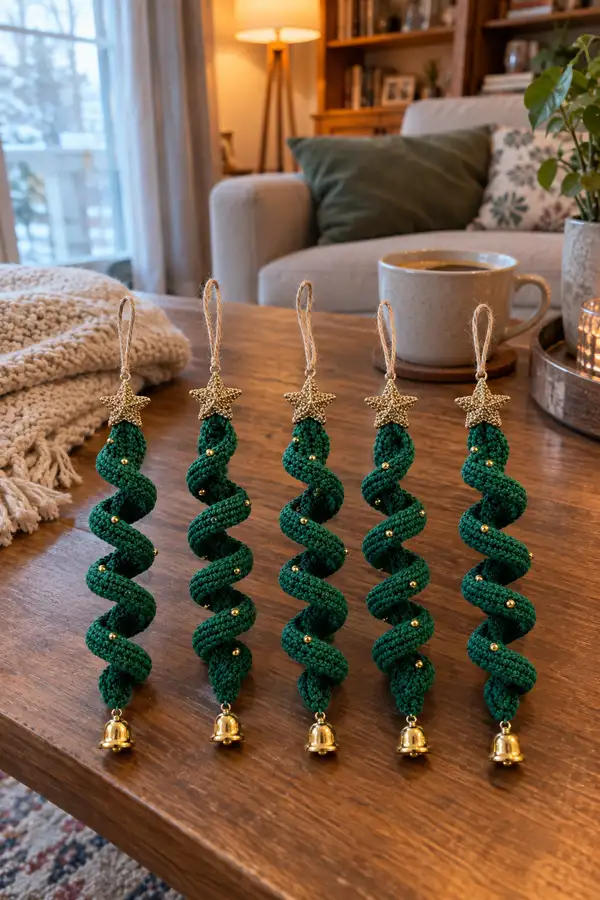
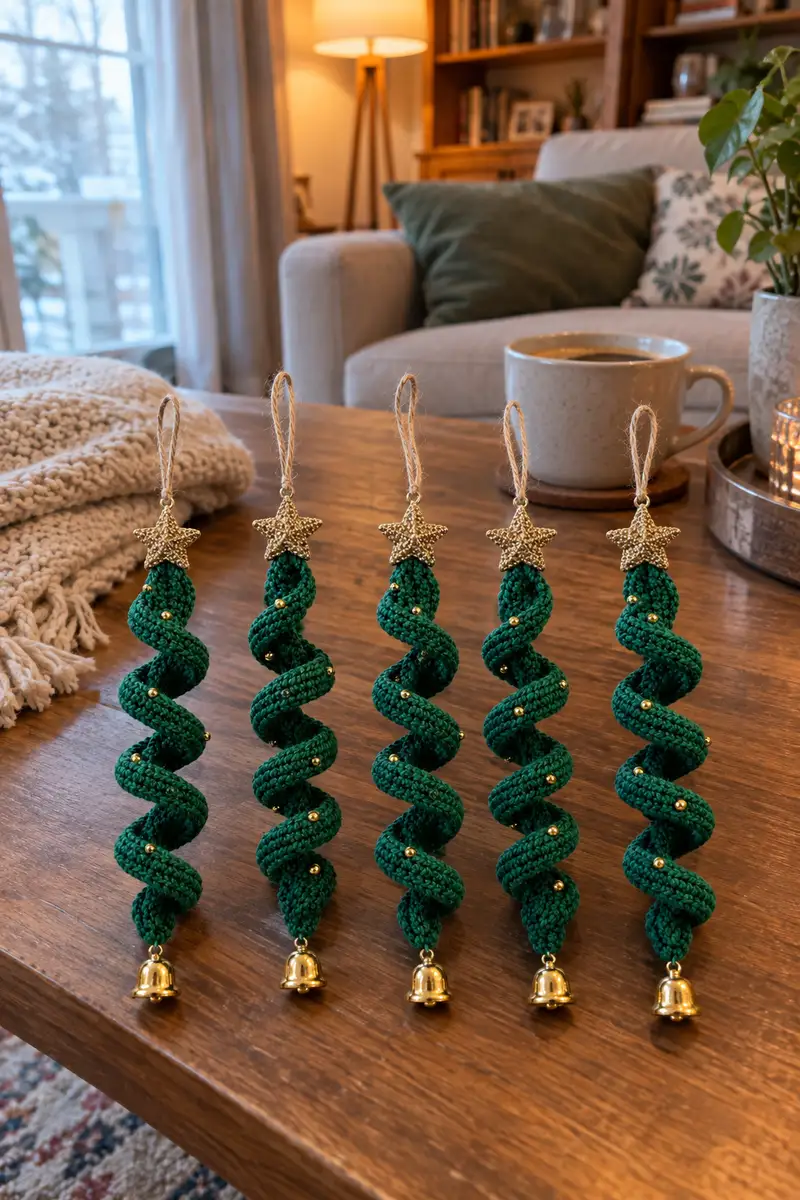
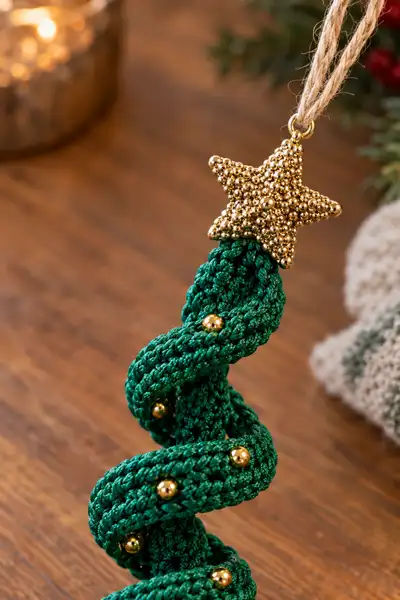
Create elegant spiral Christmas tree ornaments that dangle like tiny green helixes. Each ornament features a dark green crocheted spiral, tiny gold bead decorations, a glittering star topper, jute hanging loop and a small golden bell. These ornaments are lightweight, easy to store, and make gorgeous additions to garlands, tree branches or gift tags. The pattern focuses on a simple tubular crochet technique that is then shaped into a spiral and embellished for a festive finish.
Progress Tracker
0% Complete
— Overview & Gauge :
Info :
This pattern makes one spiral tree ornament approx. 12-16 cm long when completed (without loop). Gauge is not critical, but aim for a firm fabric: 12 sc x 12 rounds = approx. 4 cm in diameter when worked in cotton DK with 3.5mm hook.
Info :
Decide whether you will use an internal core (recommended). A thin flexible wire or a length of strong cotton cord works well; you will insert it into the crocheted tube before final shaping. The internal core length should be slightly longer than your finished spiral to allow attachment to the bell and star.
— Tube / Tree Body :
Round 1 :
6 sc in magic ring (6)
Round 3 :
1 sc in each st (12)
Info :
From round 3 onward we will work even in continuous rounds to create a seamless tube. Place a stitch marker in the first stitch and move it up each round. Keep tension fairly tight so stuffing or the inserted core will not show through.
Round 4-12 :
1 sc in each st (12) — work 9 continuous rounds to build initial tube length (12)
Info :
If you prefer a slightly wider tube, you can add one more increase round here: (1 sc, inc) x 6 = 18 sts. The sample uses 12 sts for a slender spiral; adjust only if you want a thicker spiral.
Round 13-22 :
1 sc in each st (12) — continue even rounds, keeping fabric tidy and removing any loose loops as you go
Info :
Every 8-10 rounds, run your fingers along the tube to check for even tension. If your rounds appear to rotate or twist, relax your yarn tension slightly for the next few rounds to rebalance.
Round 23-32 :
1 sc in each st (12) — continue building the tube. Aim for a total straight tubular length of approximately 90-130 mm before coiling (this varies with yarn and desired spiral tightness)
Info :
If you plan to insert the internal core, leave an open tail of approx. 10-15 cm of yarn now before finishing final rounds so you can seat and stitch the core into place later. If you will thread a wire through, you can do this after closing the tube end, but it's easier to add the core while you still have an open end.
Round 33-42 :
1 sc in each st (12)
Round 43-52 :
1 sc in each st (12)
Info :
At this stage you have made approximately 50 rounds (including rounds 1&2). The tube should be long enough to form 4-6 coils depending on how tight you plan to spiral it. For a long, elegant spiral, continue to 80-100 rounds total. I recommend measuring against a dowel or cylindrical object to preview the spiral curve.
Round 53-62 :
1 sc in each st (12)
Round 63-72 :
1 sc in each st (12)
Info :
If you want a ribbed texture along the spiral ridge, here is an optional technique: for 4 rounds alternately work 1 sc BLO then 1 sc FLO for the next 4 rounds. This creates a gentle rib that helps the spiral catch light. Change back to even sc rounds after finishing the ribs.
Round 73-82 :
1 sc in each st (12)
Round 83-92 :
1 sc in each st (12)
Info :
Start thinking about bead placement now. Plan for approximately 6-8 beads spaced evenly along the length of your spiral. Mark those positions roughly — for example, every 12-16 rounds you can add a bead. We will sew beads on after shaping to ensure they sit on the outer edge.
Round 93-102 :
1 sc in each st (12) — continue even rounds to reach desired length. Sample ornaments used 100 even rounds total from round 3 onward (so total tube rounds ~102 including initial increase)
Round 103-110 :
1 sc in each st (12) — optional extra length if you want a longer spiral (reduce if you prefer a tighter, shorter ornament)
Info :
When you reach your desired length, fasten off leaving a 15 cm tail if you will insert a cord core and tie at ends, or a 25 cm tail if you will sew the tube closed to the bell and star. If using wire, cut the wire approx. 2 cm longer than the tube to allow for looping into the bell and passing into the star connector.
Round 111 :
Optional finishing round: sc in each st decreasing every 4th st to slightly taper the tip if desired: (3 sc, dec) x 3 = 9 (if you prefer pointed tip)
Round 112 :
1 sc in each st (9) — round to tidy tip
Round 113 :
Round to close: (1 sc, dec) x 3 = 6
Round 114 :
3 dec (3) — close tightly and fasten off leaving long tail for sewing to bell/jump ring
Info :
If you prefer a blunt end, skip the tapering and simply fasten off after your final even round. The sample used a slightly tapered tip to mimic a tree point and to make bell attachment neat.
— Inserting Core & Shaping :
Info :
Insert the internal core now: feed your thin wire or cord through the tube. If the tube is closed, gently open a few final stitches or use a yarn needle to thread a cord in. Ensure the core runs from the very top to the very bottom with approx. 1-2 cm protruding each end for secure attachment points.
Info :
To shape the spiral, wrap the tube around a dowel, cone or cylindrical object with the diameter approximating the desired spiral diameter (for example a 2-3 cm dowel). Coil evenly to create 4-6 full spiral turns. If using wire, coiling the wire will help the spiral hold its elegant helix shape without additional supports.
Info :
Block the coiled tube: dampen slightly with water (if your yarn allows) and pin the coil until dry, or apply a light fabric starch if you want the spiral to be slightly stiffer and permanent. For cord fibers that do not wet well, the internal wire core is the most reliable method.
— Bead Embellishments :
Info :
Plan bead positions: transfer your round counts to physical positions on the spiral. A sample spacing: beads at approximately rounds 18, 30, 42, 56, 70, 84, 96 on a 100-round tube. These marks correspond to locations along the tube that will sit on the outermost edge of the spiral.
Round B1 :
Sew first bead through the tube: use a fine sewing needle and matching thread. Insert needle at the marked stitch, pass through the bead, then back into the tube 4-6 mm away to secure it. Tie a small knot inside the tube or secure with a tiny dab of glue if desired.
Round B2 :
Repeat bead sewing for each marked position. Ensure beads sit on the outer curve of the spiral, not on the inner fold. Aim for symmetry and even spacing.
Info :
If you prefer beads integrated into the crochet as you work, string beads onto the yarn before crocheting and slide them into place at preplanned rounds. However, be mindful of bead hole size and yarn thickness when using this technique.
— Star Topper (Crocheted Decorative Star) :
Round S1 :
With gold yarn, make mr, ch1, 5 sc in ring, pull tight (5) — this creates center of star
Round S2 :
*(ch3, 2 dc in next st, ch3, sl st in next st) repeat from * 2 more times to create 5 star arms. Work carefully into each of the five base stitches to form five points.
Round S3 :
For each arm: in first arm work (sl st, ch1, 1 sc, ch1, 1 hdc, ch1, 1 dc, ch1, picot (ch3, sl st into 3rd ch)) then sl st to center; repeat for each arm to give slightly raised points and a textured surface.
Round S4 :
Fasten off leaving a long tail for sewing to the tube. Weave in ends but leave the long tail for secure sewing.
Info :
You can substitute a purchased glitter star like the sample photo for a more sparkly finish. If using a store-bought star with a small loop, pass the star loop through a jump ring that also secures into the crochet tube's top stitches.
Round S5 :
Optional beading: Sew tiny seed beads to the star center with matching thread for extra sparkle. This is purely decorative and optional.
— Bell Cap & Base Attachment :
Round Bc1 :
To attach bell at base, make a small crochet cap to hold the jump ring: mr, ch1, 6 sc in mr (6)
Round Bc2 :
Round 2: 6 inc (12) — if your bell loop is larger, add this increase round to make a slightly wider cap (12)
Round Bc3 :
Round 3: 1 sc in each st (12) — work 2 rounds to create a small cup-shaped cap
Round Bc4 :
Round 4: (2 sc, dec) x 3 = 9 — taper slightly to fit bell loop if needed
Round Bc5 :
Fasten off leaving long tail. Use tail to sew this cap to the tube tip and secure the bell jump ring. Insert the bell jump ring and sew cap around it with several tight passes to secure.
Info :
If your bells have tiny loops that don't fit directly into the crochet cap, attach a small split ring or jump ring onto the bell first. Then sew the jump ring into the crochet cap through several passes and reinforce with a small dab of clear glue if desired.
— Hanging Loop & Final Top Assembly :
Round H1 :
Cut a piece of jute twine approx. 12-14 cm long. Fold in half and tie a small knot at the fold leaving the loop for hanging. Insert the knotted end through the star loop or pass the loop through the star's jump ring and up into the tube core.
Round H2 :
Secure the jute by threading the cord ends down through the inside of the tube to the topmost stitches. Use the long tail of the tube's top loops to sew the jute into place by taking stitches through the tube and around the jute cord.
Info :
If you used wire as a core, you can loop the wire up through a small jump ring at the star base and then twist the wire neatly and tuck it into the top few tube stitches before sewing the star in place. This offers extra security and prevents rotation of the star atop the spiral.
Round H3 :
Sew the star to the top of the tube: align star center with top tube stitches and sew through the star tail and into the top 6-8 rounds of the tube so the star sits flush. Make multiple passes through the star center and tube to ensure stability.
Info :
After the star and bell are attached, give the ornament one final inspection. Adjust bead positions slightly if needed. Use small pins to hold beads while glue dries if you used glue for extra security.
— Alternative Decorative Options :
Info :
Alternative toppers: tiny crocheted hats, pom-poms, wooden stars or patterned buttons all make cute variations. You can also substitute a contrasting yarn stripe by changing color every 8 rounds during the tube stage — remember to carry the yarn neatly or weave heavy ends in securely.
Info :
Make a garland: create 8-12 ornaments and string them along a length of jute or ribbon at even intervals. Each ornament can be attached with the jute loop or with small jump rings so they hang facing forward along the garland.
Final Info :
Weave in all ends with a yarn needle, trim neatly, and if you used glue allow 24 hours to cure. Store flat or hung to preserve spiral shape, or uncoil gently to flatten for compact storage.
This spiral ornament pattern turns simple stitches into a delightful twisted tree you can hang or string into a garland. Each piece is lightweight and sparkly with gold beads, a charming star topper and a jingling bell at the base. It's a beautiful, hand-crafted accent for holiday décor and makes an elegant gift set. I hope you enjoy stitching these little spirals as much as I did — happy crafting! 🎄✨