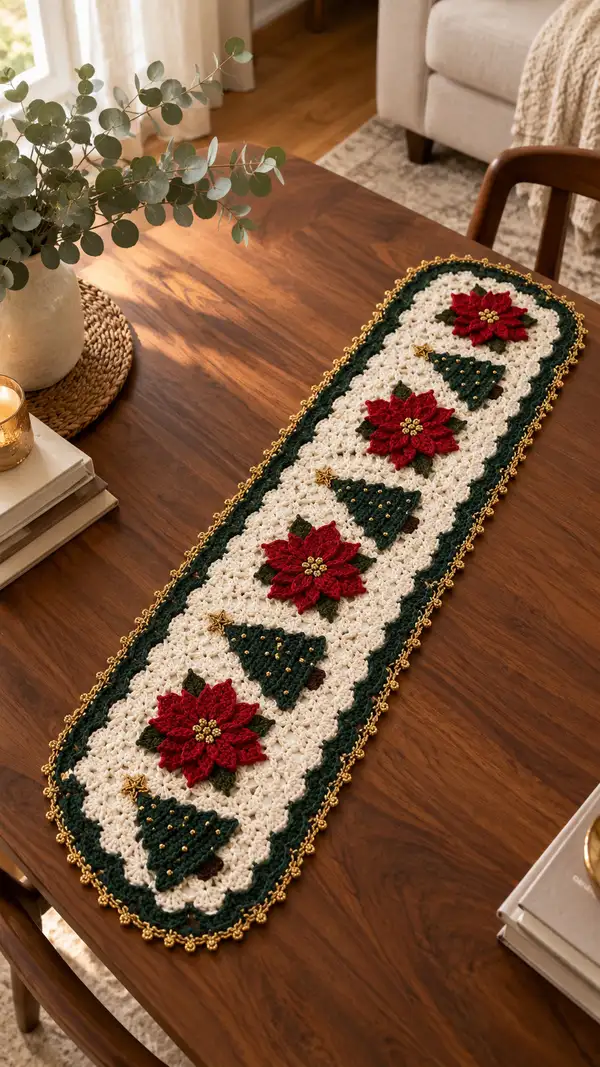
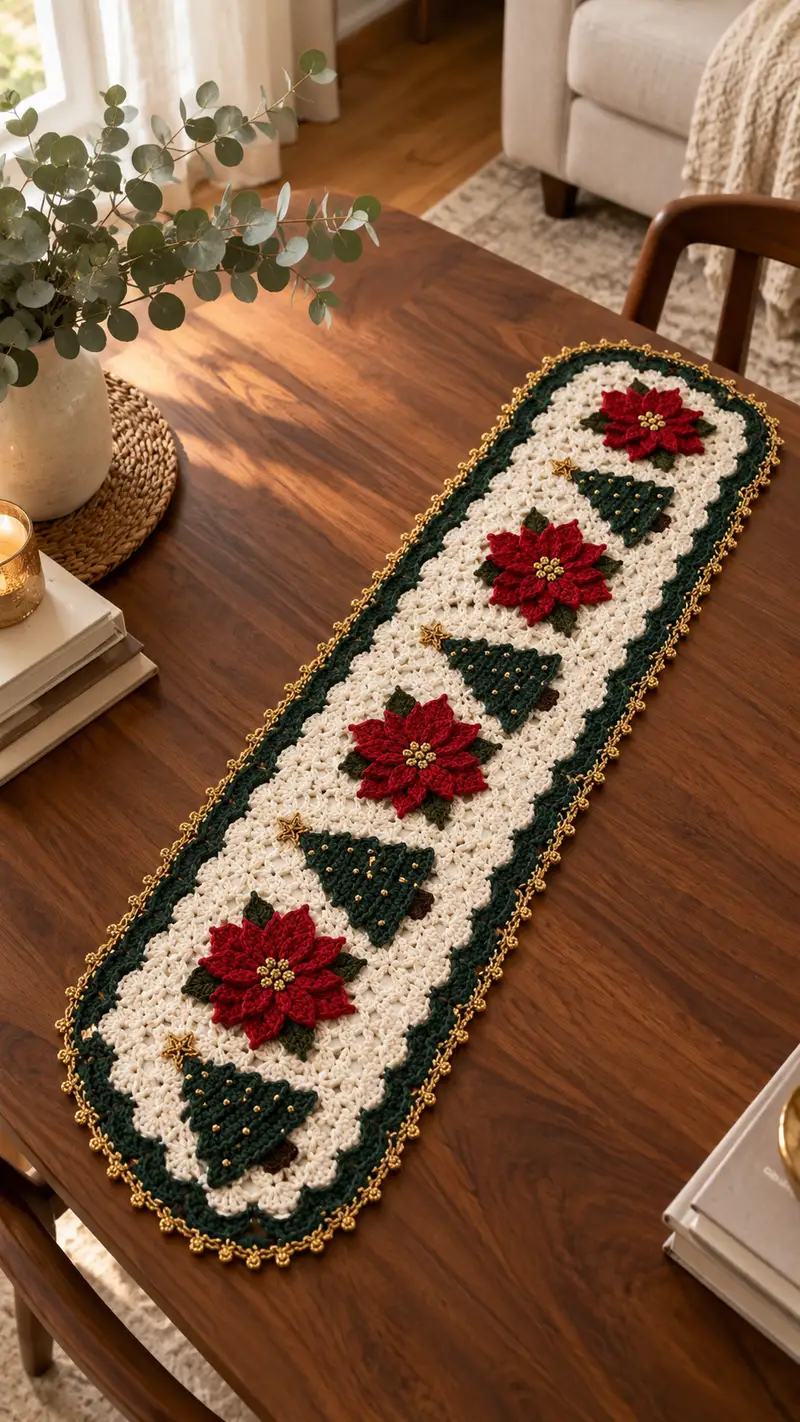
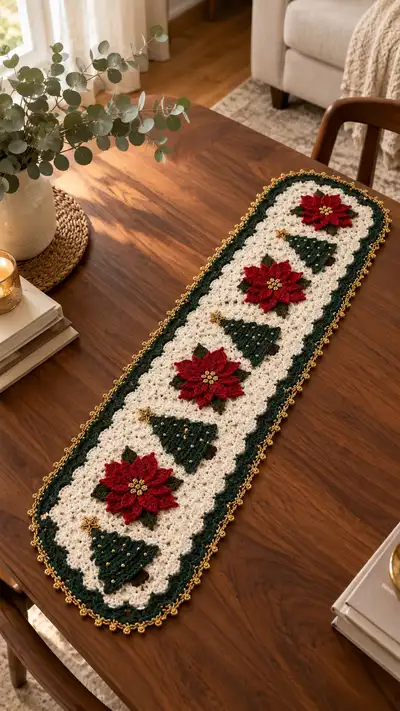
A handcrafted holiday table runner featuring cream shell stitch background, deep evergreen scalloped borders, clustered poinsettia appliques and tiny decorated Christmas tree motifs. Finished with a delicate gold beaded picot edge for a vintage festive look. Perfect for holiday centerpieces or a cozy seasonal dining table accent.
Progress Tracker
0% Complete
— Materials & Gauge :
Info :
Gauge is not critical for this decorative runner but for reference: 12 shells (shell = 5 dc cluster) = 4" across using worsted yarn and 4.0 mm hook. Exact finished size depends on number of repeats and blocking. The sample runner measures approximately 44" x 9" after blocking.
— Abbreviations & Notes :
Info :
Work in joined rounds throughout the central panel to create a continuous oval/rectangular shape. Use stitch markers to mark the start of each round. Shell = (5 dc) in same st or sp unless otherwise noted. Ch3 counts as first dc where used. For even, repeatable math we work panels in groups of 6 stitches around to create scallops; adjust length by adding or subtracting multiples of 6 to your starting chain.
— Main Center Panel (worked in joined rounds)—
Foundation :
Ch72, do not join. This chain gives a runner that will be approx 9" wide before applique and blocking. You can make longer by adding multiples of 6 to the chain length.
Round 1 :
Join with sl st to first ch to form a ring being careful not to twist. Ch1, sc in same ch and in each ch across the chain (72 sc), work 3 sc in last chain to turn the end (corner), continue working sc down the opposite side of the foundation chain back toward the beginning (72 sc), work 3 sc in the final chain at the starting end (this evens the oval). Total sts after completing the round: 78.
Round 2 :
Ch1, sc in each st around (78)
Info :
We will establish the shell pattern now. Shells are worked into spaces created in subsequent rounds so counts will remain 78 if you place shells into ch-spaces. Place a stitch marker at the start of each repeat group to help maintain symmetry; there will be 13 groups of 6 stitches.
Round 3 :
Ch3 (counts as dc), *sk next 2 sts, 5 dc in next st (shell), sk next 2 sts, dc in next st; rep from * around to marker. End with dc in the last stitch to finish. Repeat groups = 13. Maintain 78 points of repeat visually (78)
Round 4 :
Ch1, sc in each dc and in each dc of shells around to create a firm join (78)
Round 5 :
Ch4 (counts as tr), tr in next st, ch1, sk next st, work (5 dc) shell into the top of the next dc from previous shell, ch1, sk next st, tr in next 2 sts; rep around. This builds elevated shell texture for a lacy background. (78)
Info :
If your runner has the correct number of repeats, you will notice a gentle scalloped perimeter forming. If your chain was shorter/longer adjust by 6-ch increments so shells line up evenly.
Round 6 :
Ch1, sc in each st and in each ch-1 space around (78)
Round 7 :
Ch3, *5 dc shell in ch-1 space from previous round, ch2, sk next 3 sts, dc in next st; rep from * around. This opens the lace. Count remains 78 pattern points.
Round 8 :
Ch1, sc in each st including through shell tops and ch-spaces to create a tidy row (78)
Round 9 :
Ch3, dc in each st around but place 2 dc in each shell center to fill shells slightly and create a flatter field: *in shell center work 2 dc, in the following dc work 1 dc; rep around. (78)
Round 10 :
Ch1, sc in each st around (78)
Info :
At this stage the center panel has a balanced lace texture. The runner pictured alternates open shell clusters with filled rows to provide a stable yet lacy texture suitable for appliques. Work rounds 11-20 repeating rounds 3-10 two more times to build main height — this will add depth and creates the surface where appliques sit nicely.
Rounds 11-20 :
Repeat Rounds 3-10 twice more to achieve a center field of approximately 20 rows of shell texture (78)
Info :
Place sticker guide or small tape markers at four evenly spaced points to determine where the poinsettia and tree appliques will be attached (alternating pattern: poinsettia, tree, poinsettia, tree, etc.). Measure spacing so motifs are centered along length. The sample is made with 4 poinsettia and 4 trees alternating.
Round 21 :
Ch1, sc in each st around to tidy the panel surface and prepare for inner border (78)
Info :
Change to Evergreen yarn for the inner scalloped border now. Carry the cream yarn up the edge or fasten off and rejoin later. We recommend carrying if you plan to avoid many ends, but fastening off yields a neater color transition for blocking.
Round 22 :
Join Evergreen in any stitch. Ch1, sc in same st, *ch3, sk 2 sts, sc in next 3 sts; rep from * around placing a sc at each shell center or space for even scallops. This sets up the scalloped border foundation. (78)
Round 23 :
Ch1, sc in each sc and in each ch-3 space around to reinforce (78)
Round 24 :
Ch3 (counts dc), 2 dc in next st, *sk next 2 sts, 5 dc in next st (shell), sk next 2 sts, 3 dc across next 3 sts; rep from * around to produce a deep scallop. (78)
Round 25 :
Ch1, sc in each st around working through shell tops and spaces (78)
Round 26 :
Ch1, *sc in next 2 sts, picot (ch3, sl st into top of last sc), sc in next 4 sts; rep from * around to create a subtle beaded scallop base for the final gold edging (78)
Info :
If you are making a longer runner, continue repeating the center panel sequence (Rounds 3-10) to extend the length before adding the green border. Ensure appliques spacing adapts proportionally.
— Poinsettia Appliques (Make 4) :
Info :
Each poinsettia is worked in two layers (petal layer and small inner petal) plus small green leaves and a beaded center. Work on a small circular motif and block lightly before attaching. Use the red yarn for petals and dark green for small leaves. Use 3.5 mm hook for crisper petals if desired.
Round 1 :
With red, 6 sc in magic ring (6)
Round 3 :
(1 sc, inc) x 6 (18)
Round 4 :
(2 sc, inc) x 6 (24)
Info :
We begin shaping individual petals by working petals into st groupings. Each point will be created by a combination of dc and tr to give a pointed petal with texture. Make sure to pull the magic ring tightly so the center is secure.
Round 5 :
*Ch2, in next st work (1 hdc, 1 dc, 1 tr, 1 dc, 1 hdc), sl st into next st to anchor petal; rep from * around to create 6 large petals (12 petals total when inner layer is made). When complete you will have 6 outer large petals. (24 anchor points)
Round 6 :
Fasten off red or continue for inner petal layer. If continuing, ch1, join red into the base between any two petals and work small inner petals: *ch2, (1 hdc, 1 dc, 1 hdc), sl st; rep x6. These create a layered effect. Fasten off leaving a long tail for sewing. (12 inner petals)
Round 7 :
Leaves (Make 6): Join green in an anchor stitch at the underside of each petal. Ch1, sc in base, *ch3, 3 dc in next st, ch3, sc in next st to shape leaf; rep to make 6 small leaves. Fasten off leaving tails for sewing. (6 small leaves)
Info :
Bead center: use a beading needle and metallic gold thread to attach 7-9 seed beads in the center of the flower in a small cluster. Sew beads tightly and knot thread on the back of the applique. Alternatively use small gold buttons.
Round 9 :
Optional raised center: you can embroider a French knot cluster with gold thread or attach a small pompom. Ensure center is secure before sewing flower to panel.
— Poinsettia Finishing :
Info :
Lightly block each poinsettia so petals lay flat. Use a small amount of starch or light steam. Pin petals to desired shape and allow to dry. Pinned petals give a clean, professional look on the runner.
— Small Leaves (Make 8 additional leaves for spacing) :
Round 1 :
With green, ch6, sc in 2nd ch from hook, hdc in next, dc in next, hdc in next, sc in last (5 sts across); turn to work other side of chain: sc in next 2 sts, sl st to join. Fasten off leaving tail. Make 8 small leaves to tuck under poinsettias and between trees.
— Christmas Tree Appliques (Make 4) :
Info :
Trees are worked flat in rows and then seamed to create a raised triangle. Use Evergreen for the tree body and Brown for the trunk. Add gold beads to represent ornaments and a small star at the top.
Round 1 :
With Evergreen, ch10.
Round 2 :
Row 1 (right side): Sc in 2nd ch from hook and across (9 sc). Ch1, turn. (9)
Round 3 :
Row 2: Sc2tog, sc in next 5 sts, sc2tog (7). Ch1, turn. (7)
Round 4 :
Row 3: Sc2tog, sc in next 3 sts, sc2tog (5). Ch1, turn. (5)
Round 5 :
Row 4: Sc2tog, sc in next 1 st, sc2tog (3). Ch1, turn. (3)
Round 6 :
Row 5: Sc3tog (1). This creates the top point. Fasten off leaving long tail for seaming edges together to form a triangle. When seamed, the tree will be slightly puffed. (1)
Round 7 :
Trunk: With Brown, ch3, sc in 2nd ch from hook, sc in next; sl st to base center bottom of tree to attach trunk. Fasten off. Add 8-12 gold seed beads sewn evenly across tree for decoration; use a beading needle to stitch beads into place. Sew a small gold star button or a star made with metallic thread at the top.
Info :
For a 3-D tree, make two identical triangles and sew together along edges leaving bottom open, stuff lightly then attach trunk. The flat version sits cleanly on the runner and is easiest to sew down.
— Tree Star (Make 4) :
Round 1 :
With gold metallic thread or gold yarn, 6 sc in magic ring, sl st to join (6)
Round 2 :
*Ch2, dc in same st, sl st in next st; rep x3 to make a small star shape. Fasten off leaving tail for sewing star to tree top.
— Assembly Placement Guide :
Info :
Mark positions for the four poinsettias and four trees along the runner early — alternate motifs along the length. The sample has motifs centered in four equal sections. Use pins and measure spacing to ensure symmetry. Poinsettia centered in section 1, tree in section 2, and so on.
Info :
Use a dull needle and matching thread to baste each applique into place before final sewing. This helps keep the appliques from shifting while you stitch the edges.
— Sewing Appliques :
Round 1 :
Position one poinsettia on the runner and tack with three pins. From the back of the runner, bring a needle with red tail through the underside into the base of a petal. Using a ladder stitch or whip stitch, sew through the petal bases and the runner foundation for 6-8 stitches around. Tie knot on underside and weave in ends.
Round 2 :
Sew small green leaves into place partly under each poinsettia to create a natural look. Use a few small stitches so leaves lay flat and are slightly tucked under petals.
Round 3 :
Position and sew trees in alternating sections. If your trees are 3-D, sew through both layers and runner to anchor securely. Add gold beads in a pleasing random pattern sewn firmly with embroidery thread. Finish with a star sewn at the top of each tree.
— Inner Border Finalization :
Round 1 :
After appliques are attached, re-check edge. If any manipulations disturbed the scallops, rework the edge in Evergreen: join where needed and sc around to tidy transitions (78)
Round 2 :
Ch1, sc in each st around. For neatly rounded ends, work the following increases on each end of the runner: sc in next 2 sts, (2 sc, ch1, 2 sc) in next stitch to create a rounded cap, then continue sc down the side. Repeat on opposite end. Adjust where necessary to keep edge even. (78)
Info :
At this point your runner has a framed green scallop. We are ready to add the gold bead picot edging which gives the runner the elegant metallic look shown in the photo.
— Gold Beaded Picot Edging (Final Edge) :
Round 1 :
Use metallic gold thread or a thin gold yarn. Join in any ch-1 space between scallops: *ch4, sl st into base to form a picot loop; move 3 sts forward and sl st into top of sc to anchor, string 1 seed bead onto your thread at every 2nd anchoring point; rep around. This creates a chain of delicate loops with intermittent beads. You should aim for about 26-30 picots around each long side and about 6-8 around each rounded end depending on your runner length. (variable)
Info :
To attach beads, either pre-string beads onto the gold thread before working the edge, sliding beads into place as you pass the thread through anchor points, or use a beading needle to sew beads on after the picot loops are completed. Pre-stringing reduces the number of passes through the fabric but requires planning bead spacing in advance.
Round 2 :
Where appropriate, secure the gold edge with small tacking stitches on the underside across every 4th picot to avoid sagging. Fasten off and weave in ends on the back of the running fabric. (variable)
Info :
Blocking: Soak runner in lukewarm water with a drop of gentle detergent, squeeze gently, then pin to blocking mat in the desired shape, opening shells and scallops. Allow to dry completely. This step dramatically improves the final look and shape.
— Extra Decorative Options :
Info :
You can add small gold star buttons at the center top of each tree, or tiny stitched metallic veins on poinsettia petals for added shimmer. Consider a contrasting thin ribbon woven through the inner scallop row for a different look.
— Care Instructions :
Info :
Hand wash gently, reshape and dry flat. Avoid high heat from irons on metallic thread. Store flat or rolled around a tube to avoid creasing appliques.
This festive table runner brings timeless holiday charm to any table with layered poinsettias, petite decorated trees, and a shimmering gold edge. Each stitch builds texture and personality, turning yarn into a centerpiece you’ll be proud to display. Work the motifs, block carefully, and watch the runner transform your dining table — such a satisfying seasonal project! 🎄✨🧶