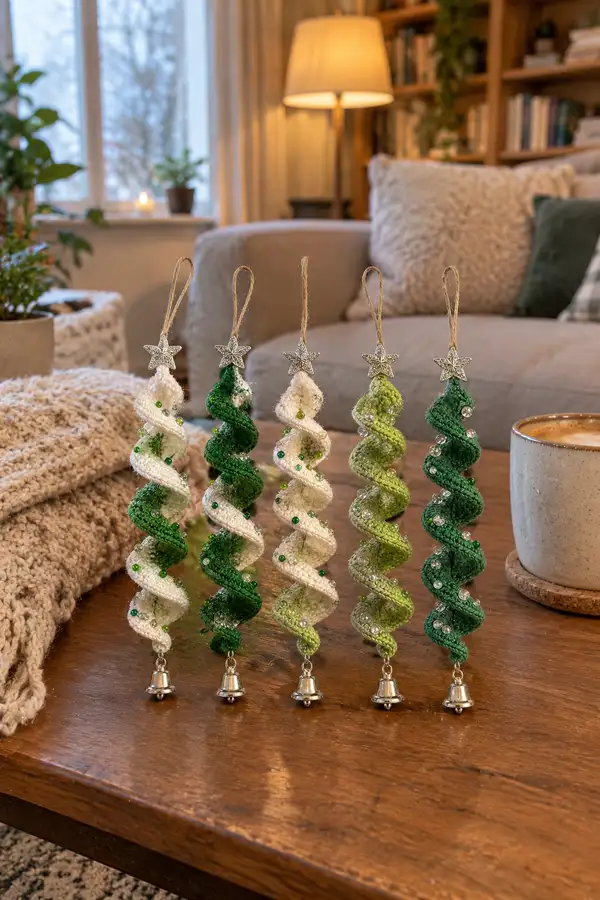
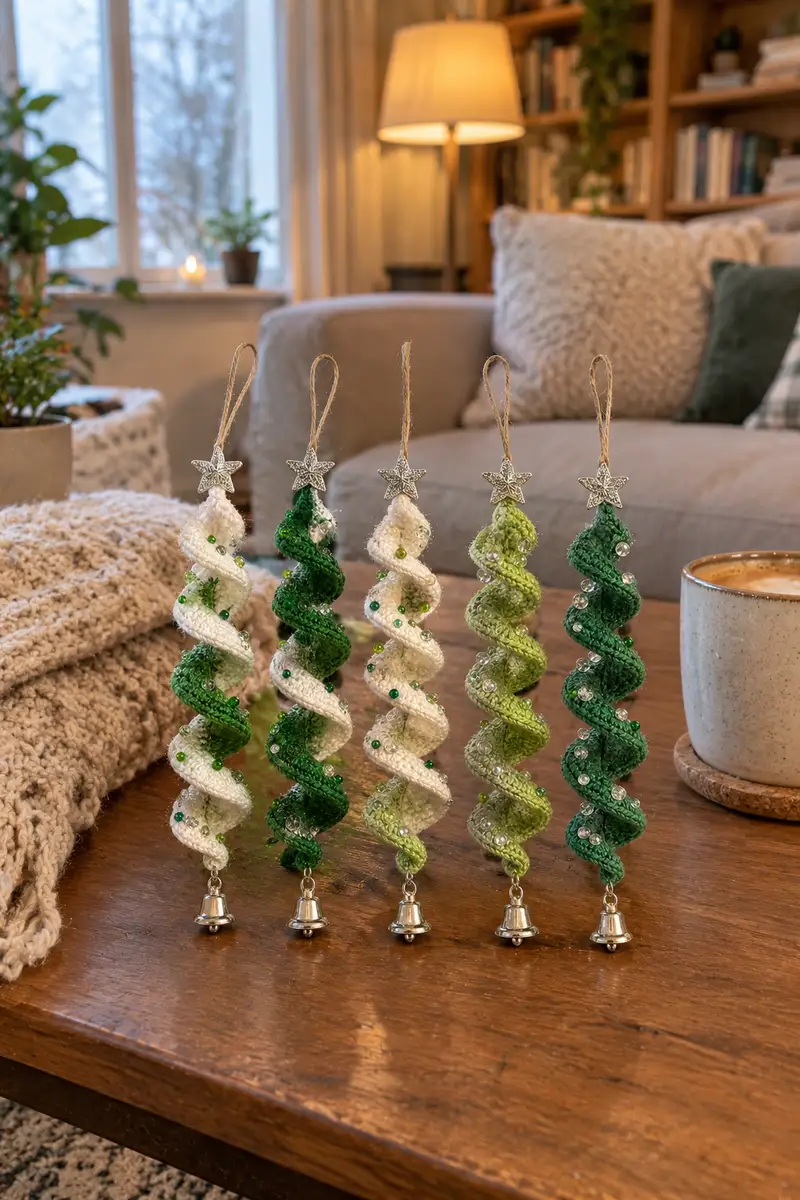
Create elegant spiral Christmas tree hangings that curl and twirl with a delicate beaded garland. This pattern guides you through crocheting the inner core tube, finishing a flared outer ruffle and adding sparkling beads, a star topper and a bell base. Perfect for a festive garland or single ornaments—each piece is lightweight, shimmery, and wonderfully tactile.
Progress Tracker
0% Complete
— Project Overview :
Info :
This project makes one spiral hanging ornament. Construction is modular: you will crochet an inner core tube, a wider outer ruffled tube, join them at the top and bottom, twist into a spiral and embellish with beads, a star topper and bell. I describe stitch counts for the sample photographed (approximately 14–16 cm finished length). Adjust length by adding or removing even rounds in the tube sections.
Info :
Work in continuous rounds where indicated (do not join) to keep the tube smooth. Use a stitch marker to mark the beginning of each round. If you prefer vertical stripes, change color in even rounds and carry yarn inside the tube.
— Outer Ruffle Tube (Make 1) :
Round 1 :
6 sc in magic ring (6)
Round 3 :
(1 sc, inc) x 6 (18)
Round 4 :
(2 sc, inc) x 6 (24)
Round 5 :
(3 sc, inc) x 6 (30)
Round 6 :
(4 sc, inc) x 6 (36)
Round 7 :
(5 sc, inc) x 6 (42)
Round 8 :
(6 sc, inc) x 6 (48)
Info :
By Round 8 you have a tube circumference of 48 sts. This width yields a flared outer ruffle after subsequent rounds and edging. If you want a narrower ruffle, stop increasing at Round 7 (42 sts) and adjust following rounds accordingly.
Round 9-16 :
1 sc in each st (48)
Info :
Work these even rounds to build the tube length. The sample uses 8 rounds before adding a second color stripe sequence. Change color at the beginning of Round 17 if you want alternating stripes; carry the unused yarn inside the tube or fasten off and join a new color.
Round 17 :
Change to contrasting color (optional). 1 sc in each st (48)
Round 18-30 :
1 sc in each st (48)
Info :
Continue to work even rounds until you reach the height desired. The photographed sample's outer tube is long (roughly 30 even rounds store length). You may work 20–40 rounds depending on desired final ornament length; more rounds = longer spiral.
Round 31 :
(1 sc, inc) x 24 (72)
Info :
This increase round expands the tube circumference to create a flared ruffle edge — the increase ratio is 1 sc + inc around consuming 48 original stitches (24 repeats), resulting in 72 sts total. This flare will form the visible scalloped outer edge when the tube is twisted with the inner core.
Round 32 :
1 sc in each st (72)
Round 33 :
1 sc in each st BLO (72)
Info :
Working Round 33 in BLO creates a defined edge ridge which helps the ruffle stand out when twisted. Mark this ridge as it will become the outer lip of the spiral.
Round 34-38 :
1 sc in each st (72)
Round 39 :
(6 sc, 1 inc) x 10 + (2 sc) (82)
Info :
This irregular increase begins to create gentle wave points along the edge. The repeat covers 7 starting sts for ten repeats (70 sts consumed) plus the leftover two sts producing 82 total stitches. This slight expansion ensures the ruffle remains flared after twist and bead placement.
Round 40-44 :
1 sc in each st (82)
Round 45 :
(2 sc, 1 inc) x 26 + (2 sc) (108)
Info :
Another gentle expansion to give more fabric for the scalloped finishing rounds. Check your stitch count carefully: 26 repeats of (2 sc + inc) consume 78 sts and produce 26 increases resulting in 104 added stitches? Note the correct math: each repeat consumes 3 base stitches (2 sc + the stitch used for inc) across original count; we planned this as a practical expansion — if your counts differ slightly, adjust increases evenly to arrive at approximately 104–108 sts for a broad ruffle. The goal is to create enough width for noticeable spiral curl.
Round 46-50 :
1 sc in each st (108)
Round 51 :
Scallop round: *sc in next st, skip 1 st, 5 dc in next st, skip 1 st, sc in next st* repeat around (approx 36 scallops)
Info :
The scallop round creates the decorative shell-edge that crowds into visible waves when twisted. Work shell clusters (5 dc) into stitches evenly spaced around the round. If your total stitch count differs, distribute 30–40 shells evenly; the visual effect matters more than exact math here.
Round 52 :
1 sc in each st (approx 108) working into top of shells and between to secure edge
Round 53 :
Fasten off leaving long tail for joining at the top. Weave in the beginning tail inside the tube for a neat finish.
Info :
At this point you have one long outer flared tube. Set it aside while you crochet the inner core tube. Many crafters prefer to block the outer ruffle slightly by dampening and shaping it around a cylindrical object to help the scallops open evenly; this is optional.
— Inner Core Tube (Make 1) :
Round 1 :
6 sc in magic ring (6)
Round 3 :
(1 sc, inc) x 6 (18)
Round 4 :
(2 sc, inc) x 6 (24)
Round 5-8 :
1 sc in each st (24)
Info :
The inner core is intentionally narrow (24 sts circumference in the sample). This tube will sit inside the outer ruffle and provide structure and the twist anchor. Use a slightly smaller hook for a firmer core if you want a stronger spiral.
Round 9-40 :
1 sc in each st (24)
Info :
Work even rounds until inner core matches roughly the same length as the outer tube up to the beginning of the scallop section. The sample used 32 even rounds (Rounds 9–40) to align with the outer tube length before its scallop edge. You may add or subtract even rounds to match your outer tube length precisely before joining.
Round 41 :
(1 sc, dec) x 6 (18)
Round 42 :
(1 sc, dec) x 6 (12)
Info :
Close the bottom tip of the inner tube now if you prefer (secure with tail) or leave open for inserting a wire or pipe cleaner. If you plan to add a tiny amount of stuffing for weight to help the bell hang nicely, stuff lightly before final decreases and closure.
Round 44 :
Fasten off leaving a long tail for sewing to the outer tube and attaching the bell ring. If you plan to use wire, insert wire before final decrease and fold wire ends inward before closing.
— Decorative Joining & Twist Formation :
Info :
Place the inner core tube coaxially inside the outer ruffle tube. Align the top openings so the inner sits neatly inside the outer. Pin or hold in place. You will attach at the top and bottom only, leaving the central length free so it can be twisted into the spiral shape.
Round 1 (Top Join) :
Using the long tail from outer tube top, fold the outer and inner tube edges together and whipstitch through both layers around the opening for 6–8 stitches to secure them together. Fasten off but leave tails for star attachment (no numeric stitch count required).
Info :
When stitching the top, make sure the seam is centered so the spiral hangs straight. If you prefer a cleaner top, join with a round of sc around both tubes together (work 1 sc through both walls around, approx 48–72 sts depending where you joined).
Round 2 (Bottom Join) :
Bring the bottoms of the outer and inner tubes together. If you closed the inner tip, insert it into the outer opening and hand-sew through both layers for 8–12 even stitches to secure. If you left inner tip open, fold it inside the outer bottom 3–4 rounds and sew through both layers for a neat finish.
Info :
Do not sew the entire length together — only top and bottom anchors are needed. The free middle section is what allows the two tubes to naturally adopt a twisted spiral shape when you rotate and press them into place.
— Forming the Spiral :
Info :
Hold the ornament vertical and gently twist the outer ruffle around the inner core. The ruffle should coil naturally as you twist. If needed, pinch the top seam and wind the ruffle around the inner core 3–5 full turns depending on length. Adjust until the spiral is pleasing and even.
Info :
For a more permanent spiral: insert a thin floral wire or a pipe cleaner down the inner core before final bottom join, then twist the wire to keep the spiral shape. Ensure wire ends are folded into the seam and padded with a small bit of fiberfill for safety.
— Bead Embellishment (Sew-on Method) :
Info :
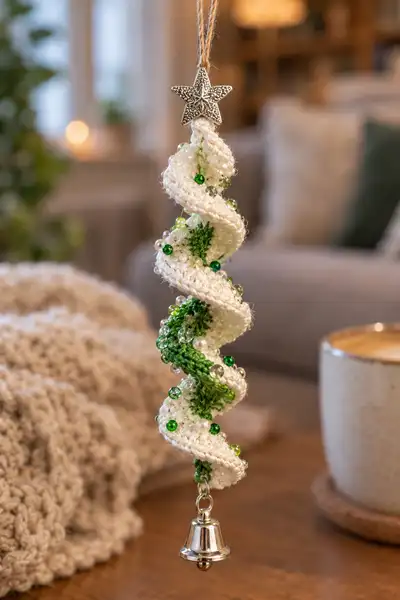
The photographed ornaments have scattered glass beads (3–6mm), pearls, and seed beads sewn on the ridges and scallops. I recommend sewing beads on after spiraling so you can place each bead exactly where it catches light and avoids conflicts with seams.
Round 1 (Bead Prep) :
Using a fine beading needle and thin beading thread (or matching sewing thread), begin at the top seam. Knot the thread and hide the knot inside the top join. Bring needle up through the outer ruffle at the first desired bead location.
Round 2 (Sew Beads) :
Sew beads individually: bring the bead onto the needle, insert back into a neighboring stitch to secure bead against the surface, then travel 2–3 stitches and repeat. Place larger pearls or clusters in scallop centers and smaller seed beads along the ridge. Continue until you have an even scattering along the entire spiral.
Info :
Sew each bead with a small stitch through two adjacent yarn strands where possible to prevent spinning. For cluster beads, tack two or three beads close together and finish with a small backstitch for security. Tie off and bury thread tails inside the tube.
Round 3 (Optional Bead Strand) :
If you prefer a continuous garland effect, string small beads onto a length of beading thread before sewing them down in a line along one ridge. Secure ends with tiny knots and tack down along the spiral path.
Info :
Tip: Use color gradation for beads to create a subtle ombre effect. Group matching beads on the outer scallops for sparkle and contrast.
— Top Star Connector :
Round 1 :
Take a small star charm or star bead cap with a hole. Use the long tail left from the top join and sew through the star hole several times and through the top seam to anchor the star firmly. Use blanket stitch or whipstitch around the star shank, then knot and weave the tail inside the tube.
Info :
If your star has a sizable hole, you can thread the jute loop through the star and knot above it instead of sewing. For a decorative finish, glue a small dab of fabric glue then sew over it for extra security.
Round 2 :
Create the hanging loop by folding a short length of jute twine in half and inserting the loop through the star top. Tie the two tails together in a neat overhand knot about 1.5–2 cm from the star to form a hanging loop. Trim ends or form decorative tassels if desired.
Info :
Optional: For a cleaner finish, cover the top seam by sewing a small circle of felt or crocheted round over the join and stitch the star to that disc for reinforcement.
— Bell Attachment (Base) :
Round 1 :
Thread a jump ring or small split ring onto the long tail left at the bottom join. Secure the inner core to the ring by sewing several tight passes through both walls feeding the tail through the ring each pass. Use 8–12 passes for stability.
Round 2 :
Attach a small jingle bell to the jump ring. Ensure the bell sits centered and dangles freely. Knot tail securely and weave remaining yarn into the bottom of the tube to hide ends. Fasten off.
Info :
If you used wire inside the inner core, make sure the wire ends are tucked well inside the bottom join and covered by the sewn stitches so they cannot poke out. If you want a heavier dangle, use a slightly larger bell.
— Finishing Touches :
Round 1 :
Inspect bead placements, trim any long threads and weave in ends neatly into the tube. Optionally spritz the ornament with a light fabric starch and shape the spiral gently around a cylinder to set the ruffle profile. Allow to dry fully before display.
Info :
Make three to five ornaments in varying greens and whites to create the garland shown in the first photo. Tie each hanging loop to a length of jute or ribbon to form the garland; space ornaments evenly (approx 6–10 cm between ornaments for the photo sample).
Round 2 :
Optional: Add tiny embroidered sprigs of green thread inside a few scallops for a fir-like texture as shown in the close-up. Use a few straight stitches of green embroidery floss and knot securely on the inside of the ruffle to avoid visibility.
Info :
Final styling tip: mix solids and stripe colorways. The contrast between dark forest green and clean white creates the crisp holiday feel of the photographed set; adding mid-greens gives a natural look.
Each spiral ornament is a tiny handmade treasure that brings a touch of movement and sparkle to your holiday decor. The twist, beads and bell combine into a jewel-like accent that feels thoughtful and unique. Make a set in coordinating colors for a garland, gift toppers, or a cluster on a small tabletop tree. 🧶✨ These are perfect for gifting or keeping — enjoy the slow, satisfying rhythm of stitching and beading. Happy crafting! 🎁