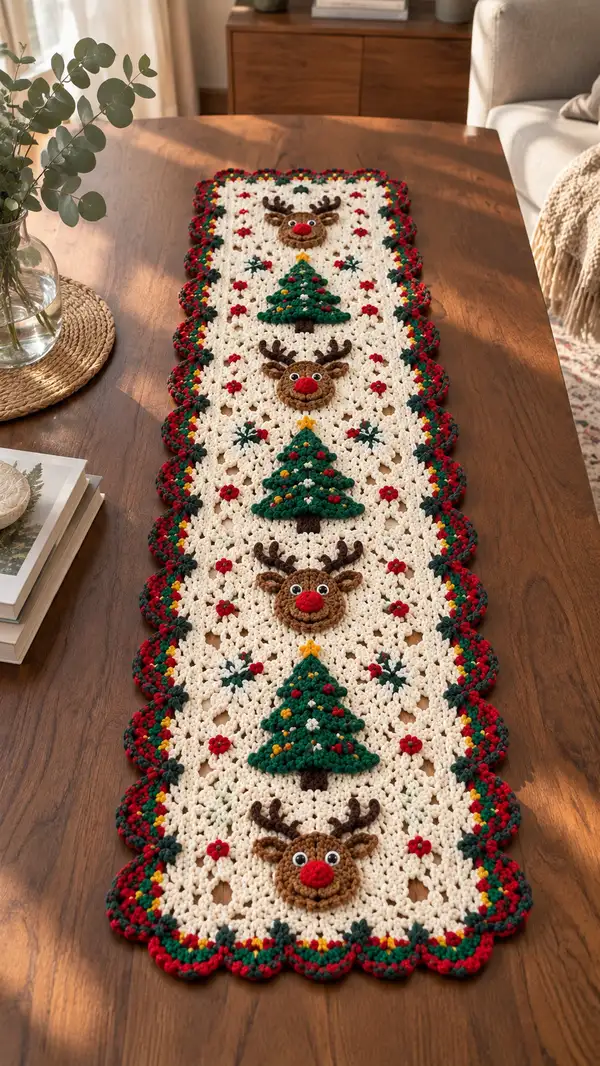
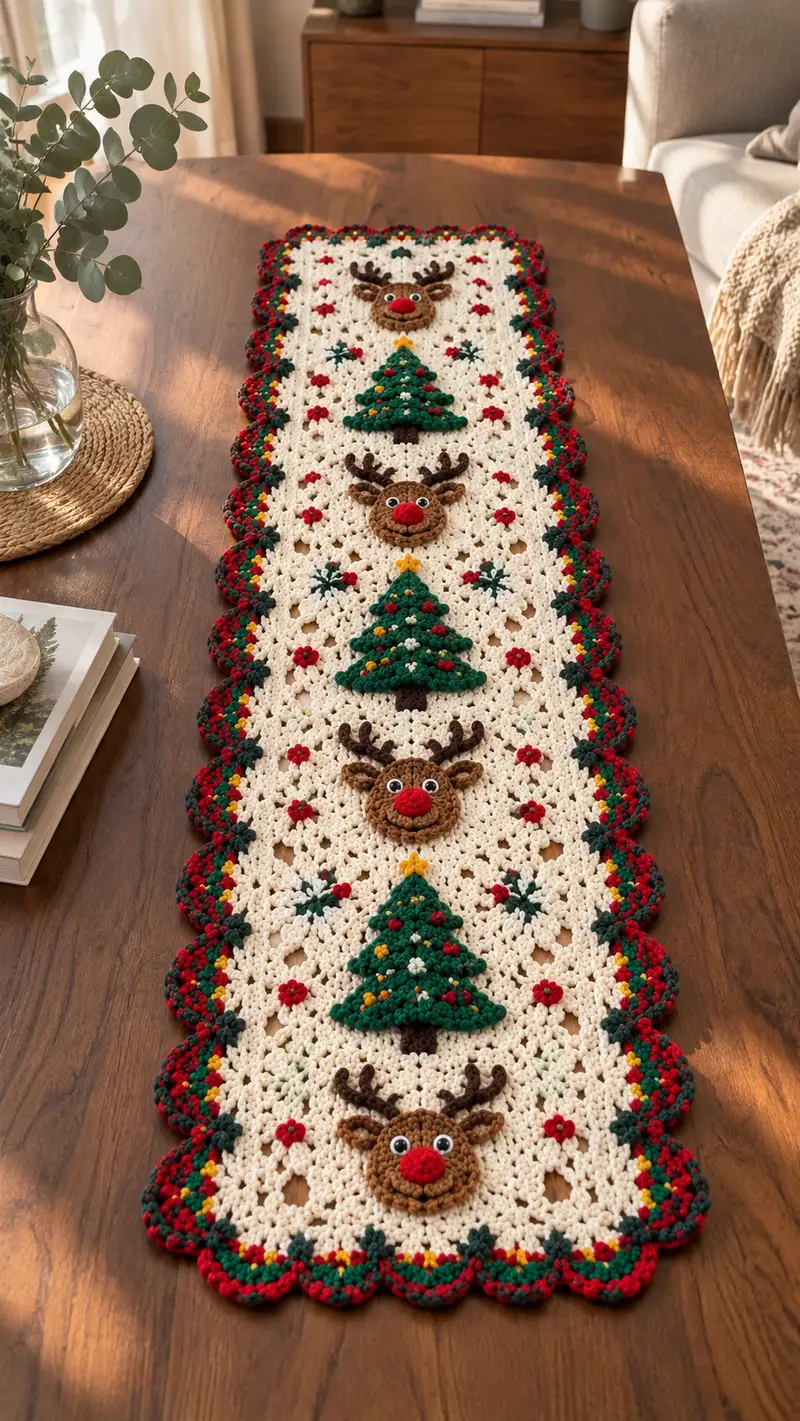
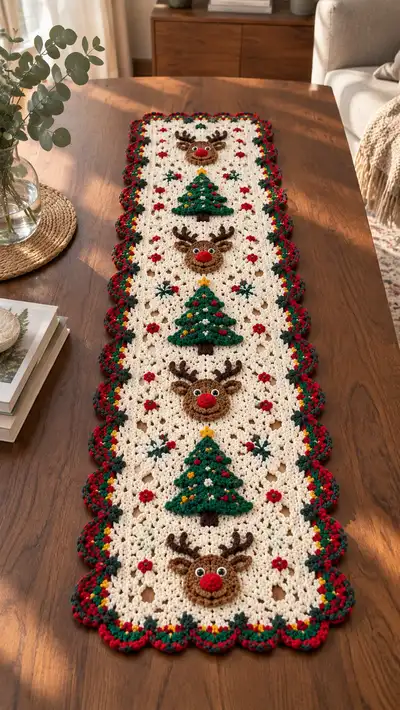
A cozy, seasonal table runner featuring repeating 3D Christmas trees and playful reindeer faces on a cream granny-lace background. Rich green trees, brown reindeer, bright red noses and a scalloped multi-color border give this runner a handmade heirloom look. Perfect for holiday centerpieces, it combines classic granny techniques with textured appliques for a joyful, dimensional finish.
Progress Tracker
0% Complete
— Notes :
Info :
This pattern builds a long rectangular granny-lace runner in a cream background with applied 3D trees and reindeer faces. The runner shown measures approximately 14" wide x 46" long using worsted weight yarn and a 4.0mm hook. Make gauge adjustments with hook size if you want a different finished size. Work tightly on appliques for definition and use a slightly smaller hook where noted.
Info :
All rounds are worked in continuous rounds for appliques (do not join) unless noted. Main panel rows are worked in joined rounds to maintain straight edges. Use stitch markers in the first stitch of each round to help keep track.
— Main Panel (Granny Lace Rectangle) :
Round 1 :
Using cream yarn, ch 4, sl st to form a ring. Ch 3 (counts as first dc), 2 dc, ch 2, 3 dc into ring, ch 1, *3 dc, ch 2, 3 dc into ring, ch 1* repeat 2 more times to make a square (corners are ch-2 spaces). Join to top of starting ch-3 with sl st. (12 dc total worked in 4 clusters; 4 corner ch-2 spaces)
Round 2 :
Join cream in any corner ch-2 sp, ch 3, 2 dc, ch 2, 3 dc (first corner made), ch 1, *in next corner ch-2: 3 dc, ch 2, 3 dc; ch 1; in side ch-1 sp: 3 dc, ch 1* repeat across to complete round. Join with sl st to top of ch-3. (12 clusters plus corner clusters)
Round 3 :
Repeat Round 2, working clusters of (3 dc) in side ch-1 spaces and clusters in corner ch-2 spaces, keeping ch-1 between side clusters. Join. You now have a larger granny square base. (Cluster count will be 16 clusters total including corners)
Info :
We will extend this square into a long rectangle by increasing at two opposite corners repeatedly to form a strip; this creates a scalloped holey granny lace suitable for appliques. Mark the two corners that will be the lengthwise corners and keep consistent increases there.
Round 4 :
Join in the corner you designated as lengthwise start. Work (3 dc, ch 2, 3 dc) in that corner, ch 1, in each side ch-1 sp along that short edge: 3 dc, ch 1. When you reach the opposite corner, work (3 dc, ch 2, 3 dc) in corner, ch 1, then along the long side increase by working: (3 dc, ch 1) in each side sp but in the two lengthwise corners work an extra ch-1 spacer before the corner to make the rectangle begin to lengthen. Join. (You should now have a 4x6 cluster rectangle roughly)
Round 5 :
Repeat Round 4 exactly, maintaining increases at the same two opposite corners. Join. (rectangle length increases by one cluster row)
Round 6 :
Repeat Round 5. By the end of R6 you should have a rectangular panel measuring approx 14" wide if using the specified yarn and hook. Count clusters across short edge to confirm width; adjust next rounds if needed.
Info :
Measure across your panel now. This pattern's final runner uses three repeated motif blocks (tree + reindeer alternation) stacked vertically. Each motif block uses 10 cluster rows of height. Plan for total length by making enough cluster rows to house 3 complete motif blocks plus border rows. The sample has 36 cluster rows total before outer border.
Round 7-16 :
Work 10 more rounds repeating Round 4 pattern, always increasing at the two designated lengthwise corners to keep the rectangle elongating. Keep join at end of each round with sl st. After Round 16 you will have approx 16-18 cluster rows; use stitch markers at cluster count 1, half, and end to keep edges straight. (Cluster pattern remains consistent each round)
Info :
At this stage, plan placement of three tree/reindeer motif centers. Using pins, mark center points along the length of the runner with equal spacing. Each motif will occupy approximately 10 cluster rounds height and centered horizontally between edges.
Round 17-28 :
Continue adding rounds repeating the granny cluster sides and corner clusters to reach the desired length. Work Rounds 17-28 as repeats of the established pattern. For the sample runner we worked through Round 28 to create the full length before adding the final border. Keep tension consistent. (Result: approx 28 cluster rows)
Info :
Placement :
Position and pin motifs: mark three evenly spaced centers along the runner where trees and reindeer will be sewn. Use pins or contrasting yarn to place them: top motif center at cluster row 5-7 from one end, middle motif around rows 13-15, bottom motif around rows 21-23. Keep about 3 cluster rows as breathing space between motifs and the scalloped border.
— Tree Applique (Make 3) :
Round 1 :
With dark brown (tree trunk color) and 3.5mm hook, mr, ch 1, 6 sc in mr (6). Join or continue in continuous rounds (pattern uses continuous rounds for smooth shaping) (6)
Round 2 :
Inc in each st around (12)
Round 3 :
1 sc in next 6 sts, ch 1, sl st to make tiny trunk tab; this forms a flat trunk disc. Fasten off leaving long tail for sewing. Trunk diameter ~1cm.
Info :
We will build layered triangular tree sections and sew them stacked above this trunk disc. Use green yarn and a slightly larger hook (4.0mm) for the tree slices so they sit a little puffed.
Round 4 :
Switch to deep green, ch 3 (counts as dc), 2 dc in same st, ch 2, 3 dc in same st to make a small top triangle center on the trunk. Turn work so triangle points upward. (Trim tail; keep for later sewing)
Round 5 :
Working around the triangle base: in the ch-2 top space of the center triangle work (3 dc, ch 2, 3 dc) to make a second row base; in each side loop of triangle work 3 dc, ch 1 between points. This forms a small layered triangle. (Count clusters: 3 main points)
Round 6 :
Increase the next layer: in each outer point work (3 dc, ch 2, 3 dc) into the point space, ch 1 between each group to create the third row for the tree. Fasten off leaving a 6-8" tail for sewing. The tree should look like three stacked triangles approximately 1.5-2" tall.
Info :
To create the 3D puffed look, after stitching layers you will anchor each layer with a few small mattress stitches near the center to lift the lower edge slightly away from the base. Optionally place light stuffing between layers for more dimension (a pinch of fiberfill placed between layers and then closed with a few secure stitches).
Round 7 :
Decorative bobbles: With small amounts of red and gold, use a 3.5mm hook to make small popcorn/bobble stitches and sew across tree tiers. Bobble: (yarn over, insert, pull up loop) x 4, yarn over and pull through all loops, ch 1. Make 5-8 small bobbles per tree and tack each to the tree layer with a few stitches. Fasten off.
Info :
Star topper: With gold/yellow, make a small star by ch 5, sl st to form a ring, into ring work (sc, ch 2) x 5, finish and flatten star and secure to top point. Sew star to the topmost triangle.
Round 8 :
Edge tidy: With cream or matching green, work sl st around the outer edge of the tree tiers to tidy and slightly flatten where you will sew to the granny base. Fasten off and leave long tail for sewing. Repeat to make three tree appliques.
Info :
Make three identical trees and pin them in place on the marked centers on the main panel. Trees are oriented with trunk down and star up. Leave about 3 clusters between tree and reindeer motifs vertically to match the reference layout.
— Reindeer Face Applique (Make 3) :
Round 1 :
Using medium brown yarn and 3.5mm hook, mr, ch 1, 6 sc in mr (6)
Round 2 :
Inc in each st around (12)
Round 3 :
(1 sc, inc) x 6 (18)
Round 4 :
(2 sc, inc) x 6 (24)
Round 5 :
(3 sc, inc) x 6 (30)
Info :
These rounds form the flat round face base. Keep stitches even and do not stuff yet. We will build a raised snout center and ears and antlers separately to overlay the face.
Round 6 :
1 sc in each st around to set the round (30)
Round 7 :
Start snout: Join a small circle of medium brown or slightly lighter brown (you can use same yarn) with mr, 6 sc in mr (6). Round 2: inc in each st (12). Round 3: (1 sc, inc) x 6 (18). Fasten off leaving long tail for sewing. Stuff snout lightly and center on face starting at round 4. Sew snout onto center of face with mattress stitch, spacing centered on face.
Info :
When attaching the snout, tack only at a few points to allow a slight raised profile. This gives the reindeer a cute 3D nose area to attach the red nose.
Round 8 :
Nose: With bright red yarn and 3.5mm hook, mr, 6 sc in mr, sl st to join (6). Fasten off leaving a tail for sewing. Sew the red nose to the center of the snout. Optionally embroider a small vertical line under nose with darker red to suggest nostrils.
Round 9 :
Eyes: Use white yarn or safety eyes. If using safety eyes (10mm), position eyes between Rounds 4 and 5 of the face, approx 6-8 sts apart. If embroidering with yarn: with white yarn, make two small circles: mr, 6 sc (6) and sew in place equidistant from snout. Add black French knots or small black safety eyes to centers. Secure tightly. (Make 2 eyes)
Info :
Place eyes slightly above the snout for friendly expression. If using safety eyes, insert washers on back before stuffing or sewing to main panel. Be careful: safety eyes cannot be repositioned once secured.
Round 10 :
Ears (Make 2 per face): With medium brown and 3.5mm hook, ch 5, sl st to first ch to form ring; Round 1: ch 1, 6 sc into ring (6). Round 2: (1 sc, inc) x 2, 1 sc (8). Round 3: 1 sc in next 2 sts, dec, 1 sc in last 2 sts (7). Fasten off leaving tail. Fold slightly lengthwise and sew to top side of face left and right at approx Round 6-7 positions.
Round 11 :
Antlers (Make 1 pair per face; each antler is worked as 2 symmetrical branches): With dark brown and 3.5mm hook, ch 8, sl st to join into a loop, ch 1, 8 sc in loop (8). Row 2: ch 1, turn, sc in each st across (8). Row 3: ch 1, turn, sc2tog, 4 sc, sc2tog (6). Row 4: ch 1, turn, sc in each st (6). Without fastening off, form small branches by chaining 4, slip stitching back down the chain to form a twig, then chain 3 and sl st back, repeat to create 2-3 twig branches along one side. Fasten off leaving long tail. Make mirrored piece for the other antler branch and seam together so antler has two prongs (approx 3-4 twig prongs per antler). Repeat for the second antler. Final antler height approx 1.5" when assembled.
Info :
Sew antlers to top rear of face between ears using mattress stitch; position them to curve outwards slightly. Make sure antlers are balanced and mirrored on each face. If you want more stability, insert a short piece of pipe cleaner inside the antler and wrap it with yarn before sewing to face.
Round 12 :
Finishing face back: If desired, make a thin backing disc with medium brown by working 12 sc in magic ring and flattening to cover back of face to create a neat sewing surface. Fasten off and leave long tail to sew onto the main panel. Repeat to make three reindeer faces.
Info :
When making multiple faces, keep them consistent by counting the same number of stitches per round and pinning them in place on the main panel before sewing. Place each face so the bottom of the snout aligns with the marked motif center cluster row.
— Small Holly & Flower Motifs (Multiple) :
Round 1 :
Small flower/bobble (for filler between motifs). With red and 3.5mm hook, mr, ch 1, 6 sc in mr (6). Do not join; ch 2, in next round make 5 petals: *(ch 3, sl st back in same st) repeat 4 more times*. Fasten off leaving tail for sewing. Make 18 small flowers and pin in alternating positions across the panel.
Round 2 :
Holly leaf: With dark green, ch 6, sc in 2nd ch from hook, hdc in next, dc in next, hdc, sc in last; working on opposite edge, sc in each corresponding ch to make a flat leaf and fasten off. Make 12-15 leaves and pin around trees and between reindeer faces for decorative clusters.
Info :
These small motifs add holiday detail and help visually tie the appliques into the granny-lace base. Sew them on before final blocking so sewing distorts the panel minimally.
— Scalloped Border (Worked after all appliques attached) :
Round 1 (Border Setup) :
With cream, join in any outer ch-1 sp, ch 1, sc evenly around the entire perimeter working 3 sc in each corner ch-2 space to maintain shape. Join with sl st to first sc. (Stitch count will vary based on your panel size; ensure even spacing)
Round 2 (Colorwork Row) :
Switch to green, ch 1, work 1 sc in each st around. Join. This row creates a color band under the scallops. Fasten off green or carry color if preferred.
Round 3 (Accent Speckles) :
With a bright gold/yellow, work a round of slip stitches or single crochet every 6th stitch to create accent speckles around the edge. Join and fasten off. This round will add small gold dots visible under the scallop.
Round 4 (Scallop Foundation) :
With dark green, ch 1, *skip 2 sc, 5 dc in next sc, skip 2 sc, sl st in next sc* repeat around. This creates the scallop foundations. Join. Count scallops and adjust if necessary so scallops fall evenly around corners. The sample shows scallops aligned to cluster rows; plan accordingly.
Round 5 (Scallop Color Layer) :
Change to red, into each 5-dc shell work (ch 2, 3 dc, ch 2) centered to make a shell ripple and give a layered color effect; sl st in space between shells to secure. Join. This produces the bold red scalloped edge visible in the photo.
Round 6 (Final Trim) :
With dark green held against red scallops, work a round of sl st and picot accents: sl st in top of scallop, ch 3, sl st into top of same scallop to make small picots spaced between scallops. Fasten off and weave in ends. Block the runner gently to set scallops.
Info :
For a multi-color scallop (as in the photo), you can add alternating color stitches into the shell centers: red outer shell, then single stitches of gold or green between shells to create the mosaic effect. Carry colors up the side and hide tails behind edge stitches for a tidy finish.
— Assembly & Placement :
Info :
Pin all appliques in position before stitching. Use the earlier placement marks: top motif (tree), below it a reindeer, then tree, reindeer, tree, reindeer arranged alternately for six motifs total (3 trees, 3 reindeer) as seen in the sample. Keep at least 3 cluster rows between each motif for visual balance.
Round 1 :
Sewing method: Using long tails left on appliques and a yarn needle, use a whip stitch or mattress stitch to secure edges: sew around the perimeter of each applique with small, even stitches that penetrate both applique edge and main panel to avoid gappiness. Secure with knots and weave tails at least 3" back into the applique body before trimming.
Info :
When sewing the snout and nose, anchor with a few stitches through the face only, not pulling through the granny background, so the snout remains raised. Use small backstitches to hold bobbles in place without flattening the tree tiers.
Round 2 :
After all pieces are sewn, check for loose threads or small holes. Gently block the runner: pin to shape on a flat blocking board and mist lightly with water, allow to dry overnight to set the scallops and flatten any distortions caused during sewing.
Info :
Optional: Add a thin interfacing behind appliques with fabric glue if your runner will be subject to heavy use, to reduce stretching around motifs.
— Additional Small Details & Finishing Touches :
Round 1 :
Embroidered eyelashes and eyebrow lines: use a tapestry needle and dark brown yarn to stitch small curved lines above eyes for expression. Use simple satin or backstitch for small lines.
Round 2 :
Light green sprigs: with very small stitches of green, stitch tiny X-shaped sprigs between clusters to suggest holly leaves in the granny holes, echoing the photograph's small dark-green crosses.
Info :
Secure all ends and trim close. If any appliques feel floppy, add a few reinforcing stitches through the applique base and anchoring into the granny panel. Avoid over-sewing the center of tree tiers so they maintain their lift.
— Care Instructions :
Info :
Hand wash gently in cool water with mild detergent. Reshape and dry flat. Avoid tumble drying. Spot clean small spills immediately. If using safety eyes and glue, avoid soaking the runner to preserve glued parts.
Info :
Store flat or rolled in acid-free tissue during off-season to preserve shape and prevent flattened appliques.
This Festive Reindeer & Tree Table Runner brings a joyful, handmade touch to any holiday table. Each stitch and applique builds into a warm seasonal centerpiece full of personality and charm. I hope you enjoy the meditative rhythm of granny clusters and the cute challenge of 3D appliques — it’s the kind of project that makes the holidays feel cozier. 🧶🎄✨