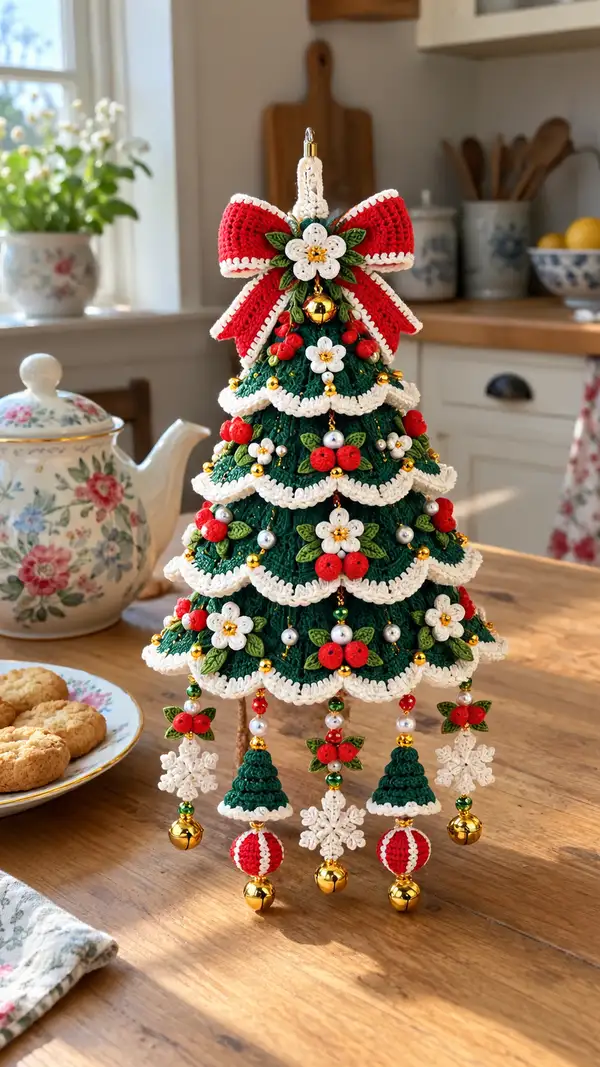
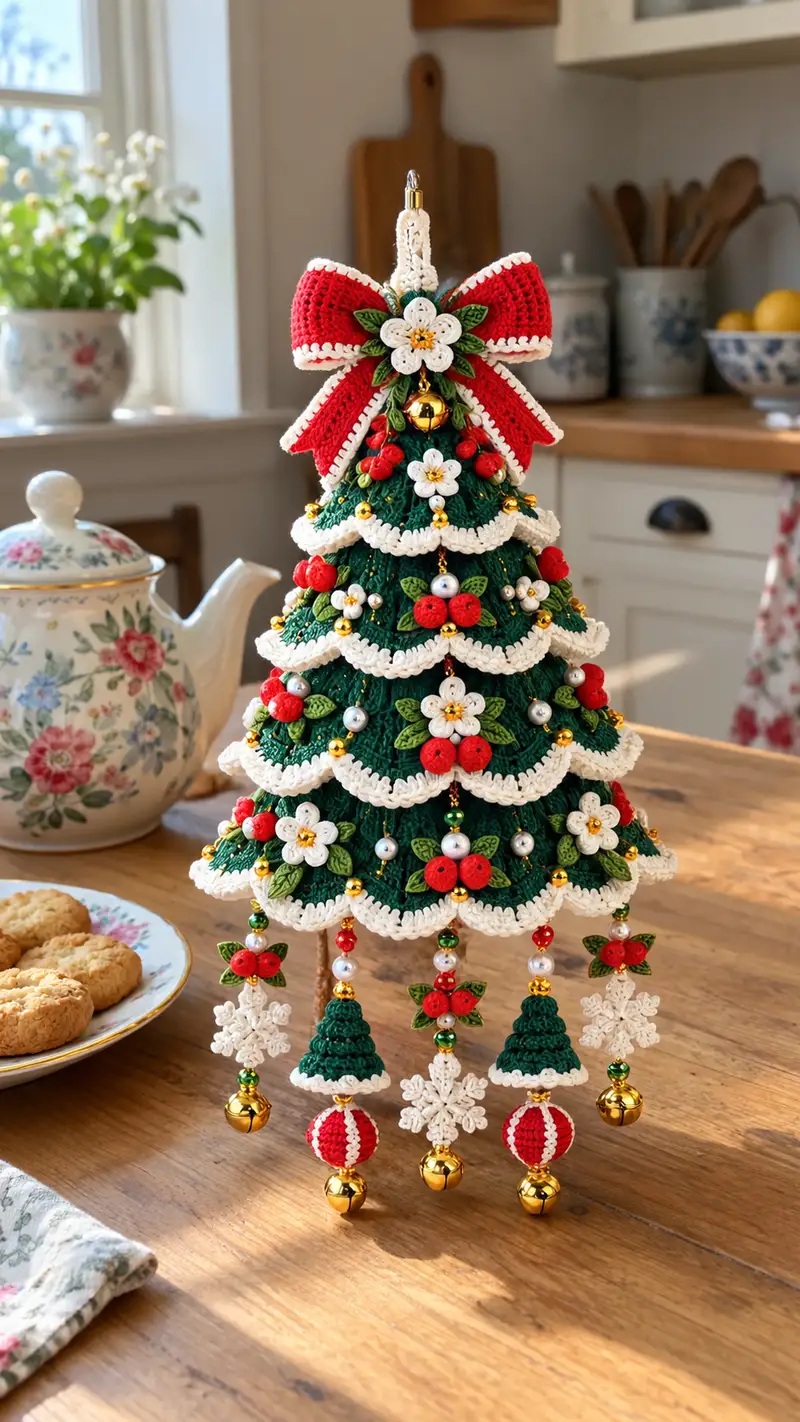
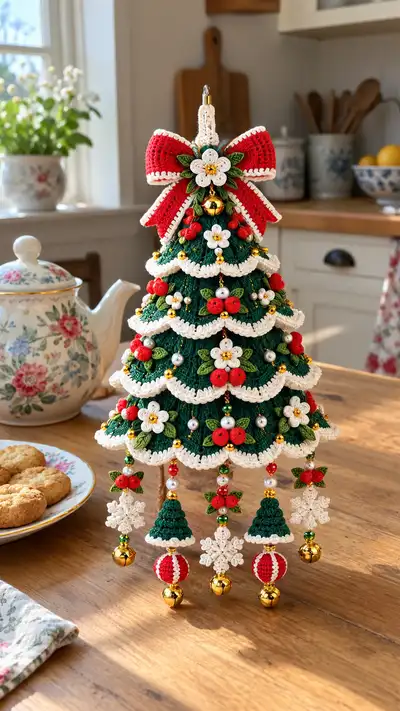
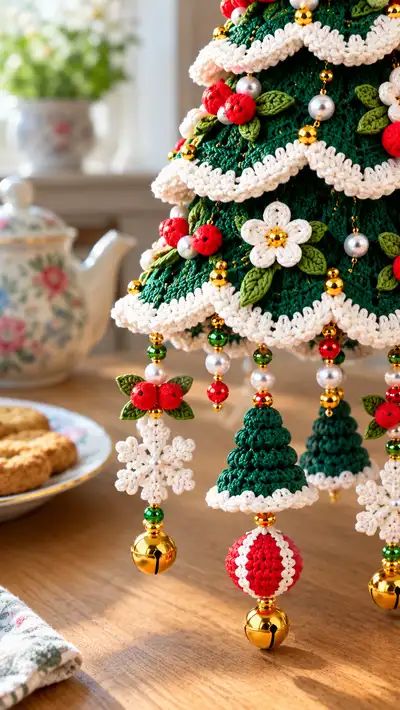
Create a beautiful freestanding scalloped Christmas tree ornament with layered tiers, delicate white scallops, little red berry clusters, white flowers and dangling charms. This pattern includes detailed instructions for the tree cone, scalloped tiers, bow topper, leaves, flowers, berry clusters, small hanging trees, snowflakes, baubles and bead-string assembly. The finished piece is richly textured and perfect for a table centerpiece or mantel decoration.
Progress Tracker
0% Complete
— Top Cone (Head) :
Round 3 :
(1 sc, 1 inc) x 6 (18)
Round 4 :
(2 sc, 1 inc) x 6 (24)
Round 5 :
(3 sc, 1 inc) x 6 (30)
Round 6 :
(4 sc, 1 inc) x 6 (36)
Info :
This top cone forms the very tip and hanger. Work tightly so the cone keeps shape. Use stitch marker at start of round
Round 7 :
(5 sc, 1 inc) x 6 (42)
Round 8 :
(6 sc, 1 inc) x 6 (48)
Round 9-12 :
1 sc in each st (48)
Info :
At this point you can add a short chain loop for hanging. Make a detachable hanger by chaining 12 with same yarn and slip stitching into top and weaving ends inside the cone
Round 13 :
(6 sc, 1 dec) x 6 (42)
Round 14 :
(5 sc, 1 dec) x 6 (36)
Round 15 :
(4 sc, 1 dec) x 6 (30)
Round 16 :
(3 sc, 1 dec) x 6 (24)
Info :
Begin lightly stuffing the cone. The cone is small and should be barely filled — just enough to hold its shape. Continue stuffing as you close.
Round 17 :
(2 sc, 1 dec) x 6 (18)
Round 18 :
(1 sc, 1 dec) x 6 (12)
Info :
Fasten off leaving long tail for sewing the cone to the inside top of the tree body. Weave tail through remaining 6 stitches and pull tight to close. Secure with a few backstitches.
— Main Tree Cone (Body foundation) :
Round 3 :
(1 sc, 1 inc) x 6 (18)
Round 4 :
(2 sc, 1 inc) x 6 (24)
Round 5 :
(3 sc, 1 inc) x 6 (30)
Round 6 :
(4 sc, 1 inc) x 6 (36)
Round 7 :
(5 sc, 1 inc) x 6 (42)
Round 8 :
(6 sc, 1 inc) x 6 (48)
Info :
The main cone will form the internal structure for the scalloped tiers. Work this foundation with slightly looser tension than the top cone so the scallops sit naturally. Add stitch marker to keep track of round starts.
Round 9 :
(7 sc, 1 inc) x 6 (54)
Round 10 :
(8 sc, 1 inc) x 6 (60)
Round 11-16 :
1 sc in each st (60)
Info :
These even rounds build height for the attached scalloped tiers. Keep tension consistent. If you prefer a taller tree reduce the number of shell tiers or add extra even rounds here.
Round 17 :
(8 sc, 1 inc) x 6 (66)
Round 18 :
1 sc in each st (66)
Info :
We will now begin to mark the positions for layered scallop attachments. Make a small stitch marker every 11 stitches (approx) to guide center points of each scallop repeat when adding tiers.
— Scalloped Tier Construction (Make 6 tiers) :
Tier Prep Info :
Each tier consists of several rounds forming a semi-circular scalloped overlay that is sewn to the cone. Work tiers in green with cream scallop edging. The following sequence makes one tier — repeat with increasing diameters to create stacked layers. Attach tiers by sewing to foundation rounds listed after each tier.
Tier 1 - Round 1 :
Join green yarn at foundation round 12 (approx) with sl st, ch1, 1 sc in same st (work into each st across to create a short row covering 24 stitches). Work in continuous rounds along the attached stitches to create a flared edge. For tier 1 we will make a small flare: 1 sc in next 11 sts, increase around to make a curve.
Tier 1 - Round 2 :
(2 sc, inc) x 6 across worked section (30)
Tier 1 - Round 3 :
1 sc in each st (30)
Tier 1 - Round 4 (Scallop base) :
*Skip 2 sc, 7 dc in next sc, sk2, sl st into next sc* repeat around to create shell scallops (5 shells)
Tier 1 - Round 5 (Cream edging) :
Change to cream yarn. Join in back loop at base of each shell, ch1, 12 sc around each shell edge to create scalloped trim. Fasten off and sew tier to foundation round 12 using long tail.
Info :
When sewing the tier to the cone, align shell centers with markers placed on the foundation to keep tiers evenly spaced. Sew through foundation cone and the base row of the tier with small neat stitches.
Tier 2 - Round 1 :
Join green yarn at foundation round 15 with sl st. Work 1 sc in each of 36 stitches to form the attached row (36)
Tier 2 - Round 2 :
(3 sc, inc) x 9 (45)
Tier 2 - Round 3 :
1 sc in each st (45)
Tier 2 - Round 4 (Shells) :
*Skip 2 sc, 8 dc in next st, sk2, sl st into next sc* repeat around creating 6 shells
Tier 2 - Round 5 (Cream edging) :
Join cream. Work 14 sc evenly across each shell edge to create scallop. Fasten off and tack to cone foundation round 16-17.
Info :
Sew tiers progressively wider as you go down the cone. Each tier's base attaches to a later foundation round so the scallops cascade. Ensure edges of tiers overlap slightly so no gaps show between layers.
Tier 3 - Round 1 :
Join green at foundation round 18. 1 sc in each of 48 stitches (48)
Tier 3 - Round 2 :
(6 sc, 1 inc) x 6 (54)
Tier 3 - Round 3 :
1 sc in each st (54)
Tier 3 - Round 4 (Shells) :
*Skip 2 sc, 9 dc in next sc, sk2, sl st into next sc* repeat around (approx 7 shells)
Tier 3 - Round 5 (Cream edging) :
Change to cream. Work 16 sc across each shell edge to form rigorous scalloped trim. Fasten off and sew to foundation round 20.
Tier 4 - Round 1 :
Join green at foundation round 22. 1 sc in each of 60 stitches (60)
Tier 4 - Round 2 :
(8 sc, 1 inc) x 6 (66)
Tier 4 - Round 3 :
1 sc in each st (66)
Tier 4 - Round 4 (Shells) :
*Skip 2 sc, 10 dc in next sc, sk2, sl st into next sc* repeat around (approx 8 shells)
Tier 4 - Round 5 (Cream edging) :
Switch to cream. Work 18 sc across each shell edge to create full scallops. Fasten off and sew to foundation round 24.
Info :
The shell counts are approximate — aim for shells to fall evenly around the tier. Small adjustments to shell dc count are fine if it keeps shells even. Use pins to hold shells in place while you sew each tier to the cone.
Tier 5 - Round 1 :
Join green at foundation round 26. 1 sc in each of 72 stitches (72)
Tier 5 - Round 2 :
(10 sc, 1 inc) x 6 (78)
Tier 5 - Round 3 :
1 sc in each st (78)
Tier 5 - Round 4 (Shells) :
*Skip 2 sc, 11 dc in next sc, sk2, sl st into next sc* repeat (approx 9 shells)
Tier 5 - Round 5 (Cream edging) :
Switch to cream and work 20 sc around each shell edge to create large scallops. Fasten off and sew to foundation round 28.
Tier 6 - Round 1 :
Join green at foundation round 30. 1 sc in each of 84 stitches (84)
Tier 6 - Round 2 :
(11 sc, 1 inc) x 6 (90)
Tier 6 - Round 3 :
1 sc in each st (90)
Tier 6 - Round 4 (Shells) :
*Skip 2 sc, 12 dc in next sc, sk2, sl st into next sc* repeat around (approx 10 shells)
Tier 6 - Round 5 (Cream edging) :
Change to cream and work 22 sc evenly around each shell edge. Fasten off and sew to foundation round 32-34 forming the final full skirt. Weave in all tails.
Info :
After all tiers are sewn, steam-block gently if your yarn allows it, shaping scallops to sit evenly. Pin scallops into waves while cooling to set shape.
— Red Bow Topper :
Bow Loop (Make 2 identical loops) - Round 1 :
With red yarn ch 16, join into ring with sl st, ch1, 1 sc in each ch around to form a tube; join (16)
Round 2 :
1 sc in each st (16)
Round 3 :
1 sc in each st BLO (16) — this narrows one side and gives ridge
Round 4-6 :
1 sc in each st (16)
Bow Loop Finishing Info :
Flatten the tube into a bow loop by laying long edge over short and wrap center with matching red yarn or a small band. Make two matching loops and join them back-to-back with a central wrap. Sew the bow to the top cone and add cream edging by working a round of slip stitches in cream along the outer edges of the loops (optional).
Bow Tail (Make 2 tails) - Round 1 :
Ch 30, join with sl st to first ch to form long loop; 1 sc in each ch around to make a flat band (30)
Round 2 :
1 sc in each st (30)
Round 3 (Edge) :
Join cream. Work sc evenly around tail edge (approx 32 sc) to give white border. Fasten off and sew tails to bow center behind loops.
Info :
Pin bow loops and tails to the top of the tree and adjust so the bow faces forward. Use a few hidden stitches through the cone to secure; reinforce with glue at the center if desired for extra hold.
— Flowers (Make 6-8 small flowers) :
Round 2 :
Ch2, (in same st: 1 sc, ch2) x6, sl st to first sc to form petal loops (6 petals)
Round 3 :
Into each ch2 loop work: (1 sc, 1 hdc, 2 dc, 1 hdc, 1 sc) to form pointy petals. Fasten off leaving tail for sewing. (Make 6-8)
Info :
Sew a small gold bead into the flower center to echo the beads used on the tree. Space flowers evenly across tiers, tacking through the base of petals into the green tiers so flowers appear to sit on the tree surface.
— Leaves (Make 24-30) :
Round 1 :
Ch 6, sc in 2nd ch from hook, hdc in next, dc in next, tr in last, continue along opposite side of foundation ch: dc, hdc, sc, sl st to base. Fasten off. (Leaf shape length approx 6-8 sts)
Round 2 :
Using leaf green, embroider central vein: 1 strand of yarn or surface slip stitch down center. If desired, work a small picot at leaf tip for texture. Make 24-30 leaves.
Info :
Leaves are worked flat then folded slightly and anchored at their base when sewing to the tree. Group leaves in pairs behind small flower motifs and berry clusters to create natural sprigs.
— Berry Clusters (Make 12 clusters of 3 berries) :
Berry - Round 1 :
6 sc in mr (6)
Round 2 :
1 sc in each st (6)
Berry Finishing Info :
Make 3 berries and sew them close together for a cluster. Use long tails to stitch clusters onto the tree with leaves behind. For texture, you can lightly stuff berries with tiny amounts of fiberfill.
— Bead-and-Bell Hanging Charms (Make 5 identical strands) :
Info :
Each hanging strand is assembled on beading thread or thin gold jewelry wire. The strand consists of: small bead stack, tiny leaf+berry sprig, snowflake or mini tree or bauble, pearl and a bell at the end. Thread beads in desired order leaving 3-4cm loop at top to anchor to the bottom edge of final tier.
Charm - Mini Tree (small 3-tier cone) Round 1 :
6 sc in mr (6)
Round 3 :
(1 sc, 1 inc) x 6 (18)
Round 4 :
1 sc in each st (18)
Round 5 :
(2 sc, 1 inc) x 6 (24)
Round 6 :
1 sc in each st (24)
Round 7 (Base scallop) :
Switch to cream. *Skip 1 sc, 6 dc in next sc, sk1, sl st in next sc* repeat around to make a single shell rim (approx 6 shells). Fasten off and lightly block.
Charm - Snowflake (Make 3 per strand option) - Round 1 :
6 sc in mr (6)
Round 2 :
Ch4, sl st in next sc to form first arm, repeat for 6 arms total. (6 arms)
Round 3 :
Into each arm: (sc, hdc, 3 dc, hdc, sc), finish with small picot to give star point. Fasten off and block flat.
Charm - Bauble (Round cover for bead) - Round 1 :
6 sc in mr (6)
Round 3 :
(1 sc, 1 inc) x 6 (18)
Round 4 :
(2 sc, 1 inc) x 6 (24)
Round 5 :
1 sc in each st (24)
Round 6 :
(2 sc, 1 dec) x 6 (18)
Round 7 :
(1 sc, 1 dec) x 6 (12)
Info :
Lightly stuff the bauble cover, then stretch over a small wooden bead or plastic bead and stitch closed. Add vertical cream stripes by surface stitching with cream yarn for the striped ornament look.
Bead String Assembly Info :
String beads, pearls, tiny gold spacer beads and charms onto beading thread in the order shown in photos. Make a small loop at top and trim thread leaving 5cm extra for sewing to the underside of the bottom tier. Secure knots with a dab of clear glue if using thread. If using jewelry wire, crimp securely and attach a tiny jump ring at the top to sew through stitches at scallop base.
— Additional Small Decorations (Holly pairs, Pearls and Gold beads) :
Holly Berry Pair - Round 1 :
Make two small berries as earlier (6 sc in mr). Sew them close together and add two small leaves behind them. Use gold bead to secure in center or to add a tiny highlight bead.
Stringing Info :
Evenly space berry clusters and white flowers around tiers. Add single gold beads to the points between scallops for extra sparkle. Use a beading needle for threading through tight spaces; alternatively use a tapestry needle with doubled metallic thread.
Info :
Remember to photograph and mark positions with pins before permanently stitching so you can step back and adjust placement for balanced visual composition.
— Finishing Touches and Base :
Base Cone Insert Info :
To create a freestanding base, make a small internal cone (brown or dark green) using the cone rounds from the top cone instructions but slightly wider so it sits steadily on the surface. Alternatively use a small cardboard disc inserted into the bottom before final tier sewing.
Final Assembly Round :
With body completed and tiers sewn, secure the top cone into the inside of the topmost tier with several rounds of whip stitches into the topmost foundation rounds. Sew the bow over the seam to hide attachment points.
Info :
Weave all loose ends into the inside of the tree. If you used metallic thread for bead links, hide thread ends inside and secure with small knot and a drop of glue to prevent slippage. Block and shape final piece if needed.
Optional Embellishment :
Sew on tiny clear seed beads among the scallops to simulate twinkling lights; place few strategically under the scallops and near flower centers. Add small safety pins behind heavier bead strands to anchor to the tree without damaging yarn if you want them removable.
Info (Care) :
Display your finished ornament in a dry place away from direct sunlight to preserve cotton colors. If dusty, gently spot-clean with damp cloth — do not submerge heavily beaded areas with glued elements.
This scalloped Christmas tree ornament brings together classic shapes and tiny handcrafted details to create a truly special holiday decoration. Each carefully layered tier and small motif adds texture, color and charm — the final piece sparkles with beads, jingles with little bells and makes a lovely centerpiece or mantel showpiece. I hope you enjoy the relaxing rhythm of creating each tier and the satisfying result when everything comes together. 🎄✨🧶