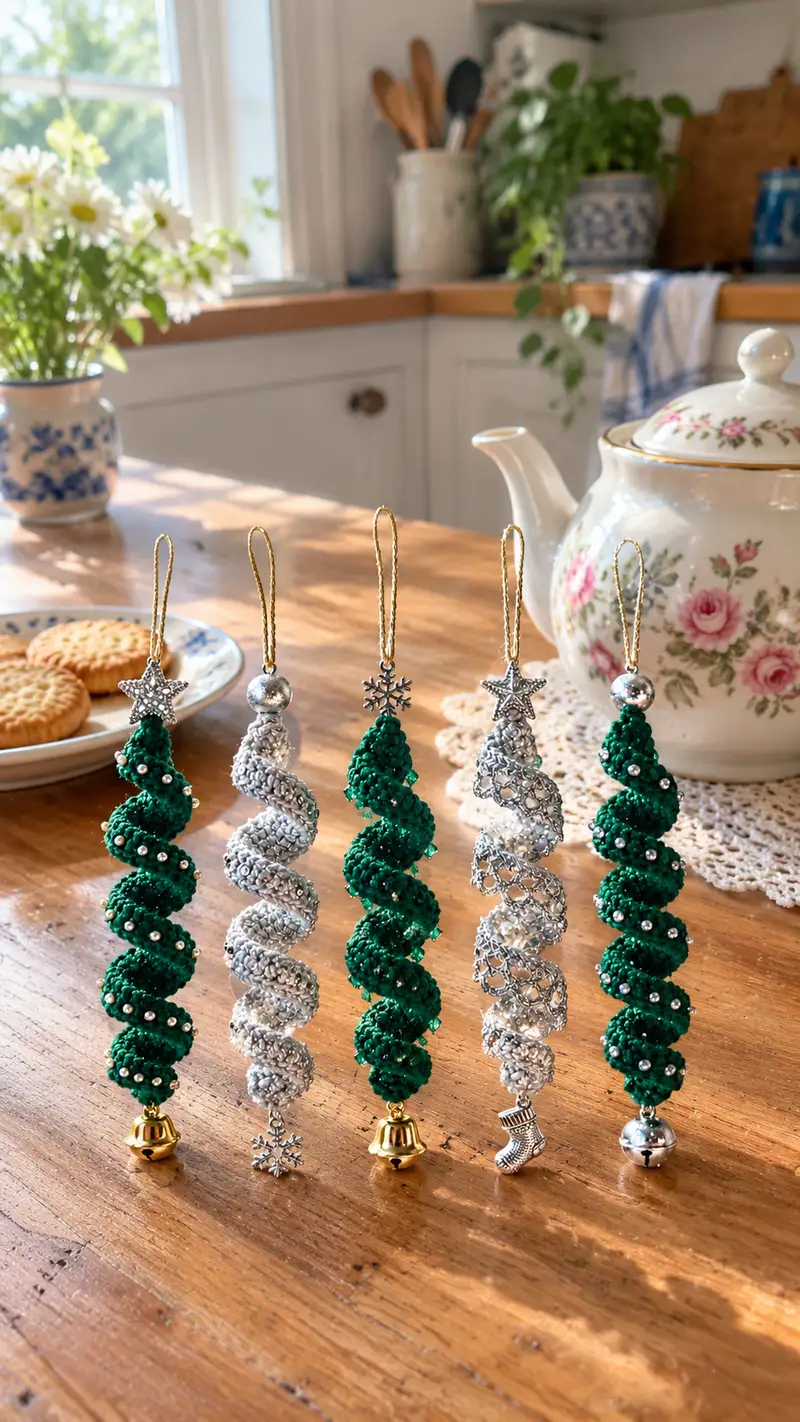
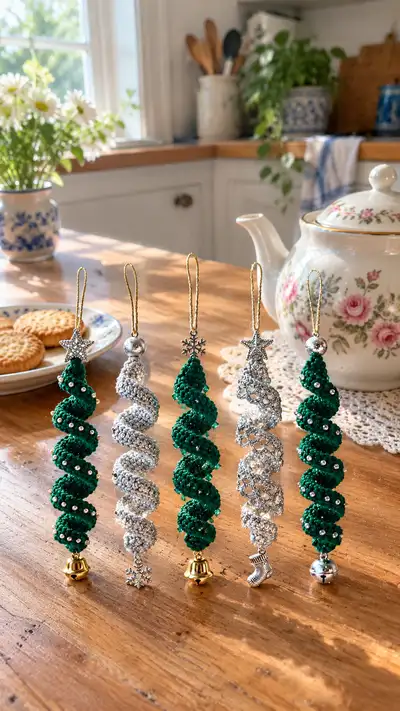
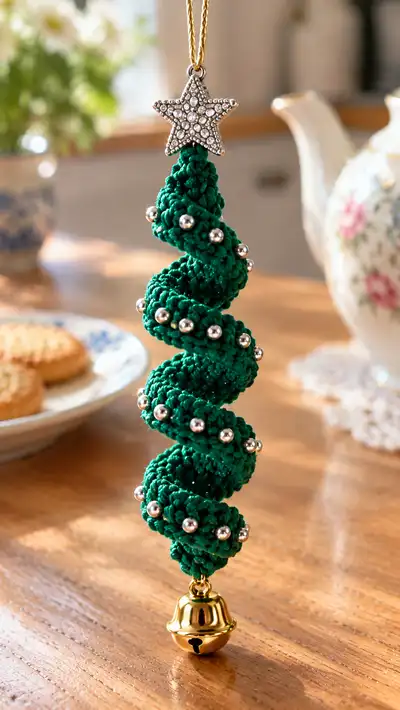
Create elegant corkscrew spiral ornaments with this detailed pattern. These delicate spirals are crocheted in fine thread, shaped into a twisting tree-like ornament, and finished with beads, tiny charms, and a decorative top loop. Two lace-style and dense variants are included so you can make sparkling silver or rich green versions like those pictured. Perfect for mantel displays, trees, or gift toppers.
Progress Tracker
0% Complete
— Materials & Setup :
Info :
Before beginning, choose whether you will crochet the Dense Spiral (tight textured tree), the Beaded Spiral (dense with beads integrated), or the Lace Spiral (openwork silver spiral). All variants start from a small tubular foundation and diverge when creating the corkscrew ruffle or lace wrap. Use a fine crochet thread (size 10) for the pictured scale. Strings of tiny beads (2–3mm) are pre-strung onto your working thread where needed.
Info :
For best results, use a hook 1.75–2.25mm. Use a stitch marker to mark the beginning of rounds for tubed sections. Have beads pre-strung and charms ready. If you want a rigid core, cut thin craft wire to the final ornament length minus 1cm; fold a small eye at the top to attach the loop.
— Dense Spiral (Green) :
Round 1 :
6 sc in magic ring (6)
Round 3 :
(1 sc, 1 inc) x 6 (18)
Round 4 :
(2 sc, 1 inc) x 6 (24)
Round 5 :
(3 sc, 1 inc) x 6 (30)
Round 6 :
(4 sc, 1 inc) x 6 (36)
Round 7 :
(5 sc, 1 inc) x 6 (42)
Round 8 :
(6 sc, 1 inc) x 6 (48)
Info :
Rounds 1–8 create the small round tube base. This tube will become the central column of the spiral. Keep your tension slightly firm so the tube holds form. Insert stitch marker at start of Round 9 and keep it there for the tube section.
Round 9-20 :
1 sc in each st (48)
Info :
Work even rounds 9–20 to lengthen the tube; these rounds make the column long enough to support the spiral ruffle. At the end of round 20 the tube should measure roughly 3.5–4cm depending on your gauge. If you want a longer base before the spiral starts, add even rounds here in multiples until you reach the desired height.
Round 21 :
Change to BLO. 1 sc in each st BLO (48)
Info :
Working in BLO will create a subtle ridge to help your ruffle attach more cleanly. Keep the stitch marker in place at each round start. If you prefer a smoother join, continue in regular rounds instead of BLO.
Round 22 :
1 sc in each st (48)
Round 23 :
1 sc in each st (48)
Round 24 :
1 sc in each st (48)
Info :
Rounds 22–24 prepare the tube for the spiral ruffle attachment. Decide how many spirals/turns you want: pictured ornaments have 6–7 distinct turns. To get 6 turns, plan for ruffle rows equivalent to 6 times the spacing you’ll create (see ruffle sequence below).
Round 25 :
Start ruffle — (1 sc, 1 inc) x 24 (72)
Info :
This first ruffle round increases the circumference so the fabric naturally flares out. The increase is worked into the same round of the tube; because your tube has 48 stitches, doing (1 sc, inc) x 24 gives 72 stitches. If your tube count differs due to tension, calculate increases accordingly: add 50% more stitches for an even initial flare.
Round 26 :
1 sc in each st (72)
Round 27 :
BLO: 1 sc in each st BLO (72)
Round 28 :
Ruffle increase — (2 sc, 1 inc) x 24 (96)
Info :
When you work successive ruffle increases on one side of the tube, the extra fabric will begin to curl and form a corkscrew. To encourage a single helical spiral instead of a ruffle that lays flat, work the increases into a narrow arc of the round (see placement tip below).
Round 29 :
1 sc in each st (96)
Round 30 :
1 sc in each st (96)
Info :
PLACEMENT TIP: To make a single continuous spiral, mark about 1/4 of the round where the increases will be concentrated. For example, mark 24 stitches as your 'increase arc' and only work the inc sequences in that arc. The rest of the round is worked even. This localized growth causes the fabric to curl into a spiral rather than a symmetric ruffle.
Round 31 :
Work one round concentrating increases in the marked arc: for the marked arc: (1 sc, 1 inc) x 12 (in arc = 36 sts); for remaining 60 sts of round: 1 sc in each st — total (96)
Round 32 :
Even round: 1 sc in each st (96)
Round 33 :
Increase again in arc: (2 sc, 1 inc) x 12 in arc (adds 12 sts in arc) — overall count (108)
Round 34 :
1 sc in each st (108)
Info :
By repeating localized increases every 2–3 rounds the fabric will gradually spiral. Check curvature as you go and adjust inc frequency to increase or decrease the curl tightness. Tighter increases = sharper corkscrew turns.
Round 35 :
Even round: 1 sc in each st (108)
Round 36 :
Repeat arc increase: (3 sc, 1 inc) x 12 in the arc (adds 12 sts) — overall count (120)
Round 37 :
1 sc in each st (120)
Round 38 :
Even round: 1 sc in each st (120)
Round 39 :
Decrease slightly across arc to tighten top of turns if desired: In arc (1 sc, 1 dec) x 12 (reduces 12 sts) — overall count (108)
Round 40 :
1 sc in each st (108)
Info :
Continue alternating 1–3 rounds even with a targeted increase round every 2–4 rounds until you reach the ornament length you desire (pictures show about 6–8 turns). Each time you work the increase arc, the spiral will form one more pronounced turn. For a 12 cm ornament expect about 36–44 total ruffle rounds depending on gauge.
Round 41-46 :
Repeat sequence: 2 rounds even, 1 round with arc increase (choose pattern 1 sc/1 inc or 2 sc/1 inc) to continue forming spirals (counts will increase gradually from 108 to about 140 depending on number of increases)
Info :
Bead Placement: For the green dense variant, add small metallic beads to the surface as you work. Pre-string beads onto your thread and slide one bead onto stitch where desired — typically place a bead every 6–8 stitches along the outermost ridgeline of each spiral turn. Use a fine beading needle to help push the bead up before making the next stitch.
Round 47-54 :
Work even rounds to stabilize the final shape — 1 sc in each st (maintain current stitch count)
Round 55 :
Finish ruffle gradually: decrease every arc round if you want a tapered bottom: (2 sc, 1 dec) x 12 in arc (reduces 12 sts in arc)
Round 56 :
1 sc in each st (reduced total)
Round 57 :
Work decreases to close the bottom into a neat narrow end: work rounds of (3 sc, 1 dec) x 12 until you reach approximately 36–48 sts depending on your final desired width
Round 58 :
Fasten off leaving a long tail for sewing bottom charm. Thread tail through remaining stitches and pull tight to close hole. Secure with knot and weave tail inside the spiral several cm for security.
Info :
Attach charm at bottom: using a jump ring or by threading the tail through the charm loop and back through body, secure a tiny bell or decorative charm. Sew multiple passes if necessary and add a drop of clear fabric glue for long-term security.
— Beaded Spiral Variant (Dense with Integrated Beads) :
Round 1 :
6 sc in magic ring (6)
Round 3 :
(1 sc, 1 inc) x 6 (18)
Round 4 :
(2 sc, 1 inc) x 6 (24)
Round 5 :
(3 sc, 1 inc) x 6 (30)
Round 6-12 :
1 sc in each st (30)
Info :
This variant keeps a narrower tube (30 sts) for a more compact spiral with beads positioned in rows that decorate the arms of the corkscrew. Pre-string roughly 50–80 tiny beads onto your working thread before starting the ruffle portion.
Round 13 :
Begin ruffle with bead incorporation. For the ruffle arc (choose a 1/3 portion of the round, roughly 10 sts), work: (slide 1 bead up, 1 sc) x 10 in arc. For remaining 20 sts work even 1 sc each — total still (30)
Round 14 :
Even round: 1 sc in each st (30)
Round 15 :
Increase in arc to expand outer edge and make room for beads: in arc: (1 sc, 1 inc) x 10 (adds 10 sts in arc = arc 30 sts); remaining even section: 1 sc in each st (20) — overall total (60)
Round 16 :
1 sc in each st (60)
Info :
Because beads were pre-strung, the bead is typically worked into the stitch by sliding bead up onto the hook side and working the sc so the bead nests on the outer ridge. Keep a small tail to secure the bead if necessary by sewing down later.
Round 17 :
Targeted arc increases again to promote corkscrew turns: in arc: (2 sc, 1 inc) x 10 (adds 10 sts) — overall count (70)
Round 18 :
Even round: 1 sc in each st (70)
Round 19 :
Arc increase with bead placements: in arc work (slide 1 bead, 1 sc, 1 sc) x 10 (beads nest on outer ridge) — overall stable count (70)
Round 20 :
1 sc in each st (70)
Round 21-34 :
Continue pattern: every 2–3 rounds add one arc increase round (choose cycle of 1 sc, inc or 2 sc, inc) followed by 1–2 even rounds. Keep adding beads evenly on the outer ridge as each spiral turn forms. Stitch counts will gradually rise (from 70 toward ~120 depending on increases).
Info :
If you need to add more embellishment, secure tiny pearls or seed beads by sewing them to the outermost bumps after finishing. Avoid overloading the spiral with heavy beads — use small metal beads for shine without weight.
Round 35 :
To finish bottom, decrease gradually across the arc in reverse pattern of increases: in arc (1 sc, 1 dec) x 10, then continue even across remainder — reduce counts in steps until you reach approx 36–48 sts
Round 36 :
Fasten off leaving long tail. Thread tail through bottom charm or bell and pull to close. Sew multiple passes for security and weave tail into body.
Info :
For extra security when adding heavier charms, route a small jump ring through a few inside stitches before tightening and knotting so the ring is hidden between layers and carries weight directly to many stitches.
— Open Lace Spiral (Silver) :
Round 1 :
6 sc in magic ring (6)
Round 3 :
(1 sc, 1 inc) x 6 (18)
Round 4 :
(2 sc, 1 inc) x 6 (24)
Round 5 :
1 sc in each st (24)
Info :
This variant uses metallic thread and openwork to create a lighter, lacy spiral. The technique uses chain spaces and dc shells that are anchored to the tube as you work, forming a spiral mesh that is airy and sparkly.
Round 6 :
1 sc in each st (24)
Round 7 :
Anchor row for lace: *ch 3, sk next st, sl st in next st* around (produces 12 ch-3 loops)
Round 8 :
In each ch-3 loop work (1 sc, ch 2, 2 dc) ; sl st to join to tube where desired — keep tube stitches intact. This creates a row of small shell loops attached to the tube (24 attachment points)
Info :
To create a spiral, anchor each new shell row slightly rotated on the tube — e.g., begin each shell not directly over the previous shell but 2–3 stitches later. This staggered anchoring forces the openwork to spiral around the tube.
Round 9 :
Even tube round beneath lace: 1 sc in each st (24)
Round 10 :
Second lace row: *sl st to next loop, ch 4, in same loop work (1 sc, ch 2, 3 dc), sl st into tube to anchor 2–3 stitches forward* — stagger anchor point compared to previous lace row
Round 11 :
Tube round: 1 sc in each st (24)
Round 12 :
Repeat lace row variations, increasing shell height slightly (use ch 4 loops then 4 dc) and always anchor 2–3 tube stitches forward from previous row to create a consistent slanted spiral effect
Round 13-30 :
Continue alternating secure tube rounds (1 sc in each st) with lace rows. Each lace row should be anchored slightly forward along the tube to move the lace pattern around in a spiral. The lace rows create the visible openwork turns; the tube rounds keep the core stable. Continue until lace reaches desired ornament length (typical 8–10 lace rounds + tube rounds to form 6–8 turns)
Info :
Bead Option: Add tiny beads into the chain arches by sliding a bead onto the thread before working the dc shell into the chain loop. Place beads sparingly to preserve the lace look. For a glittering finish, work the final lace row in metallic thread or add a thin strand of metallic yarn twisted with your thread.
Round 31 :
To close bottom, work a tube round then a decrease round: (2 sc, 1 dec) x 6 across the tube to reduce circumference (if tube is 24 sts this reduces to 18)
Round 32 :
1 sc in each st (reduced count)
Round 33 :
Fasten off leaving long tail. Thread tail through remaining stitches and pull tight to close. Sew in a tiny charm or boot at the base through the tail then weave in securely.
Info :
The lace spiral benefits from a small interior coil to keep it open and rigid — if desired, insert a thin wire through the tube before finishing. Bend the top into a small loop or attach the hang cord to the wire eye before closing.
— Top Loop, Cap & Charm Attachment :
Round 1 :
Create a small cap by crocheting a 6-stitch circle: 6 sc in magic ring (6)
Round 3 :
1 sc in each st (12)
Info :
This cap can act as a decorative top piece hiding a jump ring or the folded end of wire. Alternatively you can crochet a slightly larger collar to slide over the top of the spiral and glue or sew in place. To attach a hang loop, sew the cap to top of tube, leaving space to thread the cord through a jump ring.
Round 4 :
Fold a 10–12cm length of metallic cord in half and tie a small knot in the doubled end (or attach it to a jump ring). Place the loop inside the cap and whip stitch cap closed around the loop base to secure
Info :
For a stronger loop, thread the cord through a small metal jump ring first, then sew the cap around the ring. This helps the ornament hang straight and prevents the cord from abrading the crochet thread during display use.
— Finishing & Blocking :
Info :
Gently shape the spiral by hand — slightly press and rotate each turn so the corkscrew stands apart. Metallic threads cannot be steam-blocked easily; instead lightly mist with water and reshape by hand, or insert a thin paper towel tube inside to hold shape while drying. If you used wire, bend wire to final spiral curvature before hiding ends and closing openings.
Info :
Weave all tails into inner rounds and trim. If adding beads sewn on after crocheting, use a fine beading needle and sew through multiple innermost stitches to secure each bead from the interior to the exterior so beads sit flush on the ridges.
Round 1 :
Optional edge polish — with contrasting thread, work 1 round of slip stitch along the outer ridge of each spiral turn to create definition and a neat finish
Info :
Attach charms and bells with jump rings. If charms have small loops, use jump rings to prevent strain on the crochet stitches. Close rings securely with pliers. Add a small dab of fabric glue inside cap or at jump ring anchor for extra security when making gifts that will be handled frequently.
— Tips, Variations & Troubleshooting :
Info :
If spiral curls are too loose: add more increases localized in a narrower arc or use a smaller hook to tighten fabric. If too tight: reduce number of increases or space them every 3–4 rounds instead of every 1–2 rounds. For a double spiral effect, make two narrow spirals and wrap one around the other before adding charms.
Info :
To scale up: use thicker thread or yarn and a larger hook; adjust bead and charm sizes accordingly. For a tiny ornament, use size 20 thread and a 1.5mm hook and reduce rounds by one-third.
Info :
To make a freestanding table spiral (not hanging), increase the bottom rounds to form a stable base and add a heavier decorative weight at the bottom. Secure with a hidden metal washer or small coin for balance.
These corkscrew spiral ornaments bring playful movement and subtle sparkle to any holiday display. Each one is a little experiment in texture and shine — choose a dense green variant for classic tree vibes, or a lace silver spiral for a light, glimmering accent. Adding a tiny bell or charm at the base gives each piece personality and a soft jingle when it moves. I hope you find the process as relaxing and rewarding as I do — happy stitching and merry decorating! 🎄✨🔔