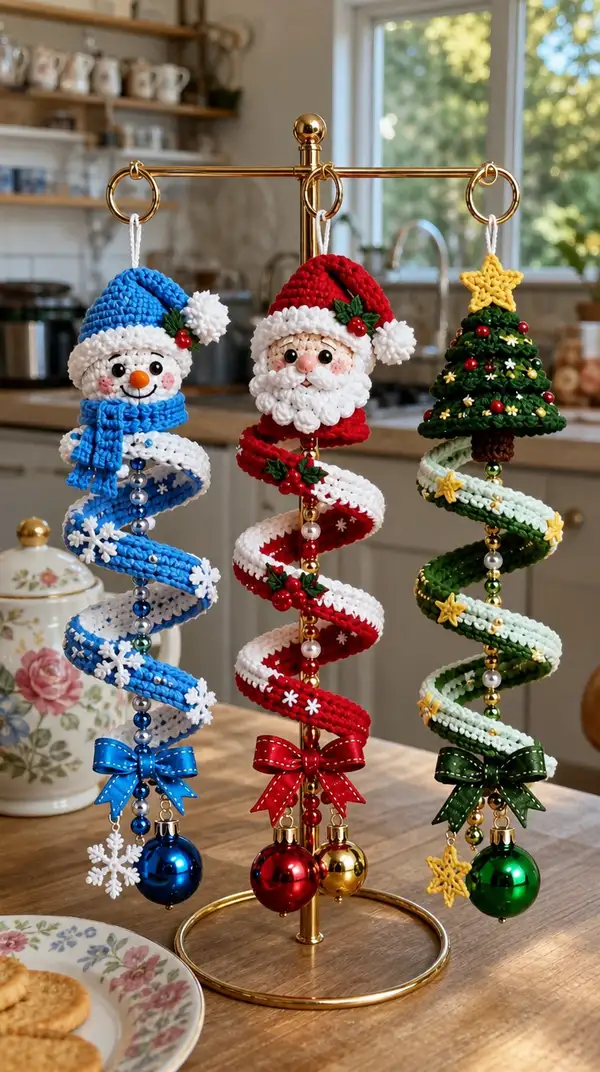
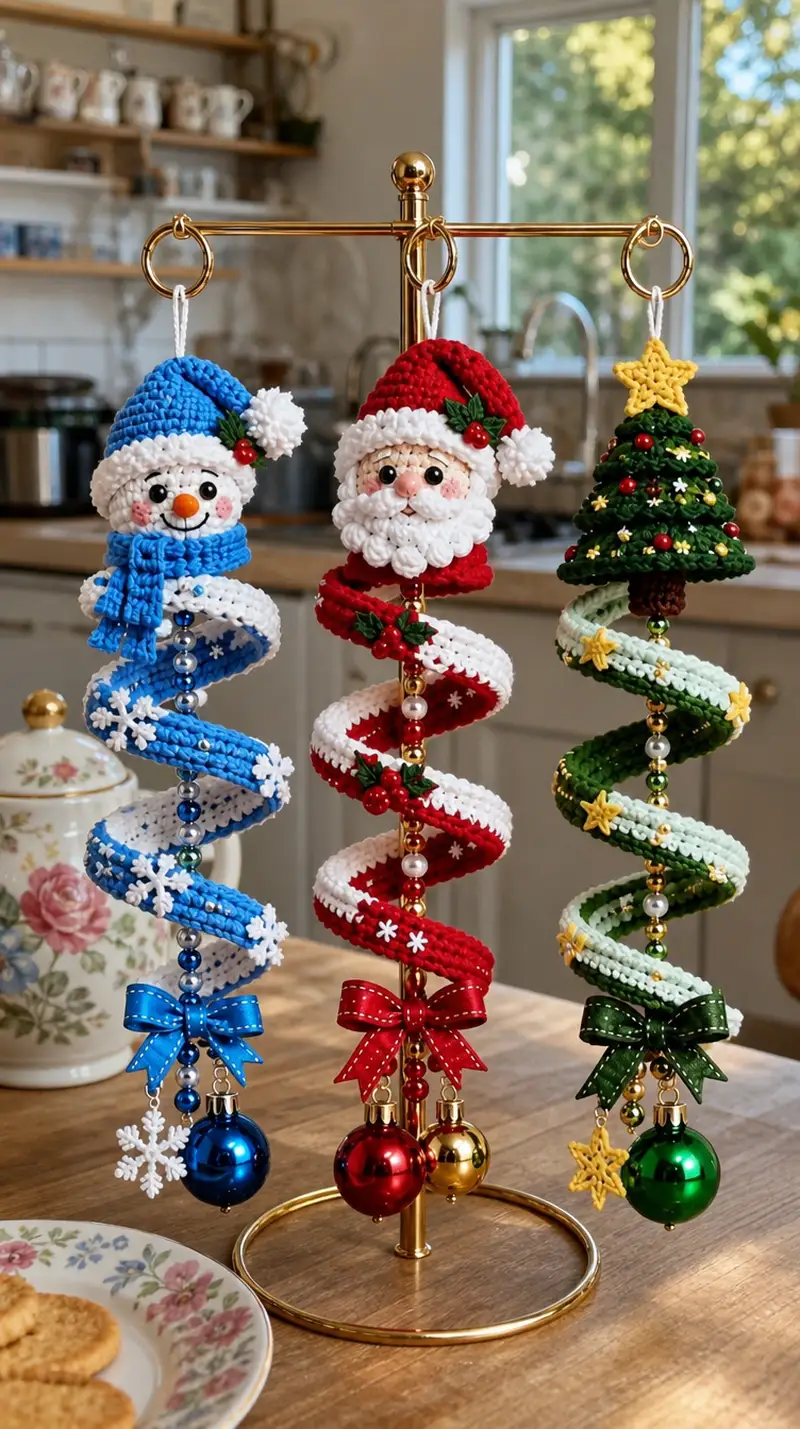
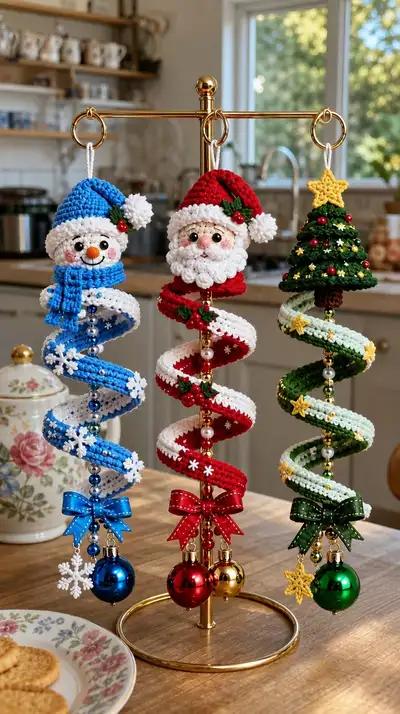
Create a set of charming spiral Christmas ornaments featuring a snowman, a jolly Santa, and a decorated tree. Each piece combines a cute amigurumi topper with a long spiral ribbon, contrasting edge, beads and a dangling bauble. The pattern includes detailed round-by-round instructions, decorative accents (holly, star, bows) and step-by-step assembly notes so you can recreate the trio shown in the photo.
Progress Tracker
0% Complete
— Pattern Notes :
Info :
Use continuous rounds unless otherwise stated. Use a stitch marker at the first stitch of each round. All round stitch counts are given at the end of each line in parentheses. Work tightly to avoid stuffing showing through. Assemble decorations on a sturdy beaded cord as shown in the images.
— Snowman Head :
Round 3 :
(1 sc, inc) x 6 (18)
Round 4 :
(2 sc, inc) x 6 (24)
Round 5 :
(3 sc, inc) x 6 (30)
Round 6 :
(4 sc, inc) x 6 (36)
Round 7 :
(5 sc, inc) x 6 (42)
Round 8 :
(6 sc, inc) x 6 (48)
Round 9-14 :
1 sc in each st (48)
Info :
Place safety eyes between rounds 11-12 approximately 10-12 sts apart depending on expression. If using 8mm eyes, place them 12 sts apart; for 10mm, place 10 sts apart. Mark center line to align nose.
Round 15 :
(6 sc, dec) x 6 (42)
Round 16 :
(5 sc, dec) x 6 (36)
Round 17 :
(4 sc, dec) x 6 (30)
Info :
Begin stuffing head firmly but not excessively. Add small amounts at a time to keep round shape. Stuff until the head is even and full, with firm cheeks to support the hat brim.
Round 18 :
(3 sc, dec) x 6 (24)
Round 19 :
(2 sc, dec) x 6 (18)
Round 20 :
(1 sc, dec) x 6 (12)
Info :
Fasten off leaving a long tail for sewing the head onto the top of the spiral hat collar. Weave tail into center to close and secure. Embroider small rosy cheeks with pink thread if desired.
— Snowman Carrot Nose :
Round 3 :
(1 sc, inc) x 2 (6)
Round 4-5 :
1 sc in each st (6)
Round 6 :
(1 sc, dec) x 2 (4)
Info :
Stuff lightly to keep a firm cone shape. Use orange yarn. Fasten off leaving a long tail and sew centered between eyes on round 12-13 of the head. Embroider nostril dots optionally.
— Snowman Hat (ribbed brim + cone) :
Round 1 :
Using blue yarn, ch 28, join with sl st to form ring (28)
Round 2 :
Ch1, 1 sc in each ch around, join (28)
Round 3-6 :
1 sc in BLO each st around to form folded rib brim (28)
Info :
Turn brim to create thick folded look. If you prefer a different brim, work 2 rounds of BLO and 1 round of FLO for decorative ridge.
Round 7 :
Change to main blue color body. 1 sc in each st (28)
Round 8 :
(3 sc, inc) x 7 (35)
Round 9 :
(4 sc, inc) x 7 (42)
Round 10-14 :
1 sc in each st (42)
Round 15 :
(4 sc, dec) x 7 (35)
Round 16 :
(3 sc, dec) x 7 (28)
Round 17 :
(2 sc, dec) x 7 (21)
Round 18 :
(1 sc, dec) x 7 (14)
Info :
Stuff minimally or leave unstuffed - hat is meant to sit on head. Fasten off and leave tail for sewing. Add a white pom-pom made of puff stitches (see Hat Pom Pom section) and sew to tip.
— Snowman Scarf :
Round 1 :
Using blue yarn, ch 30, do not join, work rows back and forth in sc for 8 rows to create flat scarf (30)
Round 2-8 :
Turn, ch1, 1 sc in each st across (30)
Info :
Edge with crab stitch or reverse sc for a finished look. Add fringe by attaching short ch-threads to ends or leave as neat rectangle. Sew scarf around snowman neck area between hat and spiral start, tacking with small stitches.
— Santa Head :
Round 3 :
(1 sc, inc) x 6 (18)
Round 4 :
(2 sc, inc) x 6 (24)
Round 5 :
(3 sc, inc) x 6 (30)
Round 6 :
(4 sc, inc) x 6 (36)
Round 7 :
(5 sc, inc) x 6 (42)
Round 8 :
(6 sc, inc) x 6 (48)
Round 9-13 :
1 sc in each st (48)
Info :
Place safety eyes between rounds 11-12, approximately 9-11 sts apart depending on eye size. Mark mouth position for later embroidery and beard placement.
Round 14 :
(6 sc, dec) x 6 (42)
Round 15 :
(5 sc, dec) x 6 (36)
Round 16 :
(4 sc, dec) x 6 (30)
Info :
Begin stuffing head firmly. The beard will cover the lower rounds; do not overstuff the jaw area so the beard sits snugly.
Round 17 :
(3 sc, dec) x 6 (24)
Round 18 :
(2 sc, dec) x 6 (18)
Round 19 :
(1 sc, dec) x 6 (12)
Info :
Fasten off leaving long tail for sewing onto the top of the spiral collar. Attach a small round peach nose (see Santa Nose section) and embroider rosy cheeks and mouth with pink/red yarn.
— Santa Nose :
Round 3 :
(1 sc, dec) x 2 (4)
Info :
Use peach yarn. Stuff lightly and sew onto center of face between eyes, around round 12-13. Add a tiny stitch for nostrils and blush the cheeks with a small amount of pink embroidery thread.
— Santa Beard (attached clusters) :
Info :
Beard is made with puff stitches attached in rows to simulate curly beard clusters. Work on lower face area after head is stuffed and eyes placed.
Round 1 (beard base) :
With white yarn and right side facing, find the round 14-16 line of the head and attach yarn. Ch1, sc across 24 sts centered under nose (24)
Round 2 :
Ch2, *yarn over twice into same st, pull up loop, yarn over and pull through 2 loops three times to make puff stitch*, sl st in next st to anchor. Repeat across creating 8 puff clusters. Fasten off (8 clusters)
Round 3 :
Attach yarn slightly lower and offset, repeat cluster row to create fuller beard (10 clusters)
Info :
Sew clusters in neat rows so beard covers lower half of face. Trim stray tails and use a crochet hook tip to un-twist and shape puffs to be round and fluffy.
— Santa Hat :
Round 1 :
Using red yarn, ch 28, join (28)
Round 2 :
1 sc in each ch around (28)
Round 3-6 :
1 sc in BLO each st to form a folded brim (28)
Round 7 :
Change to main red body color. 1 sc each st (28)
Round 8 :
(3 sc, inc) x 7 (35)
Round 9 :
(4 sc, inc) x 7 (42)
Round 10-14 :
1 sc in each st (42)
Round 15 :
(4 sc, dec) x 7 (35)
Round 16 :
(3 sc, dec) x 7 (28)
Round 17 :
(2 sc, dec) x 7 (21)
Round 18 :
(1 sc, dec) x 7 (14)
Round 20 :
Fasten off, attach white puff pom to top (use pom pom instructions) and decorate with tiny felt holly or embroidered leaves.
Info :
Sew hat slightly forward on Santa head so beard shows nicely. Add a small holly cluster on the brim using dark green yarn and red beads for berries.
— Tree Topper (Decorative Cone/Tree Head) :
Round 1 :
Using dark green yarn, 6 sc in mr (6)
Round 3 :
(1 sc, inc) x 6 (18)
Round 4 :
(2 sc, inc) x 6 (24)
Round 5 :
(3 sc, inc) x 6 (30)
Round 6 :
(4 sc, inc) x 6 (36)
Round 7 :
(5 sc, inc) x 6 (42)
Round 8 :
(6 sc, inc) x 6 (48)
Round 9-12 :
1 sc in each st (48)
Info :
We will create layered 'branches' by working rows of puff clusters over these rounds to create fullness. Attach tree trunk later by sewing a short brown cylinder to the underside.
Round 13 (branch row 1) :
Attach yarn, ch2, *puff into next 4 sts, sl st into next st* repeat across to create spaced puff clusters around (approx 8 clusters)
Round 14 :
1 sc in each st to secure base (48)
Round 15 (branch row 2) :
Offset puff clusters between previous row to create layered effect; *puff in next 3-4 sts, sl st in next* repeat (9-10 clusters)
Round 16-18 :
1 sc in each st (48)
Round 19 :
(6 sc, dec) x 6 (42)
Round 20 :
(5 sc, dec) x 6 (36)
Round 21 :
(4 sc, dec) x 6 (30)
Round 22 :
(3 sc, dec) x 6 (24)
Round 23 :
(2 sc, dec) x 6 (18)
Round 24 :
(1 sc, dec) x 6 (12)
Info :
Fasten off leaving a long tail to sew onto the top of the spiral body. Use small red beads and tiny star sequins sewn randomly into puff clusters to create ornaments.
— Tree Trunk (Make 1) :
Round 1 :
6 sc in mr using brown (6)
Round 3-6 :
1 sc each st (6) for a short cylinder about 6 rows high (6)
Info :
Stuff lightly. Sew to underside of tree cone so it sits inverted and attaches to spiral collar securely.
— Spiral Ribbon Base (blue, red, green versions) :
Info :
The spiral ribbon is constructed as a long rectangular tube that will be threaded over a central beaded cord to form a spiral. Work one tube per ornament using colors indicated: blue/white, red/white, two-tone greens. The measurements below are given in rounds; you will work until the tube measures approximately 45-60 cm in length for a spiral of 4-5 loops. Adjust length for more or fewer loops.
Foundation :
Ch 36, join with sl st to form a ring (36). This gives a tube width comfortable for small palm-sized baubles. If you want a slightly wider spiral, ch 44 (44).
Round 1 :
Ch1, 36 sc around in continuous spiral (36)
Round 2 :
1 sc in each st (36)
Round 3 :
1 sc in each st BLO for edge definition (36)
Round 4-8 :
1 sc in each st (36)
Info :
Work these first rounds evenly; the tube is knitted tight to keep shape. Use regular sc for stability. Keep your rounds continuous and do not join unless you prefer visible seams. Mark the beginning of each round with stitch marker to keep even tension.
Round 9-60 :
Continue 1 sc in each st (36) repeating until the tube measures 45-60cm in length - approximately 50 rounds depending on your gauge. Count rounds or use measuring tape. (36)
Info :
If making the snowman or Santa spiral you will alternate edge color every 8-10 rounds to create the contrasting spiral trim (see Color Change Info). For the tree, use alternating green shades to create banding.
Round 61 :
Change to contrasting edge color using join in back loop method. 1 sc in each st BLO (36)
Round 62 :
1 sc in each st (36)
Round 63-70 :
Alternate colors every 2-10 rounds depending on decorative stripe pattern you want. For example, for Santa alternate 8 rounds red, 8 rounds white. For snowman alternate 6 rounds blue, 6 rounds white. For tree alternate green shades every 5-7 rounds.
Info :
When switching colors, carry the unused yarn along the inside of the tube and crochet over the tail for tidy inside finishing. When you have achieved desired length, fasten off leaving long tail for sewing spiral ends to bead cluster and attaching topper.
— Creating the Spiral Shape and Edge Trim :
Round 1 :
Once your tube reaches correct length, block it lightly: dampen and wrap around a dowel of similar diameter to desired spiral radius, allow to dry. Alternatively, wrap around a cardboard tube and secure with pins until shaped.
Info :
Note :
In the photographed ornaments, the spiral holds shape because it is threaded over a stiff beaded cord. We recommend using a 1mm beading wire or thin brass rod threaded through beads: the tube should slide over it snugly yet allow shaping. If the tube is slightly loose, add interior stitches or a narrower internal sleeve of yarn to increase friction.
— Beaded Hanging Cord (spine) :
Info :
Cut a length of beading cord or wire to the total length of ornament plus extra for loops (approx 60-75cm). String beads in the order pictured: small metallic spacer, pearl, metallic spacer, repeat between each spiral loop segment to provide weight and visual rhythm. Leave 5-6cm at top for hanging loop and 6-8cm at bottom for bauble drop.
Assembly Step :
Slide the tube over the beaded cord starting from top. Position beads where spiral will naturally curve between loops. Use additional small beads inside the tube to anchor the tube at each loop if it slides too much. At the bottom string a cluster of beads that will attach to the dangling bauble.
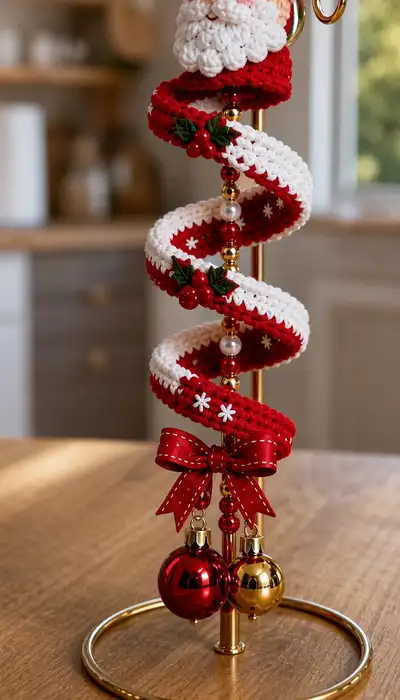
— Red & White Spiral Specifics (Santa) :
Info :
For the Santa spiral we recommend working the tube with alternating 8-round bands of red and white. After creating the tube, add small white embroidered star motifs on red bands and tiny holly clusters sewn on at 3 equally spaced points. Use small red berry beads for holly berries.
Decoration :
Sew three tiny holly leaf motifs (crocheted or felt) onto the red bands at roughly equal spacing. Add small white star sequins to the interior white faces for contrast.
— Blue & White Spiral Specifics (Snowman) :
Info :
Work 6-round bands of blue and white for a crisp striped look. On blue bands sew tiny white snowflake appliques made of star stitch or pre-bought embellishments. Attach a blue bow near the bottom above the bauble.
Snowflake Applique (Make multiple) :
Ch6, join. Round 1: *ch3, sl st in next st* x6 to create star points; fasten off and sew to spiral edge. Alternatively use small plastic snowflake embellishments sewn on with thread.
— Green Spiral Specifics (Tree) :
Info :
Work alternating shades of green roughly every 5 rounds for subtle bands. Decorate with tiny yellow star appliques and small red bead ornaments. On the tree spiral, attach a crocheted star to hang from the lowest loop or as a side ornament.
Star Applique :
Using yellow yarn: ch3, sl st to form ring. Round 1: *ch3, dc, ch1, sl st in ring* x5 to form 5 points. Fasten off, weave in. Sew to spiral or attach to bottom bead cluster.
— Bauble & Bow Assembly (Bottom Decoration) :
Round 1 :
At the bottom of the beaded cord, secure a small jump ring and hang 1 metallic bauble (20-30 mm). Above it tie a small stitched bow made with ribbon or crocheted bow piece and secure with thread.
Bow Crocheted Option :
Ch 10, sc across (10). Row 2-4: ch1, turn, sc across (10) Fasten off leaving long tail. Fold into bow shape and wrap center with contrast yarn. Sew to bottom above bauble securely.
Info :
Attach additional small charms (snowflake, small star) on short chains from the bottom cluster to mimic the sample image. Secure all metallic parts with jewelry pliers if necessary.
— Holly Leaf (Make 6) :
Round 1 :
Using dark green, ch6, 1 sc in 2nd ch from hook, 1 hdc, 2 dc, 1 hdc, 1 sc in last ch, sl st to other side of foundation and repeat to create symmetrical leaf. Fasten off (approx 6 sts each side)
Info :
Pin 2-3 leaves together and add 2-3 red beads for berries. Sew to spiral bands at chosen positions. For a sturdy look, reinforce with a small dab of fabric glue under the leaves' center.
— Pom Pom (Hat Top) :
Round 1 :
Make pom pom by wrapping white yarn around a 2cm cardboard circle 40-60 times, tie tightly and cut loops, trim to round. Alternatively use puff stitch cluster sewn to hat tip. Sew securely to hat tip.
Info :
Puff pom approach: Chain 4, join into ring, make 6 puff stitches into ring, sl st to secure, fasten off, pull center tight to puff and sew to hat tip.
— Small Details: Snowflakes, Stars & Beads :
Round 1 :
Create small embellishments by crocheting star or snowflake motifs (see earlier star and snowflake instructions). Use beads of various sizes to fill between spiral loops on the central cord for visual weight and rhythm.
Info :
Use a needle and thin thread to sew beads through the tube to secure them on inner faces if the tube slides. Use gold or metallic beads to match the photographed look.
— Final Finishing Touches :
Info :
Weave in all tails. Pin head toppers to the topmost area of the spiral and hand-sew using long tails. Ensure the beaded cord loop at top is secure for hanging. Trim and shape puffs and pom poms. Add a tiny dab of fabric glue behind glued embellishments for longevity.
Info :
For a tidy inside, pull extra yarn tails into the interior of the tube and knot on the beading cord then tuck knot inside the top so it can't be seen.
— Production Rounds Summary :
Info :
This pattern contains multiple sections with a combined total of well over 120 rounds across all components. Heads (each 20+ rounds), spiral tubes (50+ rounds each), hats and accessories (multiple rounds), and embellishment rows (cluster rounds) create the layered, textured finish shown in the photo.
Completing these spiral Christmas ornaments is such a rewarding process — they come together with playful movement, color and sweet details that catch the eye. Each finished piece looks like a tiny handcrafted holiday mobile you can proudly hang or gift. I hope you enjoy assembling the set as much as I enjoy designing them. Happy stitching and seasonal crafting! 🎄🧶✨