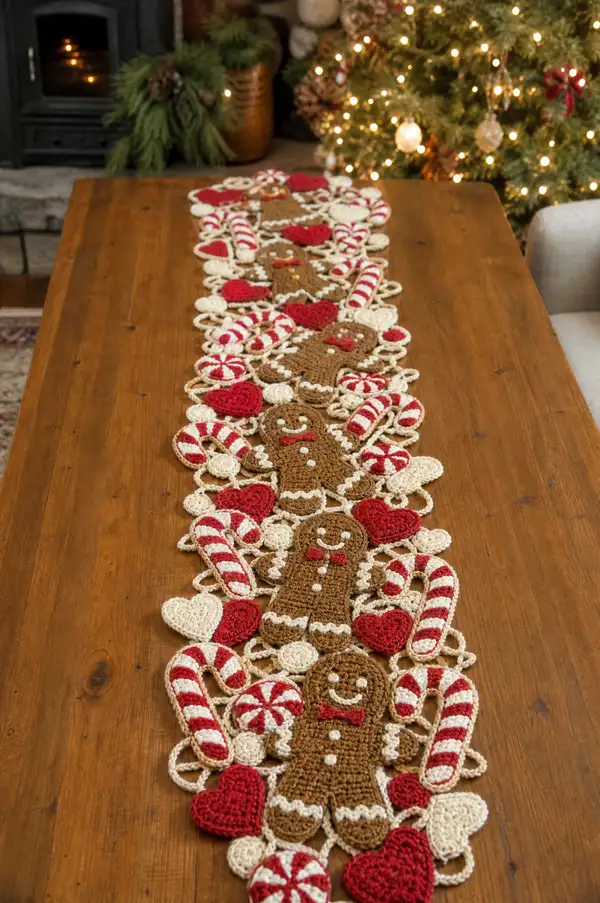
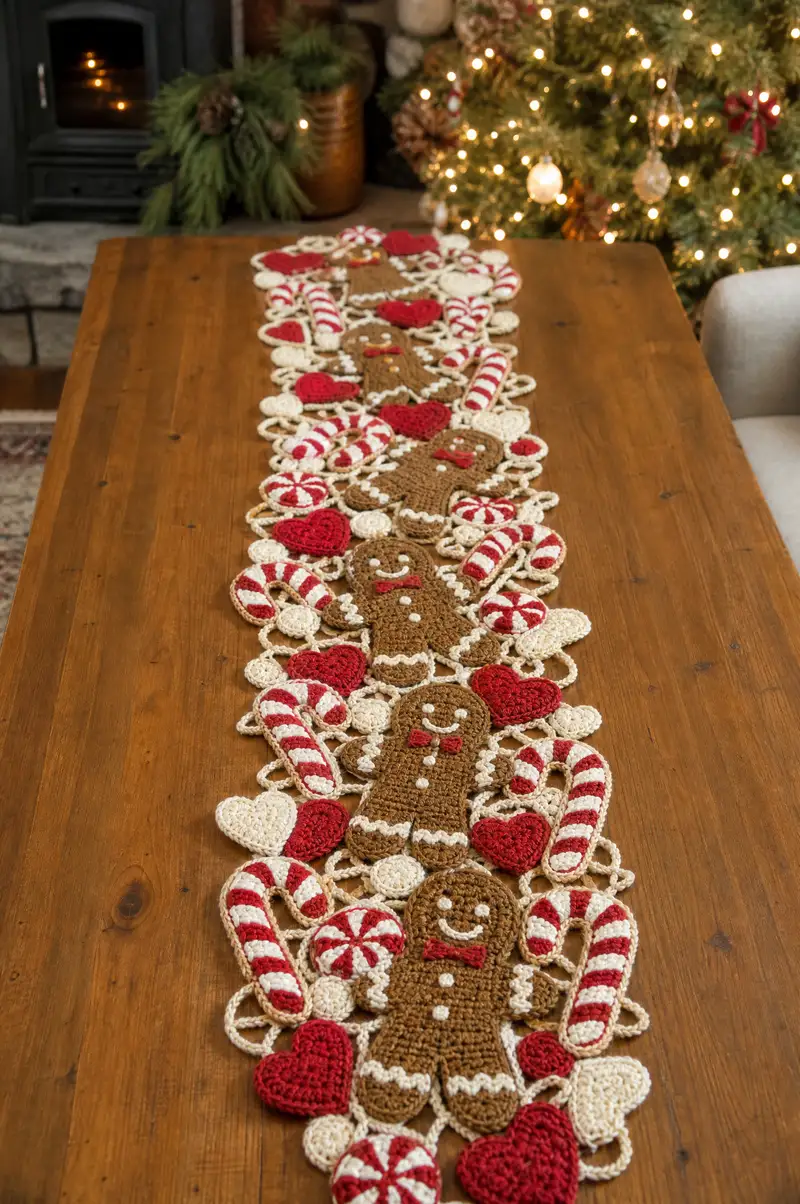
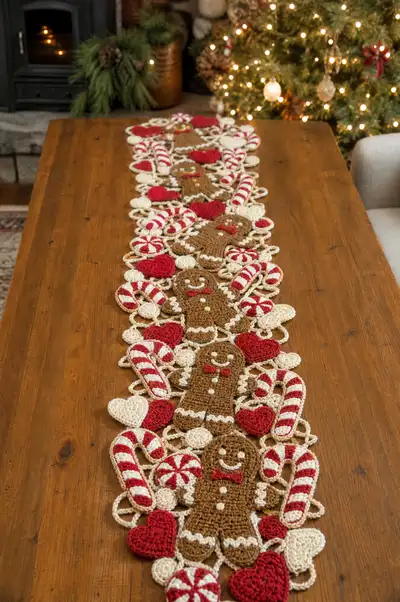
A festive, crochet table runner filled with gingerbread men, candy canes, hearts and peppermint medallions in warm browns, cream and bright red. This long runner is composed of flat motifs worked individually and joined with swirly loopy connectors for a whimsical lacey effect. Perfect for holiday tables or mantels, the design features repeating gingerbread figures, striped candy canes and clustered circular candies for rich seasonal texture.
Progress Tracker
0% Complete
— Materials & Gauge :
Info :
Gauge is not strict for this decorative runner, but motifs should be consistent. Using worsted weight yarn and a 4.0 mm hook, a finished gingerbread motif measures approximately 4.5 x 6.5 inches. If your gauge varies much, adjust hook size to match motif sizes so pieces align when joining.
Info :
Work motifs flat in rounds or joined rounds as specified. Use a stitch marker to mark each round beginning. We provide exact stitch counts so your flats remain even and circular/oval shapes are consistent.
— Gingerbread Head (Make 6) :
Round 1 :
6 sc in magic ring (6)
Round 3 :
(1 sc, inc) x 6 (18)
Round 4 :
(2 sc, inc) x 6 (24)
Round 5 :
(3 sc, inc) x 6 (30)
Info :
Begin shaping the head into a slight oval by placing more increases across two opposing sections; place marker at top center that will align with the body later.
Round 9 :
(4 sc, inc) x 6 (36)
Info :
Place eyes by embroidering two small white dots at the same round level (suggest Rounds 6-7) using white or very light yarn; spacing about 6-8 stitches apart depending on preferred expression.
Round 12 :
(5 sc, inc) x 6 (42)
Round 15 :
(5 sc, dec) x 6 (36)
Info :
On Round 15 begin placing small embroidered mouth and cheeks. Use small snips of red yarn for tongue or red felt applique if desired. Keep head flat — do not stuff; these are appliques that lay flat on the body.
Round 17 :
(4 sc, dec) x 6 (30)
Round 18 :
Fasten off; weave in ends. Leave a long tail (approx 10 inches) for sewing to the body area. (30)
— Gingerbread Body (Make 6) :
Round 1 :
6 sc in magic ring (6)
Round 3 :
(1 sc, inc) x 6 (18)
Round 4 :
(2 sc, inc) x 6 (24)
Round 5 :
(3 sc, inc) x 6 (30)
Round 6 :
(4 sc, inc) x 6 (36)
Info :
Create an oval base: work increases on the two long sides of the oval (three or four increases grouped each side) to make a squat oval appropriate for the torso; keep increases symmetric opposite one another.
Round 10 :
(5 sc, inc) x 6 (42)
Info :
Begin decorative scallop trim for gingerbread icing. Using cream yarn, attach with sl st at the top edge of the torso and work a row of small shells spaced every 4 stitches in the next round (see separate 'Icing Trim' section for detail).
Round 14 :
(6 sc, inc) x 6 (48)
Round 17 :
(6 sc, dec) x 6 (42)
Round 18 :
(5 sc, dec) x 6 (36)
Round 20 :
Fasten off leaving long tail for sewing. Weave in ends. (36)
— Gingerbread Arms (Make 12 for layered look; or 6 pairs) :
Round 1 :
6 sc in magic ring (6)
Round 3 :
(1 sc, inc) x 6 (18)
Info :
Make arms elongated: from Round 5 onward work in oval by adding increases at two opposite points to create length. These are flat, slightly tapered appliques that will be sewn under the body edges.
Round 5 :
(3 sc, inc) x 4, 2 sc along side, (3 sc, inc) x 4 (22)
Round 7 :
(4 sc, inc) x 4 + 2 sc along side, (4 sc, inc) x 4 (30)
Round 10 :
Fasten off and leave long tail for sewing. (30)
Info :
Optionally add a small cream scallop on the outer edge to mimic icing on the gingerbread arm by slip stitching a short row of small shells along a chosen side.
— Gingerbread Legs (Make 12 or 6 pairs) :
Round 1 :
6 sc in magic ring (6)
Round 3 :
(1 sc, inc) x 6 (18)
Round 4 :
(2 sc, inc) x 6 (24)
Round 6 :
(3 sc, inc) x 6 (30)
Info :
Taper the ankle by decreasing on the inside edge for the second half of rounds to create a shoe-like shape; leave outer edge slightly rounded for a cute foot.
Round 8 :
(4 sc, dec) x 6 (24)
Round 10 :
Fasten off leaving long tail for sewing. (24)
— Icing Trim (use cream color, make 12 strips total for bodies and arms) :
Round 1 :
Join cream yarn with sl st where you want trim; ch1, *skip 1 st, 5 dc in next st (shell), skip1, sl st in next st* repeat to end. Adjust spacing to fit edges.
Round 2 :
Fasten off or continue another decorative round: *sl st in base of a shell, ch1, sc in same base, ch1* to make little picot decorations between shells.
Info :
Use BLO or FLO for a subtle ridge where you place the edge; for a ruffled effect adjust shell spacing. Icing should overlay body edges slightly to simulate piped icing.
— Candy Cane Motif (Make 18) :
Info :
Candy canes are stylized curved stripes: work a long narrow tube in alternating red and cream stripes and then bend and join to create a crook. Alternatively work a short flat tube and shape by crocheting around a curved template.
Round 1 :
6 sc in magic ring (6)
Round 3 :
(1 sc, inc) x 6 (18)
Round 5 :
Sc around (18) change to red at last st of round
Info :
Striping: change color every 2 rounds for 6 pairs of stripes (12 rounds) to create a bold candy-cane stripe. Carry the unused yarn along the inside of the tube to minimize ends. Use neat weave-ins later to secure tails.
Round 6 :
Sc in red around (18)
Round 7 :
Sc in red around (18)
Round 8 :
Sc in cream around (18)
Round 9 :
Sc in cream around (18)
Round 10 :
Sc in red around (18)
Round 11 :
Sc in red around (18)
Round 12 :
Sc in cream around (18)
Round 13 :
Sc in cream around (18)
Round 14 :
Sc in red around (18)
Round 15 :
Sc in red around (18)
Round 16 :
Fasten off leaving long tail to shape and sew. (18)
Info :
To form a cane, align the last several rounds in a curve and sew through inner rounds to hold the crook. For a flatter appearance, pinch the inner curve and tack with small stitches in cream yarn to make the cane lie flat against the runner.
— Peppermint Round (Make 18) :
Round 1 :
6 sc in magic ring (6)
Round 3 :
(1 sc, inc) x 6 (18)
Round 4 :
(2 sc, inc) x 6 (24)
Round 7 :
Working in red and cream from the center: Using tapestry technique, embroider thin wedge stripes radiating from the center, or alternately join red to looped chain sections to create a swirl. Fasten off. (24)
Info :
If you prefer a pie-slice look, make 6 slip-stitch spokes from the center to the outer round in red, then fill each alternate wedge with red using surface slip stitches to form peppermint rays.
— Heart (Make 24 small hearts and 12 larger hearts) :
Round 1 :
Ch 4, join with sl st to form a small ring
Round 2 :
Ch2 (counts as first hdc), 3 hdc in ring, 3 dc in ring, ch1, 1 tr, ch1, 3 dc, 3 hdc, ch2, sl st to join. Fasten off. Makes a small heart (work in red).
Round 3 :
For a larger heart: Ch 6, join to ring, ch2, 4 hdc, 4 dc, ch2, 2 tr, ch2, 4 dc, 4 hdc, sl st. Fasten off.
Info :
Hearts are quick motifs; adjust stitch counts slightly to scale up or down. Block gently on a towel to flatten and shape the lobes before assembly.
— Small Round Candies (Make 30) :
Round 1 :
6 sc in magic ring (6)
Round 3 :
(1 sc, inc) x 6 (18)
Info :
For a petal look, add a finishing round of slip stitch scallops in cream: *sl st, ch2, sl st in same st* around. Fasten off and weave ends in tightly.
— Loopy Connector Chain (Make multiple lengths as needed, total approx 220 loops) :
Round 1 :
Attach cream yarn where motifs will meet. Ch 12, sl st back into 2nd ch from hook to form a small loop, *ch12, sl st into 2nd ch* repeat to form desired number of loops. Each loop forms a decorative connecting oval.
Round 2 :
Go back along the chain loops and sc 12 around each loop (work in BLO where you want a small ridge) to make them sturdier. Fasten off and weave ends.
Info :
Make separate loopy lengths in short pieces and join them during assembly - this makes layout easier. Keep loops consistent; each should measure about 1.25 inches across with the chosen hook and yarn.
— Edging & Final Rounds for Seamless Look :
Round 1 :
With cream yarn, sc around the outermost perimeter of the assembled motifs, placing 1 sc in each outer stitch where there is a clear edge. In curved sections place 2 sc in one stitch to maintain flatness.
Round 2 :
Work a decorative scallop round: *skip 2, 5 dc in next st, skip 2, sl st* around to form wavy lace edge. Fasten off and weave in ends.
Info :
Blocking: Block each motif flat before assembly. Use mild steam blocking or pin motifs to shape on a blocking mat. Blocking gives a professional, clean edge and keeps pieces easier to join.
— Assembly Instructions (Join-As-You-Go & Sewing) :
Info :
Arrange motifs on a flat surface in the repeating sequence: peppermint, small round candies, candy cane, heart, gingerbread head+body with arms and legs, repeat. Leave approx 0.25-0.5 in overlap to simulate layered candy clusters. Pin motif edges before joining.
Round 1 :
Join motifs using whip stitch with matching yarn tails from each motif. Use long tails left from each motif for cleaner joins - weave through 3-4 stitches along each edge and pull snug but not tight to avoid puckering.
Round 2 :
For loopy connector join-as-you-go: as you encounter a loop from the chain, insert hook into the loop and sl st to the motif edge, sl st back to the loop to anchor, then continue around motif; this creates integrated lacey ties instead of separate stitches.
Info :
Use mattress stitch for flatter joins on overlapping appliques where visible seams should be minimal. For decorative overlapping, use a few visible stitches in cream to mimic icing ties for a whimsical look.
Round 3 :
Once all motifs are joined, work a final edge in cream across the entire runner as described in the Edging section to unify the look and tidy raw joins.
Info :
Weave in all tails on the back of the runner following the flow of stitches to prevent catching. Trim any excess yarn and give the assembled runner a final blocking and press so it lays flat.
Finishing this runner is pure holiday joy — you’ll be amazed how a handful of simple motifs add up to a lavish table centerpiece. The layered gingerbread, candy canes and peppermint accents make every place setting feel festive and whimsical. I love the way the cream loops give a vintage lace feeling while the red and brown provide classic Christmas contrast. 🎄🧶 Your table will look handmade and heartwarming all season long — enjoy every stitch and happy holidays! 🎁