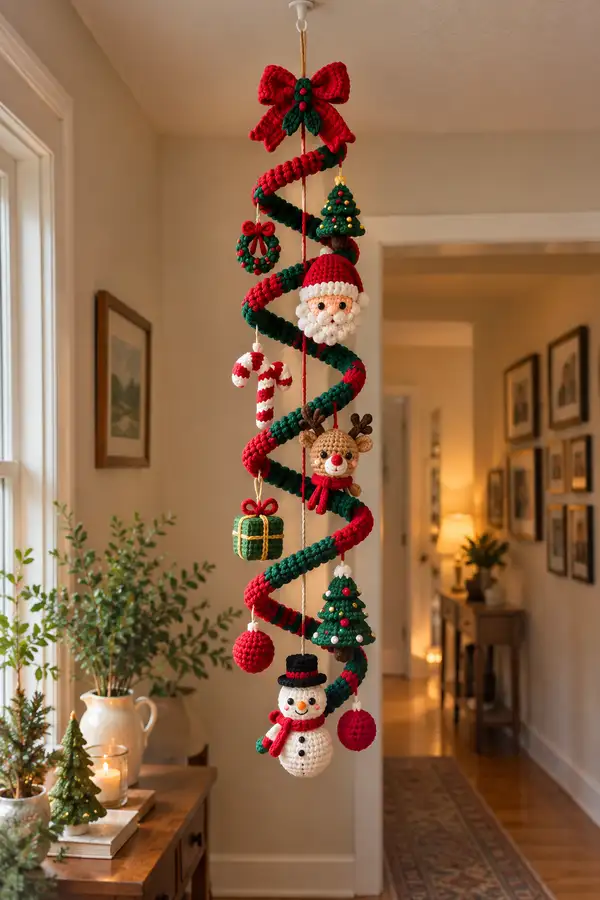
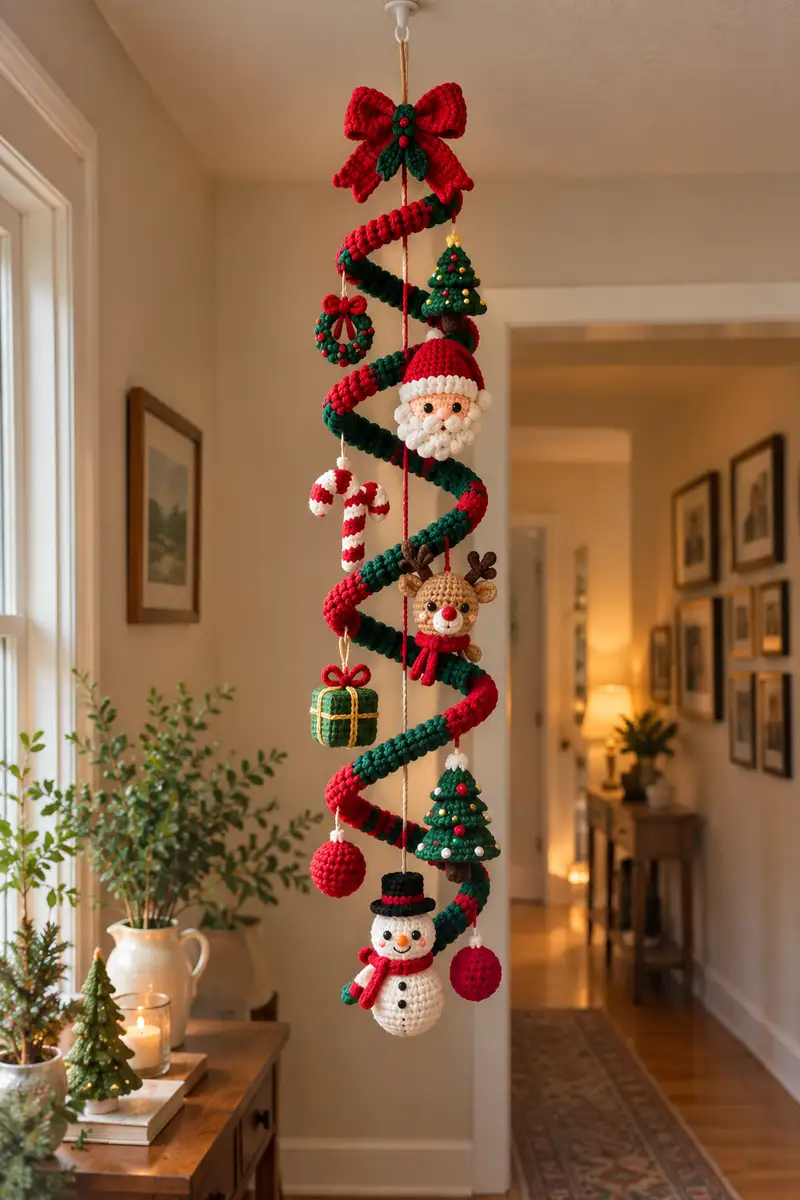
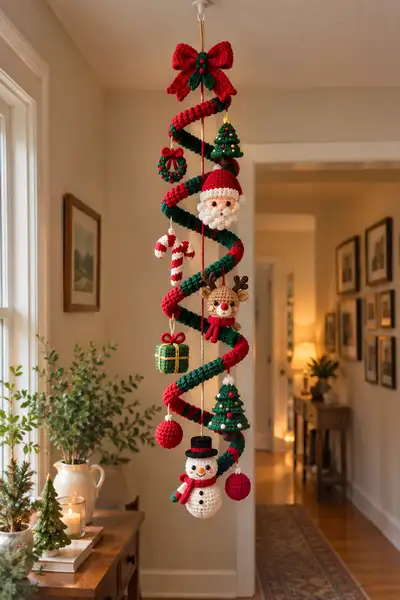
A cheerful hanging spiral garland decorated with tiny crochet ornaments — Santa, snowman, reindeer, mini tree, gift, candy canes, baubles and a bow topper. Deep red and forest green stripes coil down a sturdy crocheted tube while small, detailed amigurumi pieces dangle at intervals for a playful holiday centerpiece. This pattern includes full round-by-round instructions for every ornament and the spiral base, with tips for stuffing, assembly and color changes.
Progress Tracker
0% Complete
— Spiral Core (make 1 long tube) :
Info :
This spiral core is a long crocheted tube worked in continuous rounds. You will make two colors of yarn alternate in short stripe sections to create the visual spiral. Work tightly so stuffing does not show. Final length of tube before coiling should be approximately 100-120cm depending on how tight you coil; this sample used 110cm. Use stitch marker to mark round starts.
Round 3 :
(1 sc, inc) x 6 (18)
Round 4 :
(2 sc, inc) x 6 (24)
Round 5 :
(3 sc, inc) x 6 (30)
Round 6 :
(4 sc, inc) x 6 (36)
Round 7 :
1 sc in each st (36)
Info :
At the end of round 7 you have the diameter that works well as a sturdy tube about 1.8-2.0 cm across. If you prefer a narrower tube, stop increasing one round earlier and omit round 6 increase.
Round 8-11 :
1 sc in each st (36)
Info :
Begin color striping now. Alternate every 4 rounds for a wide stripe. For tighter alternating stripes change every 2 rounds. We'll use 4-round stripes: Rounds 12-15 = red, 16-19 = green, etc. Carry unused yarn inside the tube and crochet over tails for cleaner transitions.
Round 12-15 :
1 sc in each st using deep red (36)
Round 16-19 :
1 sc in each st using forest green (36)
Info :
Continue alternating 4 rounds red / 4 rounds green until your tube measures approximately 100-110 cm or until you have used desired yarn. This sample used 28 stripe repeats (112 rounds of stripes after the foundation) culminating in a long coil. Keep counting rounds to track final length: each 4-round stripe section adds to length.
Round 20-131 :
Repeat rounds of 4 red then 4 green in sequence: 1 sc in each st (36). Maintain continuous rounds; do not join. Use stitch marker at the start of each 4-round stripe to count repeats (36)
Info :
After completing the long tube, fasten off leaving a 30 cm tail to sew the ends together. Stuff the tube very lightly—this tube functions mostly as a structural coil, so overstuffing will prevent a nice spiral. Insert fiberfill only to maintain roundness but keep it flexible for coiling.
Round 132 :
1 sc in each st to close any small gaps and tidy ends (36)
Info :
Shape the coiled spiral by wrapping the tube around a dowel or by winding it tightly by hand in a helical form. Use pins or temporary ties to secure the shape while you plan attachment points for ornaments. Sew the two ends together invisibly using the long tail and mattress stitch. If you want a stronger base, run a length of strong cord down the center and stitch the tube over it before coiling.
— Bow Topper :
Info :
The bow is composed of two identical loops and a center knot piece. Use deep red yarn. The loops use BLO to give a ridge definition.
Round 3 :
(1 sc, inc) x 6 (18)
Round 4 :
(2 sc, inc) x 6 (24)
Round 5-8 :
1 sc in each st BLO (24)
Info :
Turn the piece flat, fold to form bow loop and gather center. Sew through layers to hold shape. Make two loops identical.
Round 9 :
Flatten loop and sc through both sides across the short edge to join (approx 12 sc) (12)
Round 10 :
1 sc in each st (12)
Round 11 :
Fasten off leaving long tail. Repeat to make second loop.
Round 12 (center knot) :
6 sc in mr (6)
Round 13 :
1 sc in each st (6). Fasten off leaving long tail to wrap around bow center and sew all pieces together. Add 3 small green leaf shapes by ch 6, sc back along chain; fasten off. Sew leaves and a trio of tiny green bobbles at center for holly effect.
— Small Wreath (ornament) :
Info :
Worked with green yarn using puff stitches to create a textured ring. Make 1 or more. Use small red bobbles for berries.
Round 1 :
Ch 8, join to form ring with sl st, ch1
Round 2 :
Work 24 sc evenly around ring (24)
Round 3 :
*ch2, puff stitch (yarn over, insert, pull up loop 4 times, yarn over, pull through all loops), sl st in next st* around to create 12 puff clusters. Adjust spacing so they sit evenly. Fasten off and sew ends behind ring.
Info :
Sew three small red French knots or use tiny red seed beads at one side for berries. Use short piece of red yarn to make a tiny bow and sew to wreath.
— Candy Cane Pair (make 2 small canes) :
Info :
Each candy cane is a small curved tube with red/white stripe spiral. Work in rounds and shape by bending and sewing. Use white as base, add red stripes every two rounds.
Round 3-6 :
1 sc in each st (12) — work two rounds white, then switch to red for two rounds, continue alternating for 8 rounds total
Info :
After length is achieved (approx 12-14 rows), bend to form a cane curve and sew through both sides to hold the curve. Stuff very lightly if you want a plumped cane; these look best lightly filled or unfilled for a slim profile.
— Mini Gift Box :
Info :
Worked as a small cube/box approximation with green body and yellow ribbon detail. Size: about 3 cm cube. Use single crochet in rounds to build small spherical-cube hybrid and add ribbon with surface slipstitch.
Round 3 :
(1 sc, inc) x 6 (18)
Round 4-7 :
1 sc in each st (18)
Round 8 :
(1 sc, dec) x 6 (12)
Info :
Fasten off and stuff lightly before final closing. Use yellow yarn to chain small bands and surface slip stitch across the outside to create ribbon crossing; add a small bow on top sewn into place.
— Small Decorated Tree (make 2) :
Info :
Worked in a cone shape with textured clusters as branches to allow beads to be sewn on as ornaments. Add a tiny brown trunk base and a gold bead star on top.
Round 3 :
(1 sc, inc) x 6 (18)
Round 4 :
(2 sc, inc) x 6 (24)
Round 5 :
1 sc in each st (24)
Round 6 :
*sc, ch2, puff in next stitch* around to create 8 puff clusters. (24)
Round 7 :
1 sc in each st (24)
Round 8 :
*sc in next 2, puff in next* repeat (24)
Round 9 :
1 sc in each st (24)
Round 10 :
Switch to brown yarn, sc 6 in a small tube for trunk (approx 6 rounds 6 sc = 6) Fasten off leaving tail to sew trunk to base of tree.
Info :
Sew small beads or seed beads into some puff clusters as ornaments. Add gold bead at tip for star. Stuff tree very lightly; more stuffing flattens the puffs so prefer minimal stuffing.
— Round Bauble (small ornaments) :
Info :
Classic small spherical baubles in red. Work tightly and stuff firmly with fiberfill. Use a loop of cord or a small chain of white stitches on top for hanging loop.
Round 3 :
(1 sc, inc) x 6 (18)
Round 4 :
(2 sc, inc) x 6 (24)
Round 5-7 :
1 sc in each st (24)
Round 8 :
(2 sc, dec) x 6 (18)
Round 9 :
(1 sc, dec) x 6 (12)
Round 10 :
6 dec (6) — Stuff firmly and close, leaving small tail to create hanging loop with chain 6 and sl st back through chain, secure and weave in end.
— Santa Face (head only, make 1) :
Info :
Santa is a small head ornament with a red hat, white beard comprised of looped bobbles, and small facial embroidery. Use flesh-tone yarn for face, white for beard and hat trim, red for hat.
Round 1 :
6 sc in mr using flesh-tone (6)
Round 3 :
(1 sc, inc) x 6 (18)
Round 4 :
(2 sc, inc) x 6 (24)
Round 5 :
(3 sc, inc) x 6 (30)
Round 6-8 :
1 sc in each st (30)
Info :
Place safety eyes between rounds 7-8 approximately 6-7 stitches apart depending on desired cute expression. Embroider small nose later with peach/orange yarn or add a tiny bead.
Round 9 :
(3 sc, dec) x 6 (24)
Round 10 :
(2 sc, dec) x 6 (18)
Round 11 :
Begin adding beard: using white yarn, attach at round 8 area, make looped bobbles across bottom half to create beard texture. For each stitch across front 12 stitches: ch2, pull up long loop through same stitch 5 times, pull through to close loop, secure with sc behind loops. Work neat row of loops to simulate curly beard. (beard area approx 12 loops)
Round 12 :
Stuff head lightly. Continue shaping: (1 sc, dec) x 6 (12)
Round 13 :
6 dec (6) — Fasten off leaving long tail to sew hat on and close. Finish stuffing before final closure.
Info :
Work hat separately: using red yarn, make small cap that sits over top 10 rounds of head. Add white band using white yarn with puff bobbles or surface loops for trim. Sew hat onto head and secure. Add small white pom or bobble at tip.
— Reindeer Head (make 1) :
Info :
Reindeer head uses tan yarn for head, darker brown for antlers and lighter red for nose. Make rounded head with small flatter muzzle and embroidered eyes. Antlers are small branched tubes sewn into head top.
Round 3 :
(1 sc, inc) x 6 (18)
Round 4 :
(2 sc, inc) x 6 (24)
Round 5 :
(3 sc, inc) x 6 (30)
Round 6-8 :
1 sc in each st (30)
Round 9 :
(3 sc, dec) x 6 (24)
Round 10 :
(2 sc, dec) x 6 (18)
Round 11 :
Place a small oval muzzle: in tan, ch6, sc back along chain to form small oval, close and stuff lightly. Sew the muzzle centered on rounds 6-8 of head. Embroider nose with red yarn or sew on tiny red bead.
Round 12 :
(1 sc, dec) x 6 (12) — Stuff head firmly now before last decreases
Round 13 :
6 dec (6) — Fasten off leaving long tail for sewing. Create antlers separately.
Antlers (make 2) :
Ch 2, 3 sc in 2nd ch (3), ch2, turn and sc across (3), at base sc 6 around to make small flange. For each antler branch, make a small ch3 extension with sc across to simulate tine. Make two antlers and sew into top of head, sewing securely and optionally reinforcing with floral wire inside antlers for stability.
Info :
Sew a tiny scarf around neck area of reindeer using red yarn: ch 30 and work hdc back along chain to create scarf, fray ends slightly or add little fringe by knotting small strands along the ends.
— Snowman (make 1 full body) :
Info :
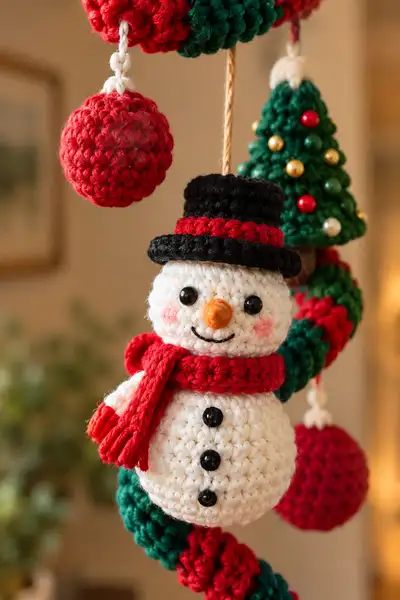
The snowman is constructed as two spheres stacked: a small head and a larger body attached. Head uses 10mm safety eyes, orange carrot nose, embroidered smile, and a small top hat worked in black with red trim. Scarf is worked as a small rectangle with fringe.
Head Round 1 :
6 sc in mr (6)
Head Round 3 :
(1 sc, inc) x 6 (18)
Head Round 4 :
(2 sc, inc) x 6 (24)
Head Round 5 :
(3 sc, inc) x 6 (30)
Head Round 6-8 :
1 sc in each st (30)
Info :
Place 10mm safety eyes between rounds 7-8 spaced about 8-9 sts apart. Embroider small rosy cheeks later or apply blush. Add a tiny carrot nose: in orange, make about 6 sc cone (6, inc to 9, 2 rounds) and sew centered between the eyes.
Head Round 9 :
(3 sc, dec) x 6 (24)
Head Round 10 :
(2 sc, dec) x 6 (18)
Head Round 11 :
Begin stuffing head firmly. (1 sc, dec) x 6 (12)
Head Round 12 :
6 dec (6). Close and fasten off leaving long tail for sewing to body.
Body Round 1 :
6 sc in mr (6)
Body Round 3 :
(1 sc, inc) x 6 (18)
Body Round 4 :
(2 sc, inc) x 6 (24)
Body Round 5 :
(3 sc, inc) x 6 (30)
Body Round 6 :
(4 sc, inc) x 6 (36)
Body Round 7-12 :
1 sc in each st (36)
Info :
Stuff body firmly but leave top opening sufficiently large to sew the head on securely. Use extra fiberfill at the base to help the snowman sit balanced when used as a free ornament.
Body Round 13 :
(4 sc, dec) x 6 (30)
Body Round 14 :
(3 sc, dec) x 6 (24)
Body Round 15 :
(2 sc, dec) x 6 (18)
Body Round 16 :
(1 sc, dec) x 6 (12) — Stuff and close with 6 dec (6). Fasten off leaving long tail.
Info :
Sew head to body using long tail and mattress stitch, matching rounds until seam is smooth. Add three small black beads or embroidered buttons down the front of the body. Work scarf: ch 30 in red, hdc across chain for 6 rows, fasten off and add fringe by knotting 6 short strands along each short edge. Attach scarf around neck and add small black top hat: make a small cylinder in black, add red band and brim by working sc in rounds and a wider flat brim with hdc.
— Snowman Hat (small) :
Round 1 :
6 sc in mr (6) with black
Round 3-4 :
1 sc in each st (12)
Round 5 :
Work flat brim: ch1, rotate and sc 24 evenly spaced around bottom edge (24) Fasten off and stitch a red band with surface sc around base of crown.
— Snowman Scarf :
Row 1 :
Ch 30, hdc in 3rd ch from hook, hdc across (28 hdc)
Row 2-6 :
Ch2, turn, hdc across (28 hdc)
Info :
Fringe: cut 6 strands of yarn about 6 cm long, fold in half and pull through edge stitch to make fringe knots on each short side. Wrap around neck and sew ends in place.
— Snowman Buttons & Face Embroidery :
Info :
Sew three small black beads down front as buttons. Embroider smile with backstitch and use tiny blush or pastel chalk for cheeks. Securely knot and weave all ends inside body.
— Assembly & Hanging Cord Preparation :
Info :
Cut a length of strong twine or cotton cord for hanging. Mark desired attachment points along spiral coil for each ornament (top to bottom spacing in sample: bow at top, 8cm down small wreath, 10cm down mini tree, 10cm Santa head, 12cm candy canes, 10cm reindeer, 12cm gift, 10cm bauble, 15cm second tree, 18cm snowman at bottom). Adjust distances to taste. Use a mattress stitch to sew small loops of yarn or use short chains at top of each ornament as hanging loops to thread onto cord.
Round 1 :
For each ornament attach a 6-10 cm hanging loop: ch 20 in white, sl st to form loop then slip knot or sew tails inside ornament when attaching. For heavier ornaments like snowman, use 15-20 cm cord segments and reinforce with additional stitching through ornament top.
Info :
Pin ornaments in place on spiral and step back to test spacing. Once satisfied, permanently stitch each hanging loop to the spiral tube through several stitches on the tube, then tie off and weave tails inside tube to hide. Use a small dab of fabric glue on knot for extra security if gifts will be handled frequently.
— Final Finishing Touches :
Info :
Weave in all yarn tails securely. If adding small beads for tree decorations, sew on beads with a needle and secure with a small knot inside the ornament. For sparkle, you can add small sequin beads or metallic thread trims. Create top loop on bow to hang entire garland from ceiling hook: loop cord through bow center and tie a strong knot. Trim any stray fibers and lightly steam-block pieces if desired to relax stitches (do not press directly on beads or safety eyes).
This festive hanging garland combines classic amigurumi techniques with charming holiday details to create a joyful centerpiece for your home. Each tiny ornament is carefully shaped and sewn to a coiled spiral to give a sense of movement and cheer. The pattern is rich in small techniques—looped beards, puff stitches for trees, and striped spirals—that make each element satisfying to complete. 🎄🧶 Enjoy stitching this seasonal decoration and share the finished piece with loved ones — it makes a wonderful handmade gift and a cozy addition to any entryway. Happy crocheting!