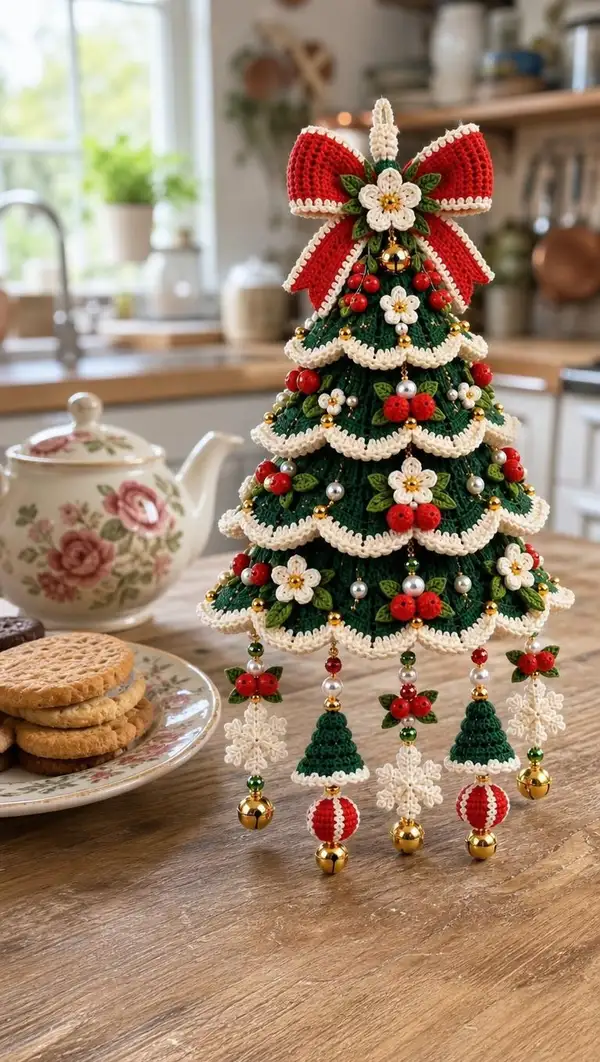
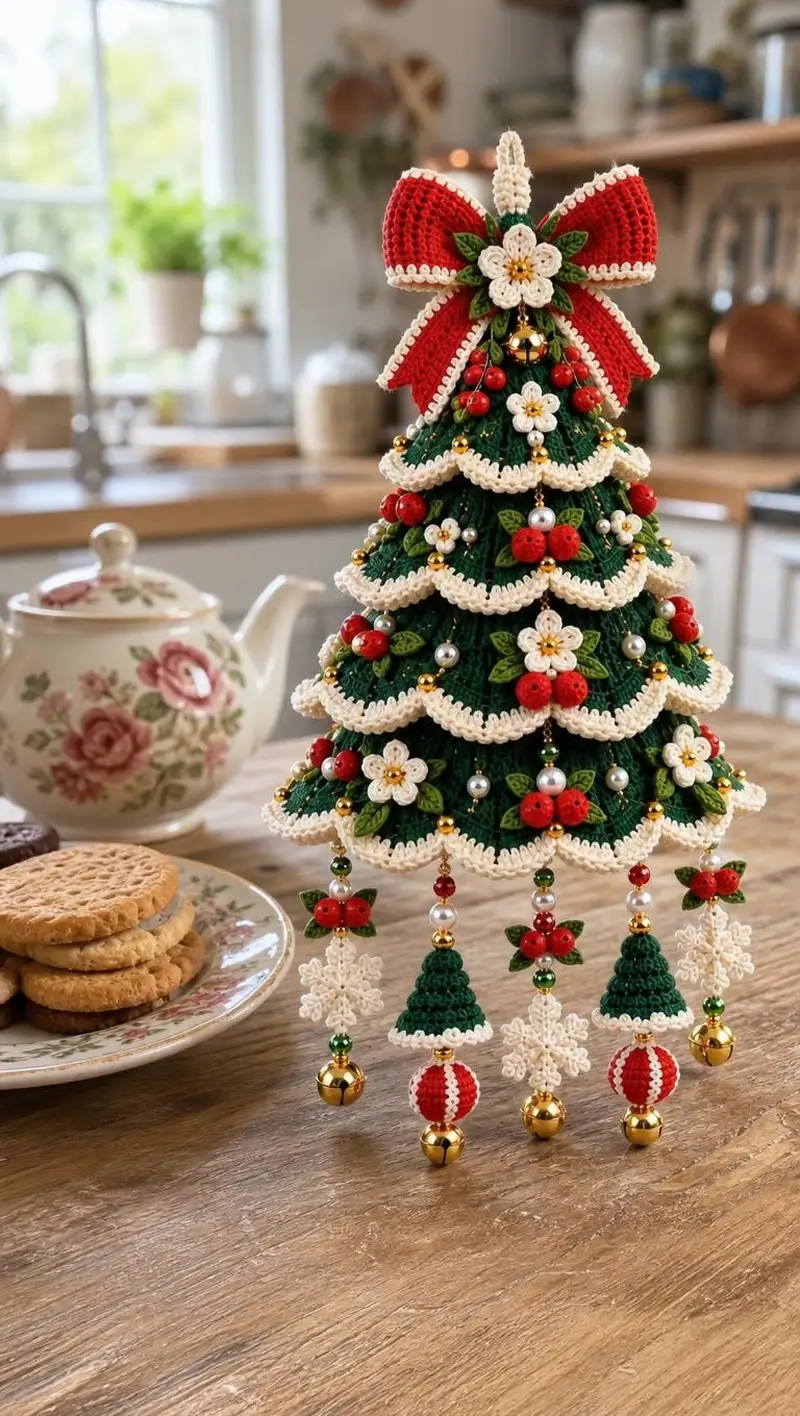
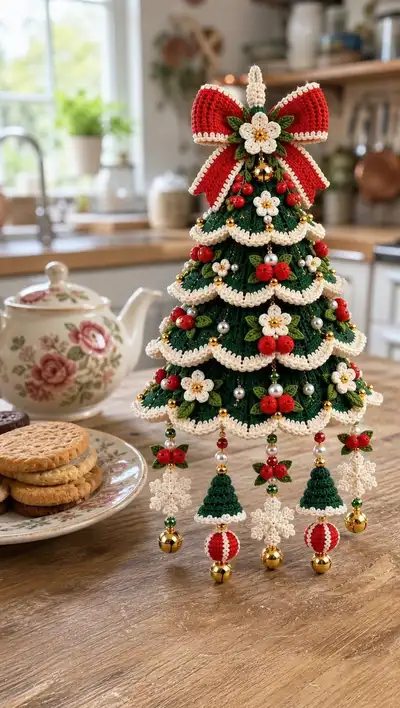
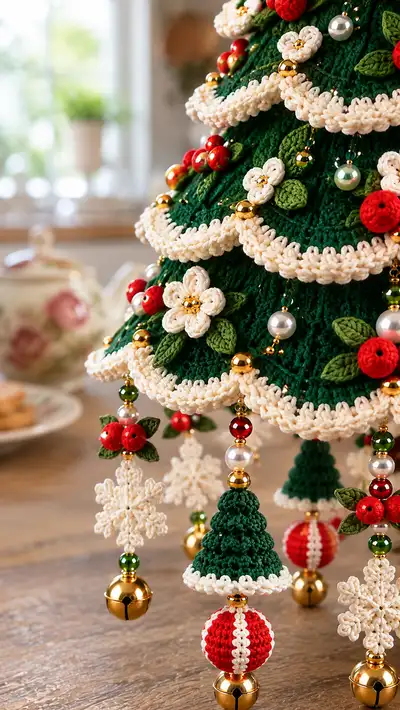
Create a stunning tiered crochet Christmas tree ornament with scalloped garlands, delicate cream flowers, tiny green leaves, red berries and dangling charms. This richly detailed tabletop tree is worked in rich green with cream edging and accented with small crochet baubles, pearl beads and tiny bells. The finished piece is perfect as a holiday centerpiece or a special handmade gift.
Progress Tracker
0% Complete
— Tree Cone (Main Structure) :
Round 1 :
6 sc in magic ring (6)
Round 3 :
(1 sc, inc) x 6 (18)
Round 4 :
(2 sc, inc) x 6 (24)
Round 5 :
(3 sc, inc) x 6 (30)
Round 6 :
(4 sc, inc) x 6 (36)
Info :
Work these increases in deep forest green. Count carefully. This base round sets the diameter of the cone; if you want a wider tree, add another increase round with (5 sc, inc) x 6 to reach 42 sts.
Round 7 :
(5 sc, inc) x 6 (42)
Round 8 :
(6 sc, inc) x 6 (48)
Round 9 :
(7 sc, inc) x 6 (54)
Round 10 :
(8 sc, inc) x 6 (60)
Info :
At round 10 you should have a firm circular base. If you are using an internal cone form, you can place it now and continue working over it for stability. Keep tension firm to avoid gaps showing stuffing or foam.
Round 11-14 :
1 sc in each st (60)
Info :
Work even rounds to build height. These rounds form the inner structure of the tree cone. Use stitch markers every 10 stitches to help keep track of counts and ensure even decoration placement later.
Round 15 :
(8 sc, dec) x 6 (54)
Round 16 :
1 sc in each st (54)
Round 17 :
(7 sc, dec) x 6 (48)
Round 18 :
1 sc in each st (48)
Round 19 :
(6 sc, dec) x 6 (42)
Round 20-22 :
1 sc in each st (42)
Info :
These rounds form the top cone taper that will underlay the topmost tier. Begin light stuffing into the cone from the bottom if not working over a foam form. Stuff gradually and add more sc rounds for desired height.
Round 23 :
(5 sc, dec) x 6 (36)
Round 24 :
1 sc in each st (36)
Round 25 :
(4 sc, dec) x 6 (30)
Round 26 :
1 sc in each st (30)
Round 27 :
(3 sc, dec) x 6 (24)
Round 28 :
1 sc in each st (24)
Info :
Fasten off leaving a long tail for sewing the cone interior to tiered layers if you are building the tree in sections. Continue lightly stuffing so the cone maintains a slightly firm but not rock-hard center — this allows your tiers to sit smoothly on the cone.
— Tier 1 (Topmost Tier) :
Round 1 :
6 sc in magic ring (6)
Round 3 :
(1 sc, inc) x 6 (18)
Round 4 :
(2 sc, inc) x 6 (24)
Round 5 :
1 sc in each st (24)
Info :
This small round will form the top scalloped tier that wraps around the cone. Work tightly in forest green so the tier keeps its shape. Join to the cone by placing this round around the cone and sewing evenly through the back loops.
Round 6 :
Change to cream yarn. Join in back loops only and work: 1 sc in each st BLO (24)
Round 7 :
Work scallop edge: *skip next st, 5 dc in next st, skip next st, sl st in next st* repeat around to create scallops. (approx 6 scallops)
Round 8 :
Picot trim: In each scallop work (ch3, picot, sl st into top of scallop) to create delicate picot edge. Fasten off. (6 picoted scallops)
Info :
Sew this tier to the cone at the position where Round 22-24 of the cone matches the tier height. Use small, invisible stitches through the BLO row to anchor scallops neatly.
— Tier 2 :
Round 1 :
8 sc in magic ring (8)
Round 3 :
(1 sc, inc) x 8 (24)
Round 4 :
(2 sc, inc) x 8 (32)
Round 5 :
1 sc in each st (32)
Info :
Place this tier slightly lower on the cone to create layered branches. Pin before sewing to check overlap distance between tiers. You want the scalloped cream trim to overlap by about 6-10mm onto the lower tier.
Round 6 :
Change to cream yarn. Join in BLO and 1 sc in each st BLO (32)
Round 7 :
Scallop row: *skip 2 sts, 7 dc in next st, skip 2 sts, sl st in next st* repeat around (approx 8 scallops)
Round 8 :
Work picot scallop edge into each scallop top with (ch3, picot, sl st), finish and fasten off (8 picoted scallops)
Info :
Sew Tier 2 on top of cone at a location roughly 4-5 rounds below Tier 1 so overall tree flares outward. Ensure scallops are evenly spaced to create a balanced look.
— Tier 3 :
Round 1 :
10 sc in magic ring (10)
Round 3 :
(1 sc, inc) x 10 (30)
Round 4 :
(2 sc, inc) x 10 (40)
Round 5 :
1 sc in each st (40)
Info :
Tier 3 is a larger band. Work in forest green. Add an additional even round if you want more height before scallop edging.
Round 6 :
Change to cream. Join in BLO and 1 sc in each st BLO (40)
Round 7 :
Scallop row: *skip 2 sts, 9 dc in next st, skip 2 sts, sl st in next st* repeat around (approx 10 scallops)
Round 8 :
Picot finish in each scallop top. Fasten off and set aside.
Info :
When attaching to cone, ensure that the scallops tuck neatly under the tier above. Use mattress stitch/whip stitch through the BLO row to anchor tiers to the cone and to each other for a seamless look.
— Tier 4 (Mid) :
Round 1 :
12 sc in magic ring (12)
Round 3 :
(1 sc, inc) x 12 (36)
Round 4 :
(2 sc, inc) x 12 (48)
Round 5 :
1 sc in each st (48)
Round 6 :
Change to cream. Join in BLO and 1 sc in each st BLO (48)
Round 7 :
Scallop: *skip 3 sts, 11 dc in next st, skip 3 sts, sl st in next st* repeat (approx 12 scallops)
Round 8 :
Picot trim on scallop tops, fasten off.
Info :
Work tidy joins: weave cream tail along the BLO stitches and pull to marry the scalloped edge to the green tier for a neat join line. This mid-tier often carries more decoration like flowers and bead garlands.
— Tier 5 :
Round 1 :
14 sc in magic ring (14)
Round 3 :
(1 sc, inc) x 14 (42)
Round 4 :
(2 sc, inc) x 14 (56)
Round 5 :
1 sc in each st (56)
Round 6 :
Change to cream. Join in BLO and 1 sc in each st BLO (56)
Round 7 :
Scallop row: *skip 3 sts, 13 dc in next st, skip 3 sts, sl st* repeat around (approx 14 scallops)
Round 8 :
Picot into each scallop top; fasten off. These wider scallops will drape beautifully and hide the seam to the cone.
Info :
Sew Tier 5 to cone at lower placement and ensure that tiers above overlap slightly for a lush look. Add beads/pearls to this band if you want extra sparkle.
— Tier 6 (Bottom Full Skirt) :
Round 1 :
16 sc in magic ring (16)
Round 3 :
(1 sc, inc) x 16 (48)
Round 4 :
(2 sc, inc) x 16 (64)
Round 5 :
1 sc in each st (64)
Round 6 :
Change to cream. Join in BLO and 1 sc in each st BLO (64)
Round 7 :
Scallop row: *skip 4 sts, 15 dc in next st, skip 4 sts, sl st* repeat around (approx 16 scallops)
Round 8 :
Picot edge across scallops. Fasten off and block lightly to shape scallops if desired.
Info :
Bottom tier anchors all hanging charms. Consider reinforcing this tier's back loops with a second row of stitches or by sewing on a narrow strip of felt from inside to carry the weight of charms and beads securely.
— Decorative Bow (Topper) :
Round 1 :
With red yarn, ch 20, sl st to join, do not twist to work in rows then ch1 and work 40 sc across the round join to make a long strip to shape into a bow (40)
Round 2 :
1 sc in each st across (40)
Round 3 :
1 sc in each st BLO (40) to create slight ridge for bow fold
Round 4 :
Fold strip into bow shape (approx 10cm wide), cinch center using cream yarn and sew tightly. Fasten off.
Round 5 :
Bow tails: make two identical tails. Ch 12, turn and sc across 12 ch, 3 rows. Change to cream and add picot along outer edge, fasten off. Attach to back of bow.
Info :
For extra structure, press bow on a towel with a warm steam iron or insert a small ribbon inside the fold. Sew the bow to the topmost cone point securely, catching a few rounds of the cone interior to anchor it.
— Small Flowers (Make 6) :
Round 1 :
6 sc in magic ring (6)
Round 3 :
Change to cream; *ch3, sl st into next st* repeat 6 times to make 6 petals (12 sl st) (visual petals)
Round 4 :
Work 5 hdc into each ch3 loop, sl st to base to form puffed petal (6 petals)
Round 5 :
Fasten off leaving tail. Sew a small gold bead into center of each flower using gold thread or embroidery thread.
Info :
Sew these flowers evenly around Tier 3 and Tier 4, spacing them roughly every 6 to 8 stitches. Use pinning to place before stitching.
— Little Leaves (Make 18) :
Round 1 :
With leaf green, ch 6, sl st in 2nd ch from hook, sc in next, hdc in next, dc in next, sl st in last, fasten off (tiny leaf approx 5 sts long)
Round 2 :
Optional: For fuller leaves, work along one side: ch1, 1 sc in base, 1 hdc, 1 dc, 1 hdc, 1 sc, sl st to tip to create a small pointed leaf, fasten off
Info :
Sew leaves in pairs behind each flower or berry cluster to mimic the photo. Use three leaves for fuller clusters. Position leaves with veins pointing outward for a natural look.
— Red Berry Clusters (Make 9 clusters of 3 berries) :
Round 1 :
With red yarn, 6 sc in magic ring (6) - makes one berry
Round 2 :
6 sc (6) - work one round even to maintain roundness. Fasten off leaving tail and stuff lightly before closing.
Round 3 :
Make 3 berries per cluster and sew together in triangular cluster with leaves behind. Secure tightly.
Info :
Sew clusters strategically around Tier 2-4 and near bottom scallops as pictured. Add a little gold seed bead at the inner point to mimic berry shine.
— Mini Hanging Tree Charm (Make 3) :
Round 1 :
6 sc in magic ring (6)
Round 3 :
(1 sc, inc) x 6 (18)
Round 4 :
1 sc in each st (18)
Round 5 :
(2 sc, inc) x 6 (24)
Round 6 :
1 sc in each st (24)
Round 7 :
Change to cream. Join and 1 sc in each st BLO (24)
Round 8 :
Scallop: *skip 2 sts, 7 dc in next st, skip 2 sts, sl st* repeat around (approx 8 scallops). Fasten off leaving tail for hanging string.
Info :
Before fastening off completely, string a thin wire through the center of the mini tree and add beads above to form the hanging assembly. Attach a small jingle bell at the bottom with a jump ring.
— Striped Ball Ornament (Make 3) :
Round 1 :
6 sc in magic ring (6)
Round 3 :
(1 sc, inc) x 6 (18)
Round 4 :
(2 sc, inc) x 6 (24)
Round 5 :
(3 sc, inc) x 6 (30)
Round 6 :
Change color to cream and work 1 sc in each st around (30) to create a band
Round 7 :
Change back to red and work 1 sc around (30)
Round 8 :
Begin decrease: (3 sc, dec) x 6 (24)
Round 9 :
(2 sc, dec) x 6 (18)
Round 10 :
Stuff lightly, (1 sc, dec) x 6 (12)
Round 11 :
6 dec (6). Fasten off and close. Attach a tiny bell to bottom via jewelry wire.
Info :
String beads of alternating gold and pearl above the ball to echo the photo. Use small jump rings or knot a loop at top for hanging.
— Snowflake Motif (Make 4) :
Round 1 :
Ch 6, sl st to form ring (6)
Round 2 :
*ch5, sl st into ring* repeat 6 times to produce 6 points
Round 3 :
In each ch5 loop: (sc, hdc, dc, hdc, sc), sl st to ring
Round 4 :
For smaller decorative points, *ch3, picot, sl st in mid dc of previous round* around each point to give lacy look. Fasten off and block flat.
Info :
These delicate snowflakes hang freely from the bottom scallop in the picture. Reinforce the center with a tiny bead to give a focal point and to conceal the joining knot.
— Hanging Assembly Instructions (Beads & Bells) :
Round 1 :
Select a length of thin beading wire approx 6-8cm per hanging strand. Secure one end by forming a small loop and wrapping with thread; add a small gold bead to hide wrap.
Round 2 :
String beads in pattern: small green bead, medium pearl, gold spacer, small red bead, then the crochet motif (berry cluster/mini tree/ball/snowflake). Finish with a gold bell at the bottom crimped into place. Repeat for each hanging strand as pictured (5-7 strands).
Round 3 :
Attach each strand evenly spaced around the bottom tier by sewing the top loop into the BLO row behind the cream scallop, catching a few stitches of the tier to secure weight.
Info :
Pre-string beads and bells before finishing crochet motifs when possible. This prevents injury to the motif and avoids re-threading small openings. Crimp beads tightly to ensure bells do not slide off.
— Base Cone Finishing & Stand :
Round 1 :
Create a small round base if desired: 6 sc in magic ring, 6 inc (12), (1 sc, inc) x6 (18), 1 sc x 2 rounds to form foot. Fasten off and sew to bottom inside of cone as a stabilizer.
Round 2 :
Alternatively, insert a small wooden bead or coin under the base for weight. Sew bottom scallop tier over this to hide the support.
Info :
If you plan to hang the ornament rather than stand it, leave a loop at the cone top behind the bow. For table-top display, sew a felt circle inside the bottom to protect surfaces and add stability.
— Final Embellishments & Attachment of Flowers, Leaves, Berries :
Round 1 :
Pin all flowers, leaf clusters and berry clusters onto the tree first without sewing to verify pleasing placement. Use the photo as a guide: flowers spaced across tiers 2-4; berries concentrated in clusters next to flowers and along scallop centers.
Round 2 :
Sew motifs in place using matching yarn and small, neat stitches. Anchor each with 4-6 stitches through the motif base to the BLO row of the tier; weave in tails and knot on inside of cone for invisibility.
Round 3 :
Add extra beads and gold seed beads around flower centers by threading small seed beads onto embroidery thread and couching them in place with tiny stitches for sparkle.
Info :
Take time here: well-placed embellishments transform the simple green tiers into the ornate vintage-style tree pictured. Step back and view from all sides before committing to final stitches.
This tiered Christmas tree pattern brings nostalgic charm and handcrafted magic to your holiday décor. Each scallop, flower and berry is carefully placed to produce a lush, layered tree full of personality and sparkle. The hanging charms add movement and whimsy — a delightful project to savor across a few cozy sessions. 🎄🧶✨ Enjoy making this special piece and share it proudly as a festive treasure!