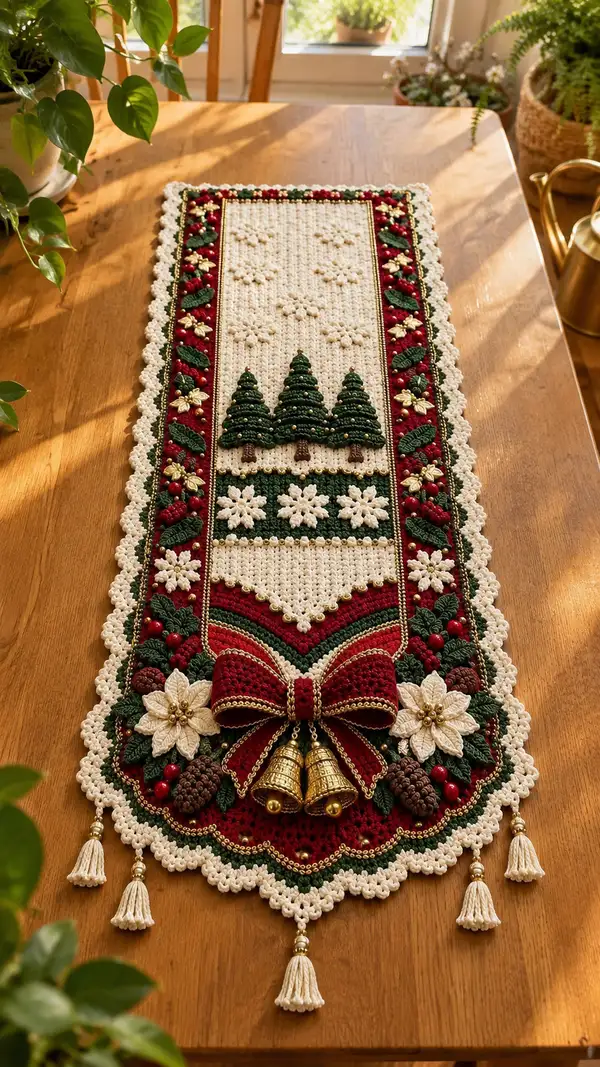
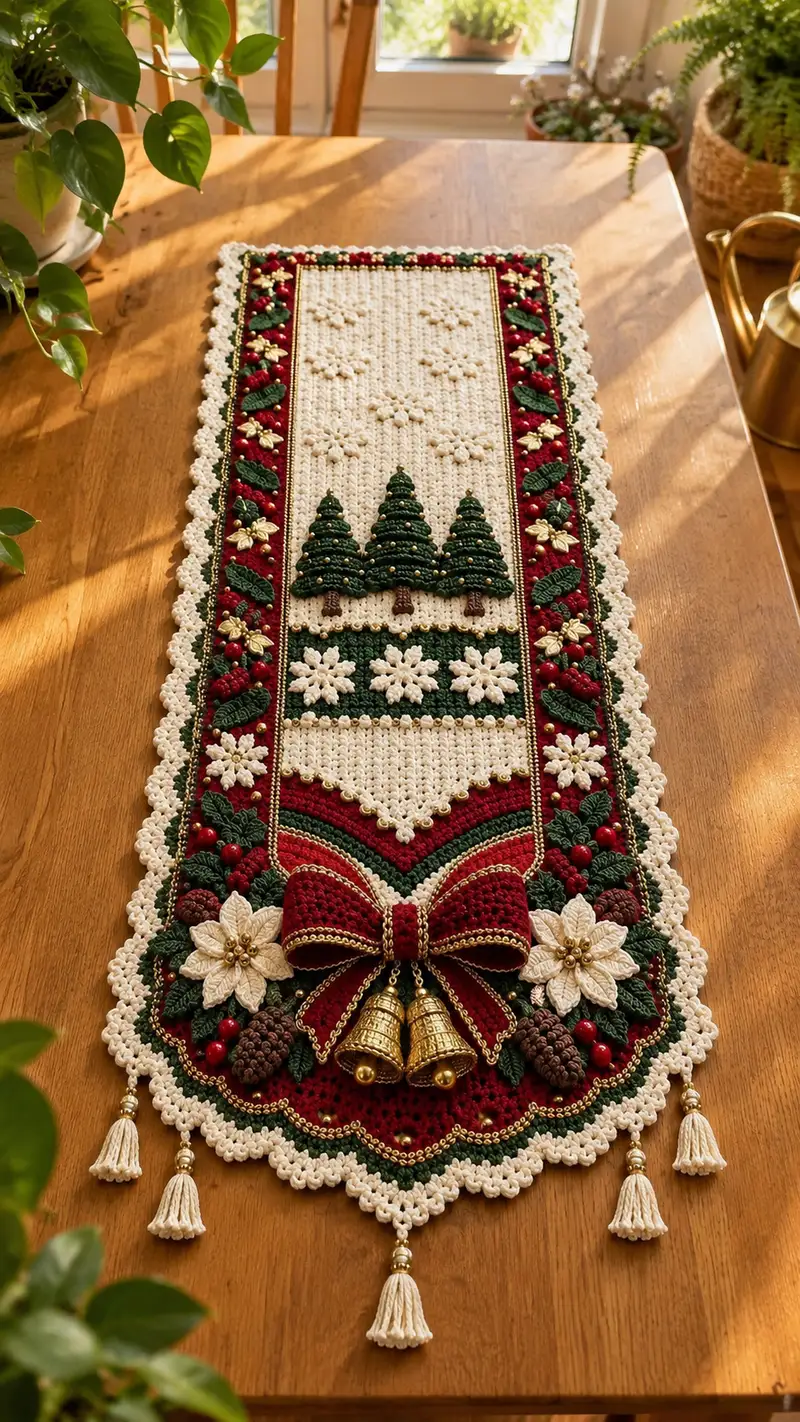
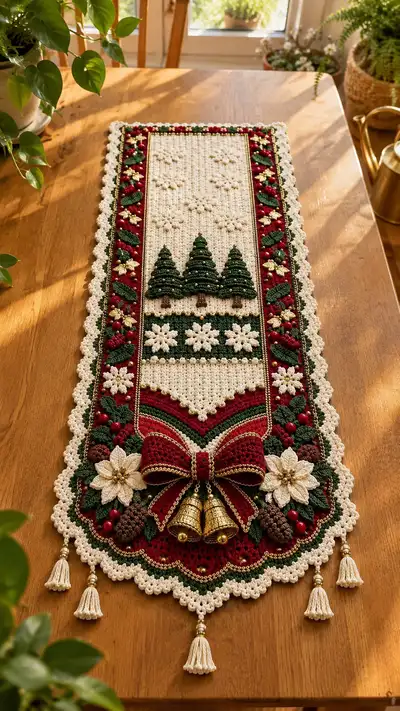
Create a richly textured holiday table runner featuring a cream ribbed center, trio of layered evergreen appliques, poinsettia flowers, berries, pinecones, gold bead accents, and a decorative scalloped edge with tassels. This pattern uses worsted weight yarn in classic Christmas colors and combines simple rows with textured stitches and appliques for an heirloom-quality centerpiece. Detailed round-by-round instructions, placement tips, and assembly notes guide you through every step to recreate the layered look shown.
Progress Tracker
0% Complete
— Materials & Gauge :
Info :
Recommended gauge: Center panel 12 sc x 8 rows = 5cm / 2in in single crochet using 3.5mm hook. Adjust hook size to match this gauge for best fit when assembling borders and appliques.
— Center Panel :
Round 1 :
Ch 81, sc in 2nd ch from hook and across — 80 sc (80)
Round 2 :
Ch 1, turn, sc in each st across (80)
Round 3 :
Ch 1, turn, sc in each st across (80)
Round 4 :
Ch 1, turn, sc in each st across (80)
Round 5 :
Ch 1, turn, sc in first st, *ch1, skip 1 st, sc in next st*, rep across, finish with sc in last st (approx 60 sc + 20 ch spaces) — this creates an open stitch row for subtle texture
Info :
Work center panel in rows. The runner pictured has vertical texture created with alternating sc rows and puff clusters. Keep tension even. Place a stitch marker at the first stitch of every 10th row to help align appliques later.
Round 6 :
Ch 1, turn, sc in each st and in each ch-1 space across (80)
Round 7 :
Ch 1, turn, 1 sc in next 2 sts, *puff in next st (yarn over, insert, yarn over and pull up loop 5 times, yarn over and pull through all loops), ch 1 to close puff, 1 sc in next 2 sts*; rep to end (80 physical stitches, 16 puff placements)
Round 8 :
Ch 1, turn, sc in each st across placing sc between puffs to secure (80)
Round 9 :
Ch 1, turn, work 4 rows sc (Rounds 9-12), 1 sc in each st (80)
Info :
Eye / motif placement note: On Row 13 (counting from foundation), the first panel decorative motif strip begins approximately 7 rows down from top. Mark Row 13 and Row 28 for motif placement. These markers will help align the three pine tree appliques later.
Round 13 :
Ch 1, turn, sc in each st across (80)
Round 14 :
Ch 1, turn, *sc in next 2 sts, skip 1 st, sc in next 3 sts* rep across. This creates a subtle raised ribline used to anchor the decorative band later (80)
Round 15 :
Ch 1, turn, sc in each st across (80)
Round 16 :
Ch 1, turn, work a decorative popcorn row: *(5 dc in next st, remove hook, insert into top of first dc, pull loop through to close popcorn), sc in next 4 sts* rep to end — this will create small raised star points that echo snowflakes (80)
Info :
Stitch Tip :
Popcorn clusters are taller than sc. Work adjacent rows of sc to compress them slightly. If popcorns are too tall, use 4 dc popcorns instead of 5.
Round 17-20 :
Ch 1, turn, sc in each st across for four rows to stabilize popcorn row (80)
Round 21 :
Ch 1, turn, create a centered decorative band across width: sc in first 20 sts, hdc in next 40 sts, sc in final 20 sts (80)
Round 22-24 :
Ch 1, turn, sc in each st across (80)
Info :
Begin lightly blocking and pinning the center panel flat as you complete rows to ensure straighter edges. Blocking after the panel is finished and before sewing border strips will greatly improve final assembly.
Round 25-30 :
Ch 1, turn, sc in each st across (80)
Round 31 :
Ch 1, turn, begin small star groups: *sc2tog over next 2 sts, ch1, sc in next 2 sts, ch1* rep across to form small recessed star shapes (80)
Round 32-36 :
Ch 1, turn, sc in each st across (80)
Round 37 :
Ch 1, turn, sc in first 10 sts, work a row of fpdc (front post double crochet) across next 60 sts to create vertical ridging, sc in final 10 sts (80)
Round 38-40 :
Ch 1, turn, sc in each st across for final three stabilization rows (80)
Info :
Finish center panel. Fasten off leaving long tail for sewing to end strips. Lightly block to measurements: approximately 90cm long x 28cm wide (finished size will vary by gauge). This central panel will receive appliques later; do not attach them now.
— Long Side Border Strip (make 2) :
Round 1 :
Ch 41, sc in 2nd ch and across — 40 sc (40)
Round 2-4 :
Ch 1, turn, sc in each st across (40)
Info :
Change to burgundy yarn now if making the inner red band. Carry the cream yarn inside if you plan to hide it; otherwise fasten off and change color for a neat stripe.
Round 6 :
Ch 1, turn, using burgundy: sc in each st across (40)
Round 7 :
Ch 1, turn, *sc in next 3 sts, bobble in next st (bobble: yarn over, insert, pull up loop 4 times, yarn over and pull through all loops), sc in next 3 sts* rep to end (40)
Round 8-10 :
Switch to green for leaf accents: ch 1, turn, sc in each st across for three rows (40)
Round 11 :
With cream accent, work a row of small sc picot edging along one long side (to be sewn under scallop later): *sc in next st, ch 3, sl st in 3rd ch from hook (picot), sc in next 3 sts* across (40)
Info :
Make two identical strips. These will be sewn along the long edges of the center panel. The 40 chains provide one chain per center panel row for easy alignment when sewing.
Round 12-16 :
Alternate rows of burgundy and green to create a layered vine look: 12 (burgundy), 13 (green), 14 (burgundy), 15 (green), 16 (burgundy) — sc across (40)
Round 17 :
Change to cream and work a final row of sc to match thickness of center (40)
Round 18 :
Fasten off leaving long tail for sewing
— Short End Border Strip (make 2) :
Round 1 :
Ch 81, sc in 2nd ch from hook and across — 80 sc (80)
Round 2-3 :
Ch 1, turn, sc in each st across (80)
Round 4 :
Change to burgundy: ch 1, turn, sc across (80)
Round 5 :
Ch 1, turn, *sc in next 6 sts, bobble in next st* rep across (80)
Round 6-10 :
Switch to green bands and cream accents every other row: sc across to create color striping (80)
Info :
These short strips will be sewn to the ends of the center panel to create the rectangular base. Keep the strip height equal to side strips for balanced layering (we used 10-12 rows here).
Round 11 :
Work a decorative scallop base row in burgundy using shell clusters: *skip 2 sts, 5 dc in next st, skip 2 sts, sl st* rep across (80 shells spaced every 5 sts)
Round 12 :
Fasten off leaving long tail
— Tree Applique (Make 3; medium size) :
Round 1 :
Using green, make 6 sc in magic ring (6)
Round 2 :
Inc in each st around (12)
Round 3 :
(1 sc, inc) x 6 (18)
Round 4 :
(2 sc, inc) x 6 (24)
Round 5 :
Ch 1, turn, work 1 row sc across (24) — this creates a base band
Info :
The tree is constructed in three stacked tiers. Each tier is worked in rows of shells to create the layered look. We'll make the lower tier first, then attach the next two tiers working upward.
Round 7 :
Lower tier: *skip 1 st, 5 dc in next st, skip 1 st, sl st in next st* across for 6 shells (creates triangular lower skirt). Turn and fasten off the row to prepare next tier (24)
Round 8 :
Attach yarn above lower tier to center of piece; work a smaller shell tier for middle: *skip 2 sts, 4 dc in next st, skip 2 sts, sl st* across for 5 shells — fasten off (approx 20)
Round 9 :
Attach yarn and work top tier: *skip 3 sts, 3 dc in next st, skip 3 sts, sl st* across for 4 shells — fasten off (approx 16)
Round 10 :
Using brown yarn, embroider a small trunk beneath tiers: ch 4, sc back along chain into trunk area, fasten off and stitch trunk into place (approx 3-4 sts)
Info :
To give the tree dimensional depth, take a tiny amount of polyester fill and place it between lower and middle tier before sewing middle tier closed. Add small gold beads to the tree by sewing them across shell ridges to mimic decoration.
Round 12 :
Repeat this process to make three identical trees. Two trees will be spaced 6 sts apart and the center tree 8 sts from edges to reproduce the look in photo.
— Snowflake Motif (Make 6) :
Round 1 :
Make a magic ring, ch 3 (counts as dc), 11 dc in ring, join (12) — form round base
Round 2 :
Ch 2, *picot (ch 3, sl st in 3rd ch from hook), ch 2, sl st in next st* rep 6 times to form 6 points — fasten off
Round 3 :
Whipstitch small cream beads into center and tips of snowflake to add sparkle
Info :
These snowflakes are small and light. Sew them to the center panel at rows previously marked (Rows 16, 22, and 30) with equal lateral spacing. Use small blanket stitch to keep them flat.
— Poinsettia Flower (Make 2) :
Round 1 :
Ch 5, join to form small ring, ch 1, 6 sc in ring (6)
Round 2 :
(Ch 6, sl st into same st) x 6 to create 6 loop bases around center
Round 3 :
Working into each loop: *sc, hdc, dc, tr, dc, hdc, sc* to form a pointed petal — rep for all 6 petals
Round 4 :
Make a second layer of 6 smaller petals under the first by joining yarn at base and working *sc, hdc, dc, dc, hdc, sc* into the loop back — gives fullness (6)
Round 5 :
Using small gold beads, stitch 5-7 beads into center and sew the poinsettia to the lower end border area adjacent to the large bow location
Info :
Use a small amount of stuffing in the flower center if you prefer a raised blossom like the photo. Sew flowers to both ends symmetrically.
— Leaf (Make 20) :
Round 1 :
Ch 10, sc in 2nd ch from hook, hdc, 3 dc, hdc, sc, sl st into last — leaf shape (8)
Round 2 :
Turn leaf and work reverse stitches along other side: sc, hdc, 3 dc, hdc, sc to create full leaf; fasten off and block flat
Info :
Leaves are sewn in overlapping pairs along side strips and around bow to mimic holly leaves. Slightly bend the leaves when sewing for realistic curvature.
— Berry / Bobble (Make 20) :
Round 1 :
Using burgundy, ch 2, work 6 sc into 2nd ch from hook to form a small round bobble (6)
Round 2 :
Work a second round of 6 sc around to firm it up if desired (6)
Round 3 :
Fasten off leaving tail for sewing; attach gold bead accents to some berries for sparkle
Info :
Sew berries in clusters of 2-4 with leaves beneath them along the side bands and near the bow. Light stuffing optional.
— Pinecone (Make 4) :
Round 1 :
Ch 6, join to form ring, ch 1, 8 sc into ring (8)
Round 2 :
Work staggered small shell rows: *skip 1 st, 3 dc in next st, sl st* around for 4 shells (8)
Round 3 :
Fasten off and shape shells with a little glue or stitch to hold shells folded — sew to runner bottom corners near bow
Info :
These pinecones are decorative and small. Sew them securely using matching brown yarn and a strong whipping stitch to keep them stable.
— Decorative Bow :
Round 1 :
Using burgundy, ch 31, sc in 2nd ch and across — 30 sc (30)
Round 2-6 :
Ch 1, turn, sc in each st across (30)
Round 7 :
Change to gold cord or a strand of metallic thread: ch 1, sc across (30) — this trains a gold trim in the bow's center stripe
Round 8-9 :
Repeat burgundy sc rows (30)
Round 10 :
Fold the rectangle in half lengthwise and sew the long sides together with mattress stitch, leaving the ends open. Turn right side out and stuff lightly to form full bow loops
Round 11 :
Using remaining burgundy yarn, wrap the center tightly with several passes and secure on the wrong side. Sew a looped tail piece behind bow for attaching bells and hanging trim
Info :
Attach two small craft bells to the center wrap using gold cord and a few secure stitches; conceal knots inside the center wrap. Add bead chains or a metallic trim if desired to mimic the photo.
— Bells & Chains :
Round 1 :
If using purchased metal bells, sew them to the bow center by threading a length of gold cord through bell tops and securing with tight stitches. Add decorative gold beaded chain along bow base using small blanket stitch to tack chain in place.
Info :
Make sure bells are sewn very securely; they are heavy decorative elements and should be reinforced with multiple passes of yarn.
— Scalloped Edge & Final Border :
Round 1 :
Once center panel and border strips are sewn together (see Assembly), with cream yarn join at any corner and work a round of sc evenly along entire perimeter, placing 3 sc in each corner to maintain lay (count will vary with assembly perimeter)
Round 2 :
Ch 1, sc across along straight edge until you reach each shell marker where you want scallops: *skip 2 sts, 7 dc in next st, skip 2 sts, sl st* rep along each side to form scallops. Work 3 shells at each short end to mirror photo (perimeter shells approx 28-34 depending on seam)
Round 3 :
Work an outer picot row in cream: *sc in next 2 sts, ch 3, sl st in 3rd ch from hook* across scallop peaks to add a delicate rim (count match scallop peaks)
Round 4 :
With gold metallic thread, chain a decorative looped line stitched onto the border just inside the scallops. Use small tacking stitches every 6-8 mm to hold chain in place.
Info :
When working scallops, place tassel attachments evenly spaced at scallop valley points (see Tassel section). The scallop count and spacing depend on your final assembled perimeter; aim for even visual spacing rather than exact numeric match.
— Tassels (Make 5) :
Round 1 :
Cut multiple strands of cream yarn approximately 12cm long (fold to form double length). Fold group in half, insert a small loop through the designated scallop valley, pull tails through loop and tighten to form tassel head. Wrap neck with a small scrap of yarn to finish and stitch securely.
Round 2 :
Add a gold bead cap above each tassel and secure with a small drop of fabric glue if desired. Trim tassel ends evenly.
Info :
Tassels are placed along the narrow end shown in photo: one center and two either side for balanced look. Reinforce the attachment strongly because tassels get handled frequently.
— Assembly Preparation :
Info :
Block center panel, side strips, and end strips flat to final dimensions. Lay pieces on a large flat surface and pin together before sewing. Use generous pins and check symmetry from both long edges.
Round 1 :
Sew long side strips to center panel by aligning the 40 chain edge of each long strip to the 40 marked rows on the center panel. Use mattress stitch and work from one end to the other. Repeat for second long strip (seams will be 40 sts long on each side).
Round 2 :
Sew short end strips to ends of the now combined center+side panels matching the short strip width (80 sts) to the runner width (80 sts) using whipstitch or mattress stitch for minimal bulk.
Info :
After initial sewing, check runner perimeter for tension differences. If any side pulls, remove a few stitches and re-stitch slightly looser to lie flat. Blocking again after final assembly will improve scallop definition.
— Motif Placement & Attachment :
Round 1 :
Tree placement: Position three trees centered on the panel band created earlier (Rows 13-19 region). Pin in place: left tree centered at 18 sts from left edge, center tree centered at midline, right tree mirrored at 18 sts from right edge. Sew around base and tack apices lightly so trees keep a slight 3D profile.
Round 2 :
Snowflake placement: Arrange small snowflakes across the cream field at Rows 16, 22, and 30 in neat spacing. Sew flat with small invisible stitch at 6-8 points.
Round 3 :
Poinsettia and bow: Place the large bow at one short end centered horizontally. Position poinsettia flowers and pinecones around the bow and sew firmly, tucking some leaves under the bow band for depth.
Info :
Use a combination of whipstitch and mattress stitch. For three-dimensional elements (berries, pinecones), sew through the base several times and add a dab of fabric glue on underside for extra security if this runner will be used in a high traffic area or outdoors.
— Final Touches :
Round 1 :
Sew gold seed beads along the green vine bands and on tree shells randomly to mimic ornaments. Use a sharp beading needle and strong nylon thread to secure beads through fabric then through yarn loop and back through beads twice for security.
Round 2 :
Weave in all ends using a yarn needle, tucking tails along seams and inside folded bow center for neat finish. Trim all tails close to fabric after weaving them back at least 4-5 cm.
Round 3 :
Final blocking: lay runner flat, mist lightly and pin to measured rectangle. Allow to dry completely before use. Attach any added metal bells with additional stitching through the runner backing for safety.
Info :
Care instructions: spot clean only recommended. If washing is necessary, remove metal trims and hand wash gently; reshape and dry flat to keep scallops intact.
This festive runner is such a joyful project to complete—layered textures, bright seasonal colors, and tiny bead accents come together to form a beautiful holiday centerpiece. Each applique adds a little surprise and the scalloped edge and tassels give handcrafted charm and personality. I hope making this brings you the same cozy pleasure I felt while writing it—it's the perfect piece to dress your table this season. 🎄🧶✨