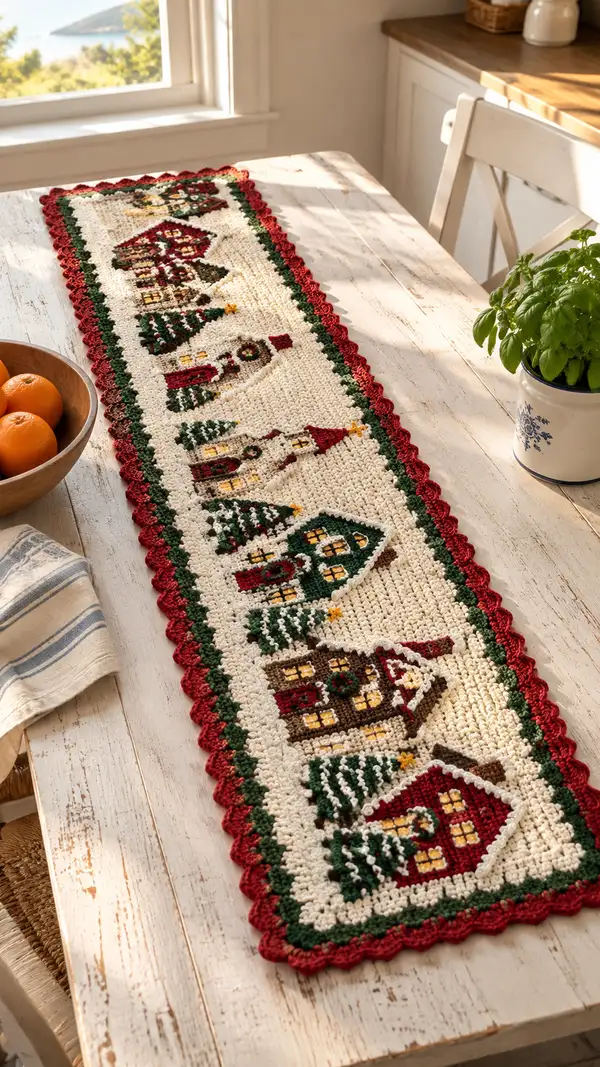
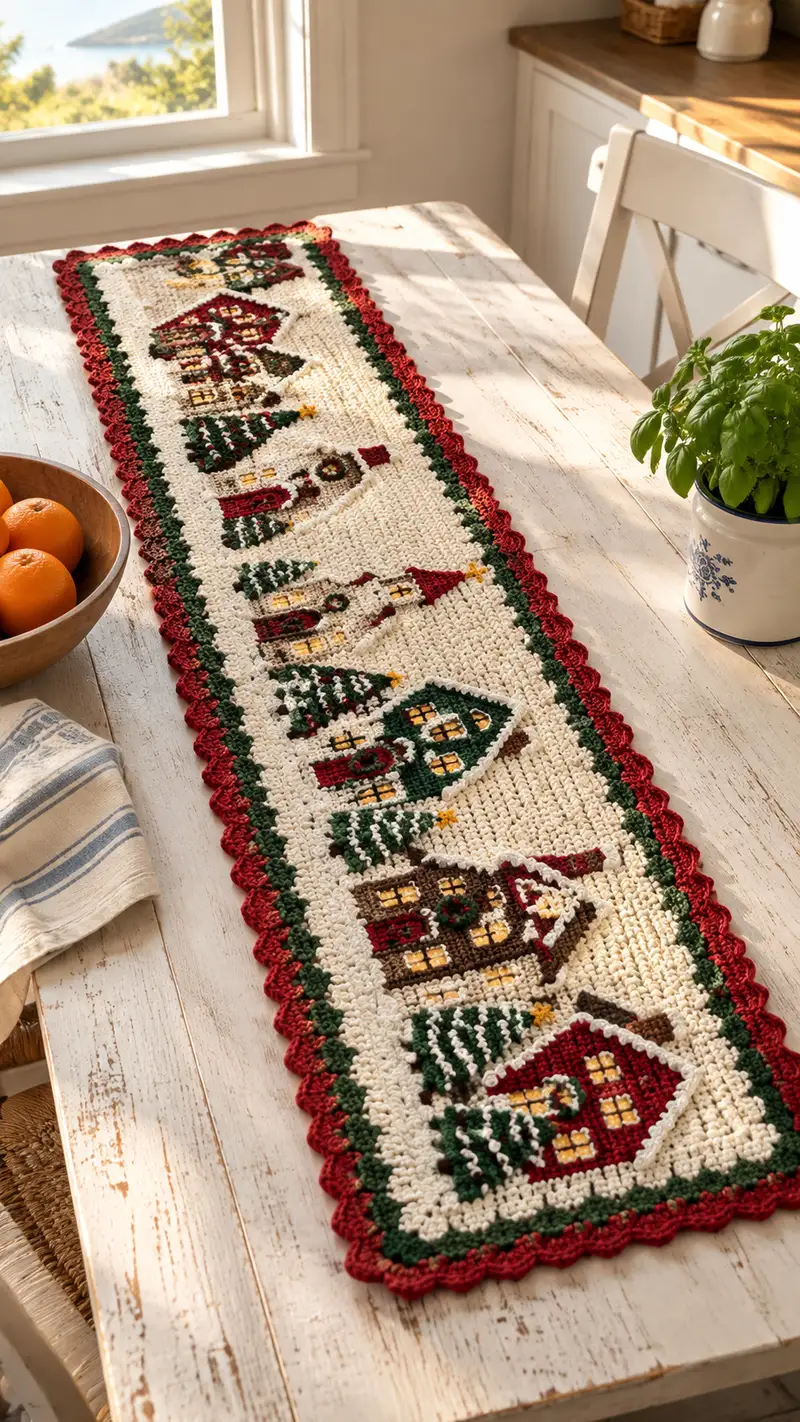
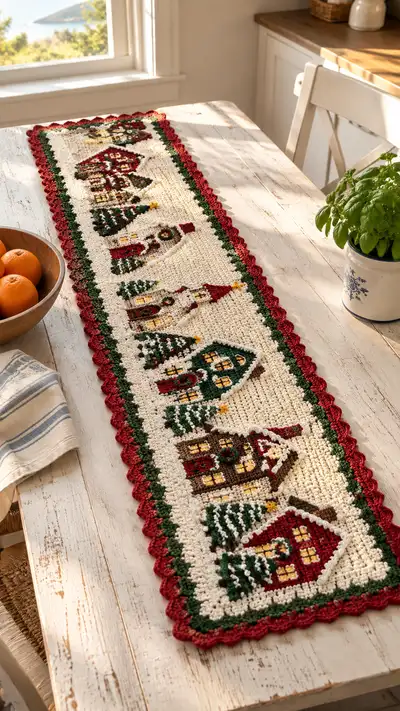
Bring a warm, vintage holiday charm to your table with this long Christmas Village crochet table runner. The design features a cream background with nine quaint houses, snowy evergreens, glowing yellow windows, and a deep green inner border framed by a scalloped red outer edge. Worked in tapestry-style colorwork for crisp, pixel-like motifs and finished with a decorative scallop edging, this runner adds a handmade festive touch to any dining surface.
Progress Tracker
0% Complete
— Notes & Gauge :
Info :
This runner is worked flat in rows using tapestry-style single crochet colorwork (US single crochet). Gauge is approximate; for a dense, decorative panel use a small hook for worsted weight yarn. Sample gauge: 18 sc and 18 rows = 4 inches in single crochet with 4.0mm hook. The pattern below is written for a foundation chain width of 52 stitches (this produces a finished width of roughly 10-11 inches depending on gauge). The overall length as written (with all motif repeats and edging) is approximately 36-42 inches. Adjust motif repeats to lengthen or shorten.
Info :
Colors used in the written rows are abbreviated: A = Ecru (main background), R = Red, G = Forest Green, B = Brown (house bases/trunks), Y = Golden Yellow (windows), W = White (snow), D = Dark (outlines/doors). Carry unused yarn along the top of the previous row inside the work (tapestry method) or use separate bobbins for each motif color for a neater back. Keep floats under 6-8 stitches long; catch longer floats with an overcast stitch to avoid long loose strands.
— Foundation & Base Field :
Round 1 :
Foundation chain 52 (ch 52). Turn. 1 sc in 2nd ch from hook and in each ch across (52)
Round 2 :
Ch 1, turn. 1 sc in each st across (52)
Round 3 :
Ch 1, turn. 1 sc in each st across (52)
Round 4 :
Ch 1, turn. 1 sc in each st across (52)
Round 5 :
Ch 1, turn. 1 sc in each st across (52)
Info :
Work the first 6 rows in A (Ecru) to create a stable base before starting motifs. Check your tension and width — the stitch count should be 52 at the end of each row. Attach a stitch marker to the first stitch of the row if you need to keep track.
Round 6 :
Ch 1, turn. 1 sc in each st across (52)
— Motif Block Instructions (Central motif area is 30 sts wide centered; outer margins 11 sts each) :
Info :
For rows 7 through 96 you will work nine motif repeats along the length of the runner. Each motif is 10 rows tall and 30 stitches wide in the center of the 52-stitch row. The layout for every row is: 11 sc A (left margin), 30-stitch motif area (varies by row), 11 sc A (right margin). Always maintain the total of 52 stitches per row. Work tapestry-style colorwork: change colors on the last yarn over before the stitch where the color is to change, and carry floats on the WS. Keep floats snug. Each motif below occupies rows in sequence — after completing one motif's 10 rows, switch to the next motif's 10 rows as specified.
Round 7 :
11 sc A, motif area: [14 sc A, 2 sc R, 14 sc A] (30), 11 sc A (52). (Entire row mostly background; start subtle roof color in center.)
Round 8 :
11 sc A, motif area: [12 sc A, 6 sc R, 12 sc A] (30), 11 sc A (52)
Round 9 :
11 sc A, motif area: [10 sc A, 10 sc R, 10 sc A] (30), 11 sc A (52)
Round 10 :
11 sc A, motif area: [8 sc A, 14 sc R, 8 sc A] (30), 11 sc A (52)
Round 11 :
11 sc A, motif area: [6 sc A, 18 sc R, 6 sc A] (30), 11 sc A (52)
Info :
Rows 7-11 build a simple triangular roof for House 1. Use R for roof; keep the stitches even and snug. If you prefer sharper points, switch to a smaller hook for the motif rows only.
Round 12 :
11 sc A, motif area: [6 sc A, 6 sc R, 2 sc Y (window), 6 sc B (door base), 10 sc A] (30), 11 sc A (52)
Round 13 :
11 sc A, motif area: [6 sc A, 6 sc R, 4 sc Y (windows), 6 sc B, 8 sc A] (30), 11 sc A (52)
Round 14 :
11 sc A, motif area: [8 sc A, 6 sc R, 4 sc Y, 6 sc B, 6 sc A] (30), 11 sc A (52)
Round 15 :
11 sc A, motif area: [10 sc A, 4 sc G (tree beside house), 6 sc B, 10 sc A] (30), 11 sc A (52)
Round 16 :
11 sc A, motif area: [12 sc A, 4 sc G, 2 sc Y (window star), 12 sc A] (30), 11 sc A (52)
Info :
Rounds 12-16 form the midsection of House 1: walls (B), windows (Y), and a small adjacent spruce (G). Note that windows are worked as Y single crochet squares; if you want tiny glow effects, place a single sc Y in the center of a two-stitch cluster as written.
Round 17 :
11 sc A, motif area: [14 sc A, 2 sc W (snow highlight on roof), 14 sc A] (30), 11 sc A (52)
Round 18 :
11 sc A, motif area: [16 sc A, 14 sc A] (30), 11 sc A (52) — all A to create a snowy ground row
Round 19 :
11 sc A, motif area: [10 sc A, 4 sc G (tree), 6 sc A, 4 sc G, 6 sc A] (30), 11 sc A (52)
Round 20 :
11 sc A, motif area: [30 sc A] (30), 11 sc A (52)
Info :
Rounds 17-20 finish House 1 motif and create a buffer snow/ground area. After row 20 you will begin motif 2 (another house or scene) which follows the same 10-row structure with different internal color placements. Always keep left and right 11 A stitches untouched — this frames your motif visually.
— Motif 2 (Rows 21-30): Cottage with green roof and wreath detail
Round 21 :
11 sc A, motif area: [14 sc A, 2 sc G, 14 sc A] (30), 11 sc A (52)
Round 22 :
11 sc A, motif area: [12 sc A, 6 sc G, 12 sc A] (30), 11 sc A (52)
Round 23 :
11 sc A, motif area: [10 sc A, 10 sc G, 10 sc A] (30), 11 sc A (52)
Round 24 :
11 sc A, motif area: [8 sc A, 14 sc G, 8 sc A] (30), 11 sc A (52)
Round 25 :
11 sc A, motif area: [6 sc A, 18 sc G, 6 sc A] (30), 11 sc A (52)
Info :
Motif 2 uses G to create a house body or a green roof shape. At the center rows use a 18-stitch block to represent a large triangular roof; later rows will place wreath details (D + R) and golden windows.
Round 26 :
11 sc A, motif area: [6 sc A, 6 sc G, 2 sc Y, 6 sc D (wreath), 10 sc A] (30), 11 sc A (52)
Round 27 :
11 sc A, motif area: [6 sc A, 6 sc G, 4 sc Y (windows), 6 sc D, 8 sc A] (30), 11 sc A (52)
Round 28 :
11 sc A, motif area: [8 sc A, 6 sc G, 4 sc Y, 6 sc D, 6 sc A] (30), 11 sc A (52)
Round 29 :
11 sc A, motif area: [10 sc A, 4 sc B (base), 6 sc A, 10 sc A] (30), 11 sc A (52)
Round 30 :
11 sc A, motif area: [30 sc A] (30), 11 sc A (52)
Info :
Motif 2 adds wreath and green roof details. Use D (dark) and R (red) accent stitches to create tiny bows or door decor; e.g., replace one or two sc in a D area with R to simulate a bow. Keep floats short.
— Motif 3 (Rows 31-40): Tall spired church-house with brown base
Round 31 :
11 sc A, motif area: [14 sc A, 2 sc R (spire tip), 14 sc A] (30), 11 sc A (52)
Round 32 :
11 sc A, motif area: [12 sc A, 6 sc R, 12 sc A] (30), 11 sc A (52)
Round 33 :
11 sc A, motif area: [10 sc A, 10 sc R, 10 sc A] (30), 11 sc A (52)
Round 34 :
11 sc A, motif area: [8 sc A, 14 sc R, 8 sc A] (30), 11 sc A (52)
Round 35 :
11 sc A, motif area: [6 sc A, 18 sc R, 6 sc A] (30), 11 sc A (52)
Info :
Motif 3 is a taller structure - use red for vertical spire. For a spire that reads well, maintain a vertical column of R stitches across multiple rows so the eye reads a tall shape.
Round 36 :
11 sc A, motif area: [6 sc A, 6 sc R, 2 sc Y, 6 sc B, 10 sc A] (30), 11 sc A (52)
Round 37 :
11 sc A, motif area: [6 sc A, 6 sc R, 4 sc Y, 6 sc B, 8 sc A] (30), 11 sc A (52)
Round 38 :
11 sc A, motif area: [8 sc A, 6 sc R, 4 sc Y, 6 sc B, 6 sc A] (30), 11 sc A (52)
Round 39 :
11 sc A, motif area: [10 sc A, 4 sc B (base), 6 sc G (tree), 10 sc A] (30), 11 sc A (52)
Round 40 :
11 sc A, motif area: [30 sc A] (30), 11 sc A (52)
Info :
Use B for the house base and G for small trees placed beside structures. If you prefer a church steeple effect, concentrate R stitches centrally and place Y windows below to simulate a stained glass glow.
— Motif 4 (Rows 41-50): Red cottage with white snowy roof and wreath
Round 41 :
11 sc A, motif area: [14 sc A, 2 sc W, 14 sc A] (30), 11 sc A (52)
Round 42 :
11 sc A, motif area: [12 sc A, 6 sc W, 12 sc A] (30), 11 sc A (52)
Round 43 :
11 sc A, motif area: [10 sc A, 10 sc W, 10 sc A] (30), 11 sc A (52)
Round 44 :
11 sc A, motif area: [8 sc A, 14 sc R (house roof/wall), 8 sc A] (30), 11 sc A (52)
Round 45 :
11 sc A, motif area: [6 sc A, 18 sc R, 6 sc A] (30), 11 sc A (52)
Info :
Motif 4 flips the palette: a white snowy roof (W) over a red house (R). Use W stitches to create a snow cap effect across 3-5 rows, then expand R below for walls.
Round 46 :
11 sc A, motif area: [6 sc A, 6 sc R, 2 sc Y, 6 sc B, 10 sc A] (30), 11 sc A (52)
Round 47 :
11 sc A, motif area: [6 sc A, 6 sc R, 4 sc Y, 6 sc B, 8 sc A] (30), 11 sc A (52)
Round 48 :
11 sc A, motif area: [8 sc A, 6 sc R, 4 sc Y, 6 sc B, 6 sc A] (30), 11 sc A (52)
Round 49 :
11 sc A, motif area: [10 sc A, 4 sc G, 6 sc A, 10 sc A] (30), 11 sc A (52)
Round 50 :
11 sc A, motif area: [30 sc A] (30), 11 sc A (52)
Info :
Add a tiny wreath detail by substituting one D stitch with a small R stitch in the center of a green motif area; a single R dot reads like a bow at this scale.
— Motif 5 (Rows 51-60): Brown chalet with lit windows
Round 51 :
11 sc A, motif area: [14 sc A, 2 sc B (chimney), 14 sc A] (30), 11 sc A (52)
Round 52 :
11 sc A, motif area: [12 sc A, 6 sc B, 12 sc A] (30), 11 sc A (52)
Round 53 :
11 sc A, motif area: [10 sc A, 10 sc B, 10 sc A] (30), 11 sc A (52)
Round 54 :
11 sc A, motif area: [8 sc A, 14 sc B, 8 sc A] (30), 11 sc A (52)
Round 55 :
11 sc A, motif area: [6 sc A, 18 sc B, 6 sc A] (30), 11 sc A (52)
Info :
Motif 5 uses B for a rustic chalet. Add Y scattered stitches for lit windows, and place small W accents for snowy roof crests.
Round 56 :
11 sc A, motif area: [6 sc A, 6 sc B, 2 sc Y, 6 sc B, 10 sc A] (30), 11 sc A (52)
Round 57 :
11 sc A, motif area: [6 sc A, 6 sc B, 4 sc Y, 6 sc B, 8 sc A] (30), 11 sc A (52)
Round 58 :
11 sc A, motif area: [8 sc A, 6 sc B, 4 sc Y, 6 sc B, 6 sc A] (30), 11 sc A (52)
Round 59 :
11 sc A, motif area: [10 sc A, 4 sc G (small tree), 6 sc A, 10 sc A] (30), 11 sc A (52)
Round 60 :
11 sc A, motif area: [30 sc A] (30), 11 sc A (52)
Info :
For windows (Y), you may place two Ys adjacent or separated by a background stitch to create varied window shapes. Keep central alignment of windows consistent so the motif reads as a glowing house.
— Motif 6 (Rows 61-70): Narrow red house with tall tree
Round 61 :
11 sc A, motif area: [16 sc A, 2 sc R, 12 sc A] (30), 11 sc A (52)
Round 62 :
11 sc A, motif area: [14 sc A, 4 sc R, 12 sc A] (30), 11 sc A (52)
Round 63 :
11 sc A, motif area: [12 sc A, 6 sc R, 12 sc A] (30), 11 sc A (52)
Round 64 :
11 sc A, motif area: [10 sc A, 8 sc R, 12 sc A] (30), 11 sc A (52)
Round 65 :
11 sc A, motif area: [8 sc A, 10 sc R, 12 sc A] (30), 11 sc A (52)
Info :
Motif 6 is narrow; place R stitches centrally for a slim house. Adjacent tall tree (G) will be introduced in the lower motif rows to vary the landscape.
Round 66 :
11 sc A, motif area: [8 sc A, 6 sc R, 4 sc Y, 6 sc B, 6 sc A] (30), 11 sc A (52)
Round 67 :
11 sc A, motif area: [10 sc A, 4 sc G, 6 sc A, 10 sc A] (30), 11 sc A (52)
Round 68 :
11 sc A, motif area: [12 sc A, 6 sc G, 12 sc A] (30), 11 sc A (52)
Round 69 :
11 sc A, motif area: [30 sc A] (30), 11 sc A (52)
Round 70 :
11 sc A, motif area: [30 sc A] (30), 11 sc A (52)
Info :
Rows 66-69 place tree shapes beside the narrow house to create varied vertical interest in the village stitch picture. Trees are clusters of G placed in V shapes across rows; this simple method reads as evergreens at this stitch scale.
— Motif 7 (Rows 71-80): House with tall red roof and star
Round 71 :
11 sc A, motif area: [14 sc A, 2 sc W, 14 sc A] (30), 11 sc A (52)
Round 72 :
11 sc A, motif area: [12 sc A, 6 sc R, 12 sc A] (30), 11 sc A (52)
Round 73 :
11 sc A, motif area: [10 sc A, 10 sc R, 10 sc A] (30), 11 sc A (52)
Round 74 :
11 sc A, motif area: [8 sc A, 14 sc R, 8 sc A] (30), 11 sc A (52)
Round 75 :
11 sc A, motif area: [6 sc A, 18 sc R, 6 sc A] (30), 11 sc A (52)
Info :
For Row 75 add a small Y stitch at the peak to represent a star on a tall roof; keep it centered. Use Y sparingly to read as a star or bright light.
Round 76 :
11 sc A, motif area: [6 sc A, 6 sc R, 2 sc Y, 6 sc B, 10 sc A] (30), 11 sc A (52)
Round 77 :
11 sc A, motif area: [8 sc A, 6 sc R, 4 sc Y, 6 sc B, 6 sc A] (30), 11 sc A (52)
Round 78 :
11 sc A, motif area: [10 sc A, 4 sc G, 6 sc A, 10 sc A] (30), 11 sc A (52)
Round 79 :
11 sc A, motif area: [30 sc A] (30), 11 sc A (52)
Round 80 :
11 sc A, motif area: [30 sc A] (30), 11 sc A (52)
Info :
At the end of motif 7 ensure your floats are neat — this area includes several color changes for windows and small stars. Use spare bobbins for the Y color if you plan to place stars frequently.
— Motif 8 (Rows 81-90): Two small houses and trees cluster
Round 81 :
11 sc A, motif area: [14 sc A, 2 sc R, 14 sc A] (30), 11 sc A (52)
Round 82 :
11 sc A, motif area: [12 sc A, 6 sc R, 12 sc A] (30), 11 sc A (52)
Round 83 :
11 sc A, motif area: [10 sc A, 10 sc R, 10 sc A] (30), 11 sc A (52)
Round 84 :
11 sc A, motif area: [8 sc A, 14 sc R, 8 sc A] (30), 11 sc A (52)
Round 85 :
11 sc A, motif area: [6 sc A, 18 sc R, 6 sc A] (30), 11 sc A (52)
Info :
Motif 8 groups two houses close together — you can vary the center splits to show two smaller roofs side-by-side. Use R and B alternately to visually separate the structures.
Round 86 :
11 sc A, motif area: [8 sc A, 6 sc R, 2 sc Y, 6 sc B, 8 sc A] (30), 11 sc A (52)
Round 87 :
11 sc A, motif area: [10 sc A, 4 sc G, 4 sc A, 6 sc G, 6 sc A] (30), 11 sc A (52)
Round 88 :
11 sc A, motif area: [12 sc A, 6 sc G, 12 sc A] (30), 11 sc A (52)
Round 89 :
11 sc A, motif area: [30 sc A] (30), 11 sc A (52)
Round 90 :
11 sc A, motif area: [30 sc A] (30), 11 sc A (52)
Info :
Motif 8 gives a sense of cluster density — good for variety in the village. Keep the top of each motif aligned so the skyline feels consistent along the runner length.
— Motif 9 (Rows 91-96): Final small red house and finishing snow row
Round 91 :
11 sc A, motif area: [14 sc A, 2 sc R, 14 sc A] (30), 11 sc A (52)
Round 92 :
11 sc A, motif area: [12 sc A, 6 sc R, 12 sc A] (30), 11 sc A (52)
Round 93 :
11 sc A, motif area: [10 sc A, 6 sc R, 4 sc Y, 10 sc A] (30), 11 sc A (52)
Round 94 :
11 sc A, motif area: [8 sc A, 6 sc R, 4 sc B, 12 sc A] (30), 11 sc A (52)
Round 95 :
11 sc A, motif area: [30 sc A] (30), 11 sc A (52)
Round 96 :
11 sc A, motif area: [30 sc A] (30), 11 sc A (52)
Info :
Rows 91-96 finish your final motif and create a clean snowy band to anchor the village. After Round 96 fasten off and weave in all ends on the WS, or continue directly into the inner border if you prefer seamless edging.
— Inner Border (Forest Green) - 4 rounds :
Info :
Attach G (Forest Green) at the end of Round 96 in the first stitch of the next RS row to begin an inner framed border. Work around the long sides with single crochet rows; this runner is worked flat, so these rounds will be straight rows across the width only. The green inner border creates a framed band inside the scallop edge.
Round 97 :
Join G with sl st to first st on RS, ch 1, turn. 1 sc in each st across (52)
Round 98 :
Ch 1, turn. 1 sc in each st BLO (52) — working in BLO creates a subtle ridge between inner border and panel
Round 99 :
Ch 1, turn. 1 sc in each st across (52)
Round 100 :
Ch 1, turn. 1 sc in each st across (52)
Info :
The BLO row (Round 98) will create a slight step for the scalloped edge to sit nicely. Keep tension consistent. Fasten off G if you prefer to attach the scalloped red edging separately; otherwise carry G to the edge join point.
— Outer Scallop Edging (Cranberry Red) - 10 rounds total with scallop rounds :
Info :
Attach R (Cranberry) at right-hand side of the final row with sl st. Work several tidy foundation rows in red to build up a base for the scalloped rounds, then work scallops along both long edges and carefully around the short ends. Scallop pattern below is repeated along the edge in sets of 6 stitches per scallop. Work evenly across the 52-st width so scallops sit symmetrically.
Round 101 :
Join R with sl st, ch 1, turn. 1 sc in each st across (52)
Round 102 :
Ch 1, turn. 1 sc in each st BLO (52)
Round 103 :
Ch 1, turn. 1 sc in each st across (52)
Info :
Rounds 101-103 create a raised base for scallops. Work neatly — these foundation rows determine scallop placement. If you want a deeper scallop, add an extra foundation round before scallops.
Round 104 :
Start scallop repeat across long edge: *skip 2 sts, 5 dc in next st, skip 2 sts, sl st in next st*; rep from * to * across until last 2 sts, sl st into final st to finish. Fasten off and move to opposite long edge, repeating scallops to mirror. (Pattern uses US double crochet set of 5 to create a wide scallop.)
Round 105 :
Turn runner to work short-end scallops: evenly space scallops so short ends have 6-8 scallops across the width. *ch 1, sl st to join, skip 1, 5 dc in next st, skip 1, sl st* — repeat until end, fasten off.
Info :
When working scallops on short ends, count spacing carefully. If you notice scallops bunching, block the runner slightly to open scallops and even the tension. Use pins along the edge and mist lightly with water, letting dry flat.
Round 106 :
Optional decorative pick-up round: With D (dark) yarn and a 3.5mm hook, work a reverse single crochet (crab stitch) across the front edge of each scallop to define edges — work in reverse direction (left to right) to create a raised ridge. 1 sc rev in each st along scallop edges.
Round 107 :
Weave in and secure all loose ends on the WS using a yarn needle. Fasten off and block runner gently to settle scallops and straighten edges.
Info :
Blocking: Lay flat, pin edges and scallops into shape, spray lightly with water and allow to dry. Blocking evens stitches and helps motifs sit flat and crisp.
— Finishing Touches & Embellishments :
Info :
To enhance window glow, embroider a tiny straight stitch cross in Y on selected window squares. For wreaths, stitch a small ring of D around a Y dot and add a single R for a bow. If you want more texture, add small French knots with D or R to simulate berries or garlands.
Round 108 :
Embroider details as desired: use yarn needle and stranded yarn to add window panes (D), wreath outlines (D), small door handles (D), and tiny decorative bows (R). Secure ends and weave through to the WS.
Round 109 :
Final trim: check scallop edges for any loose loops; tack small sections of scallop base to the runner body with a few hidden stitches if scallops tend to flip up.
Round 110 :
Final finishing: Press lightly under a cloth if desired (test on back of scrap first). Your village runner is now ready for display.
Info :
Storage tip: roll the runner around a tube (not folded) to preserve scallops and avoid creasing. If gifting, tuck care instructions: hand-wash cold, lay flat to dry to preserve colors and scallop shape.
Completing this charming Christmas Village table runner is such a satisfying project — from the first cream base rows to the last scalloped stitch your handmade village comes alive. The colorwork creates a cozy, pixel-like scene while the green border and scalloped red edge frame it with classic holiday cheer. This runner makes a warm centerpiece for a holiday table or a thoughtful handmade gift. 🧶🎄 Display with a few seasonal accents and enjoy the glow of a handcrafted village all season long!