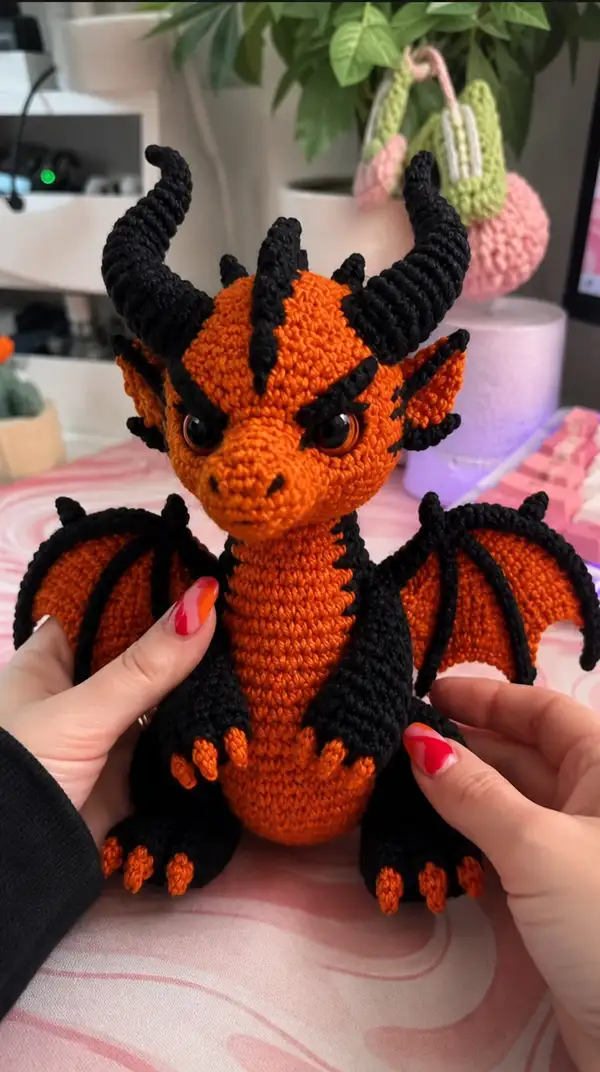
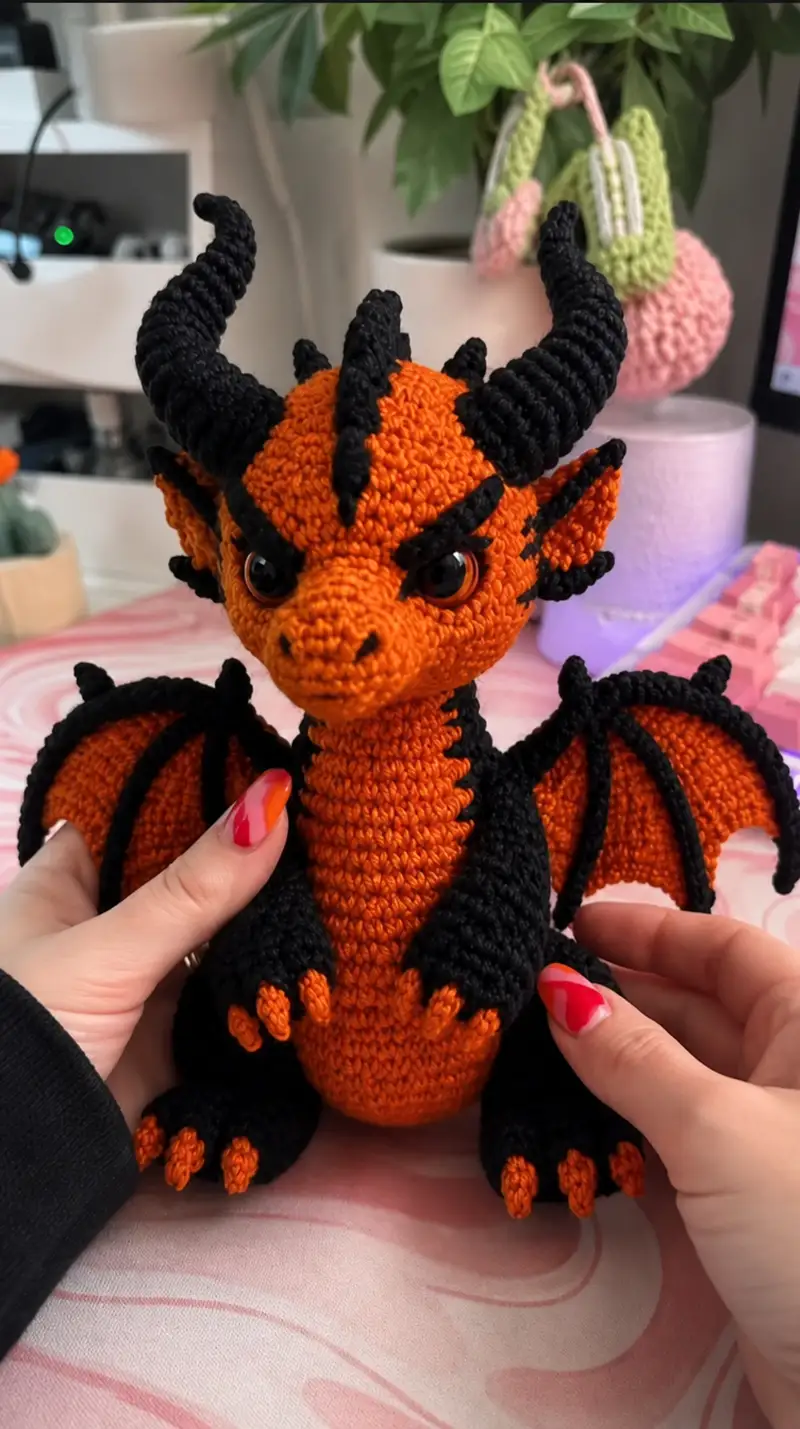
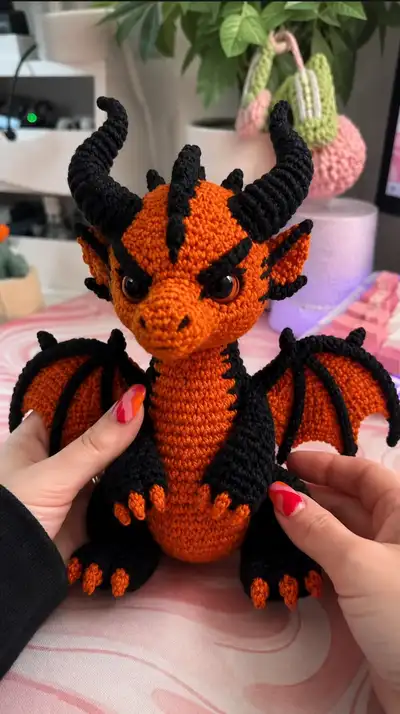
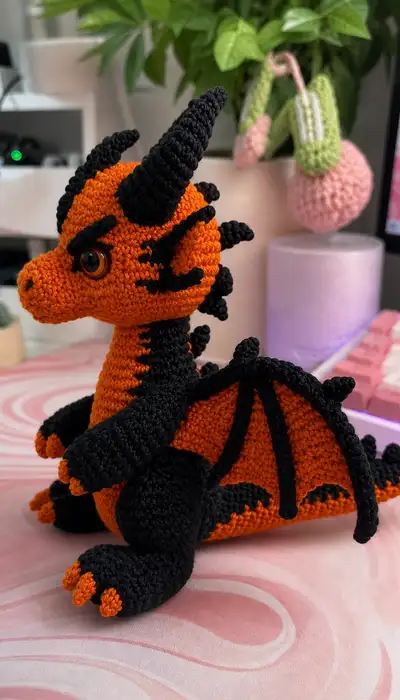
This striking little dragon combines bold orange and deep black for a fierce yet cuddly companion. Featuring curled spiral horns, articulated wings with black 'bones', a ridged spine of spikes, and contrasting orange claws and belly. Shiny safety eyes and embroidered nostrils bring animated expression to the sculpted snout. A fun, detailed project for crocheters who love character work and color contrast.
Progress Tracker
0% Complete
— Head :
Round 1 :
6 sc in magic ring (6)
Round 3 :
(1 sc, 1 inc) x 6 (18)
Round 4 :
(2 sc, 1 inc) x 6 (24)
Round 5 :
(3 sc, 1 inc) x 6 (30)
Round 6 :
(4 sc, 1 inc) x 6 (36)
Round 7 :
(5 sc, 1 inc) x 6 (42)
Round 8 :
(6 sc, 1 inc) x 6 (48)
Round 9-16 :
1 sc in each st (48)
Info :
Work in continuous rounds (spiral) for a seamless amigurumi surface. Place a stitch marker at the first stitch and move it each round. Maintain tight tension so stuffing doesn't show through stitches.
Info :
Eye placement: position safety eyes between rounds 13-14, spaced approximately 8 to 10 stitches apart for the expression seen. Mark placement with pins before inserting eyes and securing backing.
Round 17 :
(6 sc, 1 inc) x 6 (54)
Round 18 :
1 sc in each st (54)
Round 19 :
(7 sc, 1 inc) x 6 (60)
Round 20 :
1 sc in each st (60)
Info :
These additional increases create a slightly rounded forehead and upper skull that will allow space for the horns and brow ridges. Keep rounds even and check symmetry frequently.
Round 21 :
(7 sc, 1 dec) x 6 (54)
Round 22 :
(6 sc, 1 dec) x 6 (48)
Round 23 :
(5 sc, 1 dec) x 6 (42)
Round 24 :
(4 sc, 1 dec) x 6 (36)
Info :
Begin to observe the snout direction: keep decreases concentrated toward the front to shape a slightly elongated muzzle. Do NOT stuff yet — you will add stuffing after a few more decreases to shape profile accurately.
Round 25 :
(3 sc, 1 dec) x 6 (30)
Round 26 :
(2 sc, 1 dec) x 6 (24)
Round 27 :
(1 sc, 1 dec) x 6 (18)
Info :
Start stuffing the head firmly through the back opening now. Use small amounts of polyester fill and shape the snout with a chopstick or stuffing tool so the nostrils and mouth area form cleanly.
Round 29 :
1 sc in each st (12) — begin neck tube (12)
Round 30 :
1 sc in each st (12)
Round 31 :
1 sc in each st (12)
Info :
At this point the head is a distinct ball with a 12-stitch neck tube. Keep stuffing to maintain head shape — slightly firmer in the crown for horn support and moderate in the snout for nice shape.
Round 32 :
(1 sc, inc) x 6 (18)
Round 33 :
1 sc in each st (18)
Round 34 :
(2 sc, inc) x 6 (24)
Round 35 :
1 sc in each st (24) — leave last round open for sewing to body (24)
Info :
Fasten off leaving a long tail for sewing. The neck is left with 24 sts around to provide a substantial join to the top of the body — this creates a stable seam that supports the head and horns. We will attach after body is complete.
— Horns (Make 2, Spiral) :
Round 1 :
6 sc in magic ring (6)
Round 3 :
(1 sc, inc) x 6 (18)
Info :
Switch to a slightly smaller hook (eg 2.75mm) if you want tighter ridges for the spiral. Work horns in black. For the distinct spiral ridge effect, work each round into the BLO to create a ribbed look as you go.
Round 4 :
1 sc in each st BLO (18)
Round 5 :
(2 sc, inc) x 6 (24) BLO
Round 6 :
1 sc in each st BLO (24)
Round 7 :
(3 sc, inc) x 6 (30) BLO
Round 8 :
1 sc in each st BLO (30)
Round 9 :
(4 sc, inc) x 6 (36) BLO
Round 10 :
1 sc in each st BLO (36)
Info :
Now begin shaping the taper: start alternating rounds of regular sc (both loops) and rounds in BLO to maintain the ribbed spiral texture while gradually reducing the diameter.
Round 11 :
(4 sc, 1 dec) x 6 (30) BLO
Round 12 :
1 sc in each st (30)
Round 13 :
(3 sc, 1 dec) x 6 (24) BLO
Round 14 :
1 sc in each st (24)
Round 15 :
(2 sc, 1 dec) x 6 (18) — continue tapering
Round 16 :
(1 sc, 1 dec) x 6 (12)
Round 17 :
6 dec (6) — fasten off and leave long tail for sewing
Info :
Lightly stuff the base only to keep horns rigid where they attach to the head. For extra curve, wrap the finished horn around a finger and pin or steam-block slightly, or sew a few discrete stitches across the inside curve to lock shape.
— Small Head Spikes (Make 4-6) :
Round 1 :
4 sc in magic ring (4)
Round 3 :
4 sc (4) — fasten off leaving tail for sewing
Info :
Make 4 small spikes for the top-of-head ridge and the upper neck. Position them on the head centerline from the crown toward the back; sew firmly down the center of the skull.
— Snout Details/Embroidered Features :
Info :
Using a tapestry needle and black yarn, embroider two small nostril slits on the lower front of the muzzle (between rounds 7-9 on the head). A short vertical stitch or tiny satin stitch works well. Add a small mouth stitch under the nostrils if desired.
— Body :
Round 1 :
6 sc in magic ring (6)
Round 3 :
(1 sc, inc) x 6 (18)
Round 4 :
(2 sc, inc) x 6 (24)
Round 5 :
(3 sc, inc) x 6 (30)
Round 6 :
(4 sc, inc) x 6 (36)
Round 7 :
(5 sc, inc) x 6 (42)
Round 8-12 :
1 sc in each st (42)
Info :
Work the first 12 rounds in pumpkin orange to establish the belly region. The belly will remain orange; we will change to black for outer body/limbs around round 13 to create the two-tone look.
Info :
Change to black yarn at the beginning of round 13. Carry the orange yarn up the inside of the shell if you prefer no visible join, or fasten off and weave in a tidy join if color blocking is easier for you.
Round 13-16 :
1 sc in each st (42) — work in black for these rounds
Round 17 :
(3 sc, 1 dec) x 6 (36)
Round 18 :
(2 sc, 1 dec) x 6 (30)
Round 19 :
(1 sc, 1 dec) x 6 (24)
Round 20 :
1 sc in each st (24)
Info :
At rounds 17–19 we narrow towards the belly base. Keep the orange belly panel accessible — you can crochet slightly tighter through the black rounds to accentuate the orange center strip visually.
Round 21 :
(1 sc, inc) x 6 (30)
Round 22 :
(2 sc, inc) x 6 (36)
Round 23-26 :
1 sc in each st (36)
Round 27 :
(3 sc, 1 dec) x 6 (30)
Round 28 :
(2 sc, 1 dec) x 6 (24)
Round 29 :
(1 sc, 1 dec) x 6 (18)
Round 30 :
1 sc in each st (18) — leave this round open for head neck attachment (18)
Info :
Stuff the body firmly through the top opening before closing. The body should be firmly stuffed at the bottom to allow the dragon to sit upright, with slightly less stuffing toward the top where the neck and head will attach.
Info :
When joining the head, match the 24-stitch neck of the head to the top opening of the body (round 30 is 18 sts). You will create a join by placing the head slightly forward and sewing evenly around while gently easing stitches to fit — use the long tail from the head for sewing and add extra stitches where needed for a smooth join.
— Legs (Make 2 - Larger Hind Legs) :
Round 1 :
6 sc in magic ring (6)
Round 3 :
(1 sc, inc) x 6 (18)
Round 4 :
(2 sc, inc) x 6 (24)
Round 5 :
1 sc in each st (24)
Round 6 :
(3 sc, inc) x 6 (30)
Round 7-12 :
1 sc in each st (30) — work in black for outer leg
Info :
Create a slightly flattened sole by stitching across one side after stuffing or by decreasing on a few center stitches in the last rounds of the foot to encourage a flat base for sitting stability.
Round 13 :
(3 sc, 1 dec) x 6 (24)
Round 14 :
(2 sc, 1 dec) x 6 (18)
Round 15 :
1 sc in each st (18)
Round 16 :
Switch to orange for the claw tips: (1 sc, inc) x 6 (24) — work last 2-3 rounds in orange for toe tips
Round 17 :
Work 1 sc in each st (24) — position 3-4 small orange claw tufts on the front of the foot by leaving small separate chains or embroidering claws (see claw details below)
Round 18 :
Begin shaping ankle: (2 sc, 1 dec) x 6 (18)
Round 19 :
(1 sc, 1 dec) x 6 (12)
Round 20 :
1 sc in each st (12) — leave top open for sewing to body
Info :
Stuff the foot firmly and shape toes before finishing the leg tube. Keep stuffing concentrated at the sole for a stable base. Sew legs to the lower body at rounds matching the body’s lower side (pin in place first) — see assembly section.
— Front Arms (Make 2 - Smaller) :
Round 1 :
6 sc in magic ring (6) — start with black or orange depending on visible paw pads
Round 3 :
(1 sc, inc) x 6 (18)
Round 4 :
1 sc in each st (18)
Info :
Switch to black for the arm shaft starting round 5. Leave a few stitches at the front in orange for claw tips or work the claw tips separately and sew on later.
Round 5-11 :
1 sc in each st (18) — lengthen arm to desired elbow
Round 12 :
(2 sc, 1 dec) x 4, 2 sc (14)
Round 13 :
(1 sc, 1 dec) x 4, 2 sc (10)
Round 14 :
1 sc in each st (10)
Round 15 :
Switch to orange for claws: sc in front 3 sts to create claw tips using small tufts or separate tiny cones (see claw details)
Round 16 :
Stuff hand firmly, continue 1 sc in each st (10)
Round 17 :
Begin shoulder shaping: (1 sc, inc) x 5 (15)
Round 18 :
1 sc in each st (15)
Round 19 :
(2 sc, inc) x 5 (20)
Round 20 :
1 sc in each st (20) — leave opening for sewing to body
Info :
For removable poseability, insert a thin wire before finishing the arm and wrap ends to avoid sharp points. Stuff lightly in the arm shaft and firmly in the hand to keep shape while allowing gentle posing.
— Claws & Toes (Make several small cones) :
Round 1 :
4 sc in magic ring (4)
Round 3 :
4 sc — fasten off leaving tail for sewing (4)
Info :
Make 3 claws for each foot and 3 smaller ones for each hand. Attach claws to the front of the feet and hands using long sewing tail and secure with several passes to prevent loosening.
— Tail :
Round 1 :
6 sc in magic ring (6)
Round 3 :
(1 sc, inc) x 6 (18)
Round 4-7 :
1 sc in each st (18)
Round 8 :
(2 sc, 1 dec) x 4, 2 sc (14)
Round 9 :
(1 sc, 1 dec) x 4, 2 sc (10)
Round 10-11 :
1 sc in each st (10)
Round 12 :
Fasten off leaving long tail for sewing — attach small spines or a small cone at tail tip
Info :
Make the tail slightly flexible by stuffing lightly and adding a short piece of bendable wire for poseability. Sew the tail to the lower back center on the body, spacing it so it rests naturally behind the legs.
— Back Spikes (Make 6, repeat small spike pattern) :
Round 1 :
5 sc in magic ring (5)
Round 3 :
5 sc — fasten off leaving tail for sewing
Info :
Make 6 spikes (or more depending on size) and sew them along the dorsal centerline from the base of the skull down to the tail. Alternate spike orientations for a natural look and secure firmly with multiple passes.
— Wings (Make 2 - Inner membrane orange, bones black) :
Info :
Wings are worked flat and then edged with black 'bones' made as narrow tubes sewn on top. The following wing rounds are worked as single crochet increases in a semi-circular fan to create a curved membrane. Work the flat piece in orange, then make 3-4 thin black tubes for wing struts.
Round 1 :
Ch 6, sc in 2nd ch from hook and across (5) — foundation for wing tip
Round 2 :
Turn, ch1, sc across, then in last stitch work 3 sc to create a rounded tip (7)
Round 3 :
Ch1, sc across, at tip inc across 3 sts to 5 to widen the fan (9)
Round 4 :
Continue working rows in sc, increasing at the curve by working (sc, inc, sc) across the turning point to open the membrane (approx 12)
Round 5-10 :
Work even rows or slight increases to shape the fan to desired span (increase 2-4 sts per row as necessary) — aim for a membrane that measures approx 18-22 sts at the widest row
Info :
After the membrane is complete, make 3 narrow black tubes (make 3 chains long enough to reach from wing base to tip) and single crochet over the chains in a slip-stitch tube method to create the 'bones'. Sew these tubes onto the orange membrane in evenly spaced arcs to match the photo.
Round 11 :
Edge the wing with black single crochet: join black yarn and sc around the entire edge, placing 2 sc in corners to keep curvature smooth. Fasten off and weave in ends.
Round 12 :
Make 3 black tubes: ch 30 (or desired length), sl st back in each chain to create a firm tube. Fasten off leaving tails for sewing.
Round 13 :
Sew black tubes onto membrane as structural 'bones', positioning them radially from base to tip. Add a small black ridge along the top edge if desired by stitching a single-crochet ridge.
Info :
Stiffen wings slightly by inserting a thin piece of wire into the central black tube before sewing it down or by lightly starching and shaping. Wings pictured have an orange inner with a black frame and black struts giving a bat-like appearance.
— Inner Wing Ridge & Small Knobs :
Round 1 :
Make small 4-sc cones (see Back Spike pattern) and sew to the top edge of each wing to mimic the little knobs in the photo (3 per wing)
Info :
Space knobs evenly along the top curve of the wing — they visually tie the wing to the spine spikes and give the wings a more aggressive silhouette.
— Assembly & Finishing Details :
Info :
Before assembly weave in any loose color-change tails neatly on the inside. Use a yarn needle and the outer round of each piece to make the seam nearly invisible. Keep extra stuffing accessible to add small adjustments while sewing pieces together.
Info :
Sewing order suggested: legs first (for stable base), then tail, then wings and arms, then head and horns, finishing with small spikes and details. Pin everything first to check alignment from multiple angles.
Info :
Facial finishing: after securing safety eyes and stuffing head, embroider a thin black brow ridge over the eye area using surface slip stitch or tapestry needle to recreate the expression. Add tiny highlights with a touch of gloss on the eye surface if eyes are not shiny enough.
Info :
Final securement: weave any long tails through inside parts several times before trimming. Apply a tiny dab of fabric glue behind safety eye washers for added security if desired.
This fiery dragon is a bold, characterful project that rewards patience with dramatic results! Its spiral horns, framed wings, and bright orange belly give it playful personality and display-ready attitude. 🐉🧶 Whether gifting or keeping, you'll enjoy the sculptural shaping and customizable details. Share your finished dragon and enjoy the compliments — it's a real conversation starter! ✨