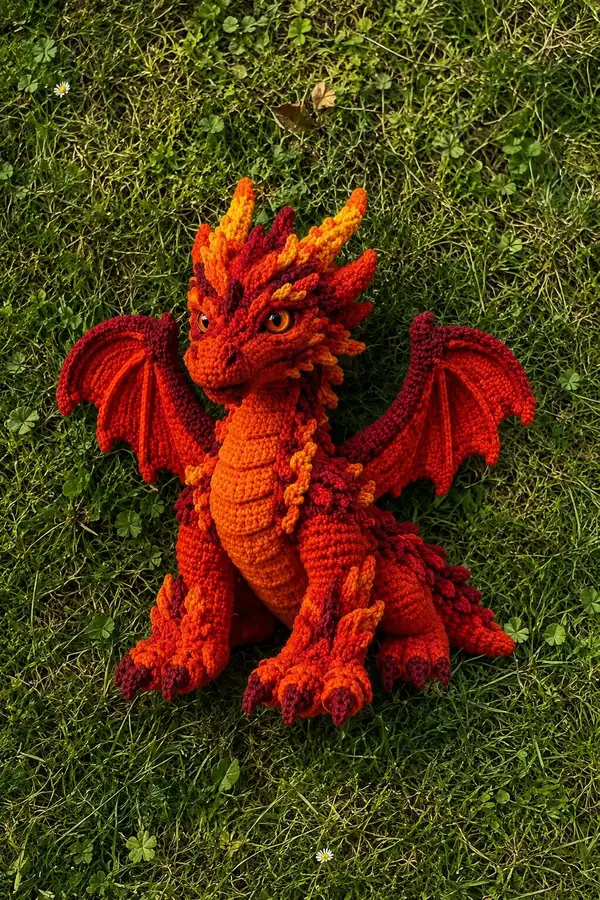
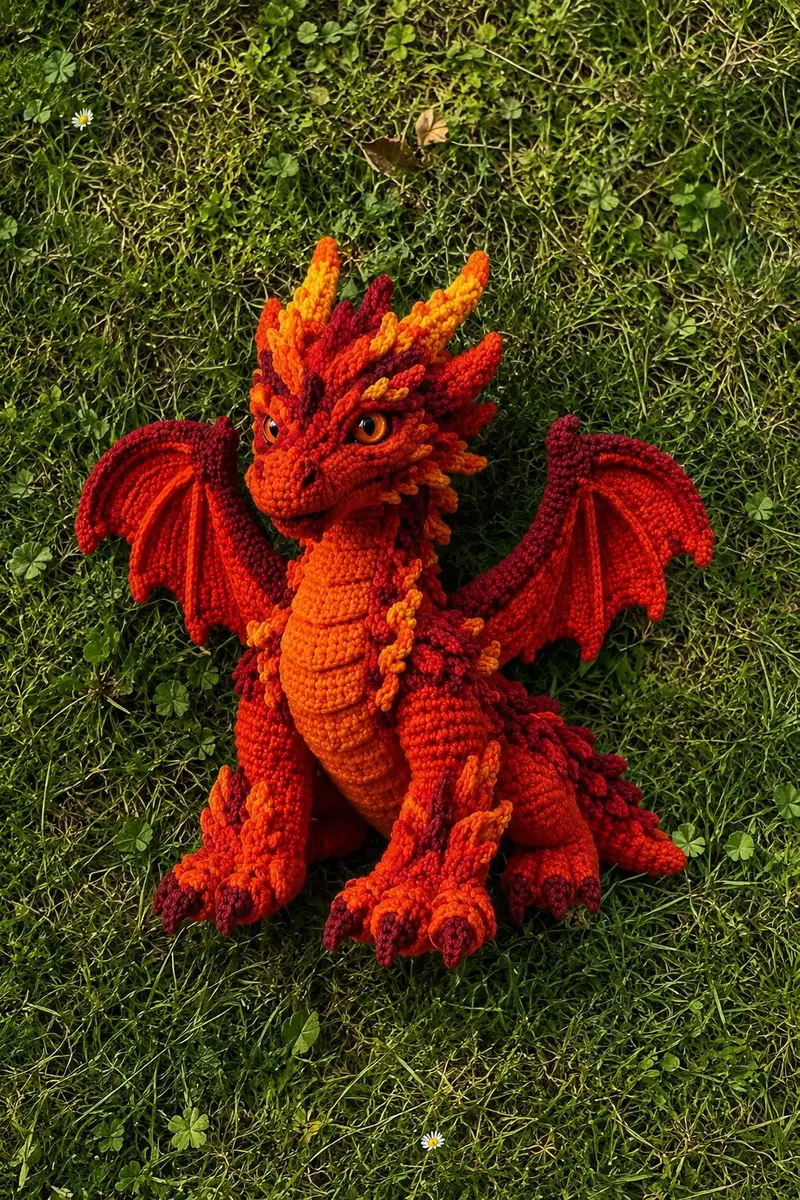
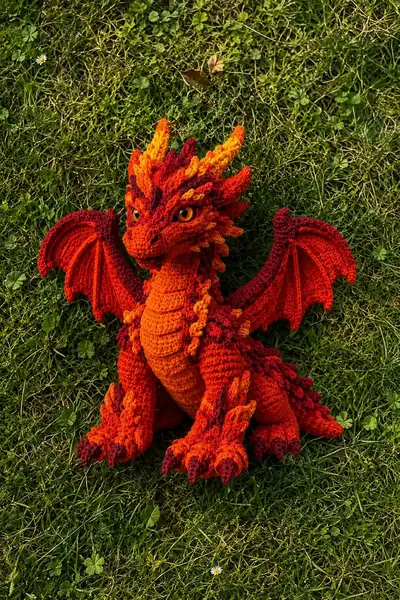
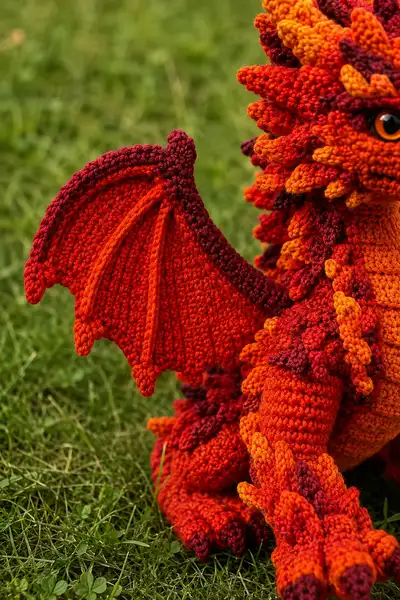
Bring a tiny fire-breathing friend to life with this richly textured Flameheart Dragon amigurumi pattern. This plush dragon features layered scales, sculpted snout, expressive amber safety eyes, articulated wings with ribbed details, and clawed feet with contrasting tips in deep crimson. The pattern uses warm gradient colors (orange, red, burgundy, yellow) to create a lively, fiery look that pops from every angle. Detailed shaping, scale placement, and assembly tips make this a rewarding project for experienced crocheters.
Progress Tracker
0% Complete
— Head :
Round 1 :
6 sc in magic ring (6)
Round 3 :
(1 sc, inc) x 6 (18)
Round 4 :
(2 sc, inc) x 6 (24)
Round 5 :
(3 sc, inc) x 6 (30)
Info :
Use Flame Orange yarn for all head rounds unless noted. Keep stitches tight to prevent stuffing showing. Place marker at first stitch of each round
Round 6 :
(4 sc, inc) x 6 (36)
Round 7 :
(5 sc, inc) x 6 (42)
Round 8 :
(6 sc, inc) x 6 (48)
Round 9-12 :
1 sc in each st (48)
Info :
Round 11 is where eye placement happens. Place 12mm safety eyes between rounds 11 and 12, spacing 10-12 stitches apart for an alert expression. Mark placement with pins before inserting.
Round 13 :
(6 sc, inc) x 6 (54)
Round 14-16 :
1 sc in each st (54)
Info :
Begin shaping snout: we will work forward shaping by creating a small raised snout over next rounds. Keep tension slightly tighter at the front to form curve.
Round 17 :
(6 sc, dec) x 6 (48)
Round 18 :
1 sc in next 4 sts, sc2tog, repeat around (42)
Round 19 :
(3 sc, dec) x 6 (30)
Round 20 :
(2 sc, dec) x 6 (24)
Info :
Start stuffing head firmly now but leave room along the neck opening to join to body. Shape snout with finger as you stuff to maintain a slightly pointed muzzle.
Round 21 :
(1 sc, dec) x 6 (18)
Info :
Fasten off leaving a long tail for sewing to neck. You should have a head that is firm, with eyes securely set. Embroider small nostrils just above the snout using deep crimson with a few tiny stitches.
Extra Head Sculpting :
To create brow ridges and cheek definition, work short rows of surface crochet after closing opening: sl st around eye rims using Ember Red placed 1-2 stitches above each eye to add shadow.
Info :
Attach eye safety backs when head is lightly stuffed but still open. If embroidering eyes instead, use six to eight embroidery stitches in brown for a rounded pupil with a single white french knot for highlight.
— Head Spikes and Crest (Make 30-36 scales) :
Scale 1 (basic) :
Ch 2, 3 sc in 2nd ch from hook (3), turn and continue: Round 2: inc in each st (6), Round 3: (1 sc, inc) x 3 (9), Round 4: 1 sc in each st (9). Fasten off leaving tail for sewing.
Info :
Create scales in graduated sizes: small scales (Rounds 1-4) - make 18 in Flame Orange; medium scales (Rounds 1-5) - 10 in Ember Red where Round 5: (2 sc, inc) x 3 (12); large scales (Rounds 1-6) - 6 in Solar Yellow and Deep Crimson alternating where Round 6: (3 sc, inc) x 3 (15)
Scale Placement :
Sew medium and large scales along head crown from forehead to nape, overlapping slightly for layered look. Smaller scales fill cheeks and sides of neck. Use pins to test placement and sew with whip stitch for secure attachment.
— Neck :
Round 1 :
Join Flame Orange to head opening then 6 sc in magic ring (6)
Round 3 :
(1 sc, inc) x 6 (18)
Round 4-8 :
1 sc in each st (18)
Info :
Work neck in continuous rounds, stuffing lightly as you go to keep neck flexible but sturdy. Add a few scales along the side rounds using the small scale pattern sewn in place.
Round 9 :
(1 sc, dec) x 6 (12)
Round 10 :
1 sc in each st (12)
Info :
Leave long tail at neck end to sew into body. Note neck length controlled by number of even rounds; add or remove rounds to change head position relative to body.
— Body :
Round 1 :
6 sc in magic ring (6)
Round 3 :
(1 sc, inc) x 6 (18)
Round 4 :
(2 sc, inc) x 6 (24)
Round 5 :
(3 sc, inc) x 6 (30)
Round 6 :
(4 sc, inc) x 6 (36)
Round 7-12 :
1 sc in each st (36)
Info :
Change to Ember Red for shadow rows starting Round 11 if you want a mottled flame effect. Carry unused yarn inside the body or fasten off and reattach color. Work Round 11 in BLO for a clean color ridge if adding a chest stripe.
Round 13 :
(4 sc, inc) x 6 (42)
Round 14-18 :
1 sc in each st (42)
Info :
Begin belly shaping: we will add a separate belly strip later that is crocheted flat and sewn in rows to the front. Start stuffing body lightly at Round 15 to keep shape consistent and allow sewing the neck later.
Round 19 :
(4 sc, dec) x 6 (36)
Round 20 :
(3 sc, dec) x 6 (30)
Round 21-24 :
1 sc in each st (30)
Info :
If adding wire support, insert a short length of floral wire through the center of the body before closing. Ensure ends are wrapped or taped and positioned away from seams to avoid poking through stitches.
Round 25 :
(2 sc, dec) x 6 (18)
Round 26 :
(1 sc, dec) x 6 (12)
Info :
Do not close body yet. Leave large opening to insert legs and tail. Fasten off leaving long tail to sew head and finish bottom later. Keep body slightly under-stuffed so legs attach neatly.
— Belly Plate (Worked flat - 16 rows) :
Row 1 :
Ch 16, 1 sc in 2nd ch from hook and across (15)
Row 2-16 :
Ch 1, turn, 1 sc in each st (15)
Info :
After Row 16, finish with a neat edge: sc evenly around the short ends to create rounded corners. Sew this plate to the front of the body from Round 10 to Round 22 using mattress stitch. Work belly in Solar Yellow or lighter orange to contrast with the body.
— Front Legs (Make 2) :
Round 1 :
6 sc in magic ring (6)
Round 3 :
(1 sc, inc) x 6 (18)
Round 4 :
(2 sc, inc) x 6 (24)
Round 5-8 :
1 sc in each st (24)
Info :
These rounds create the foot pad. Stuff the foot firmly now to keep shape for toes.
Round 9 :
(3 sc, dec) x 6 (18)
Round 10-14 :
1 sc in each st (18)
Round 15 :
(2 sc, dec) x 6 (12)
Info :
Create toes by crocheting three small claws per foot: for each toe, make a mini cone (see Claw instructions), then sew them evenly spaced across the foot front. Use Deep Crimson for claw tips and Ember Red for toe bases.
Round 16-20 :
1 sc in each st (12). Leave opening at top for sewing into body. Fasten off with long tail.
— Claws (Make 12 small claws total) :
Round 1 :
5 sc in magic ring (5)
Round 2 :
(1 sc, inc) x 5 (10)
Round 3 :
1 sc in each st (10)
Round 4 :
(2 sc, dec) x 2,(1 sc) x 2 (8)
Round 5 :
1 sc in each st (8). Fasten off leaving tail for sewing. Make tips in Deep Crimson by switching color on Round 3.
Info :
Sew claws to padded foot using the long tail. Arrange three claws across each foot, then tack smaller claws to back legs if desired. You can glue tips for extra durability but sewing is preferred.
— Back Legs (Make 2) :
Round 1 :
6 sc in magic ring (6)
Round 3 :
(1 sc, inc) x 6 (18)
Round 4 :
(2 sc, inc) x 6 (24)
Round 5-10 :
1 sc in each st (24)
Info :
Back legs are chunkier than front legs for seated posture. Stuff foot firmly and leg lightly so shape holds. Add multiple small scales to outer calf rounds for texture (use small scale pattern).
Round 11 :
(3 sc, inc) x 6 (30)
Round 12-18 :
1 sc in each st (30)
Round 19 :
(3 sc, dec) x 6 (24)
Round 20-25 :
1 sc in each st (24). Leave opening at top for sewing to body. Fasten off with long tail.
— Tail :
Round 1 :
6 sc in magic ring (6)
Round 3-6 :
1 sc in each st (12)
Round 7 :
(3 sc, inc) x 3 (15)
Round 8-14 :
1 sc in each st (15)
Info :
Work tail length according to photo (approx 12-16 rounds for proportion). Add scales along top edge using medium scale pattern sewn in staggered rows. For a curled tip, gradually decrease over final 4 rounds.
Round 15 :
(2 sc, dec) x 3 (12)
Round 16 :
(1 sc, dec) x 4 (8)
Info :
Stuff tail lightly, more toward the base for stability. Sew tail to back lower body between Rounds 4-6. Place tip scales slightly over the body seam to hide join.
— Wings (Make 2) :
Wing Membrane Foundation :
Ch 30, Row 1: 1 sc in 2nd ch from hook and across (29). Row 2-6: Ch1, turn, 1 sc across (29). This creates a flat panel for the wing membrane.
Info :
The wings are worked flat then edged and ribbed. Use Flame Orange for membrane and Ember Red/Deep Crimson for edging to create dimensional contrast. Keep panel blocked on a flat surface while you add ribs.
Wing Shaping Rounds (worked in rounds around membrane) :
Round 1: Join yarn to one corner, sc evenly around the panel adding (2 sc, inc) at corners to keep shape flat. Aim for approximately 88 sc around (count depends on panel width).
Round 2-4 :
1 sc in each st (approx 88)
Info :
Add 3 wing ribs: make three i-cord tubes (see Ribs) or crocheted tubes and sew onto membrane from base to tip spaced evenly. These ribs can be stiffened with floral wire inside for an articulated look.
Wing Edge Round :
Switch to Deep Crimson and sc around outer edge with (3 sc, picot) x repeat to create scalloped tips. A standard picot: ch 3, sl st in 3rd ch from hook to form small point.
Info :
For a curled wing tip as in photo, stitch tighter tension and add a bit of stuffing to the tip before closing. Sew wing bases into side body at Rounds 13-15 for natural shoulder placement.
— Wing Ribs (Make 6 tubes or i-cord style ribs total - 3 per wing) :
Method A (Crocheted tube) :
Ch 6, join to form ring, Round 1: 6 sc in ring (6). Round 2-30: 1 sc in each st around, do not join - work in spiral to desired tube length (approx 20-26 rows depending on wing size). Stuff lightly and insert thin floral wire of same length if making poseable. Fasten off and sew to membrane.
Info :
Make ribs slightly tapered by decreasing a stitch every 6-8 rows toward the tip. Cover wire ends with sc wrap to keep them from poking out.
— Wing Tips and Points :
Tip Detail :
At the outermost points of wing, create small teardrop points by chaining 4, 3 sc into second ch from hook, sl st to base to form a pointed tip. Work small scallops along edge every 6-8 stitches.
Info :
Sew wings to body before fully closing body bottom. When sewing, align the wing base with the back side seam and include a few stitches into the body fabric for stability.
— Tail Spikes and Back Scales (Apply many) :
Spike (larger) :
Ch 2, Round 1: 4 sc in 2nd ch from hook (4). Round 2: (1 sc, inc) x 2 (6). Round 3: 1 sc each (6). Round 4: (1 sc, inc) x 2 (8). Fasten off leaving tail. Make 12-16 larger spikes in mixed colors for tail and back ridge.
Spike (small) :
Ch 2, 3 sc in 2nd ch (3). Round 2: inc each st (6). Fasten off. Make 20-28 small spikes for neck and limbs.
Info :
Sew each spike in staggered rows down the spine and along thighs. Alternate colors for a fiery ombre effect. For a dense effect like the photo, make 40-60 scales combined of all sizes and stitch them overlapping slightly so the body ridge appears plush and layered.
— Neck Frill Detail (worked as curved strips) :
Strip :
Ch 10, Row 1: 1 sc in 2nd ch and across (9). Row 2: ch1, turn, 1 sc across (9). Row 3: ch1, turn, (1 sc, inc) across to create a ruffled outer edge (12). Fasten off. Make 6-8 strips and sew them around throat in layers.
Info :
Use mixed colors for dramatic frill. Sew to the underside of head and around neck seam to create the thick mane seen in the picture.
— Finishing Touches and Embroidery :
Info :
Using deep crimson or black yarn, embroider nostril slits on the snout. Add small vertical lines above the eyes for brows to make expression. Use long stitches to define ear ridges if desired. Weave in all ends securely and trim close.
Info :
Apply a thin fabric-safe blush on cheeks or use a small dab of fabric paint to highlight scales. For a glossy eye effect, a small dab of clear craft gloss on the white highlight creates a lifelike glint.
This Flameheart Dragon is a celebration of texture and color, combining layered scales, sculpted features, and articulated wings for a dramatic finished piece. Each scale and rib adds personality and movement, making the dragon feel alive in your hands. I hope you enjoy the meditative pace of building this little beast — every stitch contributes to its fiery charm. 🐉🧶 Let your creativity blaze with color variations and display your dragon proudly! 🔥