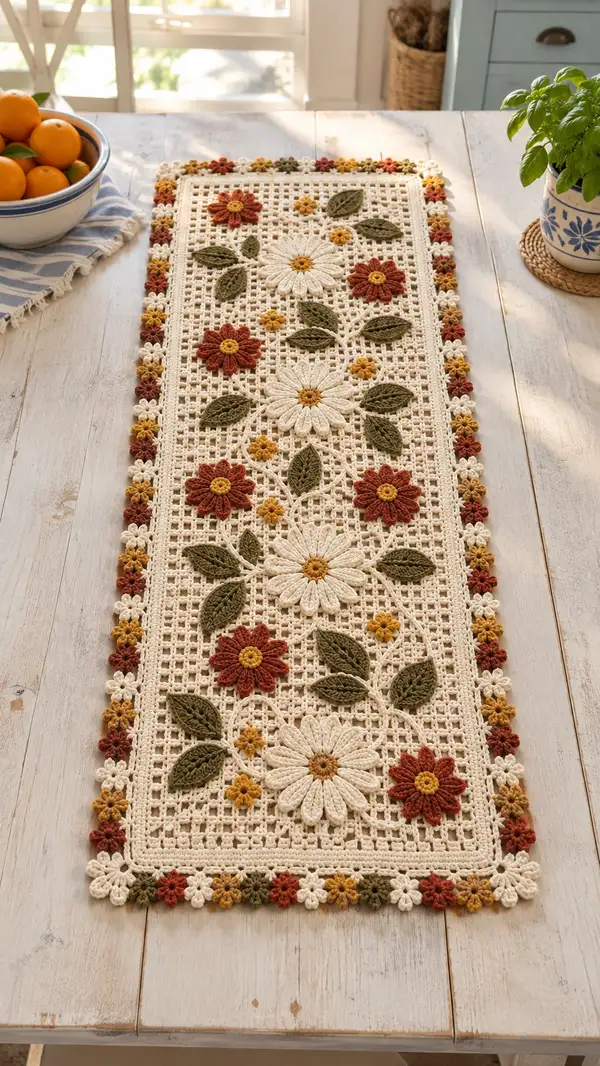
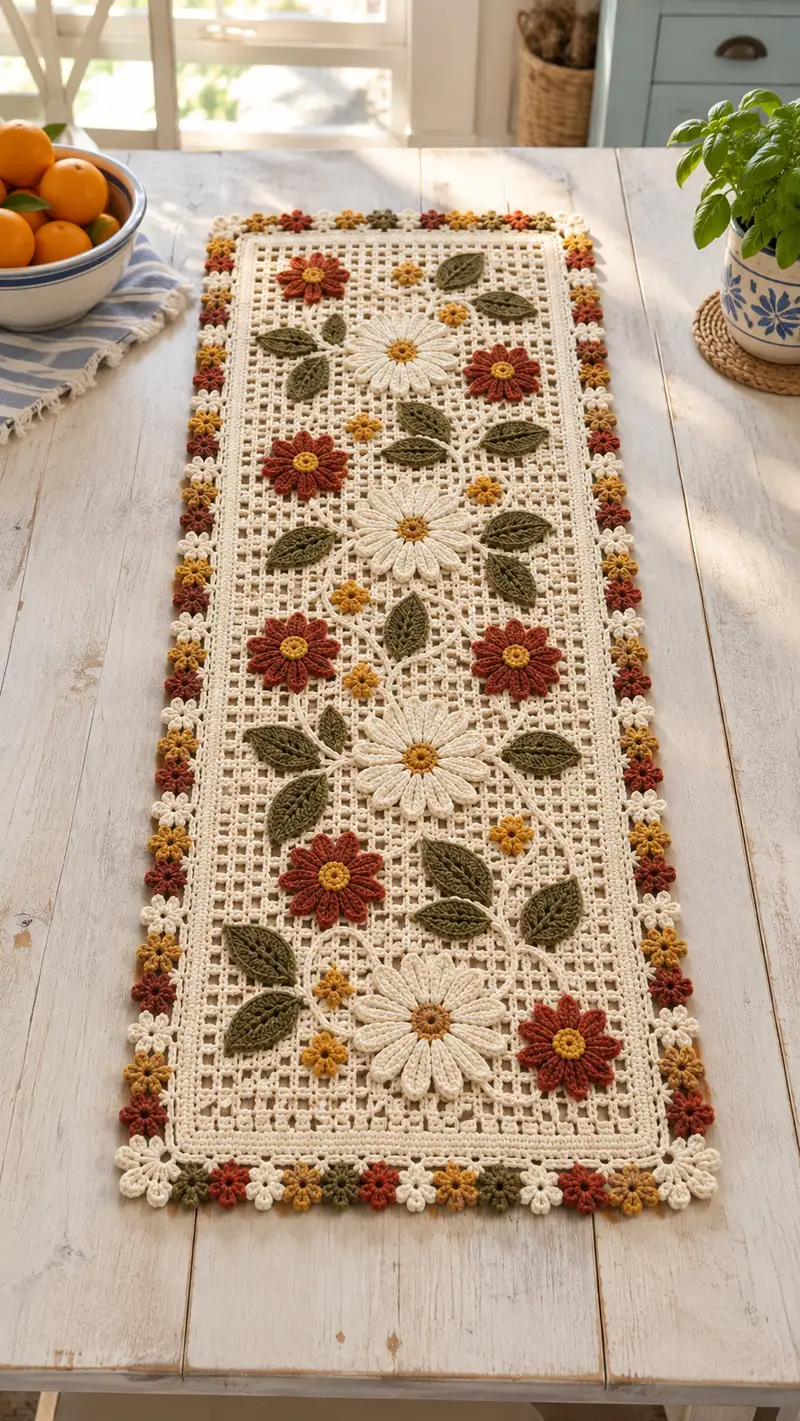
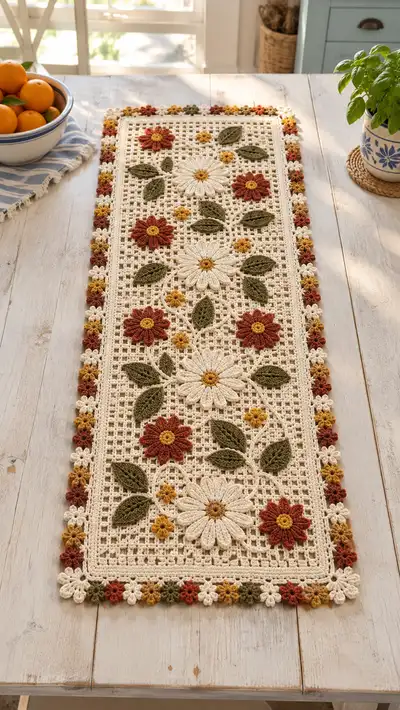
A charming rectangular table runner worked in a delicate filet mesh with appliqued daisies, rust-colored blooms, olive leaves and a daisy-chain border. This pattern uses a warm cream background with autumnal accent colors and 3D floral details that sit atop the mesh—perfect for adding a handcrafted, vintage-inspired look to a dining table or console.
Progress Tracker
0% Complete
— Notes & Gauge :
Info :
This runner is worked as a rectangular filet mesh panel then appliqued with separate motifs. Gauge is not critical for appearance but affects final size. Sample gauge: 10 mesh squares = 4" (10 cm) in width using 4.0mm hook and worsted cotton. Final approximate finished size using recommended yarn and hook: 12" (30 cm) wide x 48" (122 cm) long.
Info :
Throughout this pattern I use 'row' when working back and forth across the panel mesh and 'round' for motifs and decorative flowers. Use stitch markers at the start of each row and label right/ wrong sides as needed. Unless otherwise specified, join rows with 1 sl st into turning ch and turn.
— Main Filet Panel :
Foundation :
Ch 110 + 2 turning ch (this foundation will give 36 mesh squares across; adjust multiple of 3 to change width)
Row 1 :
Dc in 4th ch from hook (counts as first dc), *ch 2, sk 2 ch, dc in next ch* across to end. Turn. (36 open mesh squares, ending with dc)
Row 2 :
Ch 3 (counts as dc), dc in first dc, *ch 2, sk next ch2 sp, dc in next dc* across. Turn. (36 squares)
Row 3 :
Repeat Row 2 maintaining mesh. Turn. (36 squares)
Row 4 :
Repeat Row 2. Turn. (36 squares)
Info :
Work the mesh evenly. If you prefer slightly larger/open mesh, replace ch2 with ch3 throughout (adjust foundation chain accordingly). For a tighter look use ch1.
Row 5 :
Repeat Row 2. Turn. (36 squares)
Row 6 :
Repeat Row 2. Turn. (36 squares)
Row 7-10 :
Repeat Row 2 four more times (use these rows as lower margin before first motif placement). Turn after each row. (36 squares)
Info :
Lay the panel flat periodically to ensure edges remain straight. If edges begin to slope, tighten the last stitch of the row slightly or use a chainless foundation to even tension.
Row 11-14 :
Repeat Row 2 four times. These rows will sit under the first band that frames the inner field; maintain consistent tension. Turn after each row. (36 squares)
Row 15 :
Framing row: Ch 3, dc in next 4 sts, *ch 1, sk 1 mesh (ch2 sp), dc in next 5 dc* repeat across to create a tighter inner border. Turn. (36 dc clusters)
Info :
This framing row tightens the fabric where you will later place motifs. If you prefer the motifs to sit flatter, skip the ch1 pattern and maintain standard mesh.
Row 16-18 :
Repeat Row 2 three times to reestablish mesh. These rows form the first upper area for motif placement. Turn after each row. (36 squares)
Row 19 :
Row intended for baseline of large central daisy placement. Repeat Row 2 but mark positions for applique: mark across stitches 9-28 as central field where daisies will be placed (use pins or scrap yarn to note). Turn. (36 squares)
Info :
Place markers now to record where motifs will be attached later. For this runner there are three large daisies arranged along the center line: lower, center, upper spaced evenly. Small flowers and leaves are placed in surrounding mesh squares; mark approximate positions now to guide later stitching.
Row 20-26 :
Repeat Row 2 for seven rows (these rows create the field around the center daisy and provide height). Turn after each row. (36 squares)
Row 27 :
Create a narrow inner frame: Ch 3, dc in each dc across but work 1 sc in BLO along first and last 4 dc to create a ridge. Turn. (36 dc)
Info :
Working BLO on the inner frame creates a subtle raised ridge that helps motifs look framed when attached. Use the same technique at the top and bottom frame rows later for symmetry.
Row 28-34 :
Repeat Row 2 seven times. These rows form the second motif area where the middle and upper motifs will sit. Turn after each row. (36 squares)
Row 35 :
Repeat Row 15 (framing row) to mirror bottom frame. Turn. (36 dc clusters)
Row 36-42 :
Repeat Row 2 seven times to finish the field and approach the top margin. Turn after each row. (36 squares)
Info :
At this point the panel has approximately 42 rows. The total desired height for this pattern will be reached at Row 64—continue repeating mesh until you reach the final row counts and then add outer edge rounds. Keep margins even and block the panel after completion of mesh if possible.
Row 43-58 :
Repeat Row 2 for 16 rows (this extends the top area for additional breathing space above the upper motif). Turn after each row. (36 squares)
Row 59 :
Inner top frame: Repeat Row 27 (BLO ridge along edges). Turn. (36 dc)
Row 60-62 :
Repeat Row 2 three times to form top margin. Turn after each row. (36 squares)
Row 63 :
Working the final mesh row before the finishing border: Repeat Row 2. Turn. (36 squares)
Row 64 :
Fasten off, leaving long tail for border join. This completes the main filet panel which measures approximately 48" long by 12" wide with the gauge listed above.
Info :
Block the panel lightly to square edges before attaching motifs. Pin motifs in place while the panel is damp to ensure correct spacing.
— Large Daisy Motif (Make 3) :
Round 1 :
Using Mustard (center) in MR, 6 sc in mr, pull tight (6)
Round 2 :
2 sc in each st around (12)
Round 3 :
(1 sc, inc) x 6 (18)
Round 4 :
Change to Cream. Ch 2, *1 tr in same st, ch 2, sl st in center of previous round (create base for petal)* repeat around to form 12 petal bases. (12 petal base loops)
Info :
These base loops mark where each petal will be built. Keep tension even. If your yarn is thick, reduce hook one size for petals so they are sculpted.
Round 5 :
Petal row: In each base loop work: (sc, hdc, 3 dc, hdc, sc) all into loop, sl st to next base loop. Repeat around to create 12 elongated petals. Fasten off and weave tail. (12 petals)
Round 6 :
Using Mustard, embroider small raised bar stitch across center: Insert yarn at back of center, pull through, make 8 evenly spaced long straight stitches radiating slightly and secure at back to create a textured center. Alternatively, work 8 sc around center and finish with surface slip stitch for detail.
Info :
Stuff the center lightly with a small tuft of fiberfill before closing center embroidery if you want a slight dome. The petals should remain flat and slightly lifted from the fileted mesh when sewn on.
Round 7 :
Optional: Work a reverse round of 1 sc around the base of petals to give a neat edge for sewing (12 sc). Fasten off leaving long tail for sewing. (12)
Info :
Make three daisies in identical size. Block each petal gently using pins and steam or light spraying to help them flatten in consistent shape before attaching to panel.
— Medium Rust Flower (Make 6) :
Round 1 :
Using Rust color, MR, 6 sc in mr (6)
Round 2 :
Inc in each st (12)
Round 3 :
(1 sc, inc) x 6 (18)
Round 4 :
Petal base round: *Ch 3, sl st in next st* around to create 9 ch-3 loops (9 loops). Fasten off and switch to 3.5mm hook for petals if desired.
Round 5 :
Petal row: In each ch-3 loop work (sc, hdc, 3 dc, hdc, sc) then sl st to next loop. Repeat around to make 9 petals. Fasten off leaving a tail for sewing.
Info :
These medium flowers have 9 petals which sit nicely against the mesh and contrast with the large daisies. Slightly cup petals using pins while blocking for a dimensional look.
— Mini Golden Flowers (Make 18) :
Round 1 :
Using Mustard, MR, 6 sc in mr (6)
Round 2 :
*Ch 2, sl st in next st* around to create 3 ch-2 loops, or work 6 petal loops depending on preferred look. Fasten off leaving tail for sewing. (3-6 small petals)
Info :
Mini flowers are used as accents and often placed between leaves and larger motifs. They require very little yarn and can be glued lightly before sewing if preferred.
— Leaf (Make 15) :
Round 1 :
Using Olive, ch 10. In 2nd ch from hook: 2 sc, hdc, 3 dc, hdc, 2 sc. Turn to work on opposite side of foundation chain: 2 sc, hdc, 3 dc, hdc, 1 sc. Sl st to join at starting point. Fasten off. This creates a small leaf about 2.5" long depending on tension.
Info :
For a more defined center vein, before fastening off, insert yarn and stitch a running line of surface slip stitch down the center of the leaf. Block leaves on slight curve for a natural look.
Round 2 :
Optional: Work 1 sc around edge to give stronger sewing edge. Fasten off leaving long tail for applique. (approx 18 sc)
— Small Corner Daisy Motifs (Make 12 for border clusters) :
Round 1 :
Using Cream, MR, 6 sc in mr (6)
Round 2 :
Inc in each st (12)
Round 3 :
Make 6 tiny petal loops: *ch 3, sl st in next st* around. Fasten off. (6)
Info :
These tiny daisies are perfect to join into the border chain and alternate colors. Make an equal number of rust and mustard tiny daisies as well for the border color pattern.
— Border Flowers (Make approx 120 small flowers for perimeter) :
Round 1 :
Using border color sequence (Cream, Rust, Mustard, Olive alternation), MR, 6 sc in mr. Pull tight (6)
Round 2 :
*Ch 2, sl st in next st* around to form 3 small loops; or ch 3 loops for a fuller look. Fasten off leaving long tail for joining. (3 loops)
Info :
Make an approximate total of 120 small flowers to place around the perimeter of the runner (use 30 cream, 30 rust, 30 mustard, 30 olive or desired distribution). These are sewn directly to the edge chain in the finishing join sequence.
— Decorative Stem Work (worked on panel after motifs are appliqued) :
Info :
Stems are worked with surface slip stitch or chain embroidery across the mesh. Use 2 strands of cream for stems for visual continuity or olive for a bolder stem. Embroider stems after motifs are sewn in place so you can curve the stems naturally between flower centers and leaves.
Step :
Use yarn needle and 1 strand of yarn: come up on the front at motif edge, work a series of small sl st or couching stitches along desired path following mesh openings. Secure ends on the back with a few anchoring stitches.
Info :
Stem routing: lower daisy to center daisy to upper daisy path: follow approximate grid lanes and curve stems by moving one mesh over every 2-3 rows for natural swoop. Keep stitches consistent and flat on the surface.
— Assembly & Applique :
Info :
Block the main panel and all motifs first. Lay the panel flat and position motifs according to the previously marked positions. For this runner: lower daisy center at row 10 center of width, second daisy at row 30 center, third daisy at row 50 center. Place medium rust flowers alternately left and right between daisies, leaving small golden flowers as fillers. Place leaves around each flower cluster naturally.
Step 1 :
Pin each motif to the panel with rust-proof pins. Check symmetry and spacing, adjust as needed. The center-to-center spacing between large daisies should be approximately 10" (25 cm). Small flowers should fill gaps without crowding petals.
Step 2 :
Sew motifs using long tails and whip stitch through the base rounds only. For daisies, sew through the Round 7 reverse sc row (base) to anchor securely to mesh at multiple points around the base. Use matching color thread for invisible joins.
Info :
When sewing petals, take only base loops to avoid flattening petals. Keep stitches small and close so motifs are secure but still lift slightly for 3D effect.
Step 3 :
Sew leaves along stems with minimal stitches at the center vein and tail ends. Add embroidered stem couching between motifs to connect flowers visually.
Info :
If you prefer to firmly secure motifs, add a few hidden slip stitches from the back through the mesh and around the motif base for extra stability.
— Border Join & Edge Finishing :
Edge Round 1 :
Attach Cream at any corner. Working around entire perimeter: sc evenly around the runner, working 3 sc in the corners to keep edges flat. Work approximately 2 sc per mesh vertical opening and 1 sc per dc across top/bottom rows. Join with sl st. (Edge should remain flat; adjust counts as needed)
Info :
Keep counts consistent along both long edges; if one side looks tighter, add occasional increases in flat sections to remove puckering. Use stitch markers to divide perimeter into four equal sides for even stitch distribution.
Edge Round 2 :
Working in BLO: ch 1, sc in each sc from previous round to create a neat ridge, sl st to join. Fasten off and change color sequence to begin adding small border flowers.
Border Join Round 3 :
Join small 3D border flowers consecutively: With first border flower tail, position at edge, use tail to whip through edge sc and flower base, then pick up next edge sc and sew next small flower, alternating colors in desired sequence. Continue attaching flowers around entire perimeter so they butt up to each other forming a chain of tiny flowers. Fasten off and weave in tails.
Info :
Alternate colors in pleasing order (Cream, Mustard, Rust, Olive) repeating around the perimeter. At corners work 3 small flowers closer together to create a rounded corner effect.
Final Edge Round :
Optional decorative round: With Cream, work a round of crab stitch (reverse sc) around the very edge to finish and conceal join stitches. Fasten off and weave ends. Block the runner flat and allow to dry completely.
Info :
Blocking will help flowers flatten slightly and secure shape. Use rust-proof pins and spray water lightly; pin each petal separately for crisp look if desired.
— Optional Surface Embroidery & Finishing Touches :
Step :
Using a blunt yarn needle and 1 strand of Olive, add small embroidered veins on leaves and additional tiny French-knot style centers on small golden flowers for texture. Secure all tails on the wrong side and trim close after weaving.
Info :
To make the runner more durable, consider lining the underside with a lightweight interfacing or felt cut to size and slip-stitched in place. This will help protect the yarn from table friction and prevent small things from catching the mesh.
— Alternative Construction Notes and Scaling :
Info :
To make a wider runner, increase foundation chain by multiples of 3. To make shorter or longer, add or subtract groups of mesh rows keeping decorative motif positions proportional (space motifs evenly). For a placemat version, scale down number of mesh squares to 18 and reduce number of motifs to one central daisy.
Info :
If you prefer motifs integrated rather than appliqued, consider crocheting the large daisies directly onto the mesh by working petals through mesh openings as you reach placement rows. This is advanced and requires careful counting.
This floral filet table runner is a delightful blend of airy mesh and sculptural applique that brings handmade warmth to your table! The layered daisies, tiny border flowers and olive leaves create an inviting seasonal look you’ll love displaying. Each step is designed to give a professional finish while letting you enjoy the meditative rhythm of crochet. 🧶🌼✨ Make one as a centerpiece, a gift, or a charming addition to your home decor!