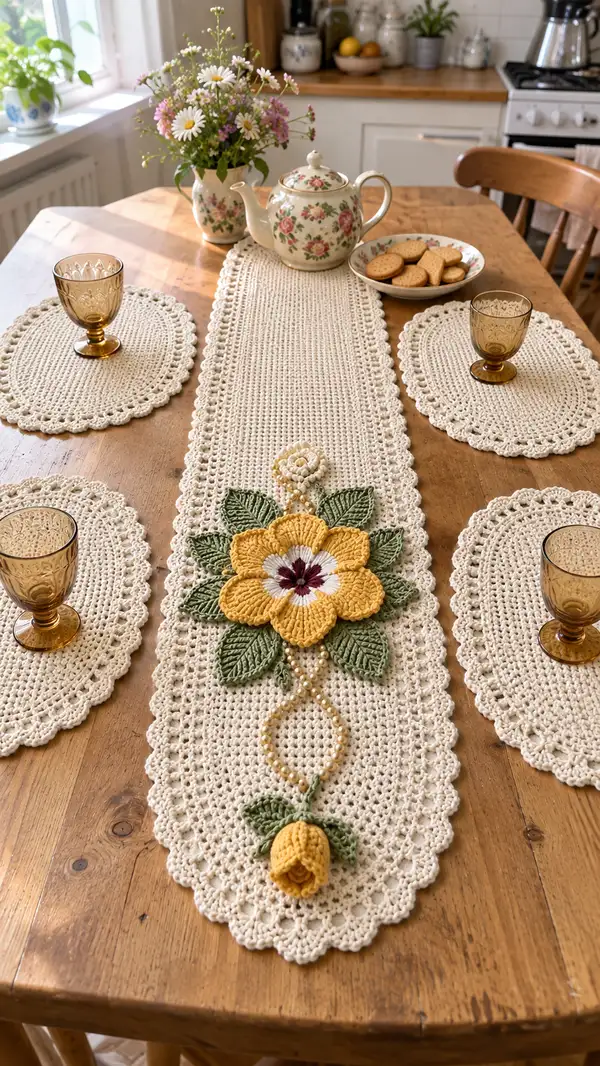
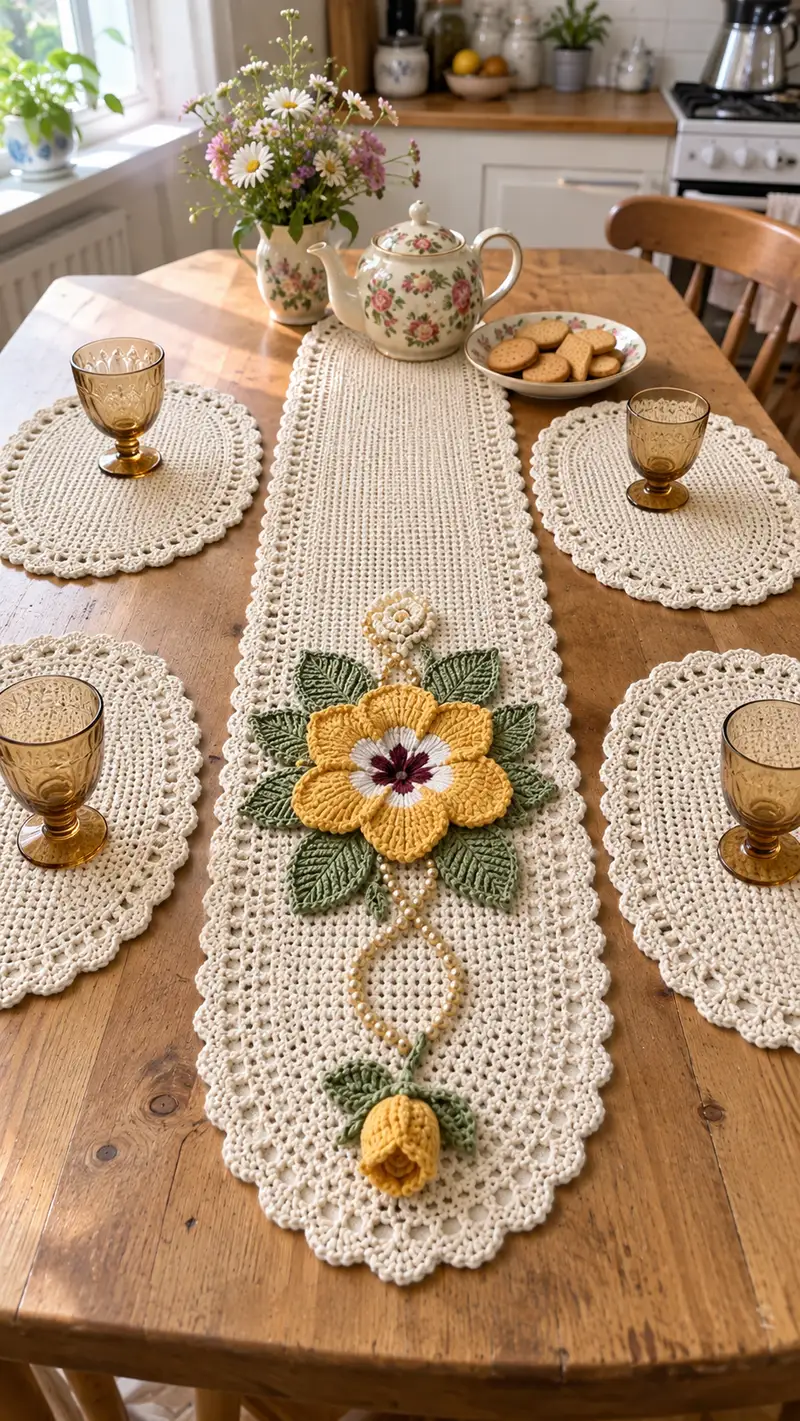
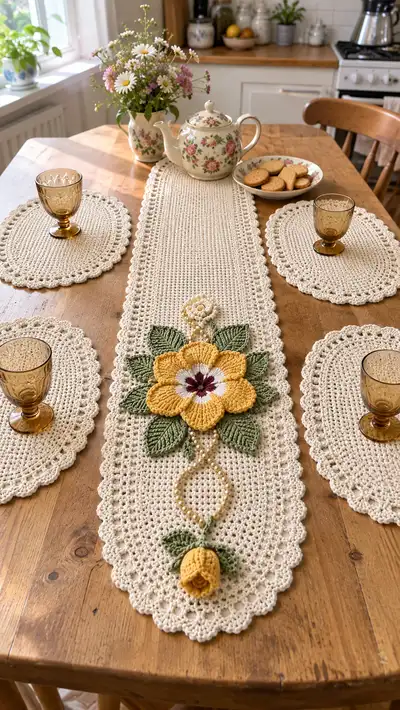
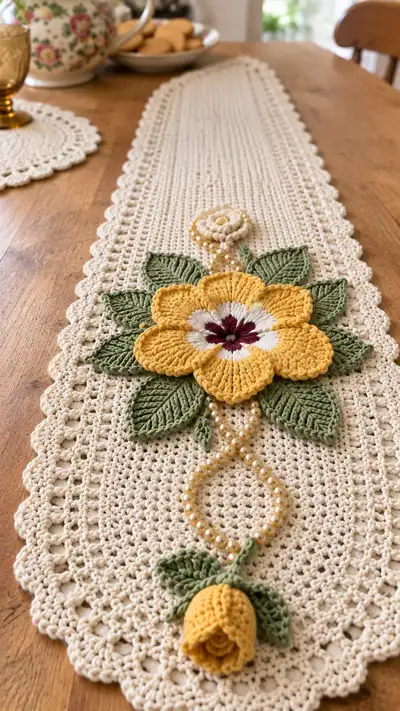
Create a timeless vintage-inspired table runner and matching scalloped placemats featuring a large textured yellow flower, layered green leaves, a beaded vine and a small bud. Worked in a soft cream cotton with raised applique motifs, this set brings rustic charm and tactile detail to any table. The design pairs solid ground rows with a delicate scalloped edge and 3D floral elements for an elegant centerpiece.
Progress Tracker
0% Complete
— Notes & Gauge :
Info :
Gauge is approximate since cotton yarn and personal tension vary. For reference, 10cm = 4 inches in single crochet measured after blocking with 14 sc x 16 rows. Use a slightly smaller hook than yarn label to achieve a dense fabric suitable for table use.
Info :
All pieces are worked in rows unless otherwise noted. For a consistent, flat tabletop fabric use even tension and block each finished piece. The pattern lists exact stitch counts and repeats — check counts at the end of each row.
— Runner Base (work flat, make 1) :
Materials :
Begin with main color (cream). Foundation chain: ch 100 (this produces 99 working stitches across). You may alter width by adding or subtracting multiples of 3 chains then +1 to keep scallop motif divisible by 3 later.
Round 1 :
Ch 100, ch 1 (does not count as st), sc in 2nd ch from hook and in each ch across — 99 sc. (99)
Info :
Place a stitch marker in the first stitch of this row to mark the turning side; keep markers at each 10th stitch to help verify counts in longer runs.
Round 2 :
Ch 3 (counts as first dc), turn, dc in each st across — 99 dc (99)
Round 3 :
Ch 1, turn, sc in each st across — 99 sc (99)
Round 4 :
Ch 3, turn, *dc in next 2 sts, ch 1, skip next st*; rep across ending with dc in last 2 sts — pattern produces 99 stitch positions, with ch-1 mesh across but maintain 99 positions
Round 5 :
Ch 1, turn, sc in each st and each ch-1 space across — 99 sc (99)
Info :
Begin alternating texture rows now: even-numbered rows worked in dc create a subtle ridged vertical effect; odd rows in sc tighten the ground. Keep counts constant at 99 stitches per row.
Round 6 :
Ch 3, turn, dc in each st across — 99 dc (99)
Round 7 :
Ch 1, turn, sc in each st across — 99 sc (99)
Round 8 :
Ch 3, turn, *dc in next 1 st, dc2tog over next 2 sts, dc in next 1 st*; rep across to maintain 99 dc stitches visually (work dc variations without changing net count). (99)
Round 9-16 :
Repeat Rounds 5-8 twice more (alternating sc row, dc row, textured dc row, sc row) keeping 99 stitches per row. (99 each row)
Info :
Work evenly and check width periodically against placemats and table. For a tighter, less lacy base use sc rows more frequently (e.g., every second row).
Round 17-24 :
Repeat Rounds 2-9 (a sequence of dc and sc rows with alternate texture) maintaining 99 stitches per row. After row 24, the fabric will be tall enough for a medium runner; continue to lengthen as desired. (99 each row)
Info :
If reproducing the pictured runner length, continue to a total of 60 rows of body (counted from Round 1). The pattern below continues Rows 25–60; if you want a shorter runner, stop earlier and work the edging starting at Round 61.
Round 25-28 :
Ch 3, dc row; Ch1, sc row; Ch3, dc cluster texture row; Ch1, sc row — keep 99 sts each row (99)
Round 29-32 :
Repeat the Rounds 25-28 sequence (4 rows) keeping fabric even. (99)
Round 33-36 :
Repeat Rounds 25-28 sequence again. (99)
Round 37-40 :
Change subtle texture: R37 ch3 dc row, R38 ch1 sc row, R39 ch3 dc (work FLO on last 6 sts to create a slight ridge near center), R40 ch1 sc row — 99 sts (99)
Info :
If you desire pronounced vertical ribs, on the odd-numbered dc rows work every 12th dc in BLO to pull a subtle ridge for a vintage look. Mark those stitches prior to the row to maintain symmetry.
Round 41-44 :
Resume original texture sequence: dc row, sc row, textured dc row, sc row. Keep counts at 99. (99)
Round 45-48 :
Repeat Rounds 41-44. (99)
Round 49-52 :
Repeat Rounds 41-44. (99)
Info :
At this stage you should have a rectangular piece with dense, neat stitches suitable for supporting appliques. If you added extra length, trim now by decreasing to desired length before edging.
Round 53-56 :
Continue 4-row sequences (dc, sc, textured, sc) to reach Row 56. (99)
Round 57-60 :
Final body rows: Row57 ch3 dc, Row58 ch1 sc, Row59 ch3 dc-texture, Row60 ch1 sc — 99 sts. Fasten off leaving a 30–40cm tail to use in the edging and for sewing appliques. (99)
Info :
Block the runner base before adding the scalloped edge if you prefer a crisp finish. Blocking now makes the scallops lie even and matching to placemats easier.
Round 61 (Edging Start) :
Join with RS facing: Join yarn to first stitch at short end, ch 1, sc evenly around the entire perimeter placing 3 sc in each corner to allow smooth turn. Work 99 sc along each long side (work counts approximate because perimeter counts include edges and corners) — work continuous around with 3 sc in corners. (perimeter sc)
Info :
For accurate scallop spacing the long edge count should be divisible by 3 (we used foundation to ensure 99 long-edge repeats). Adjust your starting chain if you changed width.
Round 62 :
Ch 3 (counts as dc), *skip 1 sc, 5 dc in next sc (shell), skip 1 sc, dc in next sc*; rep across each long side. At corners, work 5 dc shells into 3 sc corner groups to keep edge flat.
Round 63 :
Ch 1, sc in each st around, placing 3 sc in the peak of each shell to anchor. Fasten off and weave in ends. This produces rounded scallops like the photographed set.
Info :
If your scallops look large, reduce shell to 3 dc instead of 5 dc and anchor with a sc in peak (3-dc shells create smaller scallops). Block again after edging.
— Round Placemats (make 4) :
Info :
Placemats are worked as ovals with scalloped edge to echo the runner. Use the same main color and same hook for matching gauge. Foundation chain for oval: ch 35. This gives placemats approximately 30cm (12in) wide after blocking. Change chain count by +4 for slightly larger oval.
Round 1 :
Ch 35, sc in 2nd ch from hook and across to last ch, 3 sc in last ch, working on the opposite side of starting chain sc in each ch along the other side, 3 sc in starting ch — total approx 70 sc around (70)
Round 2 :
Ch 1, sc in each st around, placing 3 sc in each corner cluster (the 3-sc clusters) — maintain approx 70 sc. (70)
Round 3 :
Ch 3, *dc in next st, ch 1, skip next st*; rep around creating a delicate mesh. Anchor at corner clusters with dc groups to preserve oval shape. (70 positions)
Round 4 :
Ch 1, sc in each st and each ch-1 space around — approx 70 sc (70)
Round 5-8 :
Repeat Rounds 3-4 twice more for a layered mesh look, keeping approx 70 sts per round. (70)
Info :
Eye the oval to ensure both ends are symmetrical. If one end pulls tighter, add an extra sc in the corner to smooth shape. Block flat after finishing prior to scalloped edge.
Round 9 (Placemat Edge) :
Ch 1, sc in each st around; at the long sides anchor every 3rd sc with a small picot (ch 2, sl st in 2nd ch from hook) to start edge texture. (70)
Round 10 :
Ch 3, *skip 1 sc, 5 dc in next sc (shell), skip 1 sc, dc in next sc*; rep around, adjusting shells at the oval ends so peaks sit evenly — fasten off and weave ends. (shells around)
Info :
Make four placemats following these steps. For a fuller set, make 6. Place and block them to match runner scallops before assembly.
— Center Flower Applique (work 1 large layered flower) :
Info :
The flower is worked in three layers: a small center disk (burgundy), a white inner ring, and 6 large yellow petals worked as puff clusters and joined to form a strong 3D petal assembly. Use the yellow and white accent yarns and hook 3.5–4.0mm for tighter petals.
Round 1 :
With burgundy, make a magic ring, ch 1, 6 sc in ring. Pull tight. (6)
Round 2 :
(Inc) x 6 — 12 sc. (12)
Round 3 :
(1 sc, inc) x 6 — 18 sc. (18)
Round 4 :
Sl st to join and fasten off burgundy. Join white to any stitch, ch 1, sc in same, *ch 2, skip 1 st, sc in next st* around to make a small white frill ring — you will use this ring as an anchor for petals. Adjust so you have 6 ch-2 loops (6 loops).
Info :
The 6 loops correspond to the 6 petals. If your loops are smaller, work ch 3 loops instead so puff petals have room to sit.
Petal (make 6) :
Join yellow into one ch-2 loop, ch 1, (work the petal as follows): *ch 2, 5-tr puff cluster into loop (yarn over, insert, pull up loop; repeat 5 times then yarn over and pull through all loops, ch 1 to close cluster), ch 2, sl st in same loop to anchor*. Fasten off and leave a long tail for sewing. Repeat for each of 6 loops; arrange petals evenly around center. (6 petals)
Info :
Each petal should measure roughly 6–7 cm across when stretched; using a smaller hook tightens the puff stitches and adds definition. Block petals flat if desired before assembly.
Round after petals (petal reinforcement) :
With yellow, join behind a petal base and sc through the base of that petal and the next base (slip-stitch join across seam) across each pair to hold petals in correct splay. Work a round of sc around the back of the petals to tidy base. Fasten off and weave in tails.
Info :
For the highly textured vintage look, slightly twist each petal outward as you sew it down — this creates layered volume similar to the photo.
— Flower Inner Accents :
Round 1 :
With burgundy, join at the center front, ch 1, work a tight embroidered knot: using yarn needle pull several strands of burgundy through center to create a small star-like stitched tuft. Secure at back and weave in end. This gives the burgundy star in the photograph.
Round 2 :
With white, embroider a compact ring of elongated single crochet stitches evenly spaced between burgundy tufts. This white ring should sit directly behind the raised burgundy center and under the yellow petal bases.
Info :
If you prefer crocheted rings, you may create an additional round of sc (18 sc) directly behind the burgundy center instead of embroidered stitches. Ensure the white ring is slightly recessed so petals remain dominant.
— Layered Small Rose & Bud (make 1 bud and 1 small center rose) :
Small Rose (top of vine) Round 1 :
With cream or light yellow, magic ring, ch 1, 6 sc in ring (6)
Round 2 :
(Inc) x 6 — 12 sc. (12)
Round 3 :
Ch 1, *sc in next st, ch 2* around to create 6 ch-2 loops. Fasten off leaving tail. Wrap these loops with small petal spirals: join yarn and work sc, hdc, dc into each loop forming curving petals. Fasten off. (6 small petals)
Info :
This small rose sits near the top of the bead vine and is primarily decorative; sew onto runner after blocking and placement.
Bud (hanging) Round 1 :
With yellow, ch 6, join to form a loop, ch 1, 8 sc evenly around loop (8)
Round 2 :
Ch 1, inc x8 — 16 sc. (16)
Round 3 :
Ch 1, (1 sc, inc) x 8 — 24 sc. (24)
Round 4 :
Ch 1, sc in BLO around to create a gentler tapered top (24)
Round 5 :
Ch 1, (3 sc, dec) x 6 — 18 sc. (18)
Round 6 :
Ch 1, (2 sc, dec) x 6 — 12 sc. (12)
Round 7 :
Ch 1, (1 sc, dec) x 4 — 8 sc. (8)
Round 8 :
Stuff lightly with fiberfill to give bud body but keep soft. Ch 1, 4 dec (4) — close with magic finish or sc2tog twice, fasten off leaving tail to attach to runner. (close)
Info :
Sew a small leaf cap at the top of the bud by working 3 small leaves (see leaf pattern, small size) and sewing them around the bud opening for a natural look.
— Leaves (make 8 large leaves and 3 small leaf caps) :
Large Leaf (make 8) Round 1 :
With leaf green, ch 10. Row 1: sc in 2nd ch from hook, hdc in next, dc in next 2, tr in next 3, dc in next, hdc in next, sc in last — work along one side of chain, then continue on opposite side of starting chain doing symmetric decreases to create leaf shape. After working both sides, join to base with sl st creating a pointed leaf. Total approx 20 sts per leaf depending on shaping. (leaf)
Round 2 :
Ch 1, work into each stitch along the perimeter: sc, hdc, dc as appropriate to thicken the leaf edge. At center spine (FLO) work 4 fpdc across center stitches to create raised vein. Fasten off leaving long tail for sewing. (leaf detail)
Info :
To create the deep rib vein, use front post double crochet (FPdc) worked over a 3–5 stitch central run. Pin and steam-block leaves lightly to flatten them and emphasize veins before sewing.
Small Leaf Cap (make 3) :
Work ch 6, sc across and back symmetrically as in large leaf but scaled—approximately 10–12 sts total. Add a central FPdc vein of 3 stitches. Fasten off leaving tail. These will surround the bud top. (small leaf)
Info :
Arrange large leaves under flower in two layers (3 bottom, 3 mid, 2 top) as pictured. Pin before sewing to ensure even spread and that the flower center is slightly raised over the leaves.
— Beaded Vine (string and stitch) :
Info :
The bead vine in the photo is a faux-pearl chain arranged in an infinity/figure-8 motif under the flower. You can create this by stringing 40–60 beads onto thin cotton thread and sewing the thread onto the runner following the pattern below, or create a crocheted bead loop with sl st loops filled with beads.
Vine Stitch 1 :
Measure and mark trail on runner where vine will sit (about 10cm below flower center). Sew bead chain in place using small, tight stitches through runner fabric and through bead holes—tie off at both ends securely. The vine forms two connected loops approximately 6–8cm across each, crossing at center.
Vine Crochet Option :
With cream yarn and small hook, ch 40, then fold to form two loops and join with sl st to create a figure-8; sew the crocheted chain onto runner and add beads by sewing beads onto chain at even intervals. Fasten ends behind leaves. (vine)
Info :
If using real pearl beads, reinforce bead stringing thread with thin sewing thread for durability. Knot and hide ends in back of runner. For machine-washable use, sew beads tightly and use fabric glue on knots if desired.
— Assembly & Attachment :
Info :
Block runner and placemats first so all pieces sit flat and scallops are even. Place runner centrally on table and arrange appliques and bead vine before sewing for symmetry.
Round 1 :
Position large flower about 1/3 down the runner length (or centered visually). Pin the flower center then tack-stitch petals to base using the long tails from petals; sew through the runner base and petal base, securing every petal with 6–8 small stitches. Avoid pulling too tight so petals retain 3D lift. (attach petals)
Round 2 :
Arrange large leaves in two layers beneath the flower: 3 leaves at lower layer, 3 leaves mid-level, 2 leaves nearer the top. Pin each leaf and then sew along the central vein with small neat stitches at the base—use long tails and a mattress or ladder stitch to hide threads beneath the runner fabric. (attach leaves)
Round 3 :
Sew the small cream rose and bead vine along the marked path in front of the flower. Use bead thread to stitch beads through the runner fabric at 3–5 points along each loop to ensure stability. Secure knots on the wrong side. (attach rose and beads)
Round 4 :
Sew the bud to the lower tip of the vine by using the long tail from bud and the small leaf caps; attach leaf caps around bud and stitch through runner to secure. Add extra anchoring stitches behind the runner for stability. (attach bud)
Info :
When sewing appliques, ensure the back of the runner remains flat; avoid big knots or bulky stitching that creates lumps. For a cleaner look, use thinner sewing thread for securing then bury tails under several stitches of the runner base.
Round 5 :
Weave in all remaining tails on the underside of the runner with a yarn needle; trim close. Steam-block the entire assembled runner lightly to marry motifs to base and flatten any remaining irregularities. (finishing)
— Finishing Touches & Care :
Info :
Spot clean when possible. If washing, hand wash gently in cool water with mild soap and lay flat to dry; remove bead chain if you prefer. Re-block after washing to restore shape. Avoid tumble-drying if beads or delicate applique stitches are present.
Info :
To store, place tissue paper beneath raised petals to prevent flattening and lay runner flat or rolled loosely to prevent creases. Keep away from direct sunlight to avoid color fading over time.
This crochet table runner and placemat set blends vintage charm with tactile modern detail — the raised yellow bloom, layered green leaves, and pearl-like vine create a romantic centerpiece you will treasure. Each section is carefully designed to assemble cleanly and be durable for display or gentle use. Enjoy the meditative rhythm of the rows and the joy of building the appliques that make this piece come alive. 🧶🌼 Your handmade table will brighten gatherings and everyday moments alike — happy stitching! ✨