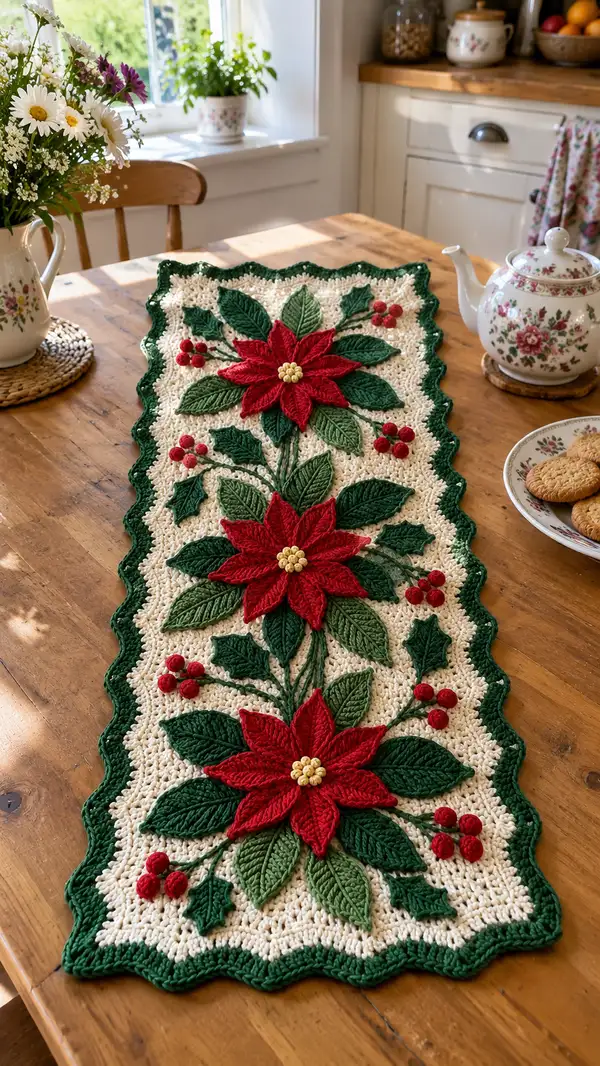
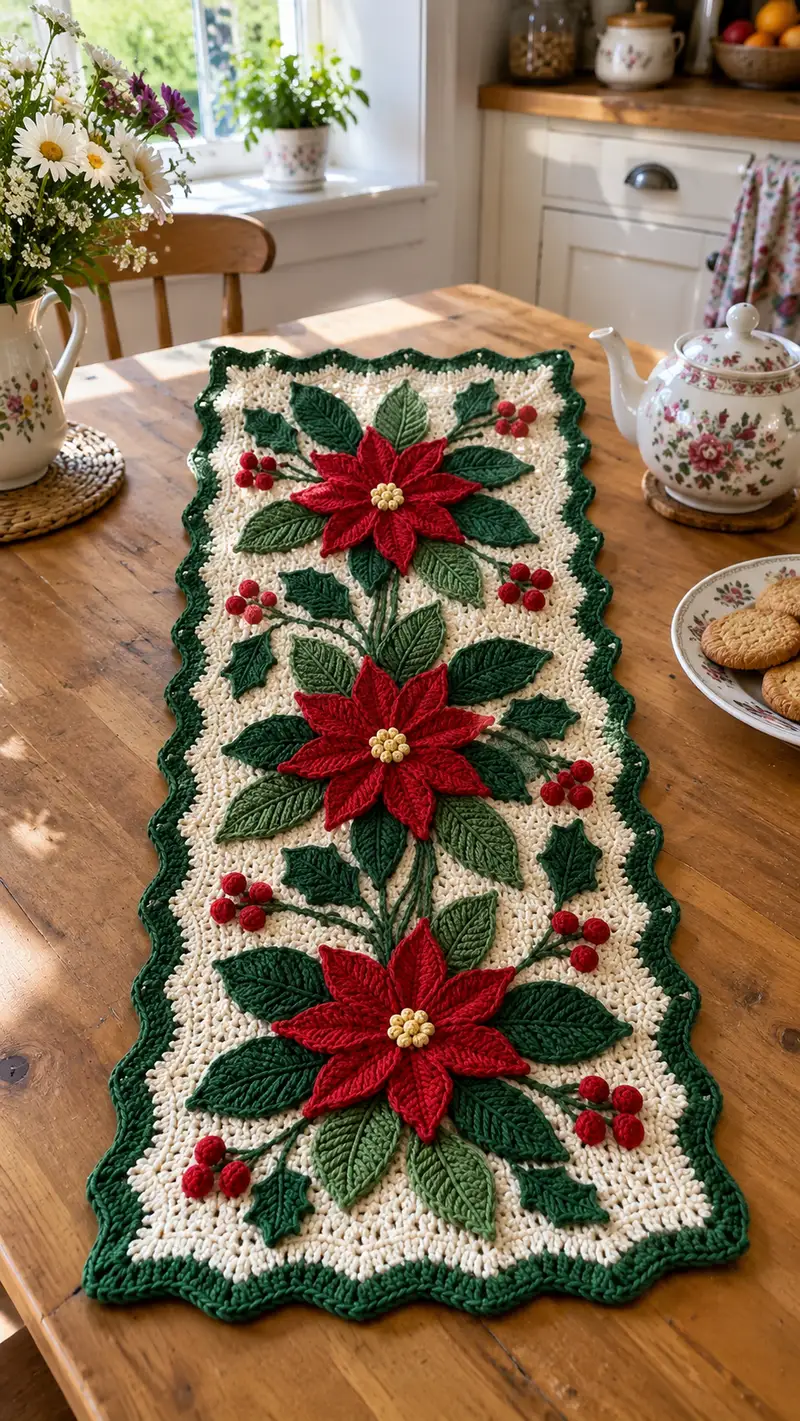
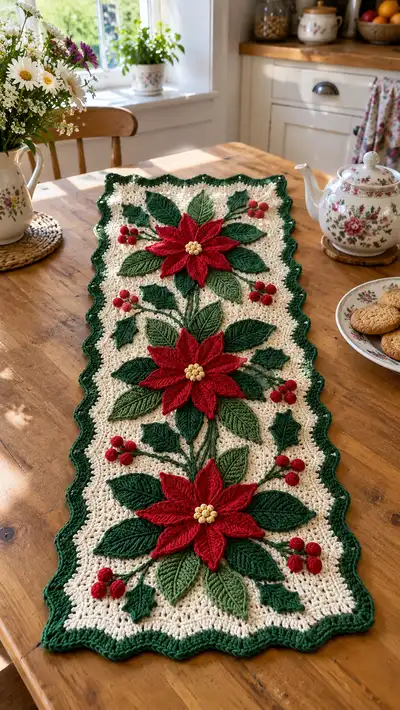
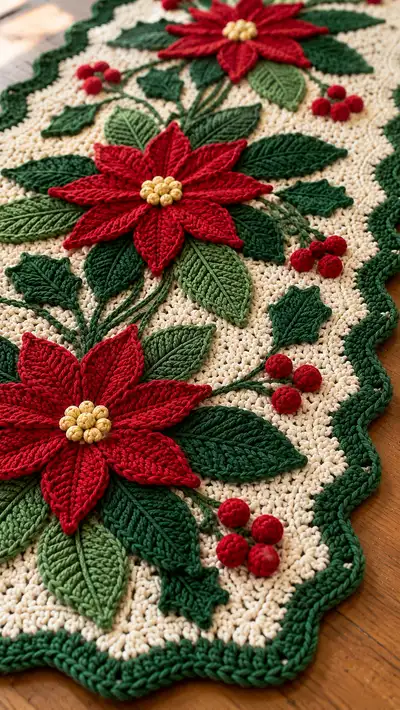
A festive, sculpted poinsettia table runner featuring layered red poinsettia flowers, two-tone green leaves, tiny clustered red berries and a scalloped deep-green border on a warm cream background. This richly textured runner combines crochet applique petals, raised leaf veins, and embroidered stems for a realistic botanical centerpiece. Perfect for holiday tables or seasonal decor, the runner is designed to be sturdy yet soft with visible dimensional detail.
Progress Tracker
0% Complete
— Overview :
Info :
This table runner is constructed as a large rectangular background panel worked in continuous rounds (joined at the end of each round) using a textured stitch in warm cream. All applique elements (poinsettia petals, inner petals, leaves, holly leaves, berries, and yellow center bobbles) are crocheted separately and sewn to the background. Stems are embroidered or worked as chains and sewn in place. Final finish includes a deep green scalloped border worked around the entire runner to frame the design. Work tightly enough to avoid stuffing showing through when applying applique.
— Runner Background (work flat in joined rounds) :
Round 1 :
Using warm cream yarn and 4.5mm hook: ch 86, turn (foundation chain counts as first row). Insert into 2nd ch from hook: 1 sc in each ch across (85 sc). Join with sl st to first sc to form a ring if you prefer working in rounds, or leave unjoined and turn for standard rows. For this pattern we'll join to work continuous joined rounds to produce a tubular but flat panel—keep turning to maintain even edges. (85)
Round 2 :
Ch 1, 1 sc in same st, 1 sc in each st across to last st, 2 sc in last st to maintain edge shaping; join with sl st to first sc. (87) Info: Use stitch markers at the beginning of each round to keep track of join and to mark center vertical axis for later motif placement.
Round 3 :
Ch 2 (counts as hdc), 1 hdc in each st around, join with sl st to top of ch-2. Maintain even tension to avoid curling. (87)
Round 4 :
Ch 1, 1 sc in each st around, join (87)
Round 5 :
Ch 2, 1 hdc in next 2 sts, *sk 1 st, 3 dc cluster in next st (shell), sk 1 st, 1 hdc in next 3 sts; rep from * across; join. This creates a subtle textured motif across the body while keeping fabric dense. Count will remain close to 87 but adjust shells evenly—if slight variation arises, check spacing. (approx 87)
Info :
Maintain a consistent stitch count across the width; when you reach the corner/join you may have to add or reduce a sc to keep the sides straight. Use blocking later to even edges.
Round 6 :
Ch 1, 1 sc in each st and in each ch-2 space or shell stitch around; join. (87)
Round 7 :
Ch 2, 1 hdc in each st around; join. (87)
Round 8 :
Ch 1, 1 sc in each st for 3 rounds to build height and texture; join each round. (87)
Round 9-11 :
Repeat Round 5 pattern (shell texture row) then 1 sc row and 1 hdc row. This builds a waffle-like textured background that helps applique adhere and stand out. (87)
Info :
Measure the runner width now and ensure gauge: with recommended yarn and hook you should achieve approximately 11.5-12 inches width (adjust chain count at start if you want a wider/narrower piece). The final runner in the photo measures about 12" x 36" for the photographed sample; chain more for a longer runner.
Round 12-20 :
Continue alternating texture rows: 1 sc round, 1 hdc round, 1 sc round, 1 shell-pattern round (as Round 5). Work these rounds to create an even base that is approximately 24 rounds tall before placing the first poinsettia cluster (you will create three clusters spaced evenly along the length). Maintain 87 sts unless you adjusted foundation chain width. (87)
Round 21 :
Ch 1, 1 sc in each st. At the vertical center (count 43rd stitch from marker), leave a longer end of yarn for basting the center applique; do not cut. Work remainder of round and join. (87)
Info :
Mark placement of three flower centers along the vertical center line: measure thirds along the runner length and place pins/stitch markers. Typical spacing is 10-12 inches between flower centers for the sample size shown. These marks guide where you sew petals and leaves later.
Round 22-30 :
Continue building background until you have approximately 40 rounds total across the body (counting the initial foundation as Round 1). Maintain the same texturing sequence so background is consistent. If you prefer a denser fabric, substitute sc rounds in place of hdc rounds. (87)
Info :
Before you finish the background, block it flat and press lightly (wet block according to yarn instructions). Lay out placement markers for the three poinsettia clusters and the accompanying leaves and berries. Blocking will help ensure even seam lines when you apply the scalloped border.
— Scalloped Border (work after applique or pre-borded application trial) :
Info :
Border is worked in deep forest green and attaches to the edge of the cream background. Work one continuous round of deep-green single crochet around the entire runner to create a firm edge, then work scalloped waves using shells and chains to shape the wave. We show a 16-round scallop sequence to create full depth and a nicely rounded finish.
Round 1 :
Join deep forest green yarn with sl st to any edge stitch. Ch 1, 1 sc in each edge stitch across, placing 2 sc in each corner row to ease around corners. (approx 87)
Round 2 :
Ch 2, 1 hdc in each st around; join. This builds a solid border base. (approx 87)
Round 3 :
Ch 1, 1 sc in each st around. Place stitch markers at equal intervals around the edge to indicate scallop centers (for 12 scallops along each long side mark every 7 sts; adjust for your runner length). (approx 87)
Round 4 :
Shell scallops: *skip 3 sts, in next st work (1 sc, 1 hdc, 3 dc, 1 hdc, 1 sc) in same st as shell; skip 3 sts; sl st in next st; rep from * around. This forms pronounced scallops. Place shells at markers to keep spacing even. (approx 12 shells per long side)
Info :
If your scallops look too loose, work the shell using dc clusters with FPdc/BPdc at the base to anchor them into place. You can adjust the size by using 2 dc instead of 3 for a smaller scallop.
Round 5 :
Ch 1, 1 sc in each stitch and in each dc of the shell around, adding an extra sc at the scallop tip for definition. Join and finish off. Fasten off and weave ends; block scallops flat to set shape.
Info :
Some crocheters prefer to work border after applique attachment; others pin scallops and baste first. If you attach appliques before final border rounds, leave 2-3 rounds of background around placement so you can overlap scallops without interfering with applique seams.
— Poinsettia Petal Motif (make 8 large petals and 8 inner petals per flower; make 3 flowers) :
Info :
Each large petal is worked in bright red using a slightly smaller hook (4.0mm) to create crisp definition. Petals are worked flat starting from the base and increasing to the widest point then decreasing to a tapered tip. The raised central vein is worked in FPdc and BPdc, or added later with surface slip stitch. Inner petals are slightly shorter and sit between large petals.
Large Petal - Round 1 :
Using 4.0mm hook and red yarn: ch 6, sc in 2nd ch from hook, hdc in next, dc in next, tr in last (foundation chain creates long tapered shape). Turn to work along other side of chain: dc in next, hdc in next, sc in last; join with sl st to first sc. (approx 10 sts across both sides, forming a teardrop base)
Large Petal - Round 2 :
Ch 1, 1 sc in first 2 sts, 1 hdc in next 2 sts, (2 dc, ch 1, 2 dc) in center tip to create slight fan, then 1 hdc in next 2 sts, 1 sc in last 2 sts; sl st to join. (shape has expanded, 14 sts)
Large Petal - Round 3 :
Ch 2, 1 hdc in next 3 sts, 3 dc shell in tip (3 dc, ch 1, 3 dc), 1 hdc in next 3 sts, 1 sc in last 2 sts; sl st. (approx 20 sts)
Info :
Place a stitch marker at the center of the petal tip to align later when sewing petals together. These early rounds create the basic teardrop; further rounds will add height and a raised central ridge using front post stitches worked into the base rows.
Large Petal - Round 4 :
Ch 1, 1 sc in next 3 sts, 1 hdc in next 4 sts to build body, 1 dc in each of 5 tip sts (work into shell spaces evenly), 1 hdc in next 4 sts, 1 sc in last 3 sts; join. (approx 26 sts)
Large Petal - Round 5 :
Ch 2, FPdc around the post of the ch-2 base stitch to create a central raised vein, then 1 hdc in next 8 sts, 1 dc in tip center 7 sts, 1 hdc in next 8 sts, FPdc at base opposite to create symmetrical ridge, sl st to join. (use 2 FPdc at centerline to form ridge)
Large Petal - Round 6 :
Ch 1, 1 sc in each st around working in BLO on the base rounds to create a neat edge; join. (approx 28 sts)
Large Petal - Round 7 :
Ch 2, 1 hdc around each st, working FPdc along central post on RS to deepen the vein: *1 hdc, 1 FPdc on vein stitch; rep across; join. (approx 28)
Large Petal - Round 8 :
Ch 1, 1 sc around; fasten off leaving 8-10" tail for sewing. Block each petal gently to shape a slightly cupped form for dimensional look. Make 8 large petals per flower (24 total for 3 flowers).
Info :
Stitch counts across petals are approximate; aim for visual consistency across petals in the same flower. Block and steam lightly to set shape before sewing them into flower formation.
Inner Petal - Round 1 :
Work inner (smaller) petal same as large petal but starting ch 5 and using fewer increase rounds: ch 5, sc, hdc, dc to tip then mirror back; finish with 4 rounds total to produce a petal 60-70% the size of the large petal. Make 8 inner petals per flower (24 total). Leave tails for sewing.
Inner Petal - Round 2-4 :
Work shaped rounds mirroring large petal but reduce dc counts at tip and use a single FPdc ridge for central vein. Fasten off and block. (approx 14-20 sts per petal)
Info :
When you assemble the flower, place inner petals between large petals and offset them so points are staggered for a full star shape. Use tail ends and whip stitch to secure petals to one another at their bases before sewing the assembled flower to the runner.
— Poinsettia Center Bobbles (make per flower) :
Round 1 :
Using golden yellow and 3.5-4.0mm hook: mr, ch 1, 6 sc in magic ring (6). Pull tight and do not join.
Round 2 :
Working in the round: (inc) x 6 (12). Use small amounts of fiberfill to slightly stuff this flat disk so it has volume. (12)
Round 3 :
Work surface cluster: *sl st into next st, ch 2, sl st back into same st; rep 6 times around to create 6 tiny beadlike protrusions; fasten off and weave tail under center. Make one cluster per flower; this becomes the central yellow bead cluster seen in photo.
Info :
Sew the yellow cluster to the center of the assembled petals, using the tails from petals to secure. Place cluster slightly raised with extra stitches under them for a crowned look.
— Large Leaves (two-tone - make 6-8 leaves per flower) :
Info :
Leaves are worked in two shades: deep forest green for darker leaves and mid-green for lighter leaves. Each leaf is worked flat with a strong central ridge formed by working FPdc and BPdc along the center row. Leaves are elongated ovals with a pointed tip and a subtly serrated edge on some holly-style leaves.
Leaf Round 1 :
With mid-green (or deep green) and 4.0mm hook: ch 12, sc in 2nd ch from hook, hdc in next, dc in next 5 sts to form length, hdc in next, sc in next, then work along opposite side of chain: dc in next 5, hdc in next, sc in last; sl st to join to first sc. (approx 24 sts)
Leaf Round 2 :
Ch 2, 1 hdc in next 4 sts, FPdc into center post to form ridge (work 3 FPdc along central st row), continue 1 hdc in next 8 sts, BPdc opposite ridge to mirror if needed, sl st to join. (approx 28 sts)
Leaf Round 3 :
Ch 1, sc evenly around the leaf working small picot points on the edge to simulate serration: *sc in next 2 sts, ch 2, sl st into last sc to create a small notch; rep across tip and both sides; flatten and block. Fasten off leaving long tail for sewing. Make 6-8 leaves per flower using a mix of deep and mid-green. (approx 28 sts)
Info :
For a more pronounced central vein, after finishing the leaf work a strand of yarn using surface slip stitch or couching along center line to deepen the ridge. Pin leaves to blocking mat with a slight curve to hold natural shape before sewing.
— Holly Leaves (small pointed leaves - make 6-8) :
Round 1 :
Using deep forest green and 4.0mm hook: ch 8, sc in 2nd ch from hook, hdc in next, dc in next 3, hdc in next, sc in last, then mirror back along chain: dc, hdc, sc; sl st. (approx 16 sts)
Round 2 :
Ch 1, sc around with small triangular points: at each of three tip dc stitches work (2 sc, ch 1, 2 sc) to create a small serrated holly edge; finish and fasten off leaving tail for sewing. Make 6-8 per runner in strategic positions. (approx 18-20 sts)
Info :
Holly leaves are smaller and used to accent the spaces between larger leaves and berries. Stiffen slightly with a spray starch if you prefer more rigid holly points.
— Berry Clusters (make 12-18 clusters) :
Berry - Round 1 :
Using bright red and 3.5mm hook: mr, ch 1, 6 sc in magic ring (6). Pull ring tight; do not join. (6)
Berry - Round 2 :
Inc in each st around (12). Stuff lightly with minimal fiberfill to round shape. (12)
Berry - Round 3 :
Sc around 12 sts, then dec next 2 sts together twice to shape the berry, sl st, fasten off leaving tail for sewing. Variation: for very small berries stop at Round 1 and make a clustered trio sewn together. Make clusters of 3-4 berries for each berry bunch as seen in photo. (approx 10-12 sts)
Info :
Sew berries in clusters of 3-4 using small stitches so they sit close together. Pin schedule clusters around the petals and along the stem lines for balance.
— Stems and Vines :
Info :
Stems are typically embroidered after appliques are sewn down. You can also crochet chain stems with slip stitch reinforcement to create slightly raised vines. Embroidered stems may be worked with 3 strands of yarn for thickness and sewn using a long needle following a pencil-drawn layout on the blocked background.
Stem Option A - Chain Stem :
Join deep forest green where stem begins; ch 20-50 depending on run length, sl st back along chain to thicken (work 1 sl st in each ch). Fasten off leaving long tail to stitch down. Repeat for each vine segment connecting leaf clusters. For multiple parallel stems, make 2-3 chains and sew them adjacent for fullness.
Stem Option B - Embroidered Stem :
Thread yarn needle with 3 strands of deep green yarn and use a stem stitch or couching to embroider a slightly raised vine following the marker lines. Anchor at ends and under leaf bases for a natural look.
Info :
When placing stems, try to mimic the gentle radiating lines in the photo: the stems branch from beneath each poinsettia cluster and sweep toward the adjacent cluster so the design reads as three linked botanical bouquets along the runner length.
— Assembly of Flowers and Leaves :
Info :
Assemble each poinsettia on a small anchoring disk of cream yarn if desired (a 2" round base worked in sc) to make sewing to the background easier. Arrange 8 large petals in a circle overlapping slightly at their bases, then place 8 inner petals offset between large petals. Sew through the petal bases in several passes to secure. Place yellow bobble cluster in center and stitch through base of bobbles into petal bases.
Assembly Step 1 :
Lay out flower components on the blocked background at the marked center positions. Pin each large petal base down with about 1/2" overlap at center. Using the long tail on a petal, blanket-stitch through the background and petal base to anchor each petal. Repeat for all petals of the flower. Sew inner petals last to tuck between outer points. (8 large + 8 inner per flower)
Assembly Step 2 :
Sew leaves in groups beneath and around each flower: place larger leaves radiating from the base and smaller holly leaves between clusters to create visual depth. Use hidden ladder stitch or whip stitch for flat attachment. Leave small stitches visible as stem anchors to be covered by embroidered vines.
Assembly Step 3 :
Sew berry clusters onto vine endpoints and to cluster nodes around flowers. Use short lengths of thread to position each berry so it nests into the space between leaves and petals.
Info :
Take time to pin everything before sewing. Temporarily baste with contrasting yarn (to be removed later) if you want to make placement adjustments. Sewing should be done with small close stitches so the appliques appear naturally grown from the runner rather than glued on top.
— Final Finishing Touches :
Round 1 :
After all appliques are sewn, weave tails securely through multiple layers under petals and leaves, knotting discreetly. Trim ends and weave them into work.
Round 2 :
Using deep forest green, pick up stitches around the edge if you did not already work the scallop border. Work border as instructed earlier, overlapping slightly over applique edges where needed. Block the runner flat and pin scallops to set shape. Allow to dry completely.
Info :
Optional: add a spray of soft starch to the berries to keep them rounded. You may also add a thin line of couching or embroidered veins on petals for additional realism. For high-traffic use, consider backing the runner with a lightweight fabric and hand-stitching it to the reverse to protect crochet stitches from wear.
— Notes on Gauge and Size :
Info :
Sample runner: approximately 12" wide x 36" long using recommended yarn and hook sizes. Adjust initial chain or add more repeats of the background stitch to lengthen. Gauge: 12 sc x 14 rows = 4" in sc/hdc textured fabric. Keep consistent hook sizes for background and smaller for applique for crispness.
Info :
Variation suggestion: make more or fewer flowers to lengthen or shorten runner; scale motifs down by using DK yarn and smaller hooks for a more delicate runner, but maintain proportions between background and applique to preserve harmony.
This poinsettia table runner brings a classic holiday look to your tabletop with lush dimensional flowers and sculpted leaves. Each stitch builds texture and warmth, making it a project worth savoring. The combination of bright red petals, two-tone greens and a warm cream background gives a vintage-meets-modern charm that will brighten your holiday gatherings. Enjoy creating this heirloom piece and showing it off with pride — happy stitching! 🎄🧶