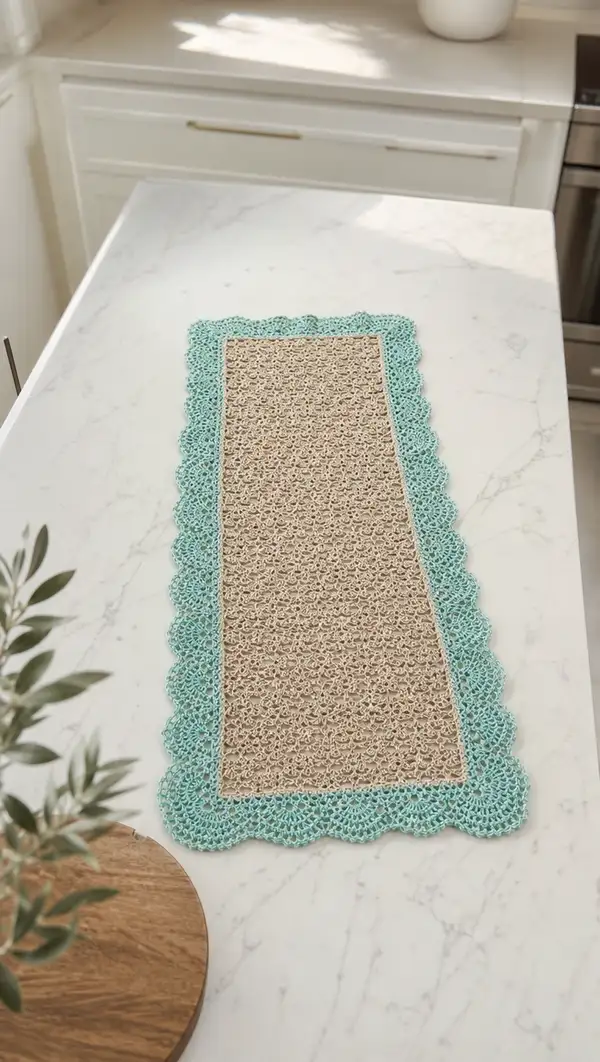
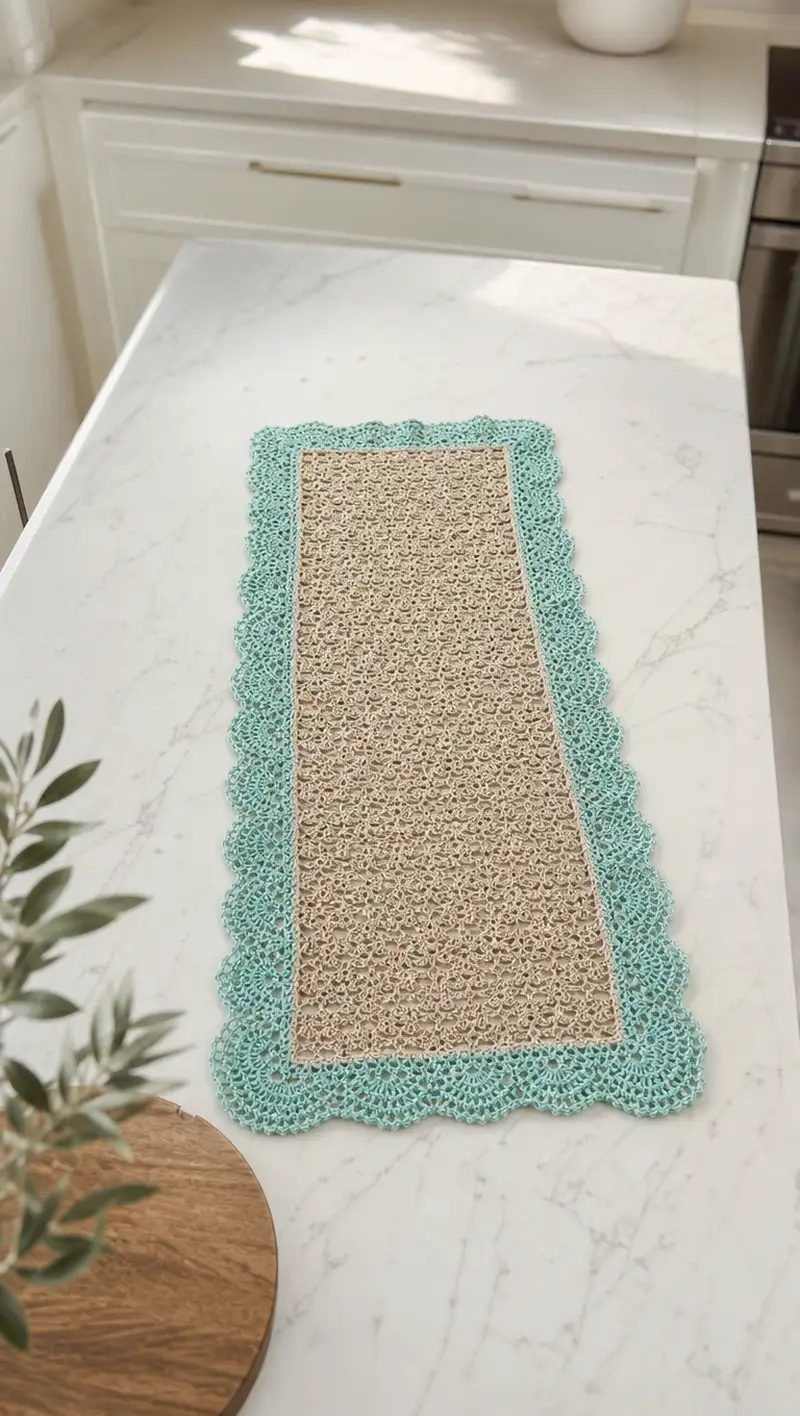
A delicate rectangular table runner featuring a tightly worked beige lace body and a scalloped mint border. The pattern uses a repeating shell-and-chain lace stitch for the center panel and a layered scallop edge that frames the runner beautifully. Perfect for dressing a kitchen island or console table and finished with a neat picot-like scallop in a contrasting color.
Progress Tracker
0% Complete
— Notes & Gauge :
Info :
This runner is worked flat in rows for the central lace panel and then the scalloped border is worked in joined rounds around the entire rectangle. Gauge for the sample: 22 dc x 10 rows = 10 cm (4 in) using sport weight yarn and 3.5mm hook; however lace gauge will vary with yarn and hook. Blocking will alter final dimensions and is recommended for a crisp finish.
Info :
Pattern multiple: The central lace motif repeats every 8 stitches across. Foundation chain is worked as multiple of 8 plus 5 edge chains. For the photographed runner the foundation chain is 157 chains (8 x 19 + 5) giving a finished width of approximately 28-30 cm (11-12 in) before blocking and 32-35 cm (12.5-13.5 in) after blocking.
— Foundation Row :
Round 1 :
Chain 157 (multiple of 8 + 5). This gives you 19 full repeats across plus edge chains (157).
Info :
Work this foundation on a firm but not overly tight chain. Use a hook one size smaller if your foundation chain is too loose. Mark the 1st and last chain with removable markers if helpful.
— Lace Center Panel (8-row motif, repeat 11 times for photographed length = 88 rows total) :
Round 2 :
(RS)Row 1: Dc into 4th chain from hook (counts as dc), *ch2, sk2, sc into next ch, ch2, sk2, 5 dc shell into next ch (shell = 5 dc in same ch)*; rep from * to * across until 5 chain remain, end with ch2, sk2, sc, ch2, dc into final ch. Maintain counts so motif repeats 19 times across (pattern repeat x19). (Row width remains 157 foundation chains worth of space)
Info :
The initial dc counts as the first vertical of the first shell sequence. Keep shells centered over the ch-ladders from the foundation when possible; working tightly at the beginning ensures the edge remains straight.
Round 3 :
(WS)Row 2: Ch3 (counts as dc), turn. Dc into first st, *ch1, sk next dc, (sc, ch2, sc) into the top of the 5-dc shell (forming an arch), ch1, dc into next dc*; rep across to end, ending with dc in top of turning ch. This creates small arches inside the shells. Maintain same width across (157).
Round 4 :
(RS)Row 3: Ch1, turn. Sc into first dc, *ch3, sk next space and sc into center of next arch, ch3, sc into next dc*; rep across. This row forms open chain arches between anchored sc's. Count stays consistent across width (pattern repeat x19 + edges).
Info :
Use stitch markers at the start and end of each 8-stitch repeat for the first few repeats until your stitch placement feels regular. Keep tension even so chain arches are uniform.
Round 5 :
(WS)Row 4: Ch3, turn. Dc into first sc, *ch2, sk next sc, 5 dc shell into next ch3 space (aligned over earlier shell positions), ch2, dc into next sc*; rep across. This re-establishes the shell placement and builds the vertical rhythm of the lace. Width remains 157 equivalent across.
Round 6 :
(RS)Row 5: Ch1, turn. Sc into first dc, *ch1, sk 2 dc, (sc, ch2, sc) into top of 5-dc shell, ch1, sc into next dc*; rep across. This mirrors Row 3 and tightens the lace.
Info :
As you work alternating shell rows and arch rows, the fabric will begin to settle into a slightly textured scroll. Keep shells stacked vertically over shells from alternate rows for a clean pattern repeat.
Round 7 :
(WS)Row 6: Ch3, turn. Dc into first sc, *ch3, sk next sc, sc into center ch of the small arch, ch3, dc into next sc*; rep across. This creates larger chain loops on the wrong side for subtle texture.
Round 8 :
(RS)Row 7: Ch1, turn. Sc into first dc, *ch2, sk next chain-loop, 3 dc cluster into center of the next small arch (3 dc worked into same ch), ch2, sc into next dc*; rep across. Clusters here add a compact focal point between shells.
Round 9 :
(WS)Row 8: Ch3, turn. Dc into first sc, *ch2, sk next dc, 5 dc shell into next chain space, ch2, dc into next sc*; rep across. This completes the 8-row lace motif. Width remains consistent across 157 foundation chain equivalents.
Info :
Rows 2-9 form the 8-row repeating lace motif. For the photographed runner the motif is repeated 11 times in sequence (8 rows x 11 repeats = 88 rows). You may lengthen or shorten by adding/removing full 8-row repeats only to preserve border symmetry.
Round 10-97 :
Repeat Rows 2-9 eleven times in total to reach 88 rows (88 rows = 11 x 8-row motif). Track your repeats with a row counter or stitch marker. After completing the 88th row you should have a rectangular panel that is straight along both long edges and measures approximately 90-100 cm (35-39 in) long for the pictured sample before blocking. (88 rows)
Info :
Periodically lay your panel flat and measure. If you prefer a longer runner add two more 8-row repeats (16 rows) evenly so corners remain balanced with border scallops. Maintain consistent tension across all repeats for even drape.
— Prepare for Border (Inner Frame) :
Round 98 :
(RS)Fasten off main color leaving a long tail for weaving if you planned to add a narrow framed inner edge. Join mint green yarn with sl st to any corner stitch (choose a corner that has a visible turning ch) and ch1 to start working single crochet evenly along the edge.
Info :
When joining the border, it helps to pin the panel to your blocking mat so the edges sit squarely. If your panel has slight cupping or waves, steam-block lightly or pin and wet-block before continuing so the border sits flat.
Round 99 :
Work 1 sc in each stitch/row end all the way around the rectangle, placing 3 sc in each corner to keep a square corner (Top edge: 157 sc; Right side: count 88 row ends = 88 sc; Bottom edge: 157 sc; Left side: 88 sc). Total sc around = 157 + 88 + 157 + 88 = 490 sc. Join with sl st to first sc. (490)
Info :
Maintain even spacing when working along the side rows—place a single sc centered into the side of the turned row (edge stitch) not into the chain ends only. Use more or fewer sc placements to keep the total consistent with the panel length; adjust so shells land symmetrically around corners.
— Border Base Rounds (establishing mint frame) :
Round 100 :
Ch1, sc in same st, *sc in next 4 sc, hdc in next 2 sc*; rep around placing (3 sc) in corner sts to maintain corners. This creates a slightly raised inner frame. Maintain total count approx 490 (adjust where necessary by adding or skipping one hdc to keep repeat consistent).
Info :
If you need to adjust slightly to keep an even repeat of the scallop pattern later, add a few extra sc along the longest edges (evenly spaced) now. Small adjustments at this stage will make the scallops land cleanly at corners.
Round 101 :
Join with sl st, ch3 (counts as dc), *skip 2 sc, work 5 dc shell into next sc, skip 2 sc, dc into next sc*; rep around, placing 3 five-dc shells into each corner to keep scallops continuous. You will form a scallop base that repeats around the 490-count perimeter; the number of full shells will be approximately 490 / 8 ≈ 61 shells. Exact shell count will vary slightly due to corner increases but maintain symmetry.
Info :
Ensure shell centers are spaced evenly along the long sides so scallops look regular. If you see gaps increase or decrease the number of sc between shells by 1 or 2 as needed to distribute shells evenly along each side.
Round 102 :
Sl st to top of first shell, ch1, sc in same st, *ch3, sc into center of next shell (work sc into the shell apex, not into the dc legs), ch3, sc into next shell center*; rep around. This forms small picot-like arches between shells and gives the scallop a lacy finish. Join with sl st to first sc.
Info :
These ch3 loops will be the foundation for the final layered scallop rows. Keep loops consistent in size by using the same tension and counting chains out loud if necessary.
— Scalloped Layering (3 rounds of decorative scallops) :
Round 103 :
Ch3 (counts as dc), turn slightly to work into the first ch3 loop: 9 dc into first ch3 loop (work closely so scallop fans outward), *sl st into base of next ch3 loop, 9 dc into next loop*; rep around placing 9-dc fans into each ch3 loop. Join with sl st to top of beginning ch3. The number of 9-dc fans will match the number of ch3 loops formed in Round 102 (approx equal to shell count around).
Info :
Keep fans centered over the ch3 loops. Press each fan gently with your finger to ensure even curvature; blocking will set the shape more permanently.
Round 104 :
Ch1, sc into first dc of fan, *ch2, skip 2 dcs, sc into 3rd dc from fan center (this creates small gaps inside fan), sc into next dc to anchor*; rep across each fan to create subtle lacy holes within the scallop. Join with sl st.
Round 105 :
Ch3, *5 dc shell into space formed by previous round's ch2 gap to create a pointed decorative picot at the scallop tip, sl st into base to anchor*; rep at center of each fan so each scallop has a smaller shell at its apex. Join and weave in ends neatly.
Info :
This three-round layering gives a deep scallop with internal lace detail. If you prefer a flatter scallop, stop after Round 103 and weave in ends; the runner will have a shallower edge.
— Final Finishing Rounds (refinement and picots) :
Round 106 :
Optional: With a smaller hook (3.0mm) and same mint yarn, join with sl st at back of a scallop, ch1, work 1 sc around the back loop of each shell dc on the previous round to create a tidy edge and help scallops hold shape. This approx equals total dc from Round 103; expect about 9 sc per fan x number of fans (approx 9 x 61 = 549 sc overall). Work evenly and invisibly around, slip stitch to join.
Info :
Use this tighter finish if the scallops feel too floppy. The tighter finish keeps scallops curved and crisp. Use a smaller hook to make the finish neat.
Round 107 :
Fasten off mint yarn securely and weave in all ends on the WS using the tapestry needle. Trim threads close after weaving through a couple of centimeters of stitches.
Info :
Weave ends into the border and main panel to keep them hidden; avoid pulling tightly – leave a slight give so fabric can move when blocking.
— Blocking & Final Touches :
Info :
Wet-block the entire runner to shape: pin to desired dimensions on blocking mat, stretching gently so the scallops sit evenly and the center panel lies flat. Let dry fully (12-24 hours). For a crisper finish, mist with a light fabric stiffener or spray starch while damp and allow to dry pinned.
Info :
After unpinning, lightly press with a warm iron on the wrong side if needed (test a scrap first). Check all woven ends and trim any stray fibers. Your runner is ready to display.
Info :
To resize: Add or remove full 8-row repeats (Rows 2-9 of the lace motif) for length. For a wider runner, restart foundation with a larger multiple of 8 + 5 and follow border instructions; re-calc shells along perimeter so scallops distribute evenly.
This lace scroll table runner brings a delicate, handmade charm to any surface with a crisp mint scalloped edge hugging a warm beige lace body. Carefully blocking and finishing elevates the runner to a fully polished piece ready for gift-giving or everyday elegance. Enjoy the meditative rhythm of the repeating lace motif as you work, and take pride in the balanced, scalloped frame you created. 🧶🌿💚