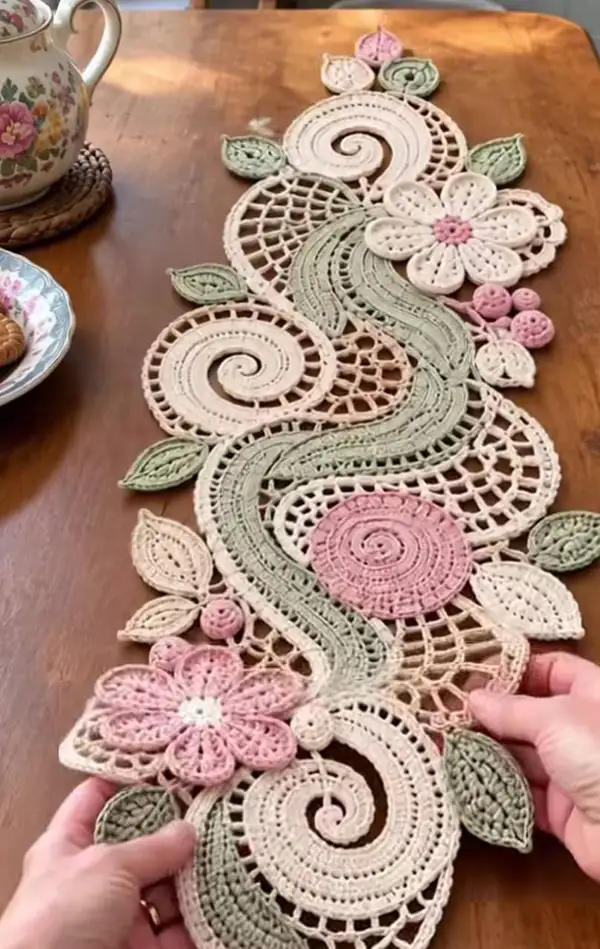
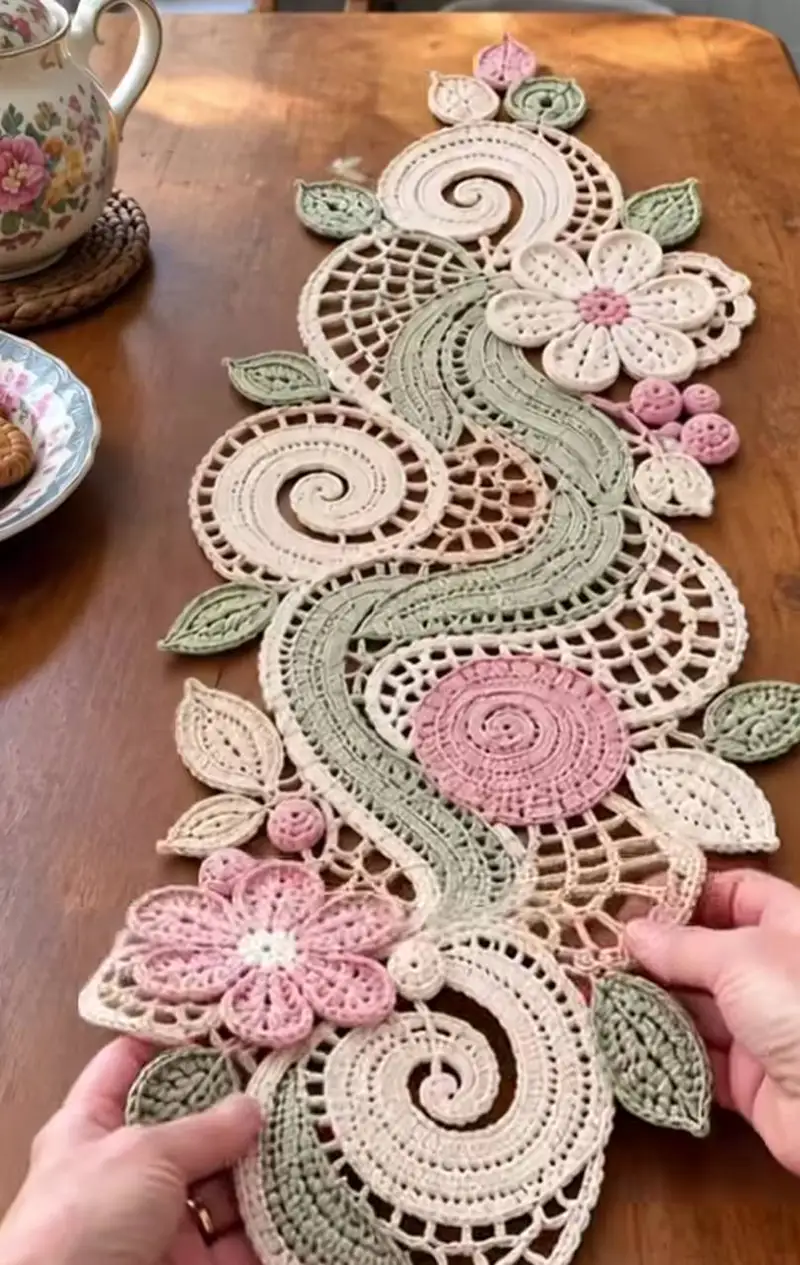
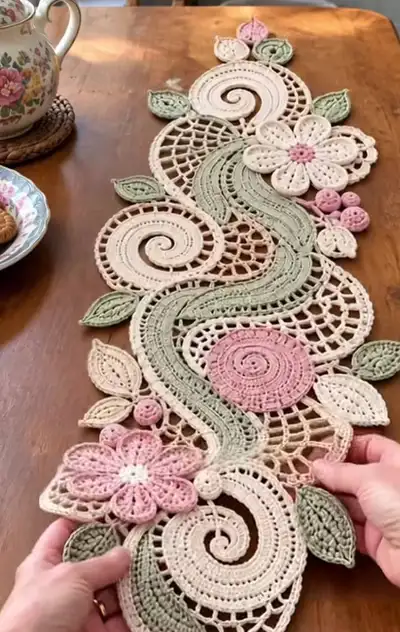
An elegant handcrafted floral lace table runner featuring spirals, openwork medallions, flowing serpentine panels, leaves and delicate flowers in soft pastels. This pattern uses fine cotton thread and classic lace stitches to create a vintage-inspired runner that lays beautifully on dining tables. The design is modular — made from motifs that are crocheted separately and joined for a flexible, flowing final piece. Perfect for gifting or dressing a wooden table with romantic, handmade charm.
Progress Tracker
0% Complete
— Overview & Tips :
Info :
This runner is modular: crochet all motifs, block them flat to final shape, then join in the layout shown in the photo. Work tightly but not overly tight so lace blocks well. Use stitch markers to mark beginnings of rounds. When joining use either slip-stitch join-as-you-go or mattress stitch with matching thread for an invisible seam.
— Large Spiral Disc (Make 3) :
Round 1 :
6 sc in magic ring (6)
Round 3 :
(1 sc, inc) x 6 (18)
Round 4 :
(2 sc, inc) x 6 (24)
Round 5 :
(3 sc, inc) x 6 (30)
Info :
Change to cream if making central spiral in main color. Keep rounds tight for initial spiral foundation so the beginning doesn't gap.
Round 6 :
(4 sc, inc) x 6 (36)
Round 7 :
(5 sc, inc) x 6 (42)
Round 8 :
1 sc in each st (42)
Round 9 :
(6 sc, inc) x 6 (48)
Round 10 :
1 sc in each st (48)
Round 11 :
(7 sc, inc) x 6 (54)
Round 12 :
1 sc in each st (54)
Info :
To create the spiral curl effect, do not join rounds with sl st to close; instead, continue in continuous spiral where recommended. Use a stitch marker at start and slide each round to count accurately.
Round 13 :
(8 sc, inc) x 6 (60)
Round 14 :
1 sc in each st (60)
Round 15 :
(9 sc, inc) x 6 (66)
Round 16 :
1 sc in each st (66)
Round 17 :
(10 sc, inc) x 6 (72)
Round 18 :
1 sc in each st (72)
Info :
For a scalloped outer edge change to a larger hook here for one round if desired, then revert. To emphasize the spiral rim, work one round of dc alternated with chain loops to create a slight lace edge.
Round 19 :
(11 sc, inc) x 6 (78)
Round 20 :
Work a decorative mesh round: *dc in next st, ch 3, skip 2* around (78 mesh loops)
Round 21 :
In mesh loops: *(sc, ch2, sc) in ch3-sp* to form laddered loops (78 small clusters)
Round 22 :
1 sc in each st (78)
Round 23 :
Edge round: *sc in next 2, picot (ch3, sl st in 1st ch)* repeat around for delicate picot edge (78 picots)
Info :
Fasten off leaving a 25cm tail for joining. Block the spiral by pinning the spiral curve to the blocking board to set the curl; spray or steam lightly and leave to dry fully.
— Small Circular Rosette / Disc (Make 4) :
Round 1 :
mr, ch1, 8 sc in ring (8)
Round 3 :
(1 sc, inc) x 8 (24)
Round 4 :
(2 sc, inc) x 8 (32)
Round 5 :
1 sc in each st (32)
Round 6 :
Decorative round: *ch4, skip 1, sc in next* repeat to create open loops (32 loops)
Round 7 :
In ch4 loops: *(sc, ch2, sc)* to form chain petals (32 small petal bumps)
Round 8 :
Edge: sc around working 2 sc in each petal peak where needed for flatness (approx 32-36 sc)
Info :
These discs are used as small filler motifs. Block flat. Leave 20cm tail for sewing into mesh joins.
— Sinuous Serpentine Ribbon Panel (Main Long Panel) :
Round 1 :
With sage green, ch 50, join with sl st to form a ring being careful not to twist (50 ch)
Round 2 :
Ch2 (counts as hdc), hdc in each ch around, join (50 hdc)
Round 3 :
Ch2, BLO hdc in each st around to create ridge base, join (50)
Round 4 :
Ch3 (counts as dc), dc in each st around (50 dc)
Round 5 :
Shaping round: *dc in next 8, inc (2 dc in next)* repeat 5 times (55)
Round 6 :
1 dc in each st (55)
Round 7 :
*dc in next 9, inc* repeat around (60)
Info :
To create S-curve, you will later create matched gentle decreases on opposite sides and add mesh rails to lift edges. Keep the panel flexible by alternating heights (hdc/dc) to encourage drape.
Round 8 :
1 dc in each st (60)
Round 9 :
*dc in next 10, inc* repeat (66)
Round 10 :
1 dc in each st (66)
Round 11 :
Shape edge A: working along one long edge only, ch3, *(dc, ch2, skip 1) across 1/3 of edge* to form a decorative open scallop; do not turn; finish row back at start (creates openwork border)
Round 12 :
On the same row work into ch2 loops: *(sc, ch3, sc)* for added lace (decide spacing visually to fit length)
Round 13 :
Continue body: 2 rounds even of dc around entire panel to stabilize (66 each)
Round 14 :
Begin S shaping: Along central serpentine path dec on one side every 8 sts: *(7 dc, dec)* overall 8 dec around that side only to create inward curve (decrease count = 8; new approx count 58)
Round 15 :
Opposite side increase to balance: *(8 dc, inc)* around for 8 increases (new approx 66)
Round 16 :
Even round: dc in each st (66)
Info :
Keep the panel long and flexible; for added texture work alternating rows of fpdc and bpdc to create a ribbed center channel that will echo the veined leaves used later.
Round 17 :
Work 6 rounds even of dc (66 each) to build length; after every 3rd round check curvature and adjust decreases/increases slightly to deepen S curve.
Round 18 :
Decorative lattice side: Along the long sides, work *dc, ch4, skip 3* to make open lattice spacing for joining later (approx 16-20 loops per side depending on length)
Round 19 :
In ch4 loops on lattice: *(sc, ch2, sc)* to form netting arches
Round 20 :
Edge finishing round: sc around entire panel with small picots on corners where motif joins will attach (counts variable; fasten off leaving long tail for joining)
Info :
Block the ribbon panel to the gentle S shape by pinning it on the blocking board; steam or wet-block to set curves. This panel forms the runner’s central spine and determines final length; adjust initial ch chain to lengthen/shorten.
— Long Narrow Leaf (Make 10) :
Round 1 :
mr, ch1, 6 sc in ring (6)
Round 2 :
1 sc in each st around (6)
Round 3 :
Work along one side: ch3, turn and hdc in same st, hdc in next 3, 3 hdc in tip to create point, then work down opposite side mirroring (approx 12-14 sts) finish with sc to base to join. (shape forms leaf)
Round 4 :
Edge round: sc around leaf working 3 sc at tip to maintain point; total approx 18 sc
Round 5 :
Add veining: ch1, sc in center ridge in FLO only across body to create visible vein texture. Work two rows of FLO sc for contrast (18)
Round 6 :
Edge decorative round: *sc, picot* around for delicate serration (18 picots)
Info :
Leaves are worked in sage green. For a double-layer look, make matched smaller leaves in pale cream and sew on top of larger leaves offset by 2-3 mm for layered depth.
— Small Leaf (Make 12) :
Round 2 :
1 sc in next 2, inc, 1 sc in next 2, inc (8)
Round 3 :
Work shaping row: ch2, hdc across to tip, 2 hdc in tip, return down other side (approx 12)
Round 4 :
sc around with small picots at tip and base (12)
Info :
These small leaves tuck between spirals and along the runner edge; block flat and position before sewing to check visual balance.
— Flower with 6 Petals (Make 4 large flowers) :
Round 1 :
mr, ch1, 6 sc in ring (6)
Round 3 :
(1 sc, inc) x 6 (18)
Round 4 :
Ch3, *skip 1, sc in next* around to form petal anchors (approx 9 anchors)
Round 5 :
Into each anchor: ch1, (sc, hdc, dc, tr, dc, hdc, sc) to create full petal. Repeat for each (6 large petals)
Round 6 :
Reverse round to flatten petals: work sc evenly around base of each petal, add small picots at outer petal tips if desired
Round 7 :
Center: use pink, mr, ch1, 8 sc in ring, sl st to center of flower, leave tail to sew (8)
Info :
Sew the pink center on top using hidden stitch, insuring center is slightly raised. Block petals gently to open them and give them dimensionality.
— Small 5-Petal Flower (Make 3) :
Round 1 :
ch6, join to ring with sl st to form small ring, ch1, 10 sc in ring (10)
Round 2 :
*ch5, sc in next* around to form 5 loops
Round 3 :
In each loop: (sc, hdc, dc, hdc, sc) to form compact petals (5 petals)
Round 4 :
Edge round: sc around petal bases to flatten and tidy (approx 25 sc)
Info :
Use these as filler flowers; you can stack one on top of the other with offset threads to add subtle depth.
— Little Round Berries / Bobbles (Make 8) :
Round 1 :
mr, 6 sc in ring (6)
Round 3 :
1 sc in each st (12)
Round 4 :
Bobbles round: *(yo, insert, yo, pull through 2 loops) x3, yo, pull through all loops* to create a single raised bobble. Repeat 3 times across the round to produce 3 small bumps (pattern variable)
Round 5 :
Sc around to tidy (12). Stuff lightly with polyester fill to raise shape; fasten off leaving tail to sew.
Info :
Keep stuffing minimal so berries flatten slightly when sewn into mesh for a natural tucked look.
— Lace Mesh Fillers (Multiple pieces) :
Round 1 :
ch12, join to form ring (12)
Round 2 :
ch3, *dc in next, ch3* around to form open arches (12 arches)
Round 3 :
In arches: *(2 dc, ch2, 2 dc)* to make fan arches connecting to neighbors
Round 4 :
Work 2 rounds of alternating *sc, ch5, sc* to enlarge mesh; fasten off leaving tails for joins
Info :
Mesh pieces are tailored to fit between spiral discs; when assembling, trim small connectors by removing one or two arches to shape the mesh precisely to the curve.
— Decorative Edge Shells (to finish runner edges) :
Round 1 :
With cream, sc around outermost motif edges to create a uniform joining border; make sure to work even sc spacing for smooth appearance (count will vary)
Round 2 :
*Skip 2, 5 dc in next, skip 2, sl st* across all edges to create shells
Round 3 :
Into shell centers: *sc, picot, sc* to add delicate points between shells; fasten off and weave ends
Info :
Edge shells unify the runner and conceal uneven joins between motifs; work this after all motifs are assembled and blocked together.
— Assembly & Joining Motifs :
Info :
Plan layout on a large flat surface or blocking board. Arrange spiral discs and serpen-tine panel in S formation, inserting medallions and mesh between curves so motifs nestle organically. Use T-pins to hold placement during joining.
Round 1 :
Join discs to mesh: using long tail, whipstitch around 8-12 points where mesh arches meet the disc outer lattice, spacing evenly to avoid puckering.
Round 2 :
Crochet join-as-you-go option: hold two edges together, insert hook through both loops and sl st to join. For a stronger seam use sc through both edges, then sl st every third stitch for flexibility.
Round 3 :
Sew leaves to serpentine panel: position leaves along S curve at rounds 10-16 of ribbon panel. Use mattress stitch with matching sage thread; stitch through base of leaf and ribbon lattice for secure hold.
Round 4 :
Attach flowers: place large flowers where spirals overlap; sew from center using long tail, anchoring at 6 equidistant points. Add small discs and berries in gaps, tacking with small stitches only on mesh arches.
Round 5 :
Finish outer outline: sc around entire perimeter to even out edge shapes, then work the shell edging rounds described previously to create unified border.
Info :
Weave in all loose ends on the wrong side, then give the entire runner final blocking. Steam gently to set shape. If any joins gape, secure with additional invisible stitches from the underside.
— Finishing Touches & Blocking :
Info :
Wet-block the runner: pin it to the desired S curve and pin all edges and motifs flat, stretching mesh to neat, even openwork. Let dry completely. Optionally use spray starch lightly to increase stiffness for table protection.
Round 1 :
Edge reinforcement: run a row of sc on the underside along critical joins to prevent stretching; use same color as main background for discretion.
Info :
Final inspection: remove any pins and check for loose embellishments. Add small whip stitches to secure any petals or berries that shift after blocking. Press lightly on wrong side if needed.
Completing this floral lace runner is deeply rewarding — each spiral, leaf and petal comes together to form a flowing landscape of crochet lace. The soft pastels and openwork create an heirloom piece that elevates any table setting. Take your time blocking and joining; the careful finishing is what makes this runner sing. 🧶🌸 Enjoy the calm rhythm of lace-making and the warm glow of handmade decor in your home. ✨