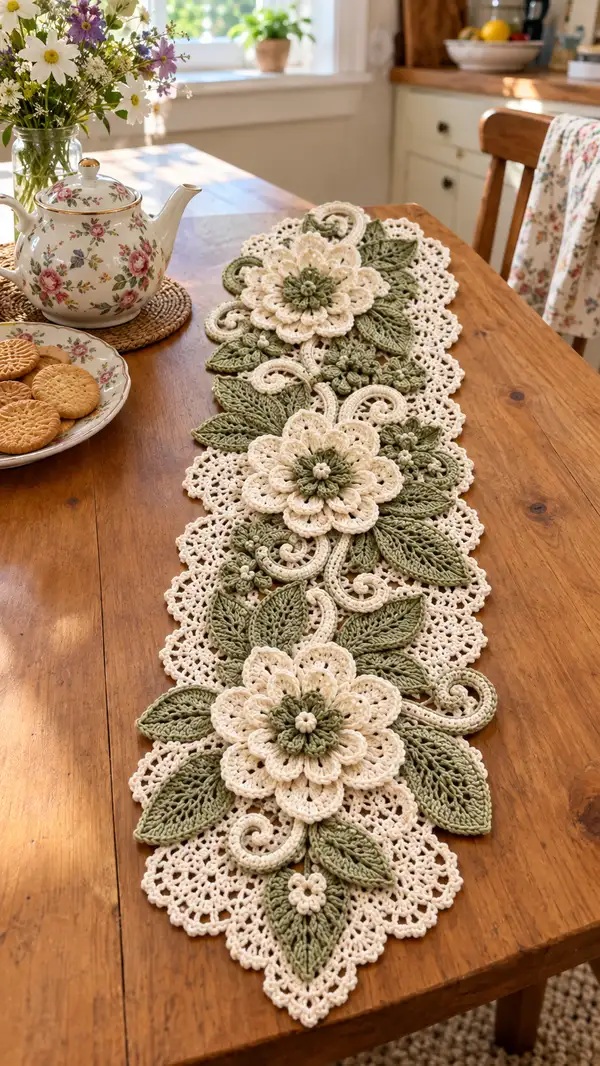
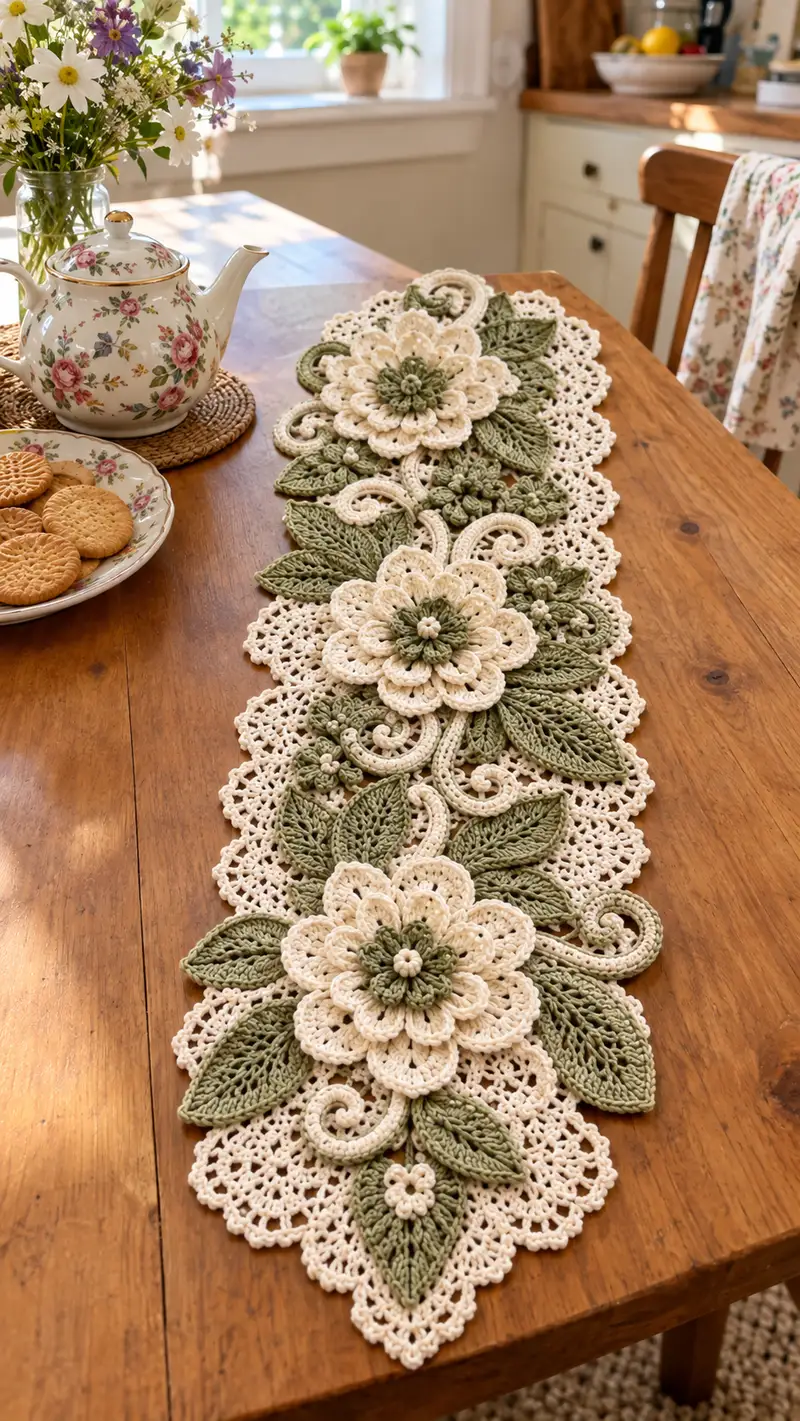
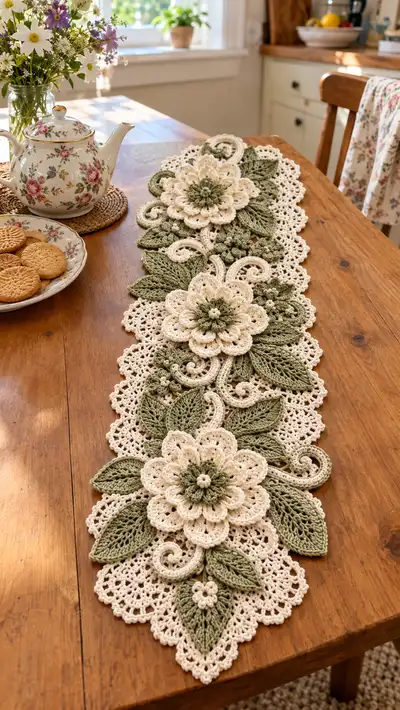
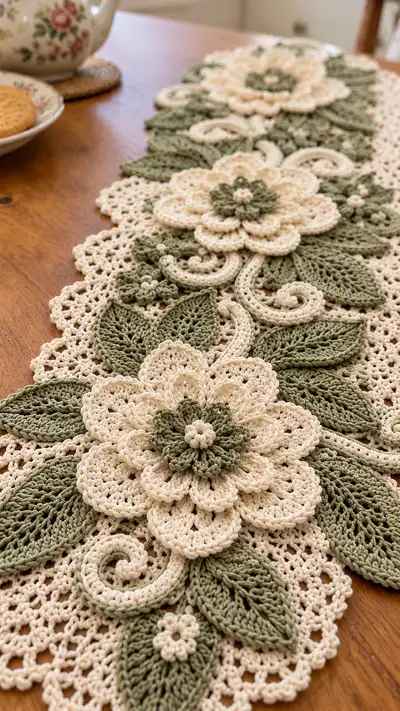
Create an elegant floral lace table runner with layered 3D flowers, sculpted leaves and delicate scalloped edging. This pattern uses two tonal cotton shades—soft cream and sage green—to build dimensional petals, textured foliage and airy lace panels that join into a long runner. Detailed stitch-by-stitch instructions guide you through each motif, leaf, scroll and the final assembly so you can recreate the charming piece shown. Ideal for a dining table centerpiece or heirloom decoration.
Progress Tracker
0% Complete
— Overview & Gauge :
Info :
This runner is created from a long open lace base panel with 3 large layered flowers and clusters of leaves, small flowers and scrolls assembled on top. Gauge for the open lace panel: 10cm square = 12 dc x 8 rows measured after blocking using DK cotton and 3.5mm hook; your gauge may vary with yarn and tension.
Info :
Make a small sample of the base lace panel (10x10cm) and the leaf motif to check scale against your table. Blocking will substantially change the look so plan for that step before joining.
— Materials & Color Notes :
Info :
Main cream shade (A) builds the lace base and the outer flower petals. Accent sage green (B) is used for leaves, flower centers and smaller leaves. Carry yarn inside motifs only where directed; otherwise fasten off and weave tails.
— Base Lace Panel (Make 1 central panel approx 120cm x 20cm before embellishment) :
Round 1 :
Ch 160, join with sl st to form a long loop (or work flat rows if preferred). This pattern is written in joined rounds for a continuous lace band. (160 ch foundation)
Round 2 :
Ch 3 (counts as dc), dc in same ch, *sk 2 ch, 5 dc in next ch (shell), sk 2 ch, dc in next ch; rep from * working 26 shell groups evenly across, finish with dc in last stitch, sl st to top ch3 to join. (160 sts worked as 1 dc + 26 shells + joining dcs)
Round 3 :
Ch 1, sc in same st, *ch 3, sc in center stitch of next shell (3rd dc of 5-dc shell); rep from * across to create arch points; sl st to first sc to join. (Approx 104 sc + 26 ch-3 arches)
Round 4 :
Ch 3, dc in same st, *work 7 dc into each ch-3 arch for a larger shell, dc in sc between shells; rep across; sl st to join. (160 dc into shells and single dcs; shells expanded to 7 dc each)
Info :
This stage builds the primary lace mesh. Work evenly and keep counts consistent for a flat panel. If working flat rows adjust repeats to keep sides straight.
Round 5 :
Ch 1, sc in same st, *ch 4, sc in 4th dc of next 7-dc shell to form picot-like arches, rep across; sl st to join. (Approx 86 sc + 26 ch-4 arches)
Round 6 :
Ch 3, dc in same st, *(dc, ch1, dc) into each ch-4 arch to create a small open fan, dc in sc between fans; rep across; sl st to join. (Fans create extra height; stitch count varies slightly but maintain symmetry)
Round 7 :
Ch 1, sc in same st, *ch 5, sc in center top of fan; rep across; sl st to join. (26 larger arches across)
Round 8 :
Ch 3, dc in same st, *7 dc into ch-5 arch, dc in sc between; rep across; sl st to join. (160 dc across enlarged shells)
Info :
After round 8 you have a stable openwork band. Check that the band lays flat. If it cupps, reduce hook one size for the next rounds; if it waves, loosen tension slightly.
Round 9 :
Ch 1, sc in same st, *(ch 3, 3 dc cluster, ch 3, sc) into center of each 7-dc shell to create decorative flowerette points across the band; rep across; sl st to join. (26 decorative points)
Round 10 :
Ch 3, dc in same st, work 3 dc into each ch-3 space created in previous round, dc in sc between; sl st to join. (Count consistent with previous round's dc locations)
Info :
Place stitch markers at points where the 3 large flowers will sit: approx at the centre and 1/3 and 2/3 positions along the band. We'll attach floral clusters at these marked positions in assembly.
Round 11 :
Ch 1, sc in same st, *ch 4, sc in next dc cluster center; rep to end; sl st to join. (26 ch-4 arches)
Round 12 :
Ch 3, dc in same st, *(dc, ch1, dc) in each ch-4 arch, dc in sc between; rep across; sl st to join. (Band strengthened)
Round 13 :
Ch 1, sc in same st, *ch 6, sc in next arch top; rep to end; sl st to join. (26 ch-6 spaces)
Round 14 :
Ch 3, dc in same st, work 9 dc into each ch-6 space to create large lace scallop sets, dc in sc between; sl st to join. (Approx 234 dc across expanded scallops)
Info :
From Round 12 to 14 the lace becomes more sculpted. Keep consistent stitch height and check the panel width frequently to ensure it stays near intended 20cm. Blocking will refine final width.
Round 15 :
Ch 1, sc in same st, *(ch 3, sc) into center of each 9-dc scallop; rep across; sl st to join. (26 sc + 26 ch-3 points)
Round 16 :
Ch 3, dc in same st, *dc in sc, (ch1, sc, ch1) into each ch-3 loop to form a lacy picot ring, dc in next sc; rep; sl st to join. (Even decorative edge)
Round 17 :
Ch 1, sc in same st, *(sc, ch 3, 3 dc cluster, ch3, sc) into top of each scallop to accentuate motif; rep across; sl st to join. (Accent clusters form rounded platforms for attaching motifs)
Round 18 :
Ch 1, sc in each st around working a small picot (ch3, sl st to first ch) into every 5th sc to create a subtle rolled edge; sl st to join. (Neat scalloped outer edge)
Info :
Fasten off and weave in ends for the full base panel. Block the panel flat using pins and light steam or wet-blocking. This is essential so that motif placement and joins later are accurate.
— Large Layered Flower (Make 3) :
Info :
Each large flower is worked in two colors: inner small petal layer in B (sage) and outer larger petals in A (cream). Work flower flat in rounds and sew layers together. After joining, block petals to shape.
Round 1 :
Using B, make magic ring, ch1, 6 sc in ring (6)
Round 3 :
(1 sc, 1 inc) x 6 (18)
Round 4 :
Change to A at end of round by pulling through new color. (Info : change to A now for outer layers)
Round 5 :
1 sc in each st (18)
Round 6 :
(1 sc, 1 inc) x 6 (24)
Round 7 :
1 sc in each st (24)
Round 8 :
*ch 2, (3 tr, sl st) into next st to form a tall petal base, sl st in next st; rep around forming 8 tall petaloid loops (8 petals; petal platform created)
Info :
Petal base built—these are the supports for layered petals. Count should remain consistent with 8 petal platforms spaced evenly; use stitch markers at each petal base for guidance.
Round 9 :
Work into first petal platform: sl st into ch2 space, ch3, (2 dc, tr, 2 dc) all in same sp, sl st to base to create full rounded petal; rep into each petal base to create 8 full petals. (8 large petals)
Round 10 :
Ch1, sc around entire flower working 3 sc into the valley between each petal to tidy and give definition; join. (Approx 64 sc)
Round 11 :
Ch 2 (counts as hdc), hdc in next 2 sts, *(hdc2tog, hdc in next 6), rep around to shape petal underside and raise center slightly (approx 56 sts)
Info :
At this point attach the inner small petal layer (worked earlier in B) on top of the raised center by sewing through both rounds 3-6 carefully with matching yarn—use small whip stitches and ensure the inner rosette sits centered.
Round 12 :
Change to B and create a small 8-petal mini rosette: join in center, ch1, *(ch2, sl st into ring) x 8 to make a ring of loops; then work (ch2, 4 dc, ch2, sl st) into each loop to form mini petals; fasten off and center-sew into place. (8 mini petals)
Round 13 :
Return to A and work a decorative picot round around all petals: sc into each st, *ch3, sl st into next sc for picot; rep and join. This creates a scalloped petal edge. (Approx 64 sc + 16-24 picots)
Round 14 :
Create a second outer petal layer by working into spaces between main petals: *in the valley between two petals, ch3, (3 tr, ch3, sl st) to create tall overlapping petal; rep to make 8 outer overlay petals. (8 overlay petals)
Round 15 :
Sc around the base of the outer overlay petals working 4 sc in each overlay valley to secure and shape; join. (Approx 96 sc)
Info :
Sew outer overlay layer to main petal base using mattress stitch or small whip stitches, then lightly steam-block petals to fan and flatten slightly. Use pins to hold shape until cool and dry.
Round 16 :
Work a decorative edged round: *(sc, ch 2, sc) across the top edges of outer petals to create a soft scallop; join. (Approx 96 scallops)
Round 17 :
Optional: add tiny cluster bead in center by wrapping B around your fingers 6 times and sewing through center to create a textured button, or make a 6 sc in magic ring small bud and sew into center. Fasten off and weave ends. (Central bud)
Info :
Each flower should be blocked and starched lightly for firm petals. Make 3 identical flowers and set aside for assembly. Trim tails leaving 8-10cm for sewing if preferred.
— Sculpted Leaf (Make 18 leaves) :
Info :
Leaves are worked flat in sage green (B) and use front-post/back-post stitches to achieve the central vein texture. Each leaf is worked as a symmetric pointed leaf, worked in rounds to allow both sides to look neat.
Round 1 :
With B, ch 12, sc in 2nd ch from hook and across to create foundation (11 sc)
Round 2 :
Ch1, turn, sc in first 3 sts, hdc in next 3, dc in next 2, hdc in next 2, sc in last st; ch1, work along opposite side of chain foundation: sc in first, hdc in next 2, dc in next 2, hdc in next 3, sc in last 3; sl st to join making a flat leaf shape. (symmetrical shaping)
Round 3 :
Ch1, sc around entire leaf placing 2 sc in curved points (2 increases at tip and base) to round the shape, sl st to join. (Approx 30 sc)
Round 4 :
Front post round: ch1, *(fpdc around corresponding dc on one side, bpdc around corresponding dc on other side) across center to create raised vein texture, sl st to join. (Textured central vein across leaf)
Info :
Work this texture gently—front/back post stitches will cause the leaf to curl slightly; block flat after completion with pins and steam to open the texture and flatten leaf.
Round 5 :
Round of shaping: sc in each st, placing (sc, ch2, sc) at top tip and bottom base to form small picot tip and base; sl st to join. (Approx 34 sc with picot tips)
Round 6 :
Edge round: sc in each st working 3 sc in valley points to keep edges flat; join and fasten off leaving 10cm tail for sewing. (Neat finished leaf)
Info :
Make 18 leaves in total: 6 larger leaves for under each big flower (make larger by extending initial chain to 16 and adjusting rounds accordingly), 12 medium leaves for filler. Block all leaves before assembling.
— Small Cluster Flower (Make 6) :
Round 1 :
Using B, magic ring, ch1, 6 sc in ring (6)
Round 2 :
*ch2, 3 dc in same st, sl st in next st; rep around to make 3 tiny puff petals; finish and fasten off. (3 tiny petals per cluster)
Round 3 :
Sew a tight 6-8 loop center (wrap B 8 times and tack) into the center of the tiny flower to make a raised bud. Fasten off and weave tails. (Tight textured bud)
Info :
These tiny clusters sit in gaps near leaves and at petal bases to visually fill the design. Make 6-8 of these small clusters.
— Sculpted Scroll/Stems (Make 6) :
Info :
Scrolls (s-shaped stems) are created by working a firm cord (chain + sl st or short i-cord) then shaping into spirals and tacking into place. Use A for scroll background edges and B for inner vine contrast.
Round 1 :
Ch 36 (for a medium scroll); sl st back across chain in each ch to create a firm rope (36 sl st used). Fasten off leaving long tail. (36 sl st rope)
Round 2 :
Using surface slip-stitch in B over the top of the sl st rope if you want a two-tone effect: join B to rope and work sl st into each sl st across for subtle color contrast. Fasten off. (Decorative surface slip-stitch)
Info :
Block the rope slightly damp and shape into a tight spiral at one end and a loose spiral at the other. Pin to blocking board in desired final form and secure with a few whip stitches after it's dry to maintain shape.
Round 3 :
For larger scrolls increase chain length (e.g., ch 56) and repeat sl st return to make longer ropes. Create 6 scrolls varying lengths for visual balance.
— Joining Motifs & Assembly Prep :
Info :
Lay the blocked base panel flat and arrange the 3 large flowers about 35-40cm apart along the center line. Tuck leaves and small clusters into gaps and place scrolls between flower groups to mirror the photo. Pin every piece in position before sewing.
Round 1 :
Attach first large flower: position flower centered over the decorative point of the base panel (marked earlier). Using spare length of A from flower, sew through the base panel using a blind mattress stitch around 12-16 equally spaced points around the flower base. Pull stitches lightly to secure but do not flatten petals. (Secure with ~16 mattress stitches)
Round 2 :
Sew leaves in place: place 3–4 larger leaves under each flower, and 2–3 medium leaves between flowers. Use whip stitch from leaf tail to panel across 6–8 stitches to secure. Hide sewing tail through leaf back and pull tight. (6–8 stitches per leaf)
Round 3 :
Tack small cluster flowers and buds into holes between petals and leaves using a few stitches through the panel to anchor them; these should be slightly raised to create texture. (3–4 tacking stitches each)
Info :
Bring scrolls in last: pin scroll shapes on top and tack with small stitches under outer edges so scrolls appear to curl above and overlap leaves. Use color-matched thread for hidden stitches.
Round 4 :
After all large pieces are temporarily tacked, join all underside seams by sewing through base panel and motifs where overlaps occur. Reinforce stress points with 2 rows of whip stitch if runner will be moved often. (Reinforcement rows optional)
Round 5 :
Edge join: work a thin lace edge around the entire runner by slip-stitching A through edge loops of base panel: join A, ch1, sc evenly around panel through outer picots; in corners create (sc, ch3, sc) to form gentle scallops; sl st to join and fasten off. (Even edge round finishes runner)
Info :
If you prefer a more permanent seam between motifs and base, use a small amount of matching fabric glue under large petals before sewing to prevent shifting while stitching.
— Final Finishing & Blocking :
Round 1 :
Wet-block the entire assembled runner carefully: pin to desired dimensions on blocking board with petal edges fanned, leaves slightly lifted for dimension, and scrolls held in a spiraled position. Use rust-proof pins to avoid staining. Allow to dry fully. (Full runner blocking)
Round 2 :
Optional starching: spray a light coat of starch for a rigid, formal look; allow to dry completely. Remove pins and trim any visible tails, tuck them into underside with yarn needle. (Starching optional)
Info :
Press lightly with a steam iron on low if needed—do not apply high heat to mercerized cotton as color and sheen may change. Check for loose stitches and reinforce if necessary.
Round 3 :
Final check: hold runner in place and use a few invisible stitches under largest petals to stop any shifting that occurred during blocking. Add a few reinforcing stitches where scrolls meet leaves. (Final reinforcement)
Info :
Store runner flat or rolled—avoid folding along petal edges. Hand-wash gently in cool water to preserve blocking and shape.
This floral lace runner is a labor of love—every layered petal, sculpted leaf and curling scroll comes together to create graceful dimensional beauty on your table. The combination of soft cream and sage lends a timeless, cottage-style elegance perfect for morning tea or a special dinner. Blocking and careful assembly make the motifs sing with texture and depth. I hope you enjoy making and gifting this runner as much as I enjoyed designing it—happy crocheting! 🧶🌿