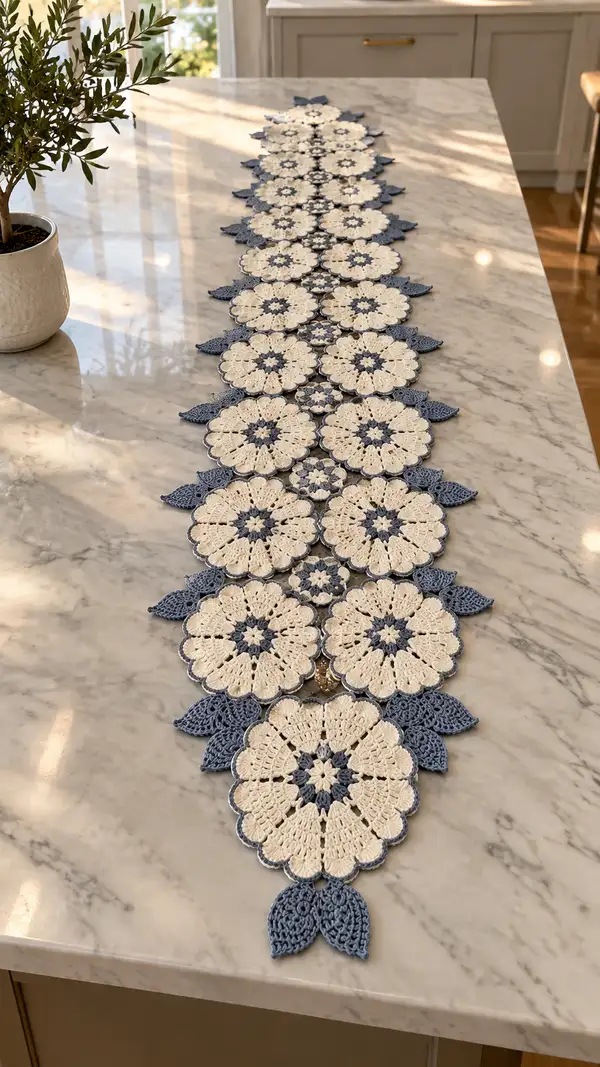
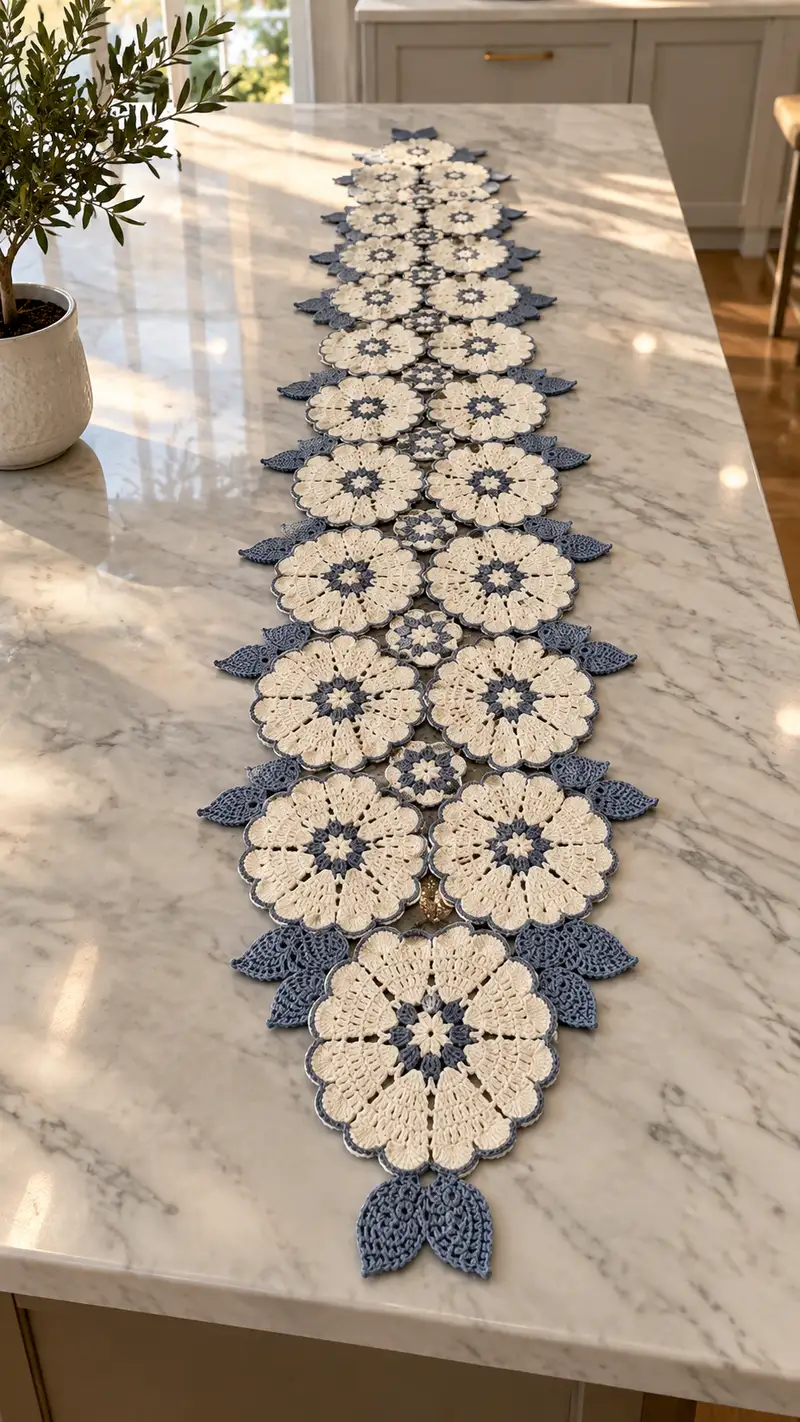
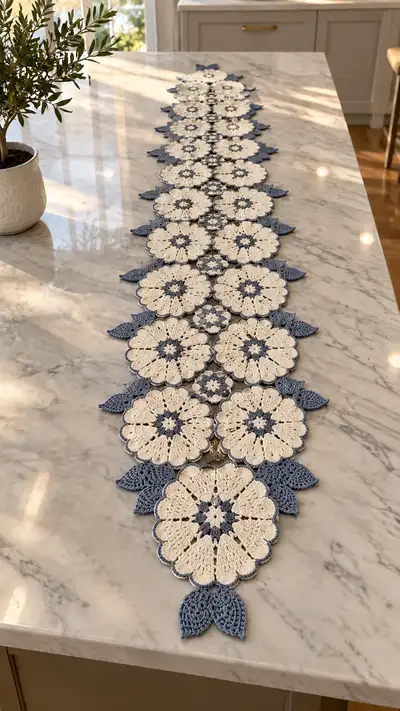
A delicate floral lace table runner made from linked circular motifs and decorative leaves in a soft cream and cool slate blue. The design features large scalloped flower medallions connected by smaller star motifs and leaf accents to form a long, elegant runner. Perfect for dining tables, sideboards, or as a centerpiece runner for special occasions. Worked in fine cotton for crisp stitch definition and a flat, drapey finish.
Progress Tracker
0% Complete
— Notes & Gauge :
Info :
This pattern is written to create a modular table runner consisting of large floral medallions ("Large Motif"), small star connector motifs ("Small Motif"), and leaf motifs ("Leaf"). Work motifs in the stated colors and block each motif to match measurements. Gauge is not critical for an heirloom runner but for consistent joining the Large Motif should measure approximately 12.5-13.5 cm (5-5.3 in) across after blocking when worked in the specified thread and hook.
Info :
Use stitch markers at the start of each round. We recommend making a small sample set of 2 large motifs and 1 leaf to practice joining method before committing to full runner length.
— Large Flower Motif (make X, see layout) :
Round 1 :
With COLOR A (slate-blue) make mr, ch1, 6 sc in ring, sl st to first sc to join (6)
Round 3 :
(1 sc, inc) x 6 (18)
Info :
Keep rounds 1-3 in COLOR A to create the blue center star seen in the photo. Change to COLOR B (cream) at end of Round 3 using last pull-through.
Round 4 :
Change to COLOR B. (2 sc, inc) x 6 (24)
Round 5 :
(3 sc, inc) x 6 (30)
Round 6 :
(4 sc, inc) x 6 (36)
Round 7 :
(5 sc, inc) x 6 (42)
Round 8 :
(6 sc, inc) x 6 (48)
Round 9 :
(7 sc, inc) x 6 (54)
Round 10 :
(8 sc, inc) x 6 (60)
Info :
Rounds 4-10 expand the cream area for petal foundation. At the end of Round 10 you should have 60 sts; these are divided conceptually into 12 petal sections (60/12 = 5 sts per petal foundation).
Round 11 :
1 sc in each st around (60)
Round 12 :
1 sc in each st around (60)
Round 13 :
(Sc in next 4 sts, ch1) x 12 (60)
Info :
Round 13 creates 12 evenly spaced ch-1 spaces to be the foundation for 12 petals. Count your stitches and adjust if needed so you have exactly 12 spaces.
Round 14 :
*In next ch-1 sp work: (sc, hdc, 3 dc, hdc, sc); sl st to next sc on base; rep from * around to make 12 petals (12 petals)
Round 15 :
*Ch3 (counts as dc), in same st work 2 dc, ch1, 3 dc in top of petal cluster from previous round, sl st to base between petals; rep from * around producing a scalloped outer petal ridge (12 scallops)
Info :
Work Round 15 loosely enough to allow petals to relax flat when blocked. This round begins to create the large petal fan visible in the cream motif.
Round 16 :
Sl st to the center of one petal fan, ch1, (sc, ch3, sc) in center of each petal fan around to create small arch points between petals (12 arches)
Round 17 :
*Into each arch (sc, ch2, 5 dc cluster, ch2, sc) around to build a fuller petal edge (12 petal clusters)
Round 18 :
Sl st to next dc, ch1, sc in same st, *ch3, sc in center dc of next petal cluster; rep from * around to create 12 decorative chain loops (12)
Info :
From Rounds 14-18 you are creating the textured petal architecture. Maintain consistent tension so petals remain evenly sized. Blocking at the end will help petals lay flat and neat.
Round 19 :
Switch to COLOR A (slate-blue) on last pull-through. Ch1, sc around each foundation sc and into each chain loop from previous round, working (sc, ch1, sc) in centers of petals to pick up 12 scallop joins — this creates a blue outline at petal base (60 sc with 12 ch-1 picot points)
Round 20 :
*In next chain loop work: ch2, 3 dc, ch2, sl st into loop center; skip to next loop; rep around to create small blue fan accents between petals (12 fans)
Round 21 :
Working in BLO of previous round fans: 1 sc in each st around across the petal edges to anchor fans and prepare outer scallop (count approx 72 sc)
Info :
Round 19 introduces the contrasting slate-blue outline that frames each cream petal. Color changes should be made neat: finish final stitch of cream in the normal way and pull through with slate-blue to begin Round 19.
Round 22 :
*In next 6 sts work (sc, hdc, 3 dc, hdc, sc) to form outer scallop mirroring the cream petal shape; repeat around (12 large scallops)
Round 23 :
Ch1, sl st to center of each scallop, *ch3, sl st in center of next scallop; rep around to make decorative chain links (12 links)
Round 24 :
Into each chain link work (sc, picot [ch3, sl st into first ch], sc) to produce tiny picot points around outer edge (12 picots plus base scs)
Round 25 :
Turn runner-side: 1 sc in each st around working evenly to neaten edge (approx 96 sc). Fasten off COLOR A and weave ends. Block motif flat to measured diameter.
Info :
Fasten off leaving long tail only if you will join motifs by sewing; otherwise weave ends fully. Blocking is essential — gently pin to shape and spray lightly until dry to achieve a uniform diameter.
— Small Connector Motif (make between large motifs) :
Round 1 :
With COLOR A make mr, ch1, 6 sc in ring, sl st to join (6)
Round 3 :
(1 sc, inc) x 6 (18)
Info :
Rounds 1-3 form a small blue star to echo the large motif center; make many to place between large motifs as shown in runner layout.
Round 4 :
Change to COLOR B. (2 sc, inc) x 6 (24)
Round 5 :
1 sc in each st around (24)
Round 6 :
(Ch3, sl st in next st) x 12 to create 12 small chain loops around (12 loops)
Round 7 :
*In each chain loop work (sc, 3 dc, sc); sl st to next base st; rep around creating 12 tiny petals (12)
Round 8 :
Ch1, sl st around to even edge, 1 sc in each st and in each space to tidy (approx 48 sc)
Info :
Small motifs should be blocked flat and can be joined directly to large motifs during the joining rounds. Keep them slightly smaller than the center of the large motif so they nest neatly in the connecting gaps.
Round 9 :
Working with COLOR A, sl st into alternating outer sc and chain loops to add a contrast dot (optional): (sl st, ch2, sl st) x 12. Fasten off and weave ends.
— Leaf Motif (make 2 per join position, or as layout requires) :
Round 1 :
With COLOR A ch9, sc in 2nd ch from hook, hdc in next, dc in next 2, tr in next 2, dc in next, hdc in next, sc in last (9 stitches along chain including starting sc)
Round 2 :
Turn, working along opposite side of starting chain: sc in first st, hdc in next, dc in next 2, tr in next 2, dc in next, hdc in next, sc in last; do not join across top; continue to next step (leaf outline formed)
Round 3 :
Ch1, sl st to tip of leaf (center of chain), ch3, sl st to base point to create vein, fasten off COLOR A and change to COLOR B for decorative edging if desired
Info :
Leaf shaping is created by working identical stitches along both sides of a short foundation chain. Keep tension even so leaf lays flat. Block leaf lightly to gentle curve if desired.
Round 4 :
With COLOR B (optional) join at base and work (sc, hdc, 3 dc, hdc, sc) in evenly spaced points around leaf edge to produce scalloped leaf border. Fasten off; weave ends.
Round 5 :
For a 3D vein, use surface slip stitch or embroidery with COLOR A: from leaf base to tip, use 1-2 rows of sl st to emphasize center vein (optional)
Info :
Each leaf should measure approximately 5-6 cm long after blocking. Make leaves mirror each other when placing around outer motifs so pairs create the pointed petal-like shapes seen in the image.
— Joining Motifs & Layout :
Info :
Plan your layout: the photographed runner alternates large motif, small connector, large motif in a center column touching at 6 points per large motif, with leaf clusters at outer edges. Arrange motifs on a flat surface and pin after blocking to check placement before permanent joining.
Round 1 :
Place two adjacent Large Motifs face-up. With COLOR A and right sides up, position Small Motif between them where gaps line up. Using a yarn needle and a length of COLOR A, sew through corresponding picot or sl st points on Large Motif edge and Small Motif to join with a neat invisible ladder stitch. Make 6 evenly spaced joins per adjacent set for stability.
Round 2 :
Continue joining every adjacent Large Motif to its neighboring Large Motif through intervening Small Motifs in the same manner until the central row is complete. Sew slowly and check alignment frequently.
Info :
If you prefer crocheted joins instead of sewing, you can use slip-stitch joins during Round 25 equivalent; align two motifs and work slip stitches through corresponding outer edge sts to join. Sewn joins appear flatter and are recommended for a clean, flat runner.
Round 3 :
Attach leaves: position leaf pairs at each outer scallop junctions as shown in photo. Using COLOR A, sew leaf bases securely to the outer edge of Large Motifs in pairs so they point outward. Each leaf pair occupies the space between two petal scallops.
Round 4 :
After joining central column, repeat assembly for second column of motifs if making a dual-width runner; otherwise proceed to edging. Reinforce joins by passing needle twice through each join point for strength (especially for larger runners).
Info :
Keep tension of joining stitches even; pulling too tightly will pucker motifs, too loosely will leave gaps. Aim for a flat join with no visible bunching on either side.
— Outer Edging & Finishing Rounds (applied after full runner assembly) :
Round 1 :
With COLOR A and running around the assembled edges, join yarn at an outer scallop point by sl st. Ch1, sc evenly along edge across outermost stitches and into leaf edges where appropriate to anchor leaves (stitch count varies by layout; keep stitches approximately 4-6 per scallop depending on density; estimate 6-8 sc per large scallop)
Round 2 :
*Sk 1 st, 5 dc in next st, sk 1 st, sc in next; rep along all outer scallops to create decorative picot-like fans; on leaves work small 3-dc fans at tips to visually match photo (repeat for each outer element)
Round 3 :
Ch1, sl st into top of each fan and into leaf tip fans to unify edge, then 1 sc in each sl st space around to tidy edge (evening round)
Info :
Edging should flow smoothly around the entire runner. If you notice gatherings or sags, insert a few extra sc evenly spaced to tighten or skip a stitch to loosen. Aim for a uniform border rhythm.
Round 4 :
Optional decorative picot round: *sc in next 2 sts, picot (ch3 sl st into top of last sc), sc in next 2 sts; rep along outer edges and leaves for an added lacy finish.
Round 5 :
Final tidy round: 1 sc in every visible stitch around, working lightly and evenly; fasten off and weave ends generously into nearby stitches to hide them.
Info :
After finishing, perform a final light blocking with pins to even out scallops and edge. Use a washable starch spray or light steam if you want a crisper finish; avoid heavy steam on cotton threads that may shrink if not pre-washed.
— Variation & Length Adjustment :
Info :
To lengthen the runner add additional repeats of the Large Motif + Small Motif sequence. Each additional pair of large motifs plus connector adds approximately 12.5-13.5 cm to the runner length (after blocking). You can also make a wider runner by creating additional parallel columns of motifs and joining them across matching small motifs and leaf placements.
Round 1 :
To change the motif center color, swap COLOR A and COLOR B at Round 4 of Large Motif so centers are cream and petals slate-blue for an inverted palette. Adjust color distribution across many motifs for a sampler look.
Info :
Store your finished runner flat in a breathable fabric bag. Avoid hanging for long periods which can stretch the connections. Wash gently by hand or in gentle machine cycle in a mesh bag and re-block to dry flat.
This floral lace table runner is a lovely blend of vintage charm and modern styling that brings a handmade centerpiece to your table. The two-tone palette and scalloped petals create an elegant, heirloom-quality finish that's perfect for everyday or special occasions. As you finish each motif and see them link together, the project becomes an unfolding ribbon of texture and color. 🧶 Place it on your favorite table and enjoy the handcrafted beauty—and don't forget to share your finished piece with friends! 🌿