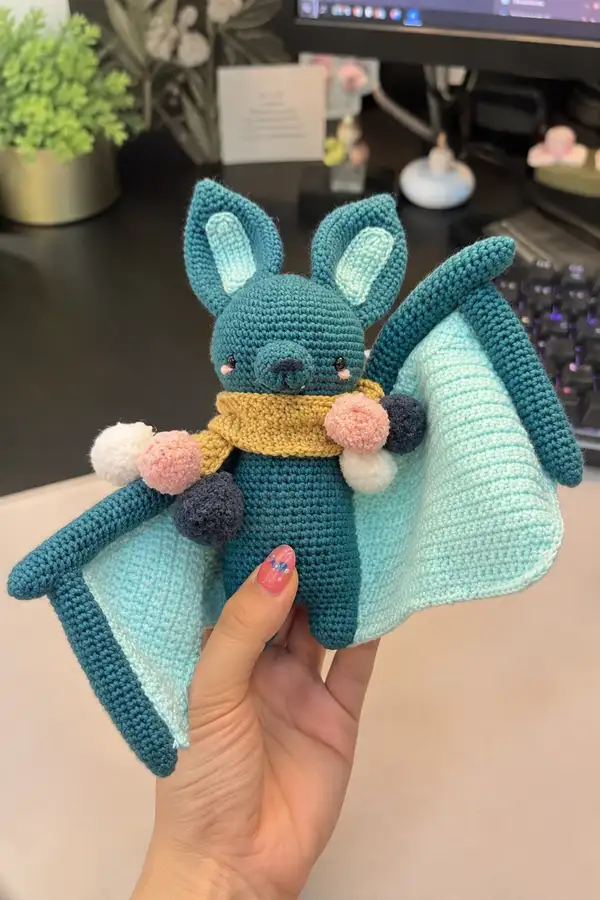
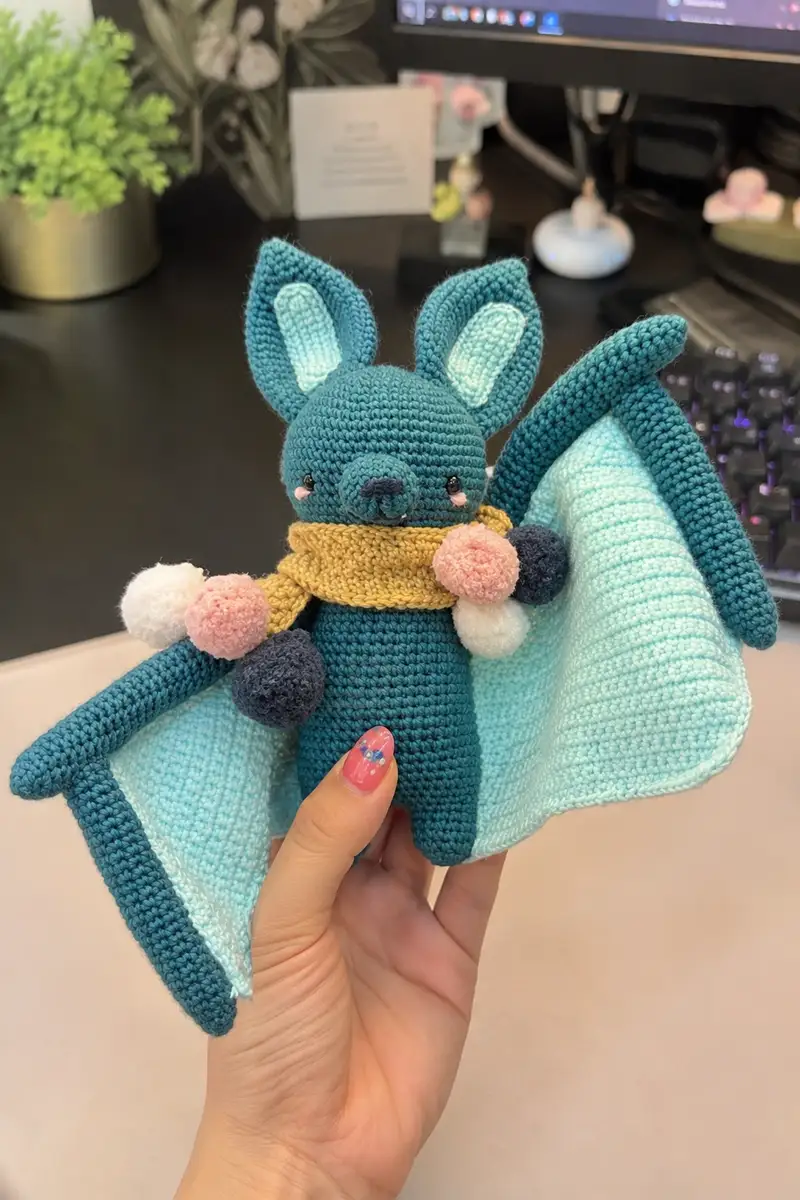
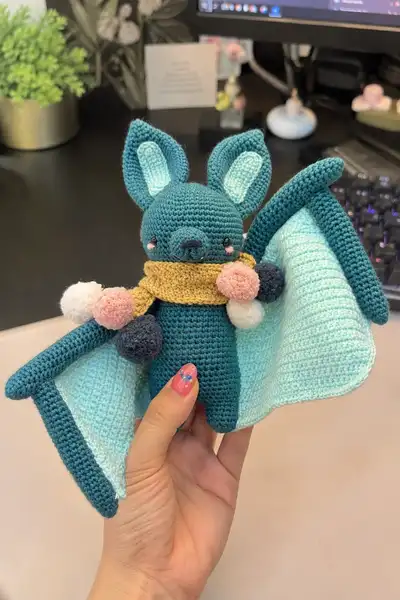
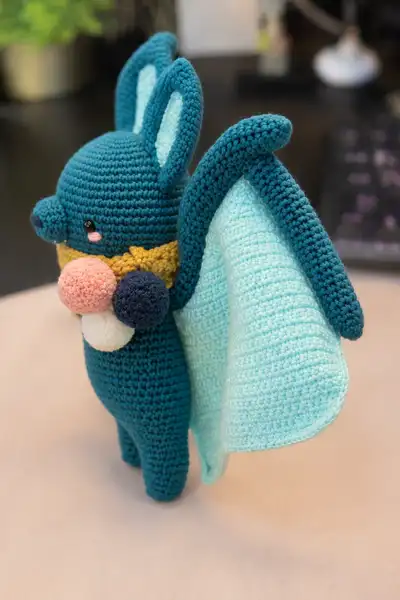
Hugo the Bat is a cuddly, teal-colored amigurumi with oversized wings, mint inner lining, and a cozy mustard scarf decorated with soft pom-poms. This pattern recreates the squishy rounded head, elongated body, sculpted snout, and dramatic flared wings that fold like a lovey blanket. Perfect as a gift or nursery companion, Hugo stands upright and feels wonderfully plush thanks to tight stitching and thoughtful shaping. Detailed assembly notes and tips are included to help you sew every part together for a clean, professional finish.
Progress Tracker
0% Complete
— Head :
Round 1 :
6 sc in magic ring (6)
Round 3 :
(1 sc, 1 inc) x 6 (18)
Round 4 :
(2 sc, 1 inc) x 6 (24)
Round 5 :
(3 sc, 1 inc) x 6 (30)
Round 6 :
(4 sc, 1 inc) x 6 (36)
Info :
Work tightly; use a stitch marker at the start of each round. This section forms the rounded top of Hugo's head. Keep counts exact; if you tend to crochet loose, try dropping to a 3.25mm hook for the head rounds.
Round 7 :
(5 sc, 1 inc) x 6 (42)
Round 8 :
(6 sc, 1 inc) x 6 (48)
Rounds 9-14 :
1 sc in each st (48) (6 rounds)
Info :
Place safety eyes between Rounds 11-12. Measure approximately 8-10 stitches apart (center-to-center) so Hugo's expression remains sweet. If using 8mm eyes, 6-8 stitches apart is usually ideal; for 10mm use 8-10 stitches.
Round 15 :
(6 sc, 1 dec) x 6 (42)
Round 16 :
(5 sc, 1 dec) x 6 (36)
Round 17 :
(4 sc, 1 dec) x 6 (30)
Info :
Begin stuffing head fairly firmly now, but leave room near the neck so you can attach the head to the body. Use small amounts of fiberfill and distribute evenly, pushing stuffing into the forehead and around the eye sockets to avoid flat spots.
Round 18 :
(3 sc, 1 dec) x 6 (24)
Round 19 :
(2 sc, 1 dec) x 6 (18)
Round 20 :
(1 sc, 1 dec) x 6 (12)
Info :
Fasten off leaving a 20-25 cm tail for sewing to the body if you prefer attaching after both parts are complete. Weave the tail through the remaining 6 stitches and pull tight to close, or leave the opening intentionally larger to join directly to the neck of the body (see assembly notes).
Round 22 (Snout Start) :
Join yarn at front-center of face (between the eyes). 6 sc in magic ring (6)
Round 24 :
(1 sc, 1 inc) x 6 (18)
Round 25 :
1 sc in each st (18)
Info :
Stuff snout lightly to keep it rounded but not stiff; the snout will be sewn onto the head with the bottom tucked between head rounds 14-17. For a small nose tip, change to contrasting dark navy in the last 2 rounds.
Round 26 :
(2 sc, 1 dec) x 6 (12)
Round 27 :
(1 sc, 1 dec) x 4, 4 sc (8) — leave long tail for sewing
Round 28 :
Fasten off, leaving a long tail. Sew snout onto center front of head between Rounds 11-15. Embroider a small triangular nose in charcoal or navy on the snout tip using several short stitches.
Info :
Use a needle to tack the snout down at three or four points before sewing tightly. This helps avoid shifting while you stitch across a curved surface. Embroider small nostril creases with two short vertical stitches if desired.
— Body :
Round 1 :
6 sc in magic ring (6)
Round 3 :
(1 sc, 1 inc) x 6 (18)
Round 4 :
(2 sc, 1 inc) x 6 (24)
Round 5 :
(3 sc, 1 inc) x 6 (30)
Round 6 :
(4 sc, 1 inc) x 6 (36)
Info :
The body begins with the same base as the head to create a seamless neck join. This body is tall and gently tapered—we will work many even rounds to form the torso length that supports the wing attachments.
Rounds 7-12 :
1 sc in each st (36) (6 rounds)
Round 13 :
(5 sc, 1 dec) x 6 (30)
Rounds 14-24 :
1 sc in each st (30) (11 rounds)
Info :
Decide where the neck meets the body: if sewing the head on later, stop stuffing the body firmly until the head is attached. For a direct join, leave the top 6-8 rounds less stuffed so you can fit the head opening over the body and whipstitch the two pieces together.
Round 25 :
(3 sc, 1 dec) x 6 (24)
Round 26 :
(2 sc, 1 dec) x 6 (18)
Info :
Begin stuffing the body firmly now. Place more stuffing near the lower torso and less near the top to allow a slight shoulder slope under the scarf. For a standing toy, place a small disc of stuffing concentrated at the base of each leg position (where you will attach legs) to help balance.
Round 27 :
(1 sc, 1 dec) x 6 (12)
Round 28 :
6 dec (6) — do not fasten off if joining legs through hips; if closing, fasten off leaving tail for sewing
Info :
If you prefer a flat bottom for stability, stop decreasing at Round 27 and instead create two leg openings by leaving two sections open (see leg attachment notes). For this pattern, we will make separate legs and sew them to the bottom for better shaping and proportion.
— Legs (Make 2) :
Round 1 :
6 sc in magic ring (6)
Round 3 :
(1 sc, 1 inc) x 6 (18)
Round 4 :
1 sc in each st (18)
Info :
Legs are slightly tapered cylinders; start with a small round foot and then lengthen. Stuff the foot area firmly to help the toy stand.
Round 5 :
(2 sc, 1 dec) x 6 (12)
Round 6-14 :
1 sc in each st (12) (9 rounds)
Round 15 :
(3 sc, 1 inc) x 3 (15) — create a slight widening to form ankle
Round 16-20 :
1 sc in each st (15) (5 rounds)
Info :
When stuffing legs, pack the foot area quite firm but keep the upper leg lighter to allow movement when sewing to the body. Leave a long tail for sewing and position each leg at the bottom of the body — approximately aligning with body Rounds 26-28. Sew through several stitches around the leg top and body for a secure seam.
Round 21 :
Fasten off leaving a 25-30 cm tail for attachment; repeat for second leg
— Arms / Wing Stalks (Make 2) :
Round 1 :
6 sc in magic ring (6)
Round 3 :
1 sc in each st (12)
Round 4 :
(2 sc, 1 inc) x 4 (16)
Round 5-7 :
1 sc in each st (16) (3 rounds)
Info :
These short cylindrical arm pieces function as connection points for the wings and look like elongated fingers at the wing leading edge. They should be slender and slightly firm.
Round 8 :
(3 sc, 1 dec) x 4 (12)
Round 9-12 :
1 sc in each st (12) (4 rounds)
Round 13 :
(2 sc, 1 dec) x 3 (9)
Round 14 :
1 sc in each st (9)
Round 15 :
Fasten off leaving a long tail for sewing. Repeat for second arm. These arms are attached at the shoulder line, slightly below the scarf so they peek out when the wings are folded.
Info :
If you plan to insert wire into the wing leading edge, leave a longer tail and do not stuff the inner-most portion fully — you will be wrapping the wire inside the tubular edge to create a poseable curve.
— Ears (Make 2) :
Outer Ear Round 1 :
6 sc in magic ring (6) using teal
Outer Ear Round 2 :
6 inc (12)
Outer Ear Round 3 :
(1 sc, 1 inc) x 6 (18)
Outer Ear Round 4 :
(2 sc, 1 inc) x 6 (24)
Outer Ear Round 5 :
1 sc in each st (24)
Info :
These outer ear shells are slightly cupped to hold the inner ear oval. Work tightly and leave a long tail for sewing to the head. You may lightly shape the ear by slanting the last rounds slightly (skip one stitch) if you want a tilted ear appearance.
Inner Ear (Make 2) Round 1 :
6 sc in magic ring (6) using mint
Round 3 :
(1 sc, 1 inc) x 6 (18)
Round 4 :
1 sc in each st (18)
Round 5 :
Fasten off leaving tail for sewing. Pin inner ear into outer ear RS together and whipstitch around the base only so the inner oval sits neatly inside the ear. Sew ear to head at the top-most rounds, about 4-6 stitches from the center top on each side, ensuring symmetry.
— Wing Membrane (Make 2) :
Info :
The wings are made as flat panels in mint in rows (not rounds) to create a blanket-like feel. We will crochet a long rectangular/triangular panel with subtle increases along one edge to form the curved tip of the wing. After the membrane is complete, a stuffed tubular edging in teal is crocheted and sewn around the perimeter to create the rounded leading edge.
Row 1 :
Ch 2, 6 sc in 2nd ch from hook (6)
Row 2 :
Ch 1, turn, 6 sc (6)
Row 3 :
Ch 1, turn, (1 sc, inc) x 3 (9)
Row 4 :
Ch 1, turn, 1 sc in each st (9)
Row 5 :
Ch 1, turn, (2 sc, inc) x 3 (12)
Row 6 :
Ch 1, turn, 1 sc in each st (12)
Info :
Continue adding increases along the same edge on odd-numbered rows to open the wing out. Work all rows in RS; do not join at the ends. Keep tension even — the membrane should lie flat and be slightly flexible.
Rows 7-39 :
Continue pattern: odd rows increase 3 stitches evenly spaced along the edge (for example Row 7: (3 sc, inc) x 3), even rows sc across. Work until you have 40-42 rows total and the panel measures roughly the length of the toy from shoulder to lower tail when folded (approx 24-28 cm depending on gauge).
Row 40 :
Ch 1, turn, sc across, fasten off and weave in ends. Make second membrane mirror image by crocheting the increases on the opposite edge so both wings mirror when attached to the body.
Info :
Block each membrane flat if necessary using pins and gentle steam or a damp cloth to open the stitches and create a neater edge before adding the stuffed border.
— Wing Border / Leading Edge (Make 2) :
Round 1 :
Join teal yarn to the perimeter with sl st; evenly work sc around the panel through both loops (estimate 120-160 sts depending on panel size) — do not join, work in continuous rounds with a stitch marker to track rounds
Round 2 :
1 sc in each st around (same count)
Info :
We will create a stuffed tubular edge by working a series of rounds and stuffing inside before closing. The border will be approximately 8-12 rounds deep to create a sturdy roll that mimics the wing leading edge.
Rounds 3-9 :
1 sc in each st around (same count) — after Round 5 begin stuffing the tubular border gently to round shape; continue stuffing little by little until border is uniformly filled. (7 rounds total)
Round 10 :
(1 sc, 1 dec) around as required to achieve even taper at tips — adjust by eye and maintain even distribution. Fasten off and weave tail inside the border.
Info :
Insert floral wire or pipe cleaner along the last stitch row inside the tubular border if you want a poseable wing leading edge. Wrap the wire ends in scrap yarn and hide inside the border to prevent poking.
— Collar / Scarf :
Info :
The scarf is a short rectangle worked in mustard using moss stitch (alternating sc and ch) to create a textured fabric that sits nicely around Hugo's neck. You can also knit a tiny i-cord if you prefer.
Row 1 :
Ch 21, sc in 2nd ch from hook and across (20 sc)
Row 2 :
Ch 1, turn, sc in BLO across (20)
Rows 3-14 :
Repeat Row 2 (12 rows total) — adjust length to fit snugly around Hugo's neck allowing for overlap for a knot
Info :
Sew short ends together to create a ring, then fold and stitch to create a wrapped scarf look. Attach pom-poms securely along one side with yarn tails threaded through several scarf rows.
— Pom-poms (Make 4) :
Info :
Use a small pom-pom maker or cardboard circles approx 3 cm diameter. Wrap yarn roughly 100 times for a full pom-pom (adjust wrap count for thicker or thinner yarn). Use colors: blush pink, navy, cream, blush (repeat color if desired).
Steps :
Wrap, tie tightly through center, cut loops, trim into a round ball. Tie a long tail from the center to thread through the scarf and secure with knots inside the scarf. For extra security, stitch through the pom-pom core several times and add a drop of fabric glue.
— Nose and Facial Details :
Info :
Use dark navy for the small stitched nose tip on the snout. Embroider a very small curved mouth with 2-3 stitches beneath the snout. For blush, felt or use a small dab of washable fabric paint on the cheeks, or embroider tiny blush circles in blush pink yarn using satin stitch for a subtle effect.
— Finishing & Assembly Notes :
Info :
Block wings flat and pin before sewing the tubular border to the membrane if desired — this ensures neat alignment. Attach wing membranes to the body by sewing the inner edge of the tubular border to the shoulder area at body Rounds 14-20 for a natural drape. Make sure both wings mirror each other when sewn in place.
Assembly Tip :
Sew head to body at neck: align head RS to the top of body and use invisible ladder stitch or whipstitch, inserting stitches evenly through both pieces. Reinforce with an additional pass for security. Tuck the tail of yarn from the head into the body and weave securely.
Info :
When sewing ears, position them symmetrically: the base of each ear should sit around Head Rounds 4-6 on each side, approximately 6-8 stitches from center. Use pins and a mirror to keep symmetry while sewing.
Final Touch :
Trim stray ends, secure pom-poms and scarf, and check overall balance. If the toy tips forward, add slightly more stuffing at the back base or adjust leg placement inward for a more stable stance.
Info :
If you prefer embroidered eyes instead of safety eyes (for baby-safe toy), embroider simple oval eyes using black yarn on Rounds 11-12 position and add white French knots for highlights.
This delightful Hugo the Bat pattern combines classic amigurumi techniques with charming, modern colorwork and playful finishing touches. The dramatic wings and tiny pom-pom scarf create a character full of personality and charm that kids and adults will both adore. Take your time with the wing construction and assembly — the result will be a clean, professional-looking toy that feels truly special. 🧶 Give Hugo as a gift or keep him as a whimsical companion — every stitch tells a story. ✨