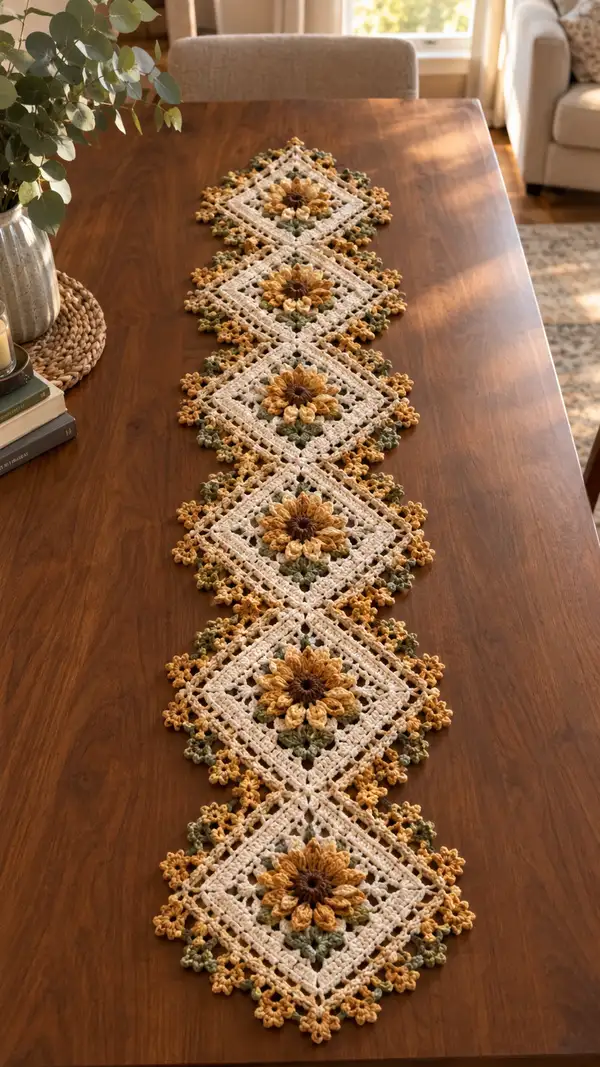
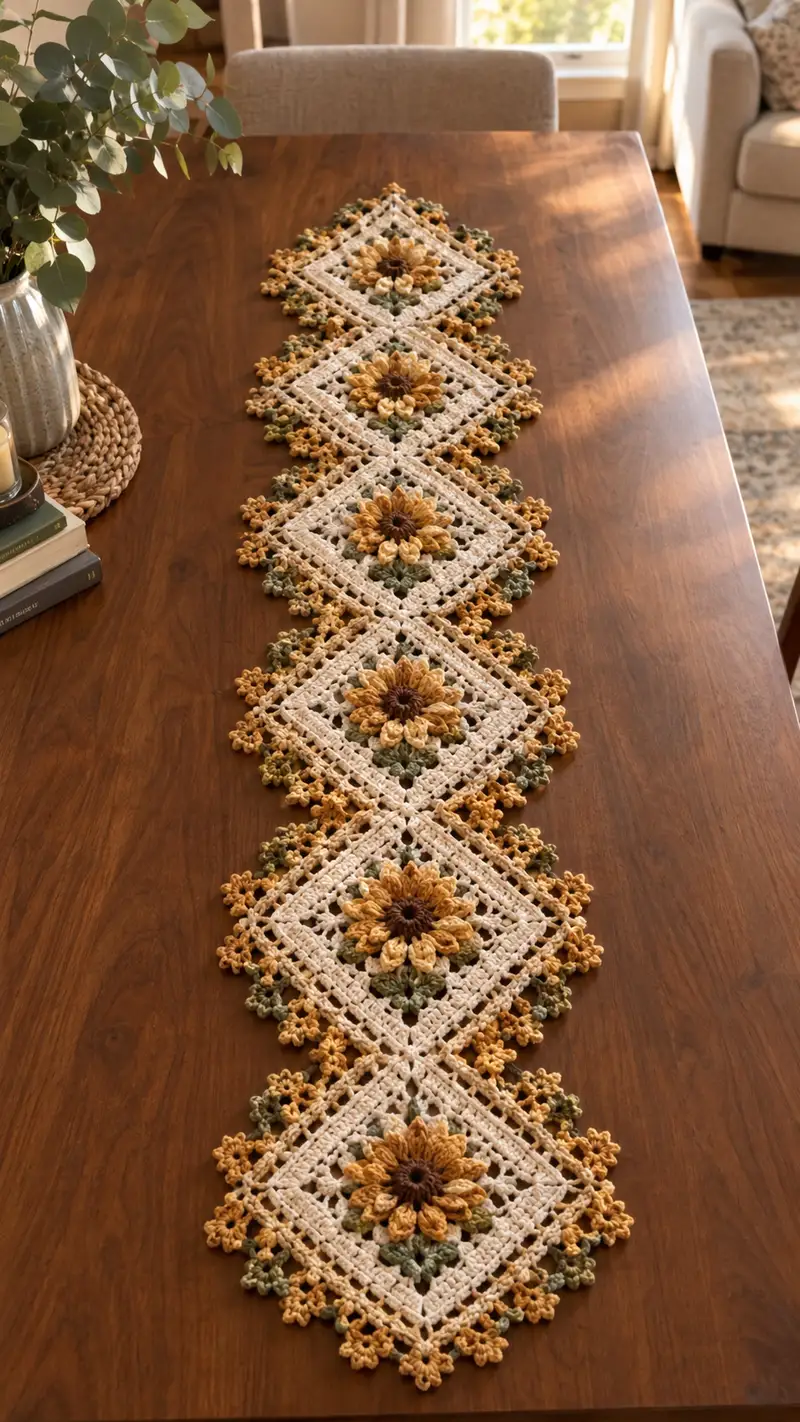
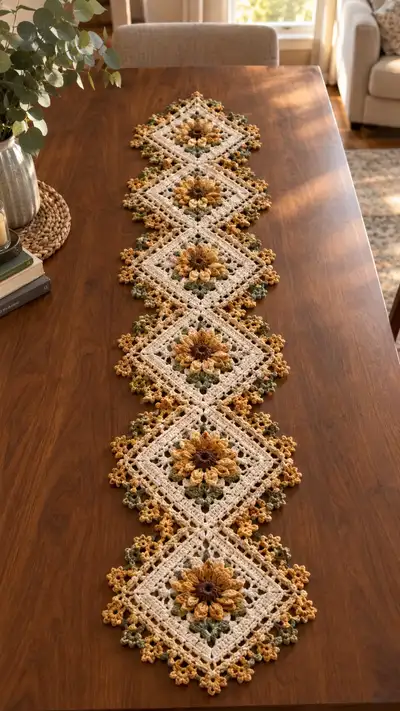
Create a warm, vintage-inspired table runner made from linked sunflower diamond motifs. This pattern features textured layered sunflower centers, delicate cream lace squares, and leafy green accents for a handcrafted, cottage-chic look. Each motif joins to form a long runner perfect for dining tables or console surfaces. Detailed instructions and finishing tips included so you can recreate the same 3D floral texture and scalloped edge.
Progress Tracker
0% Complete
— Special Stitches & Notes :
Info :
Throughout this pattern you will work puff stitches for petals and clustered leaves. Puff stitch (3-loop): yarn over, insert hook, yarn over and pull up loop (repeat 3 times total to have 4 loops on hook), yarn over and pull through all loops, ch1 to close puff. Adjust loops per puff for bigger or smaller petals. Work tightly for crisp petals.
Info :
Gauge is not critical for a decorative runner, but use a 3.5mm hook to achieve a firm fabric. Make one motif and block it to confirm desired size. Runner in photo is five motifs long, each finished motif measures approximately 8.5" (22 cm) corner-to-corner after blocking.
— Sunflower Core (Brown) :
Round 1 :
6 sc in magic ring (6)
Round 3 :
(1 sc, 1 inc) x 6 (18)
Round 4 :
(2 sc, 1 inc) x 6 (24)
Info :
If you prefer a more pronounced center, substitute hdc for sc in rounds 1-4. Keep tension firm so petal base sits neatly around it.
Round 5 :
(3 sc, 1 inc) x 6 (30)
Round 6 :
(4 sc, 1 inc) x 6 (36)
Info :
This round prepares evenly spaced anchor points for the petal base. You will place 12 visible petals later; the stitch layout uses groups of three for spacing.
Round 7 :
1 sc in each st (36)
Round 8 :
1 sc in each st (36)
Info :
Fasten off brown and weave end to the back. If you prefer a slightly raised center, add a round of slip stitch textured rib: 1 sl st in BLO around (36), then fasten off.
— Petal Foundation (Golden) :
Info :
Join golden yellow yarn at a petal anchor point (see round 6 spacing). We will form 12 larger petals distributed evenly around the center. Each petal will use a 3-loop puff followed by a short edging to round it out.
Round 1 :
*ch2, [puff stitch (3-loop) in next stitch—close with ch1], ch2, sl st in next stitch; rep from * around to make 12 petals (petal units worked over 3 stitches each) (12 petal units)
Info :
Ensure petals are centered visually: use pins to arrange petals if needed before proceeding. The ch2 on either side creates a small foundation loop and provides spacing between puffs.
Round 2 :
Work behind the petal row: sl st to space behind first petal, ch1, 1 sc in same st, ch2, 1 sc between petals (at center of next 3-st group), ch2, 1 sc between petals; rep around finishing with sl st to first sc. This creates a small bridge to anchor next petal layer (24 sc/12 ch2 loops)
Round 3 :
In each ch2 loop around petal base, work: (ch1, puff (3-loop), ch1, sl st) to create a second petal layer; rep in each loop (12 secondary puff petals)
Info :
Stagger the second-layer puffs so they nest between the first petals for a full layered look. Keep loops even—if necessary frog and rework a puff until it sits nicely.
Round 4 :
Slip stitch around to neaten: sl st in each st and space around the petal base; fasten off and weave in ends on the underside (no stitch count change)
— Petal Shaping & Tip Detail (Golden / Optional Shading) :
Info :
For extra depth you can work a small picot or chain loop at the tip of each puff to make petals more defined. Use a smaller hook (3.25mm) for these rounds if desired.
Round 1 :
Join golden yarn inside each petal top with sl st, ch1, 3 sc across the top of each puff (36 across all petals). This forms a small crown on each petal.
Round 2 :
*In next petal top sc group: (dc, ch1, dc) to form a tiny v-tip; sl st to next petal top; rep around (12 v-tips)
Info :
If using a second shade for petal tips, change color in last yarn over of a dc for a soft gradient and carry tails to weave in later.
Round 3 :
Sl st around to secure, fasten off and weave all ends to the underside of the motif.
— Leaf Cluster Round (Olive Green) :
Info :
Leaves are worked as small 3-st puff clusters placed in groups of three between petal bases, forming diamond-side leafy accents visible in the finished runner.
Round 1 :
Join green yarn at a point between two petals, ch1, *(puff (2-loop) in next stitch, ch1, sl st in same st) to form a small leaf; sl st two stitches to next leaf position; rep from * to create 12 small leaves (12 leaves)
Round 2 :
Work behind leaves to add fullness: in each sl st space behind a leaf, ch1, 1 sc, ch1, 1 sc; rep around. Fasten off and weave ends (no stitch count change)
Info :
Arrange leaf clusters so they point outward toward the future corners. These green clusters will visually anchor the motif within the square frame.
— Square Frame Start (Cream) :
Info :
We will turn the round motif into a square (worked as a rotated diamond) using corner chain spaces. Join cream yarn at the top-most point of the petal round where you want one corner to be; for consistency, orient motifs so a petal sits at each corner center.
Round 1 :
Ch4 (counts as tr1+ch1), tr in same st, *skip 3 sts of petal/leaf round and work (tr, ch1, tr) into next anchor point; rep from * 3 times to make 4 corner groups, sl st to top of starting ch to join. This creates a loosely-squared framework (4 corner groups)
Round 2 :
Ch3 (counts as dc), 2 dc in same corner ch1 space, ch2, 3 dc in same space (corner made); *move along side: in each side sp work (dc, ch1, dc) separated by ch1 spaces across until reaching next corner; in next corner ch1 sp work (3 dc, ch2, 3 dc); rep from * around; sl st to top of starting ch3. Count: 4 corners x (6 dc) + side dc groups roughly 4-6 each depending on spacing (approx 40-48 dc total)
Info :
Adjust the number of side (dc, ch1, dc) clusters to ensure corners sit at the desired diamond points. Aim for symmetrical side repeats so final motif is square when blocked.
Round 3 :
Ch1, sc in each dc and ch1 space around, placing 3 sc in each corner ch2 space to maintain corners (approx 44-52 sc depending on previous count)
Round 4 :
Ch3, 1 dc in same st, *ch2, skip 1 st, 2 dc in next st; rep around forming open lacy spaces for the classic granny-lace look; in corner ch2 spaces work 2 dc, ch2, 2 dc; sl st to join (st count varies)
Info :
Work evenly around and maintain the corner increases each round so the square widens uniformly. Use stitch markers at each corner to keep track of the corner ch2 spaces.
Round 5 :
Ch1, 1 sc in each stitch and ch-space around; place 3 sc in corner ch2s (this evens the surface and prepares for the next lacy round)
Round 6 :
Ch3 (counts as dc), *in next ch2 sp work (2 dc, ch2, 2 dc) for corner; on sides, work (dc, ch1, dc) into each ch1 space; rep around; sl st to join
Info :
At the end of this round your square should be clearly defined with four distinct corners and even edges. Blocking later will square this fully; avoid pulling too tight on side loops.
— Lace Body Rounds (Cream) :
Round 7 :
Ch1, 1 sc in each st around, placing 3 sc in each corner ch2 space (even, tidy border) (approx 60 sc)
Round 8 :
Ch3, (skip 1 st) in next st 1 dc, ch1, 1 dc making small open trellis; rep across sides and (2 dc, ch2, 2 dc) in corners to maintain shape
Info :
This openwork lattice will visually lighten the motif between the petals and the outer scalloped edging. Adjust ch1 spaces if you prefer larger or smaller lace openings.
Round 9 :
Ch1, 1 sc in each st and ch-space around to stabilize the lace (approx 64 sc)
Round 10 :
Ch2, hdc in next 2 sts, *ch3, skip 3 sts, hdc in next 3 sts; rep around inserting (hdc, ch3, hdc) at each mid-side to create diamond mesh; corners: work hdc groups evenly into corner ch2 spaces (approx 60-72 sts)
Info :
After this round the motif edges should be smooth and the square shape clearly defined. Use this as a reference for aligning motif joins later.
— Outer Decorative Lace (Cream & Golden Accents) :
Round 11 :
Ch1, sc in each st around placing (sc, ch3, sc) into every other open mesh space along the sides to begin the scalloped effect; in corners work (sc, ch5, sc) to create elongated corner points (st count varies)
Round 12 :
Switch to golden yellow for contrast: join yarn at a side scallop point, *work (ch1, 5-dc puff cluster in same sp, ch1, sl st in next sc) to create small golden rosettes along sides; rep around creating a series of small clusters (approx 20-24 small rosettes)
Info :
These small golden clusters form the delicate floral edging seen in the photo's scalloped border. Keep puffs uniform by pulling equal loops and closing with a ch1 for stability.
Round 13 :
Return to cream: sl st to each golden cluster base and sc around to anchor them, placing 3 sc in corner ch5 spaces for stability (no major count change)
Round 14 :
Ch3, in each small scallop across side work (2 dc, ch2, 2 dc) with a sl st between scallops; in corners work (3 dc, ch4, 3 dc) to keep corners prominent
Info :
Fasten off and weave ends neatly to the back. If you prefer the runner to include small multi-colored clusters at corners, add an extra small puff in olive green at corner tips now.
— Fine Scallop Edging (Golden) :
Round 15 :
Join golden yarn: *ch4, sl st into base at edge to form loop, ch2, (5 dc puff in loop), sl st to secure into base; rep around making pointed scallops (approx 24 scallops)
Round 16 :
Into each scallop: (sc, ch3, sc) to define points and add small picot tips; in corners work (sc, ch5, sc, ch5, sc) for enlarged corner points
Info :
These scallops give the runner the delicate framed look. Make sure scallops are evenly spaced; if necessary, frog and rework to align with corner markers.
Round 17 :
Sl st around to tidy and fasten off; weave all ends through the underside of motif. Block motif flat and pin corners to create a precise diamond shape.
— Making Additional Motifs :
Info :
Make a total of 5 identical motifs following the above sections for a runner length similar to the photographed piece. For a longer runner add 1 motif per additional table segment. Ensure all motifs are blocked the same size before joining.
— Join-As-You-Go (JAYGO) Method to Link Motifs :
Info :
We will join motifs along one side corner-to-corner so diamonds sit tip-to-tip forming a continuous runner. Place two motifs right sides up, aligning corners so the corner ch5 on one meets the corner ch5 on the other.
Round 1 :
Pick up new cream yarn on completed motif A at its joining corner. Work sl st into corresponding sts of motif A until you reach the corner space to be joined. With motifs A and B matched, insert hook through corner ch-space of motif B and pull up a loop, sl st through both loops to start the join. Continue sl st across corresponding sl st points across the side: sl st through next st of A, then through next st of B; rep across the side until motifs are joined evenly along the side of the diamond (number of joins depends on side stitch count, typically 8-12 sl st joins)
Info :
When joining, keep tension relaxed so the seam lies flat. Pin motifs every few stitches to avoid shifting. For a stronger seam, you can use single crochet through both layers instead of slip stitch, but this will produce a more visible ridge.
Round 2 :
After joining side edges at shared stitches, fasten off and weave ends. Repeat joining motif B to motif C until the desired runner length is achieved (5 motifs in the photo).
Info :
If you prefer a sewn join, use a yarn needle and mattress stitch along corresponding side spaces for an invisible join. Whichever join you use, join motifs while they are still pinned and blocked to ensure alignment.
— Joining Corners for Continuous Runner Seam :
Round 1 :
When joining corners tip-to-tip, match the corner ch5 loops from adjacent motifs and either sl st through both loops 5 times or sew through 3-4 strands each side with whip stitch to create a tight corner seam. Repeat for each corner connection along runner length (approx 4 corner joins per interior join)
Info :
Interior corners, where three or more motifs meet in other designs, require more careful alignment. For our linear runner only two corners meet at each connection, simplifying the join.
— Final Edge Finishing After Joining :
Round 1 :
Once all motifs are joined, examine the outer perimeter. If any outer scallops overlap or gaps appear at joins, work a tidy slip-stitch round using cream yarn to even them out: sl st in each outer stitch across the entire runner boundary.
Round 2 :
With golden yarn, rework small scallops into any flattened points: join yarn in base of scallop and work small puff cluster then secure with sl st. Repeat for any sections needing definition (no set count)
Info :
Pin the entire runner on a blocking board or clean towel with corners and scallops shaped symmetrically. Mist with water and allow to dry fully. This opens lace and sets scallops to sit beautifully on the table.
— Optional Weighted Hem / Stability Round :
Round 1 :
To prevent curling in use, work a discreet hem: join cream yarn to the underside of outer-most edge, ch1 and sc in each st around catching only the back loop to form a flat hem. Add a tiny bead or sew small washers into hem corners for weight if desired.
Info :
For small decorative washes or beads, secure firmly and place under the runner where not visible from above for safety. Do not add anything that can scratch surfaces; use felt dots where beads or washers contact table.
— Finishing Touches :
Info :
Weave all ends to the underside using a yarn needle. Trim tails close but not so close that you risk the weave slipping. Press lightly if using steam—avoid direct heat on cotton blends that may scorch. Consider a fabric-safe stiffener for very delicate scallops if you want them to stand slightly raised.
Round 1 :
Final inspection: ensure all joins are secure, motifs square, scallops even, and the runner lies flat. Make any tiny adjustments to individual scallops by reworking a puff or adding a sl st anchor if needed.
Info :
Store flat or rolled in tissue to keep scallops intact. For washing, hand wash gently in lukewarm water and reshape while damp; avoid machine washing to preserve three-dimensional petals.
Bringing all five sunflower motifs together creates a charming, vintage-inspired runner full of texture and warmth. The layered petals and lace framing give your table an elegant, handmade centerpiece that welcomes conversation and complements seasonal decor. Blocking and careful joining make the diamonds sit beautifully as a continuous band of floral detail. Enjoy the meditative rhythm of making each motif and the joy of placing the finished runner on your table! 🧶🌻